

Apply paraffin or candle wax along stuck teeth, then work slider up and down 10–15 times using needle-nose pliers for extra grip. If teeth are plastic, rub a graphite pencil into teeth instead of wax; allow 30–60 seconds for lubricant to settle.
For bent or missing teeth, inspect tape with a 10x magnifier; straighten bent teeth with flat-nose pliers, aligning tooth faces within 0.3–0.5 mm. Replace slider when slider gap exceeds 1 mm when closed; match replacement to size code on tape (common sizes: #3, #5, #8, #10).
Damaged pull? Thread a small split ring or unfolded paperclip through slider tab hole, then crimp ring closed with pliers. Missing top stopper? Fold tape end 8–12 mm, then sew through doubled area using heavy polyester thread with 3–4 stitches spaced 4–6 mm.
If tape fabric frays more than 15 mm from stitch line or teeth misalign across over 30% of length, order full replacement length. Measure pack opening in millimeters and add 10–20 mm extra for end stops; buy replacement tape with matching tooth pitch and chain type (coil vs molded).
Use heat-shrink tubing (3–6 mm diameter) as temporary top stopper: slide tubing over tape end, apply heat for 2–3 seconds until tubing shrinks tight. For added water resistance, apply clear silicone seam sealer along stitched area and allow 12–24 hours to cure.
Diagnose slider, separated teeth, broken pull, or missing stop
Apply one drop of graphite or silicone lubricant into slider track and move slider back and forth 10–15 times; if movement resumes, issue was friction or debris.
If slider stays immobile, inspect for fabric, thread or grit trapped between teeth; extract material with fine tweezers or a seam ripper under magnification, then re-lubricate and retest.
Separated teeth versus misaligned rails
Run slider slowly toward separation point. If teeth fail to interlock over a stretch longer than 10–15 mm or gap between opposing rows measures over ~2 mm, tooth strip likely damaged. For nylon coil check for crushed or stretched coils; for molded teeth count missing items across a 20 mm segment. Replace tape when more than ~10% of visible teeth are compromised.
If misalignment appears only under load, examine tape stitching and attachment points on bag body; secure loose stitching with heavy polyester thread using backstitch or bartack, 8–12 tight stitches to restore correct rail alignment.
Broken pull and missing stop solutions
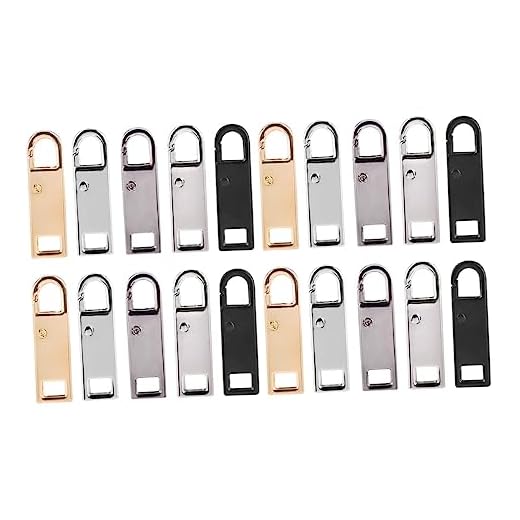
Use split ring, small keyring or unfolded paperclip as a temporary puller. For a durable replacement, buy a matched-size puller and attach by opening slider eye 0.5–1.0 mm with needle-nose pliers, slide stem into place, then crimp eye closed without deforming slider channel.
If a stop is missing and slider can run off an end, either install a metal stop sized to tape width or sew a stop: for a sewn stop, use heavy nylon or upholstery thread and 10–12 lock stitches across both tapes about 4–6 mm from tape end. For metal stops, align properly and crimp with flat-nosed pliers until snug but not crushing tape fibers.
When slider no longer meshes teeth, replace with a slider matching tooth profile and size. Measure tooth width with calipers: ~3 mm corresponds to #3, ~5 mm to #5. Choose slider type that matches original end condition (top-stop, closed-end, or two-way) and ensure channel width matches tape thickness before installation.
Unstick jammed slider with soap, graphite or pliers
Apply dry bar soap or powdered graphite directly to slider path, then work slider gently until smooth operation resumes.
Bar soap method: rub a dry soap bar along both rows of teeth for 10–15 strokes. Open slider slightly and move up and down 8–10 times. Wipe excess soap with a damp cloth.
Graphite method: use a 2B or softer pencil; scrape lead onto teeth or coil for 20–30 seconds. Tap slider lightly to distribute powder into channel, then cycle slider back and forth until movement smooths.
Pliers method: only attempt after lubrication fails. Protect metal pull with a folded soft cloth or a strip of tape. Grip pull tab with long-nose pliers close to slider body and apply steady, tiny inward pressure (roughly 1–2 kg fingertip equivalent) to coax stuck teeth past obstruction. Avoid squeezing slider housing or teeth; check alignment after each small advance.
If fabric or thread is trapped inside teeth, free fibers with pointed tweezers before manipulating slider further; then relubricate area to prevent re-jamming.
Limit attempts to 5–8 cycles per method; prolonged force increases risk of bent teeth or broken pull. If movement fails after two methods, prepare replacement slider or seek repair service.
| Material | Quantity | Use |
|---|---|---|
| Dry bar soap | 10–15 strokes | Lubricate plastic or metal teeth for initial release |
| Powdered graphite or soft pencil (2B) | 20–30 sec application | Dry lubricant for stubborn jams, safe for metal teeth |
| Long-nose pliers | 1 pair | Gentle mechanical coaxing of pull tab; wrap pull first |
| Soft cloth or tape | Small piece | Protect pull tab finish during plier use |
| Tweezers | 1 pair | Remove trapped fibers or thread from teeth |
Realign misaligned teeth: operate slider and compress fastener tape
Push slider toward misaligned section while compressing fastener tape 2–3 mm with flat-nose pliers; use steady, even pressure and avoid sudden jerks.
Make six slow forward–backward passes: first four with light compression, last two with firmer squeeze. Maintain slider travel speed around 5–10 mm per second to seat teeth evenly.
If individual teeth sit out of mesh, nudge tooth root into position with blunt-tip tweezers before sliding. For bent teeth, apply small bending force with needle-nose pliers to correct angle up to 30°; angles beyond 30° usually need replacement of affected section.
Clamp fabric adjacent to teeth 5–10 mm from problem area, hold compression for 10–15 seconds to consolidate tape weave, then operate slider across repaired zone. Repeat compress-and-slide cycle up to three times; avoid more cycles if alignment does not improve.
Temporary stop
Sew a temporary stop using heavy nylon thread: two bar-tack stitches across tape 4–5 mm above highest aligned tooth, with at least six passes. Position stop so slider cannot pass repaired section while tests continue.
Replacement criteria
Replace fastener when any of following apply: more than three consecutive teeth missing, bent-tooth count greater than five, recurrent separation within 24 hours after realignment, or tape fabric fraying beyond 10 mm from teeth.
Replace worn or broken slider – remove old unit and size replacement
Remove faulty slider immediately: pry open bottom stop with pliers, slide damaged unit off tape, preserve original pull tab for reuse when possible.
Tools
Pliers (flat-nose and needle-nose), small flathead screwdriver, caliper or ruler in millimeters, replacement stops, replacement slider matched to tape type, heavy nylon thread or sewing awl, sharp snips, optional magnifier.
Procedure
Identify track type: coil (nylon), molded plastic, or metal teeth; choose slider designed for that track and matching width measurement.
Measure closed-track width across teeth with caliper or ruler; common sizes: #3 ≈ 3 mm, #5 ≈ 5 mm, #8 ≈ 8 mm, #10 ≈ 10 mm.
Confirm slider orientation and function: left-facing vs right-facing, locking vs non-locking. Purchase replacement that matches orientation and locking style.
Remove stop: grip bottom stop with pliers and twist gently to open clamp, or cut stop with snips if damaged beyond reuse. Save reusable stop for reattachment.
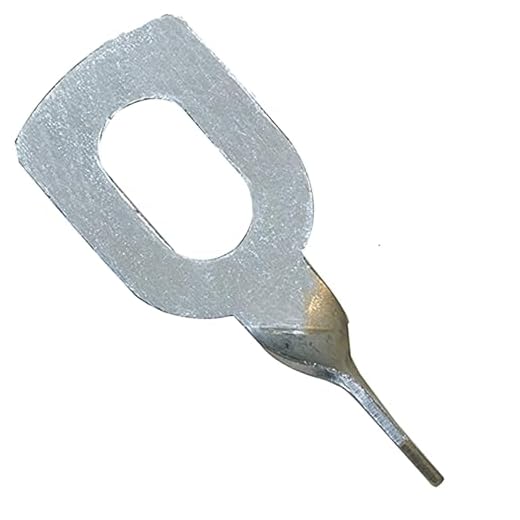
Remove old slider: slide it off tape. If seized, insert small flathead between slider halves to open gap slightly, then coax slider past last few teeth while supporting tape with other hand.
Transfer or attach pull tab: transfer original pull to new slider spindle, or fit replacement pull or split ring of appropriate diameter.
Install new slider: align tape within slider channel, seat slider over last few teeth, then push fully until movement along full length is smooth and both rows of teeth engage evenly.
Secure tape end: crimp metal stop back into place with pliers or create a sewn stop using several tight passes of heavy nylon thread; for water-resistant tape choose a metal stop for reliable hold.
Test under load: run slider repeatedly along full track with a light load applied to verify no skipping, catching, or separation occurs.
Additional resources and related gear suggestions: best travel umbrella for europe, best windproof automatic umbrella. For fueling long trips see which is better plant protein or whey protein.
Temporary pull tab: key ring, cord loop, paperclip
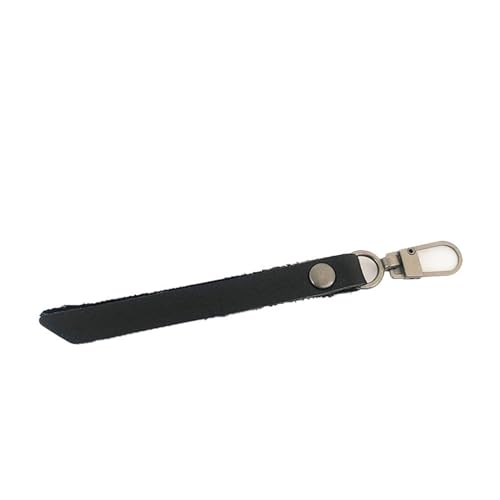
Insert small split key ring through slider pull hole; use ring as replacement tab for immediate grip and smooth opening.
Materials and sizes
Key ring: 6–12 mm diameter for compact pulls, 15 mm for large pulls; choose stainless steel or brass to resist corrosion. Cord: 12–20 cm paracord or shoelace, folded to create 2–3 cm loop; knot tightly or melt nylon tip to prevent fray. Paperclip: large (2–3 mm wire), straighten then form small hook 3–6 mm wide.
Attachment method
Key ring: pass ring through pull hole, rotate until seated, grip ring segment when opening. Cord loop: thread folded cord through pull hole, pass loop end over slider body, pull cord tails through loop and tighten; trim excess to 1–2 cm. Paperclip: form hook, slide hook into pull hole, bend remaining arm over tape and crimp gently with pliers for security. Test several full cycles before carrying item.
Avoid excess length that catches on straps or pockets; inspect metal rings for sharp edges and file smooth. Keep spare rings or short cord strips in kit for quick swaps.
Repair or Replace End Stops and Crimp New Stoppers to Prevent Slider Loss
Install matched metal end stop and crimp securely 3–5 mm past last tooth to keep slider from running off.
- Tools: pair of flat-nose pliers, needle-nose pliers, dedicated crimping pliers (preferred), small bench vise or locking pliers, wire cutters, thin metal shim or scrap aluminum, superglue (cyanoacrylate), heavy nylon thread and needle, awl.
- Parts: metal top stops, metal bottom stoppers, molded plastic stops, replacement bottom box (for separating closures), size-specific stops for #3, #5, #8 systems. Match stop width to coil/teeth width.
Top-stop replacement (non-separating closures)
- Measure tape width and tooth type. If teeth are coil/nylon, order stops labeled for coil; if metal/vislon, choose corresponding metal stops. For reference: #3 ≈ 3 mm, #5 ≈ 5 mm, #8 ≈ 8 mm tooth width.
- Slide replacement stop onto tape until it sits 3–5 mm beyond last tooth. If tape end frays, trim 2–3 mm and seal with brief low heat from lighter on synthetic tape only; avoid burning natural fibers.
- Place thin metal shim under stop to prevent crushing tape fibers. Position pliers at center of stop; crimp once firmly, then rotate 90° and crimp again to form two crush points for even grip.
- Apply a tiny drop of cyanoacrylate into crimp gap for added security on heavy-use items; allow 10–15 minutes to cure before stress testing.
- Test hold by pulling slider to stop with steady hand force (about 10–20 lbf). If stop slips, re-crimp with higher pressure or use crimping pliers designed for stops.
Bottom-stop or separating closure replacement
- If bottom box is damaged, replace with matching bottom-box assembly sized for tooth type. For simple missing stopper on closed-end type, install a metal bottom stop on both tape halves 3–5 mm from last tooth.
- For separating systems where box replacement is not available, sew a heavy stitched stop: fold tape end 6–8 mm, secure with 6–8 tight passes of heavy nylon thread using an awl to pre-punch holes. Lock stitch with a knot beneath tape fold.
- Crimp metal bottom stoppers same as top stops: use shim, crimp twice at right angles, add glue if desired. For extra durability, add a second stop directly behind first (spacing 2–3 mm).
- After installation, align slider and perform 10 full cycles under normal load to seat stop and confirm no slippage.
- Damage prevention tips: avoid over-crimping into tape fabric; use shim to spread force; do not use pliers with serrated jaws directly on stop face unless finished edges are acceptable.
- Temporary solutions: clamp small hose clamp or crimp-on ferrule if proper stop unavailable; replace with permanent metal stop within 24–48 hours for reliable retention.
- Sourcing: sewing notions shops and online fastener suppliers carry stop kits and crimping pliers. Purchase spare stops matching tooth size to keep on hand for field repairs.


