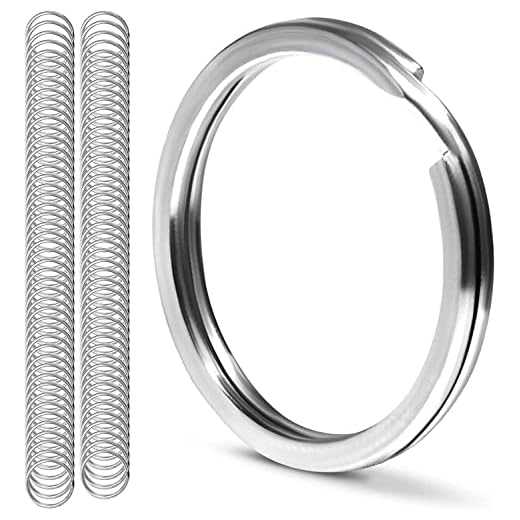


Install a 20 mm stainless-steel split ring through the zipper pull or webbing loop, then clip a compact carabiner with a gate opening of 6–10 mm. This combination keeps a fob accessible while limiting lateral swing; choose a ring rated for corrosion resistance (stainless or brass) and a carabiner under 25 g for minimal added weight.
For location, thread the ring through the second-from-top daisy-chain link or the external D-ring on the shoulder strap to reduce snag risk. If securing to a hip-belt or sternum strap, orient the fob so it hangs toward the body to avoid catching on branches or doorframes. Limit total extra mass to about 50 g for daily carry; heavier loads should be moved into an internal pocket.
Use a split ring with a closed gap under 1 mm; if the gap opens beyond that after wear, replace the ring. Add a 2.5–3.6 mm zip-tie trimmed flush and singed briefly to prevent rotation for high-movement activities. Prefer smooth, rounded hardware to minimize abrasion against webbing.
Inspect attachments monthly: check the ring for deformation, confirm the carabiner gate snaps fully, and swap corroded components. Choose materials (stainless steel, brass, or hard-anodized aluminum) that match local humidity and salt exposure, and avoid relying on accessory gear as a substitute for load-bearing climbing hardware.
Identify and test attachment points: D-rings, daisy chains, shoulder straps
Recommendation: choose hardware or webbing that visibly matches the expected load, then verify by simple static and dynamic tests before routine use.
D-rings: internal widths between 12–25 mm suit most accessory clips; prefer welded or solid-cast stainless steel over stamped or plated thin metal. Visual checks: no cracks, uniform weld seam, minimal surface corrosion. Quick tests: measure ring thickness with calipers (aim for ≥1.2 mm for small accessories, ≥2.0 mm for heavier hangers), hang a controlled weight equal to 2× the accessory mass for 60 seconds, then inspect for permanent deformation. Use a wire-gate or locking carabiner whose gate clears the D-ring opening; ensure the gate snaps cleanly and the carabiner shows a manufacturer load rating if used for heavy items.
Daisy chains: loop centers usually spaced 25–40 mm. Avoid clipping directly to the terminal micro-loop; clip to a sewn box or a mid-loop only when the webbing and stitching appear robust. Inspect stitching: bar-tacks should be dense (multiple parallel rows) and thread should not be cut or UV-brittle. Tests: pull the chosen loop at a 45° angle with a steady 2× load for 20–30 seconds, then perform 10 short drops of 30 cm to expose weak stitches. If any stitch loosens or frays, move attachment to a reinforced point or use a small accessory carabiner secured through two adjacent loops to distribute load.
Shoulder straps and webbing anchors: measure webbing width (common: 20–40 mm) and examine the attachment box/X stitch or rivet. Manual pull test: grasp strap near the attachment and pull with steady force approximating the intended load; observe for shifting stitches or fabric delamination. For items that will swing or be worn on the exterior, simulate movement by walking briskly for 10 minutes with the load attached and check for abrasion on seams and hardware rotation at the anchor point.
Hardware selection and limits: split rings for small items should be stainless steel ≥1.0 mm wire; swivel snaps reduce torque on seams. Avoid thin plated brass or zinc alloy hardware for anything heavier than small ornaments. For loads >5 kg, use a manufacturer-rated anchor or climbing-grade carabiner (marked in kN); for everything else assume untreated pack loops are design-limited and test as described.
Tools and inspection checklist: digital kitchen scale, calipers, flashlight or loupe, and a marker to note weak spots. Inspect for: frayed fibers, discolored or powdery webbing (UV damage), loose stitch tails, movement of sewn bars under load, and corrosion on metal. Mark any suspect spot and re-test at a higher load only if repairs or reinforcements are made.
Practical exclusion zones: avoid clipping to zipper pulls, decorative toggles, or single-thread sewn tabs; avoid the final stitch loop on a daisy chain for repeated loads; avoid thin metal daisy-chain connectors. If unsure about a point’s strength, use the top carry loop or a manufacturer-labeled haul loop instead.
Pick the right connector: carabiner, split ring, lobster clasp or zip tie
Choose a locking carabiner (screw- or twist-lock) for heavy items or anything that must stay secure; prefer steel or aircraft-grade aluminum with a manufacturer-stated major-axis rating (climbing carabiners typically 20–30 kN; accessory carabiners often 2–6 kN) and a gate opening sized to clear the attachment point.
Use a stainless-steel split ring for small hardware and fobs: common diameters 10–25 mm, wire thickness 0.9–1.6 mm; select thicker wire for reduced deformation and choose welded or heat-treated rings for higher fatigue resistance. Avoid thin plated rings for outdoor exposure; they’ll wear and shed plating within months under abrasive motion.
Pick a spring-loaded lobster clasp for frequent quick detach: common widths 8–18 mm, expected working load 5–30 lb depending on alloy and pin design. Prefer brass or stainless bodies with replaceable springs; test latch action before relying on it for valuable items–cheap zinc alloys deform and spring tension drops quickly.
Reserve nylon zip ties for semi-permanent fixes: tensile ratings 18, 50, 120–175 lb (8–79 kg) across common sizes; choose black UV-stabilized nylon for sunlight exposure, or stainless-steel cable ties for marine/saline environments. Use releasable zip ties when future removal is anticipated; otherwise, cut and discard to prevent accidental loosening.
Metal corrosion and seal degradation accelerate with salt, humidity and chemical exposure; check manufacturer’s finish (316 stainless > 304 stainless > brass > coated steels) and consult maintenance guides such as how to prevent air compressor leaks and ensure efficient performance for tips on preserving metal fittings and thread seals.
| Connector | Typical strength / rating | Best use | Material & sizing guidance | Removal / permanence |
|---|---|---|---|---|
| Locking carabiner | Accessory: 2–6 kN; Climbing-rated: 20–30 kN | Heavy tools, gear that must not detach | Steel or aircraft aluminum; gate 10–25 mm; choose screw/twist lock for high security | Quick release when unlocked; highly reusable |
| Split ring | Depends on wire thickness; small rings ~10–50 lb; large/heavy duty up to several hundred lb | Small hardware, multiple small items, compact connection | Stainless 0.9–1.6 mm wire; 10–25 mm diameter typical; prefer heat-treated | Reusable but requires tools to open; lowest accidental release risk |
| Lobster clasp | Typically 5–30 lb working load (varies by alloy) | Frequent detach/attach, decorative fobs, light tools | Brass or stainless body; pick width matching attachment tab (8–18 mm) | Very quick release; spring failure risk over time |
| Zip tie (cable tie) | 18–175 lb common; stainless varieties much higher | Semi-permanent mounting, tamper-evident attachments | Black UV-stabilized nylon for outdoors; stainless for corrosive environments | Single-use unless releasable type; cut to remove |
Step-by-step: attach a carabiner to a strap loop and lock it
Use a locking carabiner with a solid spine and a screw- or twist-gate; pass the spine through the loop so the gate is oriented away from the primary travel direction, then close and tighten the gate until it resists firm finger pressure.
1) Inspect the strap loop: confirm stitching clearance (no frayed threads), measure webbing thickness so the gate opens wide enough to clear the material, and check that the loop won’t fold over the gate when loaded. For examples of compatible small packs and waist rigs see best small travel backpack for women and best marathon running waist pack.
2) Route the carabiner: feed the spine through the loop with the gate facing outward from the bag’s centerline; align the spine parallel to the webbing so force is transmitted along the strongest axis of the connector.
3) Close and lock: push the gate fully closed, then twist or screw the locking sleeve until movement stops and the gate won’t open under a firm pull; for screw-gates make two full clockwise turns past the point where it first engages.
4) Functional check: hold the bag and give a firm tug on the item attached; open and close the gate three times and try to rotate the sleeve–if the sleeve slips, re-tighten or replace the carabiner with a different gate type.
5) Secondary security (optional): for high-motion use, add a short zip tie or a small heat-shrink sleeve over the locked gate to prevent gradual unscrewing; cut the tie for removal when needed.
Quick checklist
Lock type verified, loop integrity confirmed, spine aligned with webbing, gate tightened until firm, gate-check passed, optional tie applied.
Convert a zipper pull into a durable anchor without damage
Use a stainless-steel split ring (6–10 mm OD, 1.0–1.5 mm wire) combined with a short sleeve of heat-shrink tubing (3:1 ratio, initial ID ~4–6 mm) or a silicone tube (ID 1.5–2.5 mm) to create a low-profile, non-destructive anchor for keys on a pack.
- Materials (recommended specifications):
- Stainless split ring: 6–10 mm outer diameter, 1.0–1.5 mm wire thickness (thin rings pass through small zipper holes).
- Heat-shrink tubing: 3:1 shrink ratio, cut to 8–12 mm after shrinking; color optional.
- Silicone tubing alternative: 1.5–2.5 mm ID, cut 8–12 mm length; soft, stays flexible.
- Optional: micro crimp sleeve (aluminum, 1.5 mm) and pliers for a permanent metal loop if closure is acceptable to you.
- Tools:
- Heat source: small heat gun or lighter (use gentle, distant pulses).
- Needle-nose pliers (for split ring manipulation).
- Scissors or flush cutters (to trim tubing).
- Inspect the zipper pull before work: verify hole diameter, slider material, and fabric attachment. If slider is thin stamped metal or shows corrosion, choose silicone sleeve (softer contact).
- Choose split ring size so it passes through the pull hole without forcing. If the ring must be forced, select next larger ring and use silicone sleeve to fill gap and reduce movement.
- Slide the split ring through the pull hole: open the ring with a nail or pliers and thread carefully to avoid bending the slider.
- Place heat-shrink or silicone sleeve over ring where it contacts the slider:
- For heat-shrink: slide tubing over the seated ring, heat from 10–15 cm distance in short bursts until tubing conforms. Avoid prolonged direct heat to the slider to prevent warping or melting of adjacent plastic.
- For silicone: trim to 8–12 mm and seat so it covers metal-to-metal contact points; no heat required.
- Attach keys or a small micro carabiner to the split ring. Position the ring so the bulk sits on the reverse side of the slider when the bag is closed; this reduces snagging and lever forces on the slider.
- Load test: hang a 5 kg weight from the anchor for 10–15 seconds, then 10 kg for 5 seconds. If the slider deforms, remove and choose larger ring or use a silicone-wrapped ring plus distribute load to a strap loop instead.
- Limits and best practices:
- Design for light loads only: carry keys, USB sticks, small tools. Do not suspend >15 kg from a modified zipper slider.
- Avoid continuous abrasion: the sleeve reduces wear; replace tubing if it shows cuts or flattening.
- For sliders made of thin stamped metal, prefer silicone sleeve rather than heat-shrink to lower heat exposure and abrasion.
- Signs to remove and repair:
- Visible bending, cracking or separation at the slider; increased wobble of the ring; zipper misalignment while zipping.
- Fraying of any fabric loop near the slider.
Prevent loss and noise: add paracord wraps, silicone bumpers and locking clasps
Use Type III (550) paracord for protective wrapping: 1.2–2.5 m (4–8 ft) for a full cobra-braid sleeve, 30–60 cm (12–24 in) for a short wrap around a ring or shank; paracord diameter ~4 mm, tensile rating ~550 lb (≈249 kg). Secure ends with a constrictor knot or two half-hitches, trim, melt the core and apply a tiny drop of gel cyanoacrylate to prevent fraying.
For low-profile padding, slide heat-shrink tubing (diameter 4–8 mm before shrink) over the connector area and shrink to 60–90% length with a heat gun at ~120°C. Use 6 mm tubing cut 20–30 mm long for most metal links; this reduces metallic clatter and prevents abrasion at contact points.
Silicone bumpers: use split silicone tubing (ID 2–3 mm, wall 1–2 mm) cut into 8–12 mm rings and place at every metal-on-metal contact (ring-to-D-ring, ring-to-slider, shank-to-frame). Alternatively, use adhesive silicone dots 8–12 mm diameter, 2–4 mm thick; three strategically placed bumpers eliminate most rattling.
Choose a locking connector to stop accidental openings: stainless-steel screw-lock or auto-lock micro carabiners are preferred. For heavier loads pick a unit rated ≥5 kN; for daily carry choose a corrosion-resistant locking snap with secure spring and sleeve. Add a secondary retention – a 2.5–3.5 mm nylon zip-tie tucked under the sleeve or a locking split-ring – as a cheap fail-safe.
Assembly tips: slide any silicone rings or tubing onto the loop before closing the connector; orient the gate toward the interior side of the strap or webbing to reduce snagging; braid or wrap the connector pivot with paracord to dampen movement. Test by hanging a 5 kg weight for 30–60 seconds and inspect for slippage, wear or adhesive creep; re-check every 4–6 weeks and replace worn elements.


