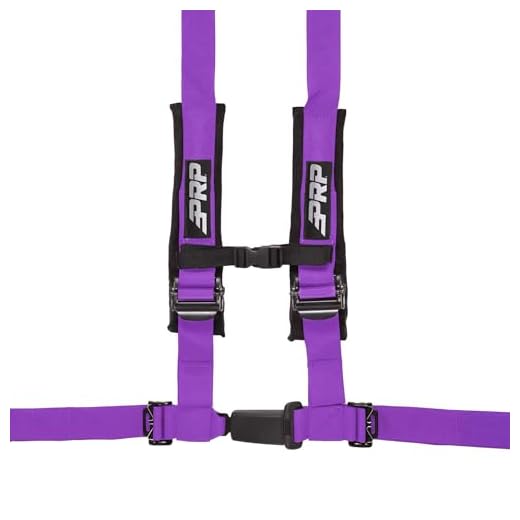


Immediate action: Release the top adjuster, unclip the chest connector, shift the load onto the hip belt, then pull the webbing back through the adjuster until the shoulder pads have about 5–8 cm of tail exposed; re-seat the adjuster so the harness rests on the deltoid muscle, not the neck.
For common adjuster types: ladder-lock – lift the free tail to reduce friction and feed webbing back through the ladder in 5–10 cm increments; cam buckle – lift the cam lever and pull the webbing out of the teeth while supporting the shoulder pad; friction-sleeve or tri-glide – pinch the sleeve, push the pad away from the buckle and pull webbing through toward the pack body. Repeat the motion until desired slack is reached.
If the webbing is jammed or sewn in place, make a temporary loop with a small carabiner or tie a thin cord to hold released length while you refasten the adjuster; use a flat-head screwdriver to lift a stuck cam lever. If shoulder padding bunches, loosen the load-lifters to about 20–30° from vertical and redistribute heavier items into the hip-belt compartment so the harness carries minimal vertical load.
Fit check: sternum connector should sit roughly 2–3 cm below the collarbone; hip belt should bear 60–80% of total mass. After adjustments, walk 50–100 m with the pack loaded and make micro-adjustments of 1–2 cm on each side until comfortable and stable.
Identify your adjuster type: ladder-lock, tri-glide, cam or cam-lock
If the pack uses a spring‑loaded cam-lock, lift the small lever and pull the loose webbing toward the body of the pack to relieve tension on the shoulder webbing.
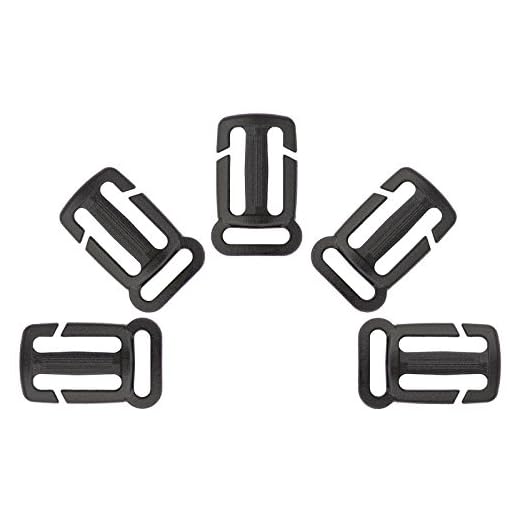
Ladder‑lock: single molded piece with two parallel slots; common widths 12, 20, 25, 32 mm. Visual cue – a rectangular “ladder” profile with no moving parts. When stuck, pinch the ladder body to reduce bite on the webbing and feed the tail back through the far slot while holding the loaded side steady. For coated or wet webbing, dry first; a little soapy water eases movement, avoid oil‑based lubricants.
Tri‑glide (double‑bar): flat rectangle with a fixed central bar. Typical on waist and compression lines. Identification – webbing is woven over and under the center bar. To lengthen, lift the tail over the outer bar and pull it back through; if sewn or melted, trimming or resewing the tail is required. Use a blunt tool or needle‑nose pliers to pull a rounded, frayed end through the center bar.
Cam (non‑lever) and cam‑lock (levered): both use a spring plate or toothed cam to bite webbing. Cam‑lock features an obvious lever; cam without a visible lever has a small spring plate that must be depressed. Identification: metal housing with serrated bite surface. To release, depress the plate or lift the lever and simultaneously pull the webbing toward the pack. If the cam is stiff, depress the spring with a flat screwdriver and cycle the lever several times; a tiny drop of silicone on moving metal parts reduces corrosion – keep it off fabric.
Quick diagnostics: check width against common sizes (½”, ¾”, 1″, 1¼”), inspect for sewn ends or melted stops, and test release with the pack unloaded on a flat surface. If hardware is corroded or plastic cracked, replace the adjuster rather than forcing it; measure webbing width before ordering a replacement. For cleaning stubborn grime on webbing or foam components consult how to clean a foot scrubber.
Unload the pack and lift the shoulder harness to remove tension before making adjustments
Remove all gear or set the pack on the ground; lift each shoulder harness 2–3 in (5–8 cm) away from the torso to create visible slack in the webbing before any length changes.
-
Preparation: unclip the sternum strap, loosen top compression straps and open lid pockets so the load can settle or be removed completely.
-
Off-body method (preferred): place the pack upright on a firm surface. With one hand grasp the shoulder harness at its top attachment and pull up 2–3 in (5–8 cm). With the other hand, feed the shoulder webbing through the adjuster until slack appears.
-
On-body alternative: fasten the hip belt snugly so the hips carry the bulk of the weight, stand upright and then lift each shoulder harness 2–3 in (5–8 cm). This transfers load to the hips and lets the shoulder webbing move freely for fine tuning.
-
Finger placement: place your thumb under the webbing near the shoulder panel and your index finger on top of the webbing just before the adjuster; pull upward while using the other hand to pull or feed the tail. This prevents the webbing from twisting and reduces friction.
-
When slack won’t appear: check for trapped webbing in fabric channels, locked cam levers, or threading through extra loops. Release those points, depress the adjuster release (if present) or unthread the tail one turn, then retry the lift-and-feed motion.
-
Quick verification: after creating slack and making the intended adjustment, let the shoulder harness settle back onto the shoulders (or sit the pack back on a flat surface), then recheck that the webbing moves smoothly and the harness does not bear the pack’s full weight until final tuning is complete.
Open quick-release buckles and detach sternum or hip belt connections first
Unclip the primary quick‑release buckle, then free the sternum clip and unfasten the hip‑belt connection before altering shoulder harness tension or webbing runs.
Release technique by buckle type: side‑release – squeeze both lateral tabs and separate; center‑push – depress the central tab and pull apart; magnetic (Fidlock) – slide halves laterally while separating; cam or levered hip buckles – lift the cam and feed webbing back through. Maintain one hand stabilizing the load at shoulder height while operating the release with the other to prevent sudden drop.
Sternum clip: compress the chest webbing housing to reduce tension, slide the buckle along the tube toward the center, then disengage. Hip‑belt: brace against a firm surface or sit, place thumbs under the male end, lift to clear the catch and pull free; if the belt uses a cam, lift the cam lever before withdrawing webbing. Immediately tuck any loose webbing into elastic keepers or webbing sleeves to avoid snagging.
When a buckle resists
Avoid excessive force. For stuck metal catches apply a small amount of penetrating spray to pivot points, align mating teeth by depressing adjacent webbing, then pull with steady pressure. For warped plastic parts warmed or chilled by weather, flex the male tab outward slightly to clear the mating slot before retrying.
Post‑detachment handling
Keep sternum and hip connections detached until shoulder harness tension is altered or the load is fully supported by hands or a surface; secure released buckles in their retainers or an internal pocket to prevent abrasion, loss, and noise during movement.
Step-by-step: feeding webbing through ladder locks to lengthen a band
Feed the free end through the ladder lock’s top slot from the rear, loop it over the middle bar and back down through the lower slot so the tail points away from the load; pull 10–20 mm increments until the desired extra length is reached, then secure the tail.
Procedure
1. Align the webbing flat with no twists. 2. Push the tail up through the top slot from the back side so the smooth face remains visible on the exterior. 3. Lay the webbing over the center bar, keeping it centered by eye. 4. Thread the tail back through the lower slot from the front side so the webbing doubles over the center bar. 5. Pull the tail in 10–20 mm steps, test the hold, repeat until length increase matches fit. 6. Trim the tail to 25–30 mm beyond stitching point or heat-seal edge; apply a bar-tack or three parallel stitches across the webbing width to lock the tail.
| Step | Action | Measurement / Target | Common error |
|---|---|---|---|
| 1 | Insert tail through top slot (rear → front) | Tail centered, no twist | Feeding from wrong side causes twist and slippage |
| 2 | Loop over center bar | Webbing lies flat over bar | Off-center loop reduces friction |
| 3 | Return tail through lower slot (front → rear) | Tail exits toward opposite direction of load | Routing same direction twice creates poor bite |
| 4 | Adjust in 10–20 mm increments, test hold | Desired extra length reached; slip ≤ 5 mm under 20 kg | Pushing too much at once masks slipping |
| 5 | Secure tail: trim, melt edge, stitch | Tail length 25–30 mm; 3 parallel stitches across width | Too-short tail or no stitching allows fray/slip |
Tools and verification
Recommended: flat-nose pliers or hemostat to pull a short tail through tight locks; heavy-duty polyester thread and needle or sewing machine capable of zigzag on 1–1.5 mm webbing; lighter or hot knife for heat sealing. Verification: apply ~20 kg static load for 30 seconds; acceptable movement ≤5 mm. If movement >10 mm, re-route and add reinforcement stitch or replace the ladder lock.
Untwist and reroute shoulder webbing through anchors for smooth sliding
Rotate any 180° twist at the upper yoke: flip the shoulder webbing so it lies flat with the sewn edge following the anchor contour, then pull 40–60 mm of tail through the guide before seating the webbing in the channel.
For confined anchor tunnels, use a smooth stiff aid (plastic skewer, taped coat-hanger, marlinspike) to feed the webbing; protect the fibers by wrapping the tool tip with electrical tape and avoid sharp metal contact that will abrade the weave.
Route the webbing with the smooth face against molded plastic or nylon to minimize friction. Where the webbing meets a hard corner, create a rounded path: add a thin 1–3 mm shim of folded tape or leather over the corner to increase the turning radius to at least 6 mm.
At D-rings, cams or sewn load plates, orient the sewn end so it exits on the load side and the running tail passes beneath the load surface; prevent an abrupt 90° bend–if necessary thread the webbing through a sewn loop or tri-glide spacer to force a gradual curve.
Reduce binding by treating high-friction contact points: place a 6–10 mm strip of PTFE tape wrapped three turns around the webbing where it contacts the anchor, or apply 1–2 short sprays of silicone lubricant and wipe excess; avoid solvents or heavy oils that stiffen fibers.
After rerouting, perform a slide test: the shoulder webbing should move under light hand pressure (~1–2 kgf). Trim excess to 40–60 mm tail, melt synthetic ends 2–3 mm to seal, or whip-stitch the cut end for a clean finish.
Replace any webbing with more than 10% width loss, multiple frayed zones, or failed stitching. For emergency field repair fold a 20–30 mm overlap, stitch through both layers and secure with heavy-duty tape until proper replacement is available.
Weather protection options to carry: best cheep umbrella and best vented golf umbrella.
Prevent slippage after lengthening: tie-offs, Velcro wraps, and heat-seal webbing ends
Immediate best practice: leave a 10–15 cm tail on 20–25 mm webbing (6–10 cm on very tight systems), route the tail back through the adjuster if possible, then apply a stopper knot plus a secondary wrap or heat finish for redundant security.
Tie-off options (compact and reliable): a double-overhand stopper knot on the tail produces a low-profile, strong stopper; for flatter webbing an overhand-on-a-bight (loop) pulled tight resists slip without thickening the adjuster feed. If there’s clearance, re-feed the tail back through the adjuster and tuck it under the main run by at least two centimeters before tying – this doubles friction. Trim excess only after the knot is snug; leave at least 2–3 cm beyond the knot.
Hook-and-loop wraps (quick, removable): use 25 mm (1″) hook-and-loop tape or commercial wrap straps cut to 10–12 cm. Wrap the tail 2–3 turns so the hook side fully contacts the loop side; position the wrap 1–2 cm past the adjuster to bear load through the hooked area. For long-term use, stitch the loop side to the webbing with 4–6 box stitches (polyester thread) so the wrap cannot migrate.
Heat-seal and heat-shrink finishes (permanent): determine material: nylon typically softens ~215–265°C, polyester near ~250–260°C. For small edges, singe briefly with a lighter until the tip beads, then press with pliers or a flat metal surface to fuse and flatten the tail end; do short pulses to avoid large melts. For cleaner, stronger finishes use a soldering iron or hot knife set to ~300°C and slice/press the edge in one pass. Add a 1–2 cm piece of 3:1 heat-shrink tubing over the fused end and heat to stabilize shape and add abrasion resistance. Work outdoors and ventilate; avoid melting close to stitched seams.
Combined sequence for best retention: 1) route tail back through adjuster if possible, 2) tie a double-overhand stopper, 3) trim leaving 2–3 cm beyond knot, 4) fuse the cut end or apply heat-shrink, 5) add a hook-and-loop wrap a few centimeters past the adjuster for serviceability. This stack provides mechanical friction, a physical stopper, and visual confirmation of security.
Safety notes: do not melt webbing near sewn structural junctions; avoid inhaling fumes; test any mod on non-critical gear before relying on it in the field.


