

Quick recommendation: for daily commuting select a daypack that lists durable water repellent (DWR) finish on the face fabric, a polyurethane (PU) laminate or coating rated at least 1,500 mm HH, and either taped seams or a dedicated rain cover. If you need protection for electronics during prolonged exposure, add an internal dry sack or a neoprene laptop sleeve with an IPX rating.
Typical casual models from the label use 600D polyester with a factory-applied DWR; that construction resists light showers for 20–60 minutes but will leak under sustained heavy downpours or immersion. DWR treatments commonly lose performance after roughly 20–50 washes; restore repellency with spray-on or wash-in products such as Nikwax TX.Direct or Grangers Performance Repel. Do not use bleach or fabric softener; hand-wash or machine-wash on gentle, then air-dry away from direct heat sources.
Zippers and seam treatment matter more than exterior fabric weight. Exposed coil zips allow capillary seepage; look for coated/laminated zipper profiles or zipper garages, and for models that advertise taped or welded seams. Roll-top closures and external storm flaps provide significantly better protection than single exposed zips for extended wet-weather use.
Practical checklist before purchase: confirm presence of DWR + PU laminate with a numeric HH value, check for sealed/taped seams, inspect zipper type, and plan to reproof every few months if regularly exposed to rain. For heavy-rain environments choose a technical rucksack with ≥2,000–3,000 mm HH or carry a lightweight rain cover rated ≥3,000 mm HH; for urban commutes a treated 600D daypack plus a small dry bag for valuables is usually sufficient.
Protection level of the brand’s daypacks
Choose models with coated polyester, a DWR (durable water-repellent) finish and water-resistant zippers; add a compact rain cover for heavy showers.
Materials and construction: common shells use 600D polyester or coated cotton canvas with a DWR layer. Tarpaulin or vinyl-coated bases greatly reduce moisture transfer at the bottom. Primary ingress points: stitched seams, exposed zippers and closure flaps. Prefer welded/taped seams and laminated or water-resistant zipper tape for measurable improvement against driving rain.
Practical performance: pieces with DWR typically repel light to moderate precipitation and surface splashes. Continuous heavy rain, sustained soaking or submersion will allow water through seams and zipper channels. Models that include an internal coated liner or a sealed laptop compartment deliver noticeably better protection for electronics during short downpours.
Maintenance and upgrades: restore DWR with a wash-in or spray-on treatment (e.g., Nikwax or equivalent), apply clear seam-seal tape to vulnerable stitch lines, and store sensitive items in waterproof dry sacks. For extra defense, carry a lightweight rain cover sized to pack volume (20–25L, 25–30L, 30–40L options available) or retrofit a taped seam service at a repair shop. Condition any leather trims to reduce saturation and staining.
Field tactics: face the main closure away from wind-driven rain, tuck zippers under a flap when possible, avoid placing the load directly on puddled ground without a barrier, and choose roll-top or tarpaulin designs for prolonged outdoor use. For coordinating child-transport rain protection and umbrella solutions see best double umbrella stroller for disney.
Which models use impermeable materials versus water-resistant coatings?
Select packs described with terms like “laminated shell,” “TPU-coated,” “PVC/tarpaulin,” or “welded construction” for genuinely watertight protection; choose signature canvas or polyester models listing “DWR” (durable water repellent) for light-rain resistance only.
Materials and construction that equal true imperviousness: PVC/tarpaulin shells, TPU-laminated polyester, vinyl-coated fabrics, welded seams, taped seams, roll-top closures and sealed zippers. Product listings that mention any of these features will hold up in heavy rain better than standard coated textiles.
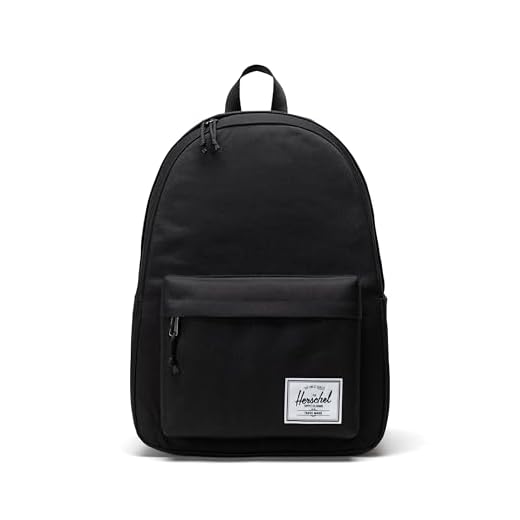
Common core lines (Classic, Heritage, Little America, Retreat, Settlement, Pop Quiz, Novel and similar everyday designs) typically use polyester, nylon or cotton canvas with a DWR finish and reinforced bases. Expect splash protection and brief downpours, not submersion protection.
Collections or pieces with “laminated,” “tarpaulin,” “PVC,” “TPU” or “rubberized” in the name or spec sheet are the ones more likely built from impermeable materials. Those items are rarer in the brand’s catalog and are usually marketed toward travel, commuter or technical use.
Quick buying checklist: 1) Look for fabric type (TPU/PVC/tarpaulin = high barrier; polyester/canvas + DWR = light resistance). 2) Check for taped/welded seams and sealed zippers. 3) Verify whether the product title or spec explicitly uses “laminated” or “coated with TPU/PVC.” 4) If carrying electronics in heavy rain, pick a laminated/tarpaulin model or add a dedicated rain cover.
How to inspect tags, fabric and zippers to judge a pack’s water protection
Start with the inner label: look for specific terminology such as “PU”, “TPU”, “laminate”, “seam-taped”, “DWR” or numerical fabric weights like 300D, 600D, 1000D; presence of those terms means a coating or lamination rather than only plain woven textile.
Labels and tag details
Check the care and manufacturer tags for certification marks or construction notes – “seam-taped”, “taped seams”, “laminated”, “coated”, “AquaGuard” or similar zipper-brand references indicate built-in liquid protection. If the tag only says “water-resistant” or “repellent” without listing a laminate or taped seams, expect only a surface treatment (DWR) that will lose effectiveness with wear and washing.
Find the RN or model code and compare it with the maker’s product page: the product listing often specifies membrane type (TPU vs PU) and whether seams are taped. A plain fabric-only entry with denier listed but no coating terms usually means limited splash protection only.
Fabric, seams and zipper inspection
Fabric: feel and appearance tell a lot – laminated fabrics have a slightly stiff, plasticky inner face and a faint sheen on the outside; PU-coated polyester feels smoother and less porous than untreated canvas. Higher denier numbers (600D, 1000D) increase abrasion resistance but do not guarantee internal membranes; always pair denier with tag language. Visible inner film or a glossy inner layer is a reliable indicator of lamination.
Seams: look inside for seam tape (a narrow bonded strip covering stitch lines) or for welded/bonded seams with no needle holes. Sewn-only seams without tape will admit liquid along stitch holes under sustained exposure. Inspect stitch density and bar-tacks on load points – tight, even stitches suggest factory quality and fewer leak paths.
Zippers: water-shedding models have coated zipper tape with no exposed teeth and a molded, rubbery finish (YKK AquaGuard and similar are common labels). A simple storm flap that overlaps the zipper improves performance; a sealed zipper (fully bonded) offers significantly better protection than a standard coil or metal-teeth zipper. Test visually: press the coated tape – it should be continuous and bonded to the zipper tape, not stitched over an exposed tooth row.
Quick field test: place a tissue inside the main compartment, run a small amount of water along an external seam and across the zipper for 30–60 seconds, then check the tissue for damp spots. If beads form and roll off on the outer face and the tissue stays dry, the treatment/laminate and seams are functioning; if moisture appears quickly, expect only minimal protection.
How to perform a quick at-home water-resistance test without damaging the bag
Immediate action: perform two local checks on a hidden panel – a fine-mist spray for 30 seconds and a controlled drip for 10 minutes – using distilled water, a soft microfiber, and a syringe or dropper.
Prep: empty the item, remove removable pads, stuff with a folded towel to hold shape, place on a dry towel. Choose an inconspicuous interior seam or underside corner for testing.
Spray test (surface repellency): use a household spray bottle held 20–25 cm (8–10 in) from the fabric. Deliver 8–12 short bursts over 30 seconds. Observe: if water beads and rolls off immediately, surface repellent is present; if the fabric darkens but no moisture appears inside after 5 minutes, coating is likely; if wetness transmits to the stuffed towel within 5 minutes, protection is minimal.
Drip test (penetration check): place 8–10 drops from a syringe or dropper on the same spot. Wait 10 minutes, then press a dry tissue against the interior facing area. Results: no transfer = strong resistance; slight damp edge on tissue = moderate; obvious wet patch within 5 minutes = poor resistance.
Seam and closure check: apply 6–8 drops along a stitched seam and along the zipper tape, wait 10 minutes, then inspect interior. If dampness appears only at stitch holes, consider seam tape or professional seam sealing; if zipper transmits water, expect interior leakage during sustained rain.
Damage-avoidance rules: never use boiling water, heat guns, abrasive brushes, or household cleaners with solvents; avoid testing on printed logos and leather trims; always blot test spots with a microfiber then air-dry away from direct sunlight or heaters.
Post-test care: blot excess water, let the item dry fully for 24–48 hours with airflow. If beads failed, treat fabric with a spray-on DWR or silicone-based reproofing product following the product instructions and re-test on a hidden area.
Need a compact travel alternative with built-in weather resistance? See best carry on duffels for travel.
Which aftermarket treatments, seam sealing methods and rain covers increase protection
Apply a spray-on DWR designed for technical textiles, seal stitch lines with a product matched to the bag coating (silicone-based for silnylon, PU-based for polyurethane coatings) and pack a welded-seam silicone or PU-coated rain cover plus internal roll-top dry sacks for valuables.
-
DWR treatments (outer-face repellency)
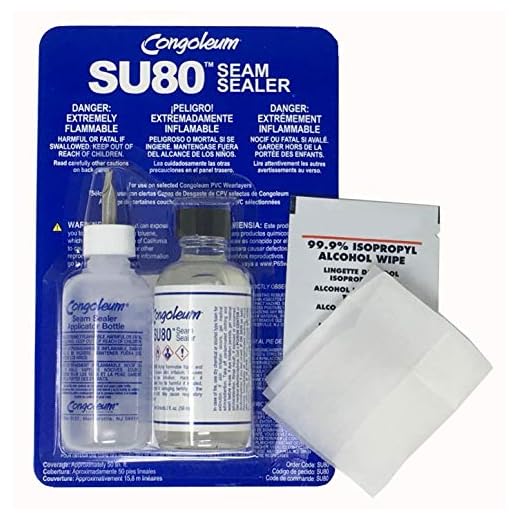
Hot PickSU80 Seam Sealer With Applicator BottleStrong one-part PVC seam sealerEfficiently seals PVC vinyl flooring seams, ensuring durability and strength across a long-lasting finish. This user-friendly kit covers approximately 50 linear feet of seams.- Best picks: Nikwax TX.Direct Spray-On, Grangers Performance Repel (current PFC-free formulas), Atsko Silicone Water-Guard (silicone spray).
- Method: clean with mild soap, fully dry, spray evenly from 15–20 cm, work with a soft brush if product instructs, allow full cure. For heat-activated formulas follow manufacturer temperature recommendations (low heat tumble or warm iron with cloth).
- Reapply when beading fails or after ~20–40 machine washes; for daily-use packs expect reproof every 6–12 months depending on wear and washing frequency.
- Note: silicone sprays can darken some fabrics; test a hidden patch first.
-
Seam sealing and stitch-line protection
- Options: factory-style seam tape (welded or iron-on where compatible), liquid seam sealants, and fabric-compatible seam tapes/patches for repairs.
- Products to consider: Gear Aid Seam Seal (liquid), McNett Seam Grip WP (for higher-flex repairs), PU-based seam sealers for PU-coated panels and silicone-compatible sealants for silnylon.
- Application protocol: clean seam channel, remove loose thread/soil, apply thin continuous bead on interior stitch line, press seam to spread, allow 24–48 hours cure, perform flex test and add second coat if seepage appears.
- For high-stress seams combine tape + liquid sealer: apply tape first, then coat overlap area inside; taped seams are superior to sealed-only seams for long-term leak prevention.
-
Zippers, closures and zipper-area treatments
- Use water-resistant zippers (YKK Aquaguard-style) or add a sewn external rain flap to cover the slider and stitch line.
- Aftermarket protection: small bead of seam sealer along the zipper stitch line on the interior; apply zipper lubricant sparingly to maintain slider function after sealant cures.
- For electronics, store in small waterproof pouches regardless of zipper treatment.
-
Rain covers and external shells
- Preferred materials: silicone-coated nylon (Silnylon) for strength and longevity; PU-coated ripstop with taped/welded seams for lighter weight options.
- Seam construction: welded or taped seams significantly outperform stitched-only seams. Avoid covers with exposed stitched seams unless sealed.
- Hydrostatic head guidance: 3,000–5,000 mm is sufficient for heavy rain on a cover; choose >10,000 mm for dry sacks intended to keep contents dry under prolonged exposure or submersion.
- Fit: select a cover one size larger than the unloaded bag size to accommodate bulky loads; look for elastic hem + locking buckle or strap system to prevent blow-off.
- Examples of formats: full-wrap covers (best external protection), half covers (lighter, less protection for top-loading spills), integrated stowable covers vs removable ultralight models.
-
Internal redundancy
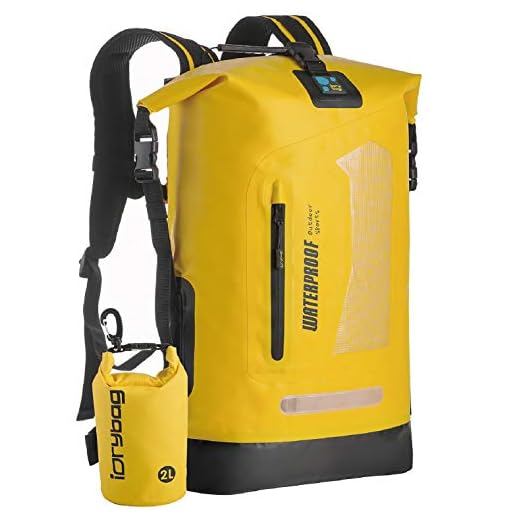
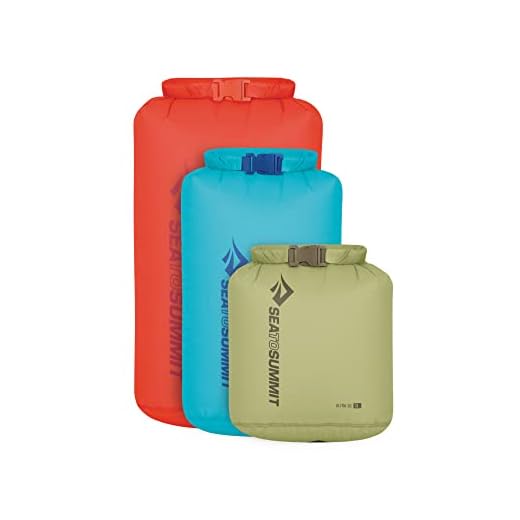
- Use roll-top dry bags or sealed pouches for laptops, camera gear and documents. Aim for dry sacks rated ≥10,000 mm HH for reliable dry storage.
- Seal small electronics inside double-sealed pouches or zip-locks as an inexpensive backup.
-
Maintenance and compatibility checks
- Always confirm coating compatibility before applying a liquid or tape; PU adhesives can fail on silicone-coated textiles and silicone products can repulse PU surfaces.
- Test any product on an inconspicuous area for color change or adhesion problems.
- Avoid applying heavy coatings to padded or breathable back-panels where breathability is required; restrict treatments to outer shell panels.
How to dry, pack and care for a wet daypack to prevent damage
Immediately empty the pack, open every zipper, remove any removable pouches, and stuff the main compartment with dry microfiber towels to wick moisture away from seams and padding.
Immediate drying (first 0–6 hours)
Flip the bag inside-out through the main opening to expose the lining and pockets. Position the top handle over a hanger so the bag hangs inverted; this encourages gravity drainage. Place a fan at low speed 30–50 cm away to increase airflow; expect visible drying of surface moisture within 2–6 hours.
Use a hairdryer only on cool or low fan setting from 30 cm distance and for brief intervals (under 2 minutes per spot). Do not apply direct heat above 40°C (104°F) to synthetic fabrics; limit leather trim exposure to under 30°C (86°F).
For foam back panels and padded straps, push absorbent towels into cavities, replace towels every 1–2 hours until dampness drops significantly. For stubborn internal wetness, insert silica gel packs or dry rice in breathable pouches overnight to pull residual moisture.
Packing wet for short transport and preventing damage during storage
If transport is required before complete drying, place damp items in a waterproof dry sack or heavy-duty plastic bag and ventilate upon arrival. Do not seal a soaking pack in plastic for longer than 4–6 hours; trapped moisture causes delamination, mold and odour.
Once dry, close zippers halfway and store in a cool, dry space on a shelf or hung from the top loop to maintain shape. Insert cedar blocks or activated charcoal pouches to control residual odours. For leather trim, apply a light coat of leather conditioner only after the piece is fully dry.
| Material | Immediate action | Drying method | Safe temp / expected time |
|---|---|---|---|
| Polyester / nylon outer | Invert, towel-blot seams, fan-dry | Hang inverted + fan; avoid direct sun for colored fabric | ≤40°C; 4–24 hours depending on saturation |
| Cotton canvas | Remove dirt, blot, reshape while damp | Shade air dry on flat surface or hung; rotate periodically | Ambient to 35°C; 12–48 hours |
| PU-coated or laminated fabrics | Wipe interior coating gently; avoid aggressive scrubbing | Hang inverted, low airflow; do not flex coating repeatedly | ≤40°C; 6–36 hours |
| Leather trim | Pat dry, allow natural air; do not soak | Shade air dry; condition after fully dry | ≤30°C; 12–24 hours |
| Foam panels & straps | Push towels into cavities, replace as they moisten | Air dry with circulation; use silica packs for final drying | Ambient; 24–72 hours |
Mold or mildew: test a hidden area first, then spray white vinegar diluted 1:1 with water, scrub with a soft brush, rinse with clean water and repeat drying steps. For persistent stains on fabric similar to pet items, see how to clean a used cat tree for stain-lifting techniques compatible with upholstery fabrics.
Zippers and hardware: dry metal parts thoroughly, apply a thin film of silicone zipper lubricant or paraffin for smooth operation; a single drop of light oil on steel hardware prevents corrosion–wipe excess. Leather components: treat with a pH-balanced leather conditioner after full drying to prevent stiffness and cracking.
Final check before storage: interior and all pockets must feel bone dry; pinch seams and under flaps for hidden damp spots. Insert two silica gel packs for prolonged storage. Pack only completely dry items to prevent delamination, fabric rot and lingering odours.
FAQ:
Are Herschel backpacks waterproof?
Most Herschel backpacks are not fully waterproof. They are usually made from polyester or canvas with a water-resistant finish that handles light rain, but seams and zippers are not sealed against heavy downpours.
Will a Herschel backpack keep my laptop dry during a sudden heavy shower?
No — a heavy shower can let water through the zipper and stitching. Many Herschel packs include a padded sleeve or lining that offers some protection, but for electronics you should use a padded waterproof sleeve or pack your laptop inside a sealed plastic bag when rain is expected.
Can I improve the water resistance of my Herschel backpack myself?
Yes, you can increase protection with a few easy steps. Apply a spray-on durable water repellent (DWR) treatment designed for fabric, reapply periodically, and keep the bag clean so the coating works well. For important items, use internal dry bags or a rain cover; seam sealing is possible but requires care and is not usually necessary for light use.
Does Herschel label any of its models as waterproof on the product pages?
The brand typically describes materials and lists “water-resistant” or mentions a protective coating in product details. They rarely claim full waterproof performance for their standard backpacks, and product descriptions will flag specific features like water-repellent fabric or special liners if present.
Are there Herschel backpacks suitable for outdoor activities in wet conditions?
Herschel offers some models with tougher nylon and reinforced coatings that perform better in wet weather than cotton canvas versions, but most are designed for urban use rather than heavy outdoor exposure. If you need a bag for hiking, kayaking, or long periods in the rain, choose gear with welded seams, roll-top closures, or materials such as TPU or dedicated waterproof membranes; otherwise add a rain cover and use internal waterproof pouches for valuables.


