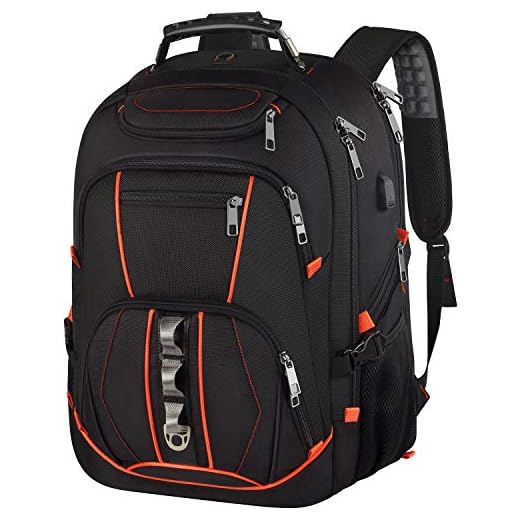

Immediate action: allocate modular pouches at 1L, 3L, 5L volumes; assign 1L to cables, chargers, power bank; 3L to toiletries, small tools; 5L to spare clothes, lunch. Position the heaviest items within 5 cm of the spine to keep the centre of mass close to the wearer.
Adopt frequency-based placement: external zipper pockets for hourly-use items, target capacity ~0.5–1 L; front quick-access pocket for transit documents, wallet, phone. Use transparent pouches for electronics, opaque for hygiene, colour-code with bright tape–red for medical, blue for tech, green for snacks. Apply compression straps to the main compartment to reduce bulk by approximately 20–40%.
At home store units upright on shelves with 30–35 cm depth, or hang by the top loop on 20–30 cm wall hooks to preserve shape. Use clear bins sized 15×30×40 cm for smaller carriers to keep pairs visible. Insert two silica-gel sachets per 5 L of internal volume when storing for longer than four weeks; replace sachets every six months.
Maintenance routine: inspect quarterly, wipe interiors with diluted dish soap, rinse, then air-dry in shade for 12–24 hours. Check zippers for smooth travel–if a full run exceeds 2 seconds, apply a drop of silicone lubricant to sliders. Replace elastic straps that have lost over 30% of original stretch, repair stitching where seam separation exceeds 1 cm.
Choose the right pack size, pocket layout for your daily routine
Pick capacity by total items: 15–20 L for phone, wallet, keys, light jacket; 20–28 L when carrying a 13–15-inch laptop plus lunch; 28–35 L when you need gym kit or extra shoes; 35–45 L when you transport child supplies, camera gear, multiple work folders.
Size guidelines
Measure core items before purchase: laptop length, water bottle diameter, folded jacket thickness. Add ~20% spare volume for occasional extras. Typical laptop sleeve inner dimensions for a 15-inch device: 38 x 26 cm; allow sleeve internal height 39–40 cm, width 27–28 cm. Side bottle pockets handle diameters up to 7 cm; choose elasticized pockets for bottles 7–9 cm. For loads under 5 kg use shoulder straps ~3 cm wide; for repeated heavier loads choose 4–5 cm wide straps plus a sternum strap. Rigid base dimensions help retain shape when carrying lunches or small boxes.
Pocket layout by routine
Commuter: one padded laptop sleeve, one slim tablet pocket, two quick-access external zip pockets for transit card, phone, one internal zip pocket with RFID lining for wallet, two pen loops, key clip near top. Place heavy items low against the back to improve balance.
Office worker: dedicated laptop compartment with 3–5 mm padding, separate A4 document sleeve, insulated lunch pocket or removable lunch pouch, internal organiser panel with at least four card slots, cable loop for charger. Choose a flat base so the pack sits stable on a desk.
Parent: two large external zip pockets for wipes, one insulated bottle pouch, a change compartment with waterproof lining, quick-access top pocket for snacks, internal mesh pockets for small toys, stroller-strap loops or luggage pass-through for hands-free carrying.
Cyclist: low-profile daypack 10–18 L with chest strap and sternum clip, reflective external pocket, roll-top closure for rain protection, hydration sleeve for 1–2 L bladder, minimal internal dividers to prevent shifting. Prioritise a ventilated back panel with channelled foam.
Travel hybrid: 30–45 L with a full-clamshell zip compartment, lockable zippers, hidden anti-theft pocket at the back panel for passport, modular dividers to separate tech from clothes, external compression straps to reduce volume when partially full.
Test any candidate fully loaded: walk 10 minutes, adjust straps so the center of mass sits high on the upper back, confirm zip closure smoothness when pockets are filled.
Group items by use: pack daily must-haves, work tools, snacks
Place daily-access items in the top quick-access pocket: phone (≤8 cm wide), wallet, keys, sunglasses. Store those in a 7×10 cm mesh pouch; limit combined weight to ≤300 g. Add a 10,000 mAh power bank (≈200 g), a short 30 cm USB-C cable, compact earbuds, a single folded face mask.
Keep work tools in a central padded sleeve against the spine for stability: laptop 13–15 in (sleeve area ~35×25 cm), 65W charger (≈220 g), compact mouse (≈90 g), portable SSD 1 TB (≈40 g), A5 spiral notebook, pen roll with three pens. Bundle cables inside a 20×10 cm organizer pouch. Aim for total tech weight between 1.5 kg and 3 kg depending on laptop size.
Store snacks in a lower external pocket inside a resealable insulated pouch sized about 22×15 cm to prevent spills. Suggested single-day inventory: two granola bars (50–60 g each), 30–50 g mixed nuts, one firm fruit (apple preferred; avoid banana for long trips), one single-serve coffee sachet. Use vacuum-seal or zip-lock packs for crumb control.
Keep a clear 15×10 cm hygiene pouch with: 10 adhesive bandages, three antiseptic wipes, two blister plasters, 100 ml hand sanitizer, daily medication labeled for 48–72 hours. Position this pouch next to the top quick-access pocket for immediate retrieval during short stops.
Weight placement rules: heavy items closest to the body/spine, bulk of tech centered, snacks low, frequently used items in the top pocket, liquids inside a leakproof pouch. For longer trips requiring checked hold luggage consult best luggage for long haul flights for size options. For occasional outdoor maintenance include a compact pressure washer option; see best pressure washer with adjustable pressure ranges for models suited to small-scale jobs.
Protect electronics: chargers, padding, placement, cable management
Store a laptop in a dedicated padded sleeve with at least 8 mm closed-cell foam, snug fit with maximum 10–20 mm side clearance, positioned against the carrier’s rear panel to reduce flex and impact forces.
Padding specifications
- Materials: closed-cell EVA foam for shock absorption; neoprene outer layer for water resistance; hardshell cases for portable HDDs and fragile peripherals.
- Thickness guidelines: laptops >13″ – 8–12 mm; 11–13″ – 6–8 mm; tablets – 4–6 mm; smartphones – 3–5 mm.
- Sleeve fit: allow ≤20 mm total extra volume; loose sleeves increase movement risk during drops.
- Additional protection: removable foam inserts of 10–15 mm for high-risk transit; corner guards for devices with exposed edges.
Placement rules
- Center heavy electronics close to the carrier’s spine, vertically around the shoulder-blade area, to keep mass near the body and minimize swing.
- Avoid placing chargers or power bricks directly against screens; use a separate compartment or a rigid divider between screens and loose objects.
- Store power banks in a ventilated pocket with easy access; heat dissipation needs space, especially for 20,000 mAh units that can reach 40–60°C under load.
- Hard drives, camera bodies, lenses should sit in padded modular cubes or hard cases to separate them from cables and chargers that cause pressure points.
- Keep moisture-sensitive electronics with a silica gel packet; replace packets every 3–6 months if exposed to humid conditions.
Cable management recommendations:
- Use a dedicated pouch with elastic loops, mesh pockets, plus a flat compartment for a charger brick; pouch dimension example: 200 × 120 mm for a laptop charger plus two short cables.
- Cable length: 20–50 cm for powerbank use; 50–120 cm for wall chargers; shorter cables reduce tangles inside compartments.
- Coiling technique: use loose figure-8 or single-loop coils to avoid sharp bends; secure with reusable Velcro straps or silicone bands.
- Labeling: color-code cables with heat-shrink tubing or write-on tags near connectors for quick identification; label charger outputs (e.g., 65W USB-C, 45W USB-C, 5V/2.4A).
- Connector care: fold prongs or use plug protectors; store adapters in small zip pouches to prevent scratching device surfaces.
- Fastening: add adhesive cable anchors inside the compartment to route charging cables through a fixed path, preventing abrasion against zippers or hard items.
Maintenance checklist:
- Inspect cables monthly for frays; replace at first sign of exposed wires or intermittent charging.
- Check sleeve padding every 6 months for compression; replace foam once thickness drops >30% from original.
- Clean connector contacts with isopropyl alcohol every 3 months if devices charge sluggishly.
Use modular pouches with clear labels for small-item visibility
Store small items in transparent modular pouches sized by category: 70×100 mm for SD cards and coin-sized items; 100×150 mm for short cables, earbuds; 150×200 mm for power bricks, multi-tools; 200×300 mm for toiletries or first-aid kit. Use pouch thickness 0.3–0.5 mm TPU or 0.4–0.6 mm PVC for durability; choose welded seams over stitched seams for splash resistance.
Apply printed adhesive labels on the pouch front using this concise format: ITEM / QTY / DATE. Example: “USB-C CABLE / 2 / 2025-08”. Print in sans-serif at 16–18 pt for legibility; use 6 mm tall labels for narrow pouches, 10–12 mm for larger ones. Laminate labels or use transparent label protectors to prevent smudging.
Color-code categories with label background tones for instant recognition: electronics #4ECDC4 (teal); cables #FFA726 (orange); medical #FF6B6B (red); toiletries #7E57C2 (purple). Use single-letter prefix on labels when space is tight: E: for electronics; C: for cables; M: for medical; T: for toiletries.
Mount pouches inside the main compartment using one of these attachment methods: Velcro loop sewn to pouch back for hook-panel surfaces; elastic strap sewn into pouch for slipping over internal dividers; D-ring clip for hanging from internal webbing. Orient clear face toward main opening so contents remain visible when retrieving items.
For quick inventory count use small transparent pockets with numbered slots or printable QR stickers linking to a short inventory list (format: item name; serial; qty). Scan time per pouch typically 1–2 seconds using a smartphone QR app; required when carrying many similar components.
| Pouch size (mm) | Typical contents | Suggested label text |
|---|---|---|
| 70 × 100 | SD cards, SIM tools, coins | SD / 4 / – |
| 100 × 150 | Earbuds, short cables, adapters | CABLE / 2 / 2025-08 |
| 150 × 200 | Power bank, charger, small toolset | POWER / 1 / 2026-01 |
| 200 × 300 | First-aid items, toiletries, spare clothing | MED / 1 / 2026-05 |
Replace hand-written labels every 6–12 months when ink fades; use solvent-resistant printers for long-term durability. For fragile small parts, insert foam dividers inside a clear pouch to prevent shifting without obscuring visibility.
Balance weight: place heavy items near the spine; secure loose loads
Place the heaviest items within 5–8 cm of the spine, positioned vertically between the shoulder blades and the top of the hip belt.
Weight targets
60–70% of total carried mass should sit on the hip belt; limit load above shoulder level to <10% of total weight. For day use keep single-item weights under 3–4 kg close to the back to prevent forward pitch.
Stabilization techniques
Fasten the hip belt first; tighten until snug against the iliac crest. Close load-lifter straps at a 30–45° angle to pull weight toward the torso; adjust shoulder straps only to remove slack. Use sternum strap to reduce lateral sway; set at a comfortable chest height that does not restrict breathing.
Use compression straps on both sides; tighten until internal movement is under 2 cm when the pack is shaken. Secure irregular items with shock cord or short webbing straps threaded through daisy-chain loops; place long rigid items parallel to the spine to preserve centerline. Fill voids with soft pieces to prevent shifting of dense objects.
Test stability by walking 50 m at normal pace; observe for a sway angle over 5° or item displacement greater than 2 cm. If either occurs, redistribute heavy pieces closer to the spine or add lateral compression until movement stops.


