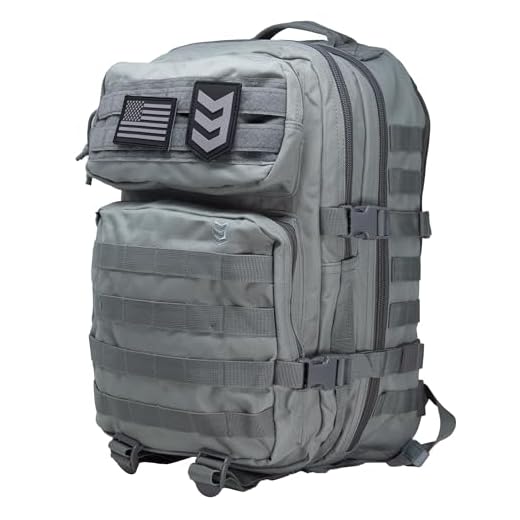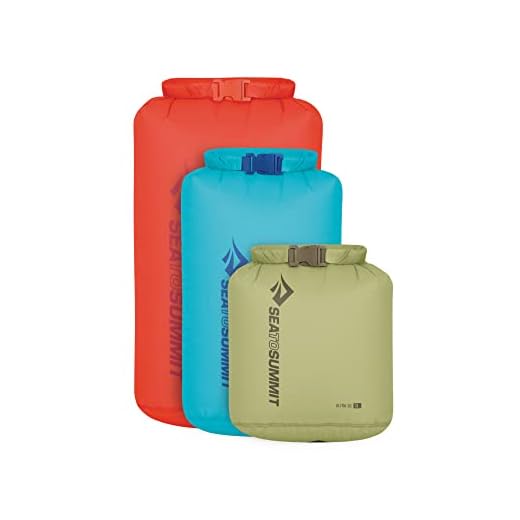


Compress the bedroll into a waterproof compression sack to roughly 33% of its unpacked volume, place it against the pack frame and fasten with two independent attachment lines: one low (at the base lash point) and one mid-height (through the side daisy chain). Use lightweight locking carabiners or sewn webbing cinch loops; keep the roll centered and no more than 5–10 cm from the frame to minimize wobble and leverage on the shoulder straps.
Attachment procedure in three concise actions: (1) Run a continuous length of webbing or cord under the frame and up through the compression sack’s lash points; (2) tension with a cam buckle or a double-back webbing finish and secure the tail by folding it back and tucking into the nearest elastic keeper; (3) add a second transverse cord about 20–25 cm from the first to prevent rotation. Use two attachment points spaced at least 15–20 cm apart to limit pitch and roll.
Adaptation by pack type and weather: on framed packs place the load directly against the internal frame or within the lower compartment if rain is expected; on frameless models position the roll as low and close to the carrier’s back as possible. If you must carry externally in wet conditions, keep the sack inside a dry outer cover or under the lid flap for splash protection.
Quick field checks before departure: give a firm downward and backward tug; allowed movement is under 5 cm. Walk 20–30 steps and re-tension if the roll shifts. Trim any webbing tails to 5 cm and tuck them away to avoid snagging on branches or rocks.
Where to place your overnight roll for load balance and quick access
Place the compressed night roll low and centered on the exterior of the pack, resting across the lower third of the frame–about 5–15 cm above the hip belt–so the mass rides close to the lumbar region and maintains a neutral center of gravity.
Keep it outside only when the item is light and bulky: target below 10% of total carried weight (for example, under 1.5–2.0 kg on a 15–20 kg load). If the bedding-equivalent exceeds that threshold, stow it inside against the frame between shoulder blades and mid-torso to prevent rearward torque.
Low-centered mounting details
Secure with two independent tie-down points aligned vertically and spaced 25–30 cm apart to eliminate pendulum motion. Orient the roll horizontally so its long axis follows the pack’s back to reduce drag and rubbing. Use a waterproof stuff sack and tuck the bottom edge under the hip-belt webbing or lower load-lifter to limit bounce.
Top and side placement for rapid retrieval
For immediate access, place a compact quilt in the lid pocket or front-access sleeve where it can be removed without unloading the pack; ensure it does not block hip-belt operation or zip openings. For side carries, use two low-profile cinches and cross-tension the lower webbing to prevent slippage, and avoid mounting opposite heavy items (water, stove) to preserve lateral balance.
After wet trips, rinse removable covers and sacks; for cleaning larger tarps or outer covers consult best pressure washer with adjustable pressure ranges.
Use pack compression webbing to secure a rolled camp quilt
Recommendation: Feed the compression webbing through the roll’s stuff sack and the pack’s webbing ladder, cross the lines beneath the roll to form a cradle, then tighten until the roll moves no more than 1–2 cm when you give it a firm pull.
Preparation: Insert the insulated roll into a smooth-faced compression sack or dry sack to prevent snagging and create a uniform cylinder; remove loose straps and tuck drawcords so the webbing bears on the sack material, not fragile fabric or zippers.
Routing technique: Run each webbing tail through its buckle once, then through the pack’s compression slots. Keep webbing flat (no twists) and place buckles on the outside for access. For long rolls use two pairs of webbing: one set near each end. Cross the left over the right under the roll (and mirror on the other side) to produce an X that resists rotation and lateral swing.
Tensioning method: Tighten each side in short, even pulls: cinch one side a few centimeters, then the opposite, repeating until snug. Stop when firm pulls leave under 1–2 cm of movement. Avoid crushing loft – if the insulation visibly flattens along the entire cylinder, ease off several centimeters of tension.
Securing tails and redundancy: Trim or fold excess webbing and tuck it into elastic keepers or route a short bungee through the folded tail to prevent flapping. Add a safety loop: run a thin cord or small webbing through the pack haul loop and clip the roll with a locking carabiner; this prevents loss if a buckle slips or breaks.
Field tips: If buckles contact the sack directly, place a thin foam pad beneath them to reduce abrasion. For wet conditions use a waterproof stuff sack so repeated tightening won’t soak the roll. Do not maintain high compression for storage longer than transport–restore loft at camp between trips.
Lash a rolled bedroll beneath a pack using webbing or daisy chains
Use two lengths of 25 mm (1″) flat webbing, 1.5–2.5 m each, and tension through the lowest daisy-chain loops with a trucker’s-hitch finish and two half hitches for a secure, low-profile carry.
- Prepare gear: fold or roll the insulated quilt/tube into a tight cylinder, contain it in a waterproof sleeve or compression cover to reduce snagging and water exposure.
- Anchor spacing: align two anchor points on the roll 20–30 cm apart along its length; these will correspond to two separate daisy-chain loops or lash points on the pack’s base.
- Threading sequence:
- Feed one end of webbing through the chosen daisy-loop from outside toward the center, pass it under the roll and back up through the same loop or the next lower loop to form a girth hitch around the roll.
- Create a temporary half hitch to hold position, then repeat with the second webbing and the second anchor point.
- Tensioning: form a trucker’s-hitch on each webbing run to achieve high mechanical advantage; pull until the roll is snug against the pack base with no more than 1–2 cm free play when shaken.
- Finish knots: lock each tension with two half hitches on the standing part; if using synthetic webbing, add a bite and fuse or secure with a heat-shrink sleeve to prevent slippage if required.
- Quick-release option: route one webbing through an accessible daisy-loop and back through a small cam buckle or light-duty aluminum gate carabiner; this creates a single-pull release while the other webbing remains a fixed backup.
- Abrasion protection: place a 10–15 cm length of foam or cordura patch between webbing and shell at contact points to prevent wear on both surfaces.
- Webbing spec: 20–25 mm width, 1,200–2,500 kg breaking strength recommended for safety margin; avoid narrow cord for primary lashing.
- Daisy-chain use: prefer the lowest continuous loops near the frame or baseplate; avoid using gear loops meant for light items only.
- Testing: before hitting trails, load the pack and walk 200–300 m, then recheck tension and knot security; re-tension if shift exceeds 2 cm.
- Weather: keep the roll inside a waterproof sleeve; external lashing increases wet exposure and dries slower–store more absorbent insulation inside the main compartment when rain is expected.
- Redundancy: for long treks, use two independent webbing runs so a single failure doesn’t drop the roll.
Secure a sleep system inside a waterproof dry sack to prevent soaking
Choose a welded‑seam roll‑top dry sack in TPU‑laminate or welded PVC, 8–12 L for a regular adult sleep system; insert an inner silicone‑coated 6 L compression sack and expel air, then roll the closure at least three tight turns and clip the buckle to create two independent barriers.
Select materials by tradeoffs: TPU‑laminated nylon offers light weight and welded seams (typical 5 L weight 40–80 g), PVC gives maximum abrasion and puncture resistance but adds mass (5 L often 120–250 g), silpoly is ultralight but seam strength varies; reject sewn seams unless fully seam‑taped or taped afterward with waterproof tape.
Use a controlled sealing routine: lay the quilt flat inside the inner liner, squeeze out trapped air by pressing from the far end toward the closure, smooth fabric to avoid dead air pockets, then fold the roll‑top under tension three times; tuck the closure into the rolled section so the taped/welded seam faces outward to shed running water.
Double‑barrier options for prolonged wet exposure: combine an inner silicone compression liner plus an outer welded dry sack, or use a welded dry sack lined with a heavy‑duty waterproof liner (polyethylene or TPU liner). Add a small self‑sealing zip bag for delicate items (electronics, documents) inside the inner liner.
Control internal moisture: place 2–4 silica gel sachets (10–20 g each) depending on trip length and humidity; add one microfibre towel as a sacrificial absorber if nights are humid; if condensation forms inside the dry sack at camp, open and air for 30–60 minutes while sheltered.
Field checks and repairs: submerge a closed dry sack for 3–5 minutes to inspect welds and closures before departure; treat pinholes or seam leaks with a liquid TPU adhesive or Aquaseal; carry a 2–3 g roll of waterproof repair tape for quick fixes.
Integration with other gear: avoid packing damp garments inside the sleep system liners; use a closed‑cell foam pad sleeve or lightweight pad wrap as a physical spacer to reduce external compression and ground moisture transfer. For related carry and material choices see best messenger bag design and best luggage material for international travel.
Quick-release knots and one-handed access techniques
Use 25 mm webbing or 1″ tubular webbing with a slipped trucker’s hitch finished by a slipped overhand on a bight and a 15–25 cm paracord pull-tab (550 cord, ~4 mm) for reliable tension and single-handed release.
Step sequence for a single-handed-ready setup: 1) Wrap webbing around the rolled camp roll and route through lower daisy chain or sternum-loop accessible from the hip. 2) Form a fixed loop for the trucker’s hitch by making a small loop or using an alpine quick-loop on the anchor point. 3) Create the pulley with a bight, pull the running end to tension (aim for 25–40 kg preload depending on load), and maintain tension with your knee or pack frame. 4) Secure with a slipped overhand on a bight as the locking knot; leave a 12–20 cm tail and tuck the slip loop under the tightened webbing before finishing. 5) Attach a colored paracord pull to the slipped loop with a simple girth hitch or heat-fused splice so a single tug releases the entire assembly.
Alternative quick-release knots: for tubular webbing use a slipped water knot (leave 8–12 cm tails); for cord-only systems use a slipped figure-eight follow-through finished with a bight. For repeatable, heavy-tension applications, replace the final slipped knot with a slipped double overhand for reduced jamming while keeping single-pull release.
Hardware options for genuine one-handed operation: 20–25 mm side-release fastex buckles positioned so the male end faces outward for a thumb press; quick-release cam buckles with an exposed tab; or a lightweight metal quick-link combined with a pull-cord loop. Avoid cam levers that require two-handed lifting under load.
Night and glove use: make the pull-tab 20–30 cm long, use high-visibility cord or reflective tape on the tab, and add a 20 mm rubber or wooden toggle to improve grip. Test the release with gloves on and under a load equal to expected tension before setting off.
Inspection and load checks: leave knot tails 10–20 cm, verify webbing width 25 mm or wider for stable compression, and perform a static pull test at ~50–75% of anticipated peak load to confirm no slippage. Re-tension after the first 500–1000 m of travel and replace any cord frayed beyond 30% of diameter.
Stop roll sway and abrasion on a secured bedroll
Use two anchor points spaced 15–20 cm apart and position the roll so its midpoint sits within 6–8 cm of the pack base to minimize lever arm and rotation.
Run low-stretch webbing fore-and-aft through the roll’s compression loops and clip or cam-buckle both ends; tighten until there is no visible gap between roll and pack frame but avoid crushing insulation.
Add a crossed shock cord assembly: two 30–40 cm lengths of 3–4 mm bungee crossed under the roll and tensioned with cord locks to damp oscillation without rigid fixation.
Place a 10–15 cm-wide abrasion pad (closed-cell foam 3–6 mm or neoprene) under the contact area; secure the pad with 2–3 wraps of thin webbing or loop tape so it cannot migrate during movement.
Reduce diameter to 7–12 cm using a low-volume compression sack and cinch its internal cords; smaller girth lowers sail area and reduces rub points against the pack shell.
Create two short tether loops 10–15 cm forward and aft of the roll and run the webbing beneath the hipbelt or through lower daisy-chain points to transfer side loads to the hipbelt instead of the shoulder straps.
Prefer cam-buckle webbing or lightweight metal buckles over simple cord knots for maintainable tension on multi-day trails; re-tension after 100–200 steps and again after river crossings or steep descents.
For fabrics prone to abrasion, apply a 8–12 cm-wide self-adhesive repair patch or a sewn-on Cordura strip along the pack contact strip; replace tape after heavy use to keep friction low.
FAQ:
What is the safest way to attach a sleeping bag to the outside of a backpack?
Place the sleeping bag in a waterproof stuff sack and compress it as much as possible. Attach it low on the pack, close to the frame and spine, using the pack’s lower compression straps or dedicated lash points. Thread straps through the sack’s carry loops or webbing, pull tight, and lock the straps so the bag cannot slide. If your pack has a top lid or sternum straps, tuck the upper edge of the sack under them for a second anchor. Check the attachment before each day of hiking and after rough terrain to prevent shifting or rubbing against sharp seams.
Should I strap my sleeping bag to the top or bottom of my pack for a multi-day hike?
Top placement gives fast access at camp and keeps the bag away from mud on the trail, so it works well if you stop often or need the bag during chilly daytime breaks. Bottom placement keeps weight low and makes the load more stable on steep climbs, but you will need to unpack the main compartment to reach it. Choose top when access matters more than stability; choose bottom when you prefer a steadier carry and can live without quick access. If weather is wet, protect the bag with a waterproof liner or position it under a pack rain cover so it doesn’t soak.
How can I keep my sleeping bag dry when it is attached outside the pack?
Put the bag in a waterproof dry sack or heavy-duty dry compression sack before attaching. Add a thin plastic liner inside the sack for redundancy. If your pack has a rain cover, tuck the bag beneath the cover or under the top lid so it sits out of direct rainfall as much as possible. On long wet sections, carry the bag inside the main compartment or in a waterproof stuff sack inside a side pocket. Also avoid hanging the bag where it will ride close to the ground or brush that holds water.
Can I use carabiners or bungee cords to secure a sleeping bag, and what are the risks?
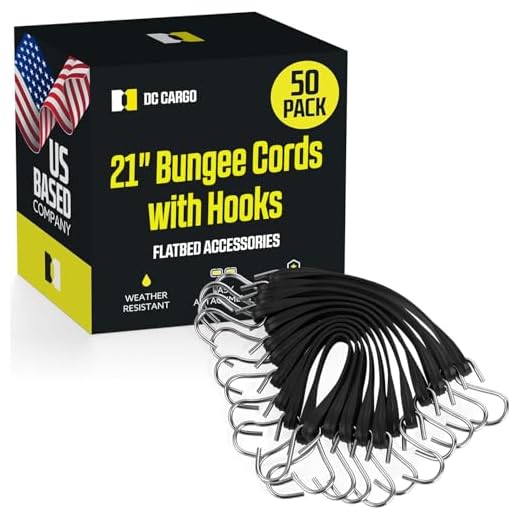
Carabiners can serve as quick connectors if they clip to strong webbing or dedicated loops; use locking gates for added security and clip only to webbing rated for external loads. Bungee cords are fast but can stretch and loosen, causing the bag to shift or fall; they may also snap under sudden strain. Best practice is to use the pack’s compression straps as the main hold, then add carabiners as a backup. Avoid relying solely on elastic cords for long hikes or rough terrain.
How should I route straps and manage weight when my sleeping bag is bulky but lightweight?
Compress the bag tightly to reduce swing and volume. Place it as close to the pack frame as possible; that minimizes torque and keeps the center of mass near your back. Route two straps across the bag: one low around the hip/waist area and one higher near the pack base, or use a pair of side compression straps that capture the bag evenly. For very bulky sacks, cross the straps diagonally to lock the load against lateral movement, then tuck loose ends so they don’t catch on branches. Check that straps do not rub sensitive seams; add a thin foam pad between the sack and webbing if abrasion occurs. Re-check stability after the first hour of walking and tighten if the bag starts to shift.


