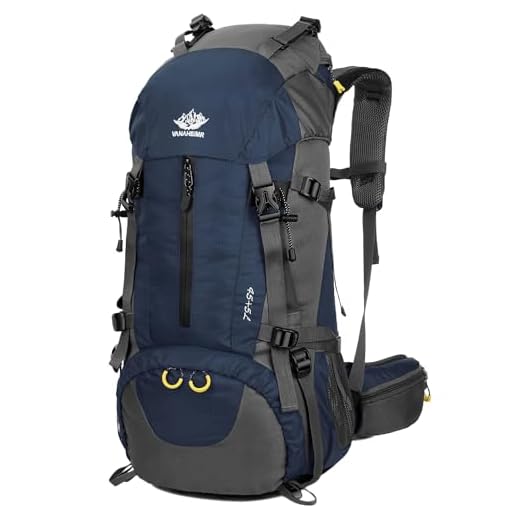


Place the sleeping bag in the lower compartment; compress it tightly and seal in a waterproof sack. Stow heavy items (cookset, fuel canister, hydration reservoir, first three days’ food) centered and as close to the back panel at torso height – aim to concentrate ~50–60% of total carried mass at hip level, ~30–40% above, remainder below.
Lower: insulated sleeping pad and bag. Middle (against the back): stove, fuel, 1–3 days’ food in drybags, heavier clothing layers. Top lid: weather shell, headlamp, map, lightweight snacks. Hip belt pockets: phone, GPS, multitool, quick snacks. Side pockets hold water bottles or tent poles; external lash points keep wet items separated from insulated gear.
Aim to keep total carried mass under 20–25% of body weight on multi‑day trips; on single‑day outings target under 15%. Expect shelter plus sleep system to occupy ~30–40% of volume but only ~25–35% of mass with ultralight choices. Food typically reduces the load by ~0.7–1.0 kg per day; plan initial mass with that burn‑off in mind.
Tighten the hip belt so the majority of weight rests on hips, then compress the load with side straps to remove bounce. Adjust shoulder straps until torso length aligns with the frame; set the sternum strap to stabilize shoulder spacing without restricting breathing (approx. 5–8 cm below the collarbone). Walk 10–15 minutes on varied terrain and shift items between compartments if you detect sway or imbalance.
Store the hydration bladder in the internal sleeve adjacent to the back panel; carry a separate 0.5–1.0 L bottle in an outer pocket, accessible without fully unshouldering. Keep a compact repair kit and a safety lamp in a top pocket, and place an emergency blanket near the lid for immediate deployment.
Compress soft items to eliminate voids, seal electronics in drybags, and use external straps to isolate wet or muddy gear. Reassess load distribution during long pushes and migrate heavier elements downward toward the hips when gradients steepen.
Place heavy items (stove, water, food) close to your spine and centered above the hips
Keep stove, water and food 2–4 in (5–10 cm) lateral to the spine and centered directly above the hip belt; target roughly 60–70% of total carried mass on the hips.
Vertical and lateral placement
Position heavy loads between the lower scapulae and the top of the pelvis (mid‑back). Laterally, maintain a 5–10 cm corridor along the torso centerline to minimize rotational torque and reduce shoulder fatigue.
Stabilization and setup
Seal stove and fuel canister in a small waterproof sack, cinch tight, then compress with main compartment straps to prevent shifting. Keep water reservoirs centered and low enough to keep the combined center of mass adjacent to the hips; when carrying multiple liters, split across compartments while keeping each portion close to the midline. Use load‑lifter straps so the shoulder straps carry ~20–30% of weight while the hip belt supports the remainder. If total carried mass exceeds 16 kg (35 lb), move heavy items within ~2 cm of the spine and lower them slightly to reduce pendulum effect. Secure sharp or liquid items in secondary pockets near the centerline. To maintain gear at home consult best car pressure washer for home use.
Sleeping bag and pad: lower center of gravity – lower compartment vs external straps
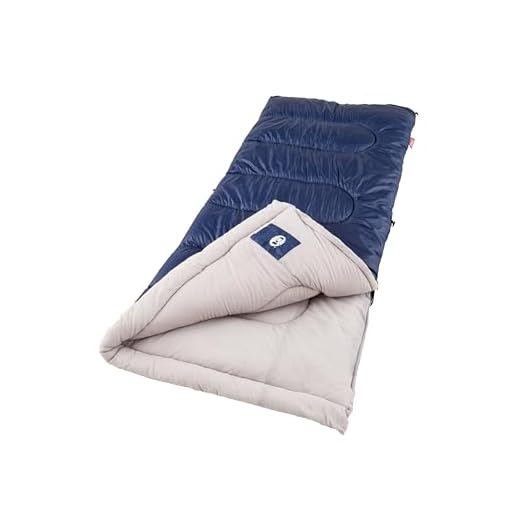
Stow the sleeping bag in the lower compartment whenever possible; reserve external tie-downs to carry bulky, noncompressible pads or saturated items.
-
Lower compartment benefits
Trending NowColeman Brazos Cool-Weather Sleeping BagNo-snag zipper and machine washable designStay warm in cooler temperatures with this roomy sleeping bag featuring a draft tube for heat retention. It's easy to pack and can be combined with another bag for extra space.- Lowest center-of-gravity gain: a 600–1,200 g bag compressed to 6–12 L inside the base noticeably reduces sway compared with roof or lid placement.
- Protection and loft retention when placed inside a waterproof stuff sack; interior storage minimizes abrasion and exposure to moisture.
- Capacity note: base pockets commonly accept up to ~15–18 L; aim to keep sleeping system volume under that limit for true low placement.
-
External straps advantages
- Use when internal space is depleted or the pad is noncompressible: closed-cell foam often occupies 8–20 L and is impractical to stow inside.
- Saturated or muddy items remain outside, preventing contamination of the main cavity and speeding campsite setup.
- Trade-offs: greater snag and wetting risk; mitigate with a waterproof sleeve or roll bag.
-
Sizing and weight benchmarks
- Down sleeping bags: ~400–900 g; compressed volume ~3–8 L.
- Synthetic sleeping bags: ~800–1,500 g; compressed volume ~12–22 L.
- Inflatable pads: ~200–600 g; packed volume ~1–3 L.
- Closed-cell foam pads: ~150–400 g; bulky volume ~8–20 L when strapped outside.
-
Attachment technique
- Use a dedicated compression sack inside the lower compartment; position the sack against the rear panel to keep mass close to the torso/frame.
- If using external straps, center the item on the frame, loop two straps around it, then tension until movement stops but valves and buckles remain undamaged.
- Cross-strap the pad axis perpendicular to the stride plane to reduce pendulum motion on steep climbs.
-
Stability checks and field rules
- After securing, walk briskly 100–150 m and observe lateral movement; re-tension if slosh exceeds ~3–5 cm.
- If heel strike causes dragging while descending, relocate the external item higher into the lid or move it inside at the next stop.
- Always seal down bags in a waterproof liner when stored inside the base in wet terrain to preserve insulation loft.
-
Quick decision matrix
- If the sleeping system compresses under ~12 L and is dry – choose the lower compartment.
- If the pad is bulky (foam) or saturated – use external straps with a waterproof cover and double-strap security.
- If rapid nightly access is required and internal space is limited – accept external straps but check snag risk on tight trails.
Keep daily-access items (rain jacket, water, snacks, map, headlamp) in top lid and hipbelt pockets
Store the rain jacket in the top lid’s waterproof compartment; carry the primary water source and most-reached snacks in the hipbelt pockets.
Top lid – quick-access weather and navigation
Use a 1–3 L waterproof stuffsack or a dedicated zip pocket. Fold a rain shell into a 20×15 cm bundle to fit flat; place the map in a laminated sleeve or clear map case and slot it beneath the shell to keep it crease-free. Keep a headlamp in the lid with the lens facing down and fresh batteries in a small zip-seal bag. Reserve any top-lid space for items that must be grabbed while stopped: lightweight rain layer, map, compact first-aid strip, and a small repair kit (needle, duct-tape strip).
Hipbelt pockets – hydration-on-the-move and immediate snacks
Assign the side matching your dominant hand to the main water source: a 500–750 ml rigid bottle or a 0.5–1.0 L soft flask fits most pockets. Use the opposite pocket for quick snacks in resealable bags (trail mix portions of ~150–250 kcal per bag). Store one-handed items (phone, compass, sunscreen stick) in shallow mesh sections for rapid retrieval; avoid bulky containers that cause bounce. After dusk, move the headlamp to a hipbelt pocket for instant access. Regularly return used wrappers to a sealed trash pouch to keep pockets functional.
Practical checks: verify zippers close fully, waterproof the top lid contents with a drybag if rain is expected, and test single-handed retrieval while walking to confirm placement ergonomics.
Use dry bags and waterproofing to separate electronics and clothing from moisture
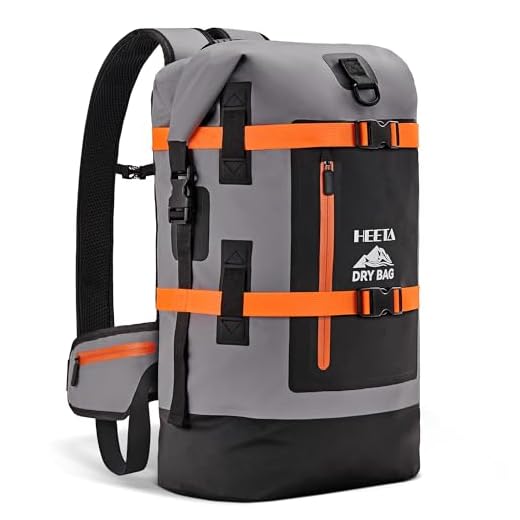
Store sensitive electronics in a two-layer system: a hard, crush-resistant case with an IP67/IP68 or MIL-STD-style seal (phone, GPS, SSD) inside a 1–3L roll-top dry bag (PVC or TPU, welded seams). Cameras and batteries: hard case (small Pelican-style) → 3–6L roll-top dry bag. Laptops/tablets: watertight, pressure-relief hard case sized to the device, then stowed inside a 10–20L liner if needed.
Materials, closures and ratings
Choose welded-seam roll-top bags over zipper-style unless the zipper is rated IP67+. Roll-top guideline: perform 3 complete rolls and clip the buckle. Preferred materials: TPU-laminated nylon or heavy-duty PVC (500–1000D). Look for seam-taping or welded seams; avoid stitched seams without waterproof tape. For electronics cases, target IPX7 (1 m, 30 min) minimum or IP68 for deeper submersion; MIL-STD-style O-ring cases add crush protection and a pressure release valve.
Organization, testing and moisture control
Size and desiccant rules: use 0.5–1L bags for phones/headlamps, 3–6L for camera + spare batteries, 10–20L for clothing. Add silica gel: 1–2 small packets (5–10 g each) per 2–6L bag; 3–5 packets for 10–20L bags. Double-bag electronics (zip-lock freezer bag inside roll-top) only for short trips; rely on purpose-made dry bags for prolonged exposure. Field-test every closure before departure: seal the bag, submerge in a bucket for 30–60 seconds, check for bubbles and internal moisture. Wring out wet garments and store immediately in a separate 20–30L dry sack labeled “wet” to isolate dampness from insulated layers. Air and dry electronics cases and liners each evening to prevent condensation buildup.
Small extras: attach a foam float or dedicated flotation insert to phone cases if river crossings are planned; use compression-style dry sacks with welded seams to reduce volume of clothing without risking leaks; keep spare closure clips and a tube of waterproof seam-sealant in your repair kit. Gear selection comparisons and case options can be reviewed at best luggage swt.


