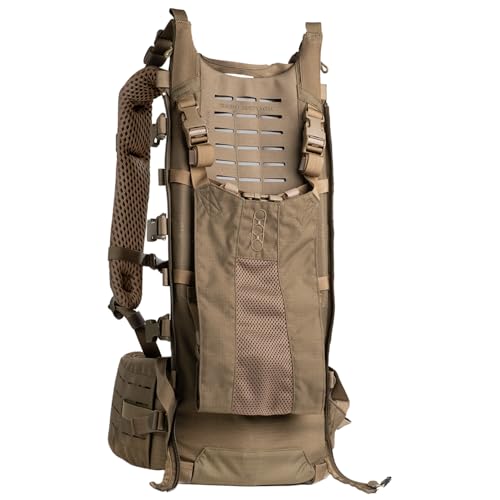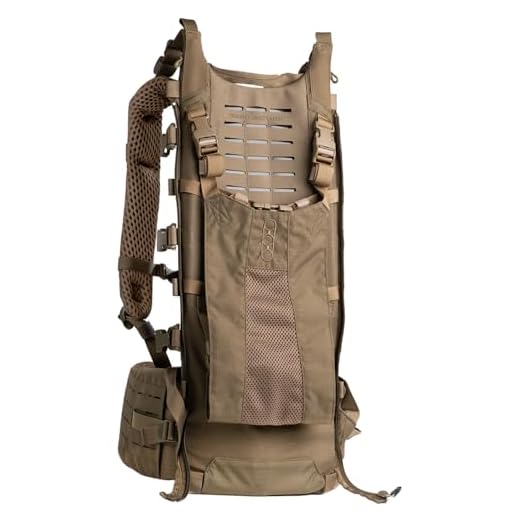

Place the pack high on the torso: top edge approximately 2–4 cm (0.8–1.5 in) below the shoulder blades; hip belt positioned on the iliac crest so the majority of weight transfers to the hips. Aim for 60–80% of total mass on the hips, with the remainder supported by shoulder straps.
Adjust the hip belt until it is snug against the iliac crest; set load lifters to roughly 30–45° so the top of the load tilts toward the wearer. Tighten shoulder straps to eliminate excess sway while maintaining a 1–2 finger gap at the top of each shoulder to avoid compression. Fasten the sternum strap about 8–12 cm below the collarbones to minimize lateral movement without restricting respiration.
Match frame height to torso length: measure from vertebra C7 to the iliac crest and choose a frame within ±2 cm of that measurement. For loads above 20% of body weight, place the heaviest items close to the spine and slightly higher on the frame; for day loads under 10–15%, position bulk lower so mass centers over the hip belt.
Recognize fit issues quickly: persistent shoulder pain indicates the hip belt lacks contact or frame is too short; forward head or neck strain signals the load is too high or the frame is oversized. Rebalance by shifting items, tightening compression straps, and walking for 5–10 minutes to confirm stability.
Correct vertical placement: top and bottom of the pack
Place the pack so its top edge sits 1–2 in (2.5–5 cm) below the C7 vertebra; the lower edge should rest at the iliac crest / beltline, spanning the L3–L5 lumbar curve. Match the pack torso length to the measured torso (C7 to iliac crest) – common fitted lengths: short 15–17 in (38–43 cm), regular 17–19 in (43–48 cm), long 19–21 in (48–53 cm).
When the top edge is higher than C7, expect shoulder/neck pressure and restricted shoulder mobility; when the lower edge falls below the iliac crest, the load pulls on the spine and increases sway. Aim for the main load to sit centered over the ribcage-to-hip zone so shoulder straps only fine-tune fit.
Adjustment checklist: (1) Tighten the hip belt so it bears 70–80% of total weight; position the belt directly over the iliac crest. (2) Compress load-lifter straps at 45° to bring weight into the torso. (3) Fasten the sternum strap for stability but keep it loose enough to avoid breathing restriction. (4) Test while walking on level ground – if the pack rides upward or downward more than 1 in (2.5 cm), remeasure torso length and re-route load.
Load management: keep heavy items centered between shoulder blades but within the torso-length window described above; place medium items mid-frame and lightweight gear in the lid and lower pockets. For day-use bags, a slightly higher top edge (flush with C7) is acceptable; for multi-day framed loads, prioritize exact torso fit and hip-belt alignment.
For trip planning or related coverage options consult best type of umbrella insurance, for entertainment on rest breaks see best tv show streaming now umbrella, and for local leisure consider best aquarium in jacksonville fl.
Adjusting shoulder straps to hold the load close to the upper torso
Tighten shoulder straps until the load contacts the upper torso with a 1–3 cm clearance above the shoulders and the hip belt carrying 60–80% of total mass.
Fasten and tension the hip belt first. Then pull each shoulder strap down and back in alternating 2–3 cm increments until the harness contours to the shoulder blades without pressing on the base of the neck. Aim for minimal gap between load and torso while preserving full range of motion in the shoulders.
Set load lifters at approximately 30–45° from horizontal; tighten them just enough to tilt the top of the load toward the torso so the center of gravity moves closer to the spine. Position the sternum strap at mid-chest and snug it until shoulder straps remain stable during walking but breathing is unrestricted.
Perform a dynamic check: walk briskly for 5–10 minutes, climb a short slope and test lateral leaning. Re-tension if the harness migrates more than 1–2 cm, or if bounce appears. Properly adjusted straps eliminate upward ride and reduce shoulder pressure.
Keep heavy items packed close to the frame and centered; whenever load changes, re-balance and repeat the strap adjustments. Secure excess webbing to prevent slippage and periodically inspect buckles and webbing for stretch during long outings.
Using the hip belt and load lifters to transfer weight off shoulders
Fasten the hip belt over the iliac crest and tighten until 70–80% of a 20–35 lb load moves onto the pelvis; lighter loads target 50–60%, heavy loads above 35 lb target 80–90% hip transfer.
Procedure: secure the hip belt first so pads compress against the hips, then tension shoulder straps just enough to close the gap between torso and pack frame. Set load lifters and tighten them gradually until the top of the frame is pulled toward the torso and the trapezius area loses pressure.
Load lifter mechanics: adjust so straps form roughly a 30–45° angle from the pack toward the shoulders; tightening beyond that range pulls the pack too far forward and reduces hip pressure, leaving weight on the shoulders again. A correct setting produces a firm connection with 1–2 inches of remaining webbing travel on the lifter strap.
Field checks and dynamic adjustments: after 10–15 minutes of walking, re-seat the hip belt and re-tension lifters. On steep ascents increase lifter tension by a small amount (about 5–10° tighter equivalent) to keep the load centered; on steep descents ease lifters to allow the load to shift lower over the hips for stability.
| Load range (lbs) | Target hip load share | Hip-belt cue | Load-lifter angle |
|---|---|---|---|
| 0–15 | 50–60% | Pads compress, torso feels light | 25–35° |
| 20–35 | 70–80% | Majority of weight on pelvis, trapezius relaxed | 30–45° |
| >35 | 80–90% | Firm hip load, minimal shoulder pressure | 35–45° |
Signs of incorrect transfer: persistent neck or shoulder pain indicates under-tensioned hip belt or loose lifters; excessive forward pull or torso tilt indicates overtightened lifters. Make small iterative adjustments rather than large changes.
Positioning for children and teenagers: height and strap adjustments
Place the pack so the top edge lies 2–3 cm below the C7 vertebra and the bottom edge aligns with the iliac crest; limit carried mass by age: ages 5–8 – max 10% of body mass, ages 9–12 – 10–15%, ages 13–18 – aim for ≤15% (do not exceed 20%).
Torso measurement and size selection
- Measure torso length while standing: locate C7 (prominent neck bone) and the top of the iliac crest (hip bone); record the straight-line distance in cm.
- Size guideline:
- < 38 cm: choose youth-sized packs or rucksacks with shorter harnesses.
- 38–46 cm: choose small/short adult models or adjustable youth-to-adult hybrid harnesses.
- > 46 cm: full adult harness recommended.
- When selecting a pack, verify that shoulder strap anchor points can be shifted vertically at least 4–6 cm to match measured torso length.
Adjustment increments and wearer checks
- Sternum strap placement: set vertical position approximately 8–12 cm below C7 for children under 12; 10–15 cm for teenagers. The strap must sit at mid-chest without restricting breathing or arm raise.
- Strap tension changes: for small fit corrections alter webbing by 1–2 cm; after growth of 2–3 cm increase strap length by 1–2 cm to avoid shoulder compression.
- Skin and posture indicators:
- Visible strap indentations deeper than 1 cm or skin redness persisting >15 minutes indicate overload or incorrect harness height.
- Forward lean greater than 10° when standing normally implies center of mass too high or carried mass too heavy.
- Check cadence: verify fit every school term (≈3 months) for ages 5–12, and after every 2–3 cm of growth for teenagers; re-measure torso length annually for rapid-growth periods.
- Packing note: place heaviest items within the central 10–20% of pack depth and close to the spine axis to reduce forward torque on the torso.
Quick checks – signs a pack is too low, too high, or tilted
If neck pressure, trapped breathing, or shoulder-strap digging occurs during short wear, the load is too high; if weight pulls on the lower spine, hip belt rides below the iliac crest, or the pack bottom hangs more than ~4 inches below the waistline, the load is too low; if one strap digs in, the hip belt twists, or the pack leans visibly to one side while walking, the load is tilted.
Measurable high / low indicators
High: top edge sitting at or above the C7 vertebra (visible bump at base of neck) or straps creating constant pressure on the trapezius; restricted arm elevation by >15° compared with the unloaded arm; sternum strap forced above the sternum notch.
Low: hip belt resting more than 1 inch below the iliac crest; pack bottom extending ≥4 inches below natural waistline; steady load felt on the lumbar region rather than transferred to hips; pack body contacting the back of the thighs when bending.
Tilt and asymmetry checks
Visual: pack leans laterally more than ~10–15° from the vertical axis or one shoulder strap appears longer by ≥0.5 inch. Functional: items shift or make noise during a 30–60 second brisk walk; one hip pad rides higher than the opposite side; sternum strap pulls toward the lower side of the chest.
Quick physical tests: (1) mirror check for even spacing between torso and pack on both sides; (2) pinch test–attempt to pull the pack 2–3 inches away from the thoracic curve; a gap larger than one finger width indicates poor contact; (3) walk 50–100 meters and immediately inspect strap lengths, hip-belt alignment, and lateral lean.


