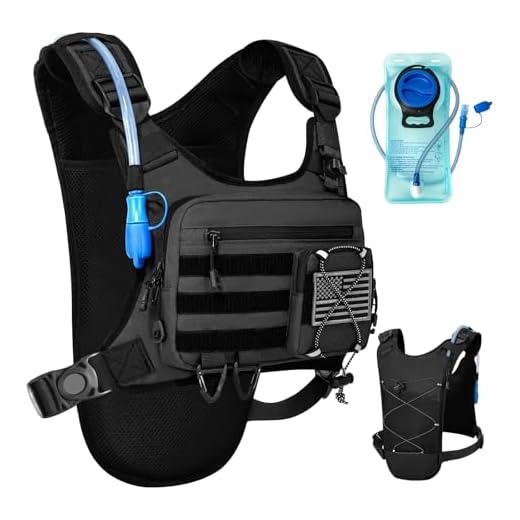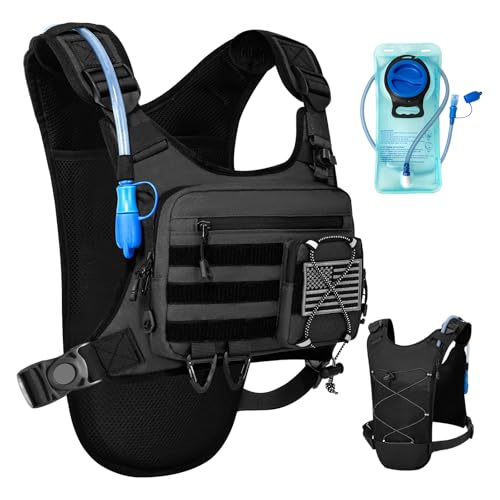

Immediate recommendation: mount a mesh pouch sized for a 750 ml flask (≈7.5 cm diameter × 25 cm height) using 25 mm nylon webbing at the top and a 5 mm shock cord at the bottom; secure attachment points with two 4 cm bar-tacks and a 10 mm seam allowance for durability.
Materials and dimensions: 70D stretch mesh or 3–4 mm open-weave polyester (cut 20 × 28 cm to allow for seams), 25 mm polyester webbing (30 cm length for the top strap), 5 mm shock cord (25 cm for bottom retention), heavy-duty bonded polyester thread, and a small locking carabiner with 20–25 mm gate. For a larger flask (1 L / 33 fl oz), increase pouch width to 9.5 cm and height to 28–30 cm.
Sewing specifics: fold mesh with 10 mm seam allowances, use a 3.5 mm stitch length on a straight stitch for the body, and reinforce stress points with four bar-tacks of 12 mm each spaced 1–2 cm apart. Attach the 25 mm webbing across the pouch top and stitch through the pack fabric with three parallel rows of stitching; on external synthetics, use a bartack or box-X pattern for each webbing end.
Quick-attach alternative: create two webbing loops (25 mm × 6 cm) sewn vertically to the side panel at 6 cm and 20 cm from the base; clip the carrier with a lightweight locking carabiner to the top loop and tension the shock cord through a bottom loop to prevent vertical movement. Position the carrier so the flask base sits 4–8 cm above the pack base to avoid catching on low obstacles.
Usage and load guidance: target vessels up to 1 L; tighten the shock cord until lateral play is <10 mm to minimize sloshing; check all stitches after the first week of use and retighten cord locks if stretch exceeds 10%. For frequent removal, prefer a quick-release carabiner rated for gear (not climbing) and replace mesh every 18–24 months if abrasion appears.
Measure your flask and pack: placement, clearance, weight balance
Position the drink sleeve so its top edge sits 2–3 cm below the pack collar; this keeps the container accessible and prevents interference with shoulder straps during reach and shoulder rotation.
Measure container diameter and height precisely: use calipers or a tape measure. Common sizes: 750 mL ≈ Ø 70–75 mm, H 220–230 mm; 1 L ≈ Ø 80–85 mm, H 240–260 mm. Design pocket mouth width = diameter + 20 mm for elastic pockets, +30–40 mm for rigid cages.
Panel clearance: leave 20–30 mm between a loaded container and any adjacent zipper, compression strap, or frame sheet to avoid snagging when inserting and removing. For insulated flasks add another 10 mm to that allowance.
Vertical placement rules: top of sleeve should not sit higher than 30 mm below the pack top edge; bottom of sleeve should rest at least 50–80 mm above the hip-belt anchor so sitting or bending doesn’t compress the carrier. If mounting on a hip-belt, keep carrier height ≤ 120 mm for leg clearance.
Lateral placement: align the carrier centerline 40–60 mm lateral from the shoulder-strap seam for side pockets on the torso panel; for external webbing rows, center the carrier over a pair of MOLLE rows with 18–22 mm spacing between mounting points.
Weight balance numbers: filled liquid density ≈ 1 kg/L – calculate filled mass and add container tare (typical stainless flask 100–300 g). Keep any single-side load ≤ 1.2 kg for daypacks; for longer treks keep side-loads balanced left/right within ±50 g to avoid perceptible pull.
Center-of-mass guideline: aim to place the filled container so its centroid is within 30–50 mm of the pack’s central plane (spine). If centroid sits >50 mm off-center, add counterweight or move other gear closer to the spine to reduce rotational torque.
Attachment strength check: simulate filled mass and hang it from the planned mounting points for 2–5 minutes; if seams stretch more than 10 mm or attachments deform, reinforce with additional webbing, bartack stitches, or a small backing plate.
Quick field test: mark proposed location with tape, load the container to operational weight, walk briskly for 10 minutes and perform exaggerated arm swings; acceptable movement is ≤25 mm lateral sway and no zipper contact. If movement exceeds that, lower the pocket or add a stabilizing strap.
Select an attachment type: compare sewn pocket, webbing loop, and external sleeve
Sewn pocket for permanent, low-profile carry when durability and weather resistance matter; webbing loop for the lightest, most modular option; external sleeve for oversized or insulated containers and for variable-diameter items.
Sewn pocket – use 500D–1000D nylon or Cordura for abrasion resistance; cut pocket 2–3 cm larger in circumference than the container at its widest point and 10–20 mm taller than the container mouth to allow easy insertion. Stitch with bonded nylon or polyester thread, 3.0–3.5 mm stitch length, 12 mm seam allowance; reinforce top and bottom with triple bartacks (6–8 mm wide) or a 4 cm box-x patch. Base layer should be doubled where the pocket meets the side panel; add a drain grommet if exposure to liquid is expected. Pros: integrated look, low snag risk, excellent lateral stability. Cons: fixed size, permanent alteration, slightly higher weight than minimal options.
Webbing loop – use 12–25 mm nylon or polyester webbing: 12–15 mm for ultralight setups, 20–25 mm for heavier containers. Sew as a vertical loop with a 3–4 cm box-x stitch or multiple bartacks spaced 10–15 mm apart; add a short horizontal tape at the base to prevent rotation. For detachable use, mount a reinforced webbing tab with a sewn-in metal or molded loop to accept a carabiner. Webbing excels for quick-clip access and modularity and adds 5–20 g depending on width; it provides less lateral support and can let tall containers swing unless paired with an upper retention strap.
External sleeve – pick stretchy mesh, neoprene, or fleece-lined nylon depending on insulation needs. Sleeve internal diameter should be 0–10 mm smaller than the container at rest for a snug fit; mouth elastic with 20–40% elongation keeps items from slipping. Sleeve length of 60–75% of container height provides vertical support without blocking insertion. Secure the sleeve with two attachment points spaced 4–8 cm apart and reinforce the lower mount with an extra fabric patch or rivet for repeated impact. Add a locking drawcord or top strap for additional retention when carrying tall items. Pros: accommodates varied diameters and insulated liners; cons: added bulk, potential for snagging on external gear.
Decision cues: pick sewn pocket for long-term, weather-resistant integration; pick webbing loop when saving grams and needing modular clip-on options; pick external sleeve when container size varies or insulation is required. For mixed needs, combine a webbing loop plus a short elastic sleeve to get both quick access and better lateral stability.
Sew a permanent pocket: choose materials, cut a pattern, and apply reinforced stitch points
Use 500–1000D Cordura or laminated ripstop nylon, bonded nylon thread, and 25 mm polyester webbing; set machine to 3.0–3.5 mm stitch length for main seams and 2.5 mm for topstitching.
- Materials
- Outer: 500D Cordura for moderate abrasion, 1000D for heavy use, or 210D ripstop PU-laminated for water resistance.
- Base reinforcement: 3–5 mm closed-cell EVA foam cut to base diameter; cover with 1000D Cordura disc.
- Webbing: 25 mm polyester or nylon for vertical anchors; 12 mm for top retention straps.
- Thread: bonded nylon (approx. B-69) for load seams; polyester Tex 40 for topstitch.
- Elastic/retention: 3–4 mm shock cord + cordlock or 12 mm elastic with stitched channel.
- Hardware: #3 (6 mm) rivets or pop rivets for high-load base anchoring; optional Grommets for drainage (6–8 mm).
- Tools
- Heavy-duty sewing machine or industrial walking-foot; needle 90/14 for 500D, 100/16 for 1000D or laminated.
- Bar-tack presser or zigzag stitch for artificial bartacks; rivet setter; seam seal tape for PU fabrics.
- Pattern cutting (rectangular sleeve + circular base)
- Measure cylinder diameter D and height H. Compute circumference C = π × D. Example: D = 7.5 cm → C ≈ 23.6 cm.
- Cut outer rectangle: width = C + 24 mm (12 mm seam allowance each vertical seam); height = H + 20 mm (10 mm top hem + 10 mm bottom hem). Example for D=7.5 cm, H=22 cm → width ≈ 26.0 cm, height = 22.0 + 2.0 = 24.0 cm.
- Cut base disc: diameter = D + 12 mm seam allowance. For D = 7.5 cm → disc ≈ 8.7 cm (round up to 9 cm) plus a 3–5 mm foam insert cut to D.
- For expansion add gusset: standard gusset width = 20–40 mm (2–4 cm) per side depending on intended clearance; attach as rectangular strip with same height as H.
- Assembly sequence
- Hem the top edge: fold 10 mm, insert shock cord if used, stitch channel with 2.5 mm stitch length; leave cord ends accessible for adjustment.
- Sew side seam: align rectangle edges, stitch with 3.0–3.5 mm straight stitch; backstitch 6–8 mm at start/end, then reinforce with a bartack at both ends (8 mm length, 4–6 passes).
- Attach base: pin base disc to lower edge, stitch around with 3.5 mm length; reinforce seam with topstitch 3 mm from edge using polyester thread.
- Insert EVA foam into pocket before final topstitch of base to ensure correct fit.
- Reinforced stitch points and anchors
- Vertical webbing anchors: run 25 mm webbing from top hem under base reinforcement; sew webbing to sleeve using box (25 × 20 mm) with X inside. Use triple straight stitch or two parallel straight seams with a box-X finish.
- Bartacks: place bartacks at top hem where webbing meets sleeve and at base edges. Settings: 8 mm length, density ~5 passes, stitch length per pass ~0.6–0.8 mm (machine bartack function or repeat zigzag).
- Rivets: install one rivet through webbing and base reinforcement at the lowest anchor point; use washer under rivet head for load distribution. Choose stainless rivets for corrosion resistance.
- Seam sealing: on PU-laminated fabrics apply heat-activated seam tape over interior seams; for Cordura apply waterproof seam sealer sparingly along needle perforations.
- Final checks and finishing
- Topstitch 3 mm from folded edges for neatness and to lock hems; use shorter stitch length (2.5 mm) for visible seams.
- Trim internal thread tails; inspect bartacks and box-X for full penetration; add a small drainage grommet in the base if moisture may collect.
- Test load: fill with intended vessel and apply downward pull equivalent to expected weight; inspect for seam stretch or webbing creep and add extra bartacks every 4–5 cm if required.
Reference: best brands for cantilever umbrellas
Install a strap-and-buckle retention system: pick webbing width, buckle style, and secure anchor locations
Use 25 mm (1″) polyester webbing with a matching side-release buckle for most cylindrical drink containers; switch to 38 mm webbing and a metal cam or heavy-duty quick-release buckle when the filled vessel exceeds ~2.5 kg or is wider than 80 mm.
Choose webbing by container diameter and wet weight: 20 mm for diameters under 60 mm and loads under 1.0 kg; 25 mm for 60–80 mm and 1.0–2.5 kg; 38 mm for >80 mm or >2.5 kg. Prefer polyester for low stretch and UV resistance; use nylon only if you need extra abrasion resistance and can accommodate some stretch. Heat-seal cut ends for synthetic webbing and fold back 15–25 mm when stitching to avoid fraying.
Select buckle type by access and retention needs: 25 mm side-release buckles (acetal/Delrin) for fast single-handed release; ladder-lock or tri-glide slide for tool-free length adjustment with minimal slippage; metal cam or aluminium quick-release for high-load security. Match buckle width to webbing width and confirm the vendor’s working-load rating before use.
Anchor locations: place a fixed lower cradling anchor pair on the pack side panel with center-to-center spacing of 50–80 mm to support the vessel base; place an adjustable upper anchor 120–200 mm above the lower pair to capture the neck or upper body of the container. Avoid attaching to thin pocket mesh or single-layer linings; choose main-panel seams, daisy-chain webbing, or the frame sheet for primary anchors.
Attachment method: cut a 60×40 mm reinforcement patch of 500D Cordura or equivalent under each anchor. Stitch anchors with a box‑x or bar‑tack pattern, 6–8 passes for hand bartacks or 4–6 mm stitch length with a heavy-duty machine; use bonded polyester thread (Tex 70–138 or #69 equivalent). For slide buckles, sew two parallel rows through the buckle body and bartack ends. If using rivets, place one rivet per anchor and stitch around it to distribute load. After installation, load-test with 2× the expected filled weight and check for seam stretch, webbing slippage, and buckle orientation; relocate anchors 10–20 mm outward if the vessel contacts zippers or restricts access.
Removable options: snap-on sleeve, carabiner loop, elastic cage
Use a snap-on sleeve constructed from 420D nylon with a 25 mm webbing strap and a stainless steel popper for daily urban use – fit it to a side daisy-chain at ~15 cm below the shoulder seam to keep the flask stable and accessible.
Step-by-step installations
Snap-on sleeve: cut a 20 x 12 cm sleeve panel for a 750 ml flask (allow 1 cm seam allowance), reinforce the top lip with 30 mm nylon tape, sew three 35 mm bar-tacks across the attachment strap, then secure with a stainless snap rated 150 kgf. Mount location: external side webbing or MOLLE strip; use a 15 mm spacer if the pack has curved profile to avoid pinching.
Carabiner loop: use a 25–30 mm nylon sling with a locking carabiner (steel, gate rating ≥ 2 kN). Create a permanent anchor point by stitching the sling through a reinforced seam or threading it under a compression strap; leave 6–8 cm of free loop so the flask hangs clear of zippers. For quick release, use a small split ring attached to the flask collar and clip with the carabiner.
Elastic cage: choose 3–4 mm shock cord with a sewn stopper and 4 cm elastic cradle; form a diamond weave using two vertical loops and one horizontal cross for side retention. Attach the top of the cage with a 20 mm webbing tab and a rivet or bartack; test stretch to 150% resting length to match typical flask diameters (6–8 cm).
| Option | Materials | Installation time | Load stability | Best for |
|---|---|---|---|---|
| Snap-on sleeve | 420D nylon, 25 mm webbing, stainless popper | 30–45 min (single sleeve) | High (when reinforced) | Commute, urban packs |
| Carabiner loop | 25–30 mm nylon sling, locking carabiner (≥2 kN) | 10–15 min | Medium (depends on swing) | Trail runs, quick detach |
| Elastic cage | 3–4 mm shock cord, 20 mm webbing, rivet | 20–35 min | Medium-high (good grip, less bulk) | Hiking, multi-size containers |
Durability checks and maintenance
Load-test attachments with a static 2 kg weight for 10 minutes and perform a 1.5 m drop test while loaded to confirm no stitching failure; inspect bar-tacks and rivets after 24 hours of use. Lubricate carabiner gate monthly and replace shock cord that loses more than 25% elasticity. For corrosion resistance, prefer stainless snaps and galvanized rivets in coastal environments.
Reference for unrelated practical comparison: best cylinder mower striped lawns


