


Target a baseweight of 6–12 kg (13–26 lb); keeping your load under 12 kg on initial multi-night trips reduces fatigue and helps maintain a steady pace of 10–20 km/day (6–12 mi) on mixed trails.
Choose a shelter weighing 0.9–1.6 kg (2–3.5 lb), a sleep system rated for ~0°C to +5°C comfort for three-season use, and a sleeping pad with R-value ≥3.0 for cold or exposed campsites. Aim for combined core gear (shelter + sleep + cook + clothing) of 3.5–6 kg to meet the baseweight target.
Carry a headlamp ≥300 lumens with spare batteries, a water filter with ≥1 L/min flow, and a stove option: canister systems ~200–350 g or ultralight alcohol stoves ~80–150 g; plan ~0.5–1 L fuel equivalent per 3 days depending on cooking style. Food planning: 2,500–3,500 kcal/day and ~0.7–1.0 kg food/day with dehydrated meals. Include a small repair kit (duct tape, cord, needle & thread) and a multi-tool.
Train specifically: three walks per week with one loaded hike of 8–16 km; begin with 10–15% of bodyweight in the pack during week one and add ~1 kg each week until you reach your target baseweight. Run a one-night shakedown near home, then a two- to three-night outing within the first month to validate gear, sleep system and meal timing.
Plan routes that match fitness: pick loops or out-and-backs within 50–150 km of home for early trips and limit daily elevation gain to 300–800 m based on conditioning. Reserve permits 2–12 weeks ahead for popular areas; expect permit fees of $5–35 per person and campsite fees $0–25/night. Field budget: $15–40/day plus gear amortization over seasons.
Prioritize map reading and a compass; carry a printed topographic map and an offline map app plus a 10,000–20,000 mAh power bank. Bring a compact first-aid kit (bandages, wound-closure strips, blister care, pain relievers, antihistamine), waterproof firestarter, headlamp, and consider a personal locator beacon (PLB) for remote routes. File an itinerary with a reliable contact and check weather 24–48 hours pre-departure.
Practical adjustments: weigh your pack before leaving and remove items >50 g that lack multi-use value; test clothing layers for moisture management (base layer + insulating mid-layer + waterproof shell); plan rest days every 4–6 days on longer trips. Progress gradually: one-night → two-three nights → longer trips, and aim to trim 0.5–1 kg from your setup each season as you refine needs and redundancy.
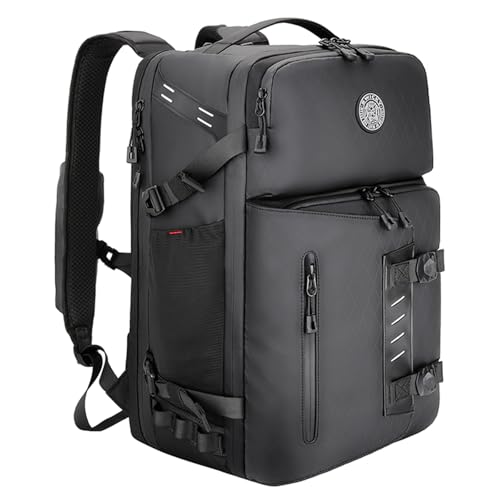
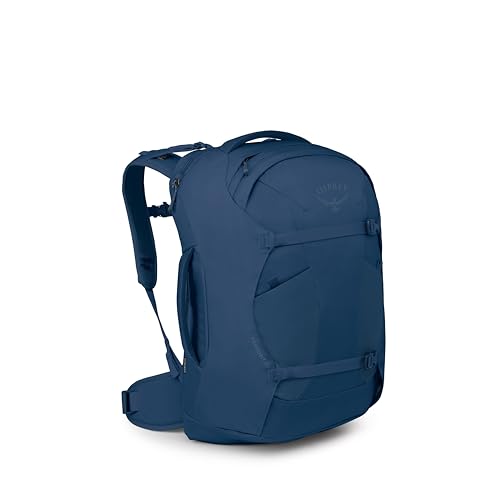
Select a backpack by torso length, capacity (litres) and suspension
Choose a pack whose adjustable torso length matches your measured spine (±1 cm) and whose usable volume matches planned consumables and shelter: 25–35 L for minimalist overnight, 40–60 L for 2–3 nights, 60–85 L for 4–7 nights, 85+ L for extended trips or shared/group gear.

Measure torso length standing: find the C7 vertebra (prominent bone at base of neck), measure straight down the spine to the top of the iliac crest (hip bone) in centimetres. Match that number to manufacturer sizing: Small 38–43 cm, Medium 43–48 cm, Large 48–53 cm, X-Large 53–58 cm. If between sizes, prefer the larger size if you carry heavy loads; prefer the smaller if you run light and need less strap slack.
Match capacity to planned base weight (equipment weight excluding food/water): base weight 12 kg → 70–95 L. Add 10–20 L for winter layers, sleeping systems that bulk, or for carrying a rigid canister (+5–10 L) and fuel containers.
Suspension types and selection: frameless packs (no rigid frame) weigh 0.4–1.0 kg and suit ≤30–40 L loads carried close to the body; internal-frame packs with aluminum stays or lightweight carbon rails suit 40–80 L and provide structure and stability; external-frame packs excel when carrying very heavy, irregular loads (>25 kg) or bulky gear and in 70–100+ L sizes. Backpanel choices: solid foam/backsheet for simple loads and durability; suspended-mesh panels (ventilated) reduce back sweat but can flex under very heavy loads–choose mesh for warm climates and lighter loads, foam/framesheet for heavy loads.
Hip belt and load transfer: a properly fitted hip belt should transfer roughly 60–80% of the pack weight onto the pelvis. Test this by loading the pack to your expected trail weight (practical test weight: 8–16 kg for multi-day; heavier if you plan longer/colder trips) and tightening the belt on the iliac crest. Adjust shoulder straps so they contact the shoulders without bearing most weight; set load lifters at about a 30–45° angle from the pack to pull the top of the load inward.
Try packs with weight: walk 10–15 minutes on a shop floor or stairs with your expected load. Check for pressure points, shoulder gap of 1–2 fingers above the collarbone, hip belt centered on the iliac crest, and no slippage when you bend forward. If the brand offers torso-length adjustability, confirm the sliding mechanism locks securely; fixed-length frames require precise size selection.
Technical notes: expect internal-frame pack weights ~1.0–2.5 kg, frameless ~0.4–1.0 kg. For frequent multi-day outings choose a pack with a removable lid or volume compression for versatility. If you plan to carry heavy fuel, water or group cookware, increase target capacity by 10–25% compared with solo ultralight setups.
Plan your first overnight route: daily mileage, elevation gain and water sources
Recommendation: aim for 8–12 miles (13–19 km) with 500–1,200 ft (150–370 m) ascent per day on mixed, non-technical trails; reduce to 5–8 miles (8–13 km) and accept 1,200–2,500 ft (370–760 m) ascent if terrain is steep, rocky or high altitude.
Daily mileage and pace
Use this timing rule: allow 1 hour per 3 miles (5 km) plus 30 minutes per 1,000 ft (300 m) of cumulative ascent. Example: a 9-mile (14.5 km) day with 1,500 ft (460 m) ascent = 3 hours (distance) + 45 minutes (elevation) ≈ 3h45. Add 10–20% to time estimate when carrying >11 kg (25 lb) or when trails are muddy/technical.
Plan hiking hours so you arrive at camp with 1–2 hours daylight remaining for water treatment, dinner and shelter setup. If pacing is uncertain, set a conservative goal: complete 60–75% of planned distance in morning, reassess midday.
Elevation gain, terrain and water strategy
Expect slower progress above 1,800 m (6,000 ft): reduce distance target by 20–30% per day for acclimatization. For sustained steep climbs (>1,000 ft / 300 m continuous), treat 1 km of ascent as equivalent to 2–3 km of flat distance when calculating time and fatigue.
Water planning (single overnight): estimate consumption and source frequency as follows – cooler weather, low exertion: 2 L/day; moderate exertion: 3 L/day; hot or high-exertion days: 4–6 L/day. Carry the amount needed for the hiking day plus 1 L for camp if nearest water is >30 minutes after planned campsite. Always pack a spare 0.5–1 L for emergencies.
| Fitness / Terrain | Target miles/day (km) | Elevation gain/day (ft / m) | Water to carry (L per person) |
|---|---|---|---|
| Beginner, easy singletrack | 8–12 (13–19) | 500–1,200 (150–370) | 2–3 |
| Moderate, mixed terrain | 6–10 (10–16) | 1,000–2,000 (300–610) | 3–4 |
| Steep/technical or high altitude | 5–8 (8–13) | 1,500–2,500+ (460–760+) | 4–6 |
Locate water sources on topo maps and recent trip reports; flag springs, creeks and lakes on GPS before leaving. Plan camps within 0.5–1 km (0.3–0.6 mi) of a reliable source when possible. Treat water with a filter or UV purifier for turbidity; carry chemical tablets as backup and keep a small syringe or spare O-ring for filter repairs. For lightweight organization and load control consult best way to pack a hiking backpack.
Create a beginner gear list under 12–15 kg with multipurpose items
Aim for a total carried weight (food + water included) of 12–15 kg; keep base weight (no food, water, fuel) between 6–9 kg.
Weight targets (quick breakdown)
- Base weight goal: 6–9 kg (non-consumables)
- Consumables: water 0.5–2.0 kg (depending on refill availability) + food 0.5–2.0 kg per day
- Pack volume: 40–55 L for 1–3 night trips with lightweight gear
Core multipurpose gear list (recommended items with weights)
-
Shelter – tarp + bug net option (700 g) or 1P ultralight tent (900–1,200 g).
Multipurpose note: tarp can double as rain/sun shelter and groundsheet when needed.
-
Sleep system – down quilt 700 g + inflatable pad 300 g = 1,000 g.
Multipurpose note: quilt compresses small and can be used as an extra layer in camp.
-
Backpack – 45 L framed pack, 1.2–1.6 kg.
Multipurpose note: external lash points accept trekking poles or extra water.
-
Cook kit – 700 ml pot (200 g) + canister stove + lighter (120 g) + spork (10 g) = 330 g.
Multipurpose note: pot serves as bowl, mug and water-boiling container.
-
Water treatment – 2 L soft bottle (60 g) + inline filter or small pump (100–150 g) = 160–210 g.
-
Clothing system – merino base shirt (180 g), insulating jacket (down 300–400 g), lightweight rain shell (220–250 g) = ~800 g.
Multipurpose note: rain shell doubles as wind layer; insulating jacket works on and off trail.
-
Footwear – trail runners 500–700 g.
Multipurpose note: lighter shoes reduce fatigue and can be worn in camp.
-
Trekking poles – 200–250 g (pair).
Multipurpose note: poles act as tent/tarp supports, improve stability.
-
Navigation & light – phone (with offline maps) 150–200 g + small headlamp 60 g + compass/back-up 40 g = ~300 g.
-
Multi-tool & repair kit – 80–120 g (duct tape, sewing needle, spare cord).
Multipurpose note: repair kit fixes gear and can improvise replacements.
-
First aid & hygiene – compact kit 120–200 g (bandages, blister care, small sanitizer).
-
Stuff sacks & packing – 100 g (2–3 lightweight stuffsacks; one can double as pillow when stuffed with clothes).
Example base-weight math (conservative lightweight setup):
- Shelter (tarp+net) 700 g
- Sleep system 1,000 g
- Pack 1,300 g
- Cook kit 330 g
- Water treatment 160 g
- Clothing 800 g
- Footwear 600 g
- Poles 230 g
- Nav & electronics 300 g
- First aid & repair 250 g
- Total base weight ≈ 5,670 g (5.7 kg)
Add typical consumables: 2 L water (2.0 kg) + 1,000 g food for 2 days = 3.0 kg → total carried ≈ 8.7 kg. More conservative gear choices or longer trips scale the total toward 12–15 kg.
Practical selection tips
- Prioritise items that serve at least two functions: e.g., pot = mug/bowl, buff = hat/pillow/pot holder.
- Replace single-use or large items with lightweight combos: a rain shell instead of a heavy hard shell plus extra layers.
- Choose durable vs ultralight based on trip difficulty: add 300–800 g for more robust gear if rough terrain is expected.
- Test pack on a day hike with scaled weight before overnight trips; adjust clothing and consumables to hit target weight.
Extras: personal property or liability queries can reference best umbrella policy provider. For vehicle-based support and cleaning options see best pressure washer trailer setup.
Pack for balance and access: item placement, compression and weight distribution
Load 60–80% of the pack mass onto the hip belt. Position the heaviest items within 10–20 cm above the hip belt, centered and pressed close to the spine so the pack’s center of mass sits near your lumbar region.
Bottom: sleeping bag (in a waterproof stuff sack) and rarely-used bulky items. Use the bottom only for items not needed until camp; avoid heavy gear here unless the pack is designed with a lower sleeping compartment.
Core (against the back): heavy gear – cook kit, fuel canister, food for the next 24–48 hours, bear canister or heavy tent body. Group these in one or two dry bags placed tight to the frame so they occupy the lumbar-to-midback band.
Upper-mid and top: soft clothing layers, insulated jacket, rain shell, and items needed during the day. Put frequently required layers near the top for quick access without shifting the heavy core.
Lid and external pockets: first-aid, headlamp, map, sunscreen, snacks and a lightweight crampon strap. Keep quick-access items in the lid or hip-belt pockets (hip pockets for items ≤300 g such as phone, snacks, small camera).
Water and bottles: 1 L = 1 kg; place a filled hydration bladder directly against the pack frame/spine or distribute weight with two bottles (one per side) in stretch side pockets. If water sources are frequent, carry 0.5–1 L extra; if scarce, add 1–2 L and move some heavy items slightly higher to maintain balance.
Tent and poles: split weight where possible – poles along the side or taped to the frame, tent body low and centered; keep the tent footprint or stakes external and low to avoid top-heaviness.
Compression technique: group items in dry/stuff sacks by density (heavy, medium, light). Tighten main compression straps until internal movement ceases; aim to reduce free space by 30–50% without crushing delicate insulation. Use side compression to pull the pack’s mass closer to your spine, and chest/shoulder adjustments to keep the top of the load snug against your shoulders.
Load lifters and strap angles: set load lifters so they form about 30–45° from the pack to the shoulder straps; tighten hip belt so most weight transfers to hips, then snug shoulder straps just enough to remove gaps – shoulders should carry minimal static weight.
On-trail rebalancing: check balance after consuming water/food – move a compact heavy item (spare fuel, small cook pot) closer to the hips if the pack feels top-heavy. Rebalance every 6–12 hours or after major consumption so center of mass stays stable.
Protect loft and comfort: compress down/Primaloft items only for transport; store them uncompressed at camp when possible. Use foam or clothing to fill voids and prevent item shift rather than letting straps alone compress unevenly.
Plan food and water: meal prep, calories per day, resupply and purification options
Aim for 2,800–3,600 kcal/day depending on pack weight, temperature and elevation: lower end for light loads and mild weather, higher end for cold, heavy loads or long uphill days.

Calories, weight and meal composition
Use kcal-per-gram to estimate weight: target an average density of 4–5 kcal/g for balanced weight and nutrition. Example: at 3,000 kcal/day a 4 kcal/g diet = 750 g of food dry weight; at 5 kcal/g = 600 g. Increase density with nuts, nut butter and oils (nuts ~6 kcal/g, peanut butter ~5.5 kcal/g, olive oil ~9 kcal/g).
Macronutrient split for sustained performance: ~50–60% carbs, 20–30% fat, 15–25% protein. Pack quick carbs for breaks (gels, candy) and concentrated fats for evening recovery (30–50 g nut butter or cheese).
Typical dry calorie densities (approx): instant oats 3.9 kcal/g, couscous 3.8 kcal/g, instant rice/pasta 3.6–3.8 kcal/g, powdered milk 4.5 kcal/g, nuts 6 kcal/g, dehydrated meal pouches commonly 3.0–4.5 kcal/g rehydrated varies. Use package nutrition and weight to calculate precise totals before leaving.
One-day example (approx totals): Breakfast – 80 g oats + 30 g peanut butter + 20 g honey = 620 kcal, 130 g dry; Lunch – 120 g wrap (tortilla) + 80 g salami/cheese + 30 g almonds = 850 kcal, 230 g; Dinner – 120 g dehydrated meal (adds 400–700 kcal depending on brand) + 10 g olive oil = 700 kcal, 120 g; Snacks – 80 g trail mix + 2 energy bars = 800 kcal, 200 g. Daily total ≈ 2,970 kcal, dry weight ~680–700 g.
Meal prep, packing and resupply tactics
Pre-portion meals into labeled resealable bags or vacuum-sealed pouches with weight and kcal written on each. For hot dinners, pre-mix dried vegetables, protein (tuna/soy) and grains so you only add boiling water. For zero-stove days use cold-soak meals (couscous, instant oats, powdered milk) and high-fat snacks to reduce fuel needs and stove weight.
Resupply frequency: plan towns or stores every 3–7 days on common routes. For remote sections carry an extra 1–3 days of food as buffer. For maildrops, ship to small-town post offices or outfitters with clear labeling (name, arrival date, instructions) and include an extra meal or two in case of delays.
Weight-management tip: replace one or two weekday dinners with high-fat, low-volume items (cheese, salami, olive oil, nut butter) to raise kcal/kg. Recalculate calories before each resupply to avoid overpacking or under-fueling.
Water planning and treatment
Daily water needs: 2–3 L/day moderate exertion; 3–5 L/day hot/steep; plan for up to 6 L/day in extreme heat or long dry stretches. Carry a baseline capacity of 2–3 L (e.g., 1 L bottle + 2 L bladder) and increase between known reliable sources.
Treatment options with practical notes:
• Pump filters (e.g., Sawyer Squeeze, pump systems): pore size ~0.1–0.2 μm, remove bacteria and protozoa; flow rates vary 0.5–1.5 L/min; require backflushing maintenance. Weight range ~65–400 g depending on model.
• Gravity filters (inline/Bag + filter): hands-free, fast for groups; same pathogen protection as pumped filters.
• Chemical treatments (chlorine dioxide tablets/liquid): broad-spectrum including viruses when used per instructions; contact time typically 30 min for bacteria/virus, up to 4 hours for protozoan cysts like Cryptosporidium in cold water; lightweight and compact.
• UV devices (battery or rechargeable): inactivate bacteria, protozoa and viruses quickly (treats ~0.5–1 L in 60–90 sec); performance drops in turbid water and requires batteries or power.
• Boiling: rolling boil 1 minute at sea level; at elevations above 2,000 m boil for 3 minutes. No equipment failure risk but fuel/time costly.
Combine methods for high-risk areas (e.g., filter + chemical or UV) if source contamination is possible.
Field practices: pre-filter turbid water through a bandana or coffee filter to extend filter life; carry spare o-rings and a syringe/backflush tool for membrane filters; avoid stagnant pools when possible; always map water sources on your route and note seasonal reliability.