

Measure the external dimensions with all straps, pockets and zipper pulls in place. A typical configuration that fits the under‑seat allowance: a 15″ laptop in a sleeve, a compact toiletry kit, a light sweater and a paperback. Soft, compressible fabrics are more forgiving at the gate than rigid shells.
If the pack exceeds the stated envelope, there are three pragmatic options: buy a cabin-sized carry during booking or before the flight (cheaper), add a gate carry allowance (costlier), or check the piece at the counter/bag drop. Low-cost U.S. carriers commonly price advance carry purchases in the range of $30–45, gate purchases $60–75; checked bags often run $30–50 when prepaid.
Practical tips: measure twice and write dimensions on a sticker; use a slim daypack or dedicated under‑seat tote for guaranteed acceptance; remove external water bottles or bulky tripods that increase depth; and verify the airline’s official size rules immediately before travel since enforcement can vary by gate agent.
Small daypack accepted as underseat carry for the carrier
Short answer: a compact daypack that fits under the cabin seat – maximum recommended dimensions 18 x 14 x 8 inches (45 x 35 x 20 cm) – is treated as the free underseat carry; any larger rucksack will require purchase of an overhead-bag allowance or must be checked and will trigger a fee.
Measure your bag fully loaded (straps and external pockets included). Soft-sided packs compress and are easier to tuck under the seat; framed or rigid packs rarely fit. Use a tape measure and compare against the airline’s published underseat size or the airport sizer at check-in.
Packing tips: place a laptop in a dedicated sleeve at the top for quick removal, keep liquids in a single 1‑quart clear bag, distribute weight low and toward the front so the pack slides under the seat, tuck straps and remove bulky outerwear before trying to stow. Aim for a working target of 16 x 12 x 6 in (40 x 30 x 15 cm) for consistent gate acceptance.
If gate staff determine the bag exceeds the allowable underseat dimensions, options are: buy an overhead allowance (usually cheaper if added during online check-in), gate‑check the bag (may be delivered at the jet bridge or baggage claim), or check it at the counter. Expect higher charges at the airport/gate than when added ahead of time.
Practical checklist before travel: measure loaded dimensions, test fit in a hard sizer or under a chair at home, opt for a soft-sided model, pre-purchase an overhead bag if unsure, and keep essentials accessible to avoid opening the pack during boarding.
Compare your daypack to the carrier’s under-seat and overhead allowances
Measure your daypack–including straps, external pockets and any hard frames–now: if it is ≤ 18 x 14 x 8 in (45 x 35 x 20 cm) it fits under the seat; if larger but ≤ 24 x 16 x 10 in (61 x 41 x 25 cm) purchase a cabin-bag allowance before boarding; anything bigger should be checked at the counter.
| Allowance | Maximum dimensions (inches) | Maximum dimensions (cm) | Typical action |
|---|---|---|---|
| Under-seat small bag | 18 x 14 x 8 | 45 x 35 x 20 | Fits beneath seat – usually included with lowest fare tier |
| Cabin (overhead) bag | 24 x 16 x 10 | 61 x 41 x 25 | Requires purchase during booking or at gate; may be refused if bins full |
| Checked luggage | Varies by weight/size rules | Varies | Check at ticket counter for transport in cargo hold |
How to measure accurately
Lay the daypack flat, compress any soft items, and measure the longest points: height (top to bottom), width (side to side) and depth (front to back) including wheels, handles and external pockets. Measure with typical contents packed, not empty. Convert with 1 in = 2.54 cm to verify against both sets of limits.
Packing adjustments and gate choices
If dimensions exceed under-seat limits by a small margin, remove rigid items (tripod, large water bottle, paperback) or move a laptop to a thin sleeve to slim the profile. Use a lightweight tote or jacket to shift essentials onto your person. Buy a cabin-bag allowance during online check-in to save vs. gate rates. At the gate, request a gate-checked tag if overhead space is tight; expect to retrieve the bag at the aircraft door or baggage claim depending on the airline’s procedure.
How to measure your daypack correctly for the airline under-seat allowance
Measure the filled daypack at its maximum compressed dimensions including external pockets, straps and any protruding hardware; target 18 × 14 × 8 in (45 × 35 × 20 cm) or smaller.
Tools: flexible tape measure (cm/in), a flat surface, a stiff cardboard box cut to the target internal dimensions, and a clamp or rubber band to hold straps in place.
Step 1 – Prepare: empty the interior pockets, zip all compartments to their smallest setting, fold or stow removable straps and anchors exactly as you will board.
Step 2 – Pack realistically: load typical travel contents (laptop, toiletries, one jacket, charged electronics). Do not underfill; measure the bag as you actually travel.
Step 3 – Measure height: place the bag upright on a flat surface and measure from the lowest point of the base to the highest point of the top closure or handle. Include rolled tops or raised zippers.
Step 4 – Measure width: measure the widest horizontal span across the face of the bag, including sewn-on pouches, bottle holders and side straps.
Step 5 – Measure depth: press the bag as it would sit against a seat back (simulate bulge) and measure from the frontmost point to the back panel. Include wheels, feet or any protruding buckles.
Step 6 – External attachments: if external items (tripod, water bottle, foam pad) cannot be detached or stowed inside, include them in all three dimensions; if they tuck into a pocket completely, measure both stowed and unstowed states and use the larger value for compliance.
Step 7 – Box test: construct or use a rigid box with internal dimensions 18 × 14 × 8 in. If the packed daypack slides in without forcing, it will pass a physical gate sizer; if it requires compression, reduce contents or reconfigure packing until it fits.
Quick measuring checklist
Empty & zip closed; pack as you will travel; tuck or clip straps; measure H × W × D including all attachments; verify fit in a 18×14×8 in box; record both packed and empty measurements.
Compression and packing tactics
Swap hard containers for soft pouches; use packing cubes to compress clothing; replace bulky shoes with lightweight options; wear the bulkiest coat aboard; tuck straps into a rear sleeve or secure under a compression strap; if dimensions exceed allowance by less than 1 in (2.5 cm), remove or reposition one small item and retest.
For cleaning or maintenance tools that must travel, review gear size and protection options before packing – example reference: best battery powered high pressure washer.
Bag styles that typically qualify for the airline’s under‑seat allowance (laptop cases, daypacks, small duffels)
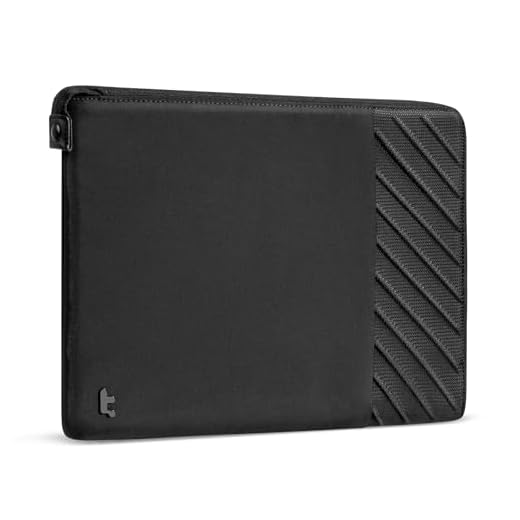
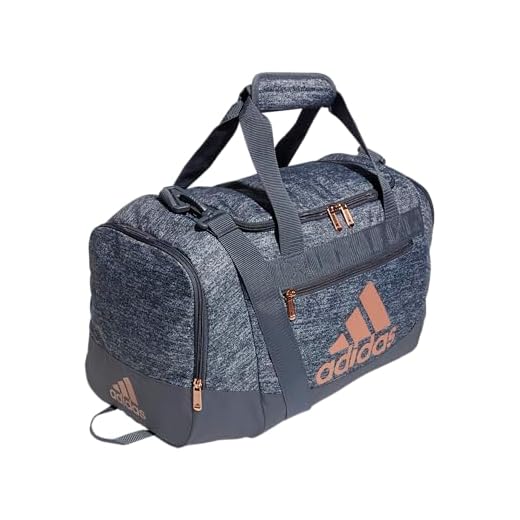
Recommendation: choose a slim laptop sleeve or messenger ≤16 x 11 x 4 inches, a soft compressible daypack ≤17 x 13 x 6 inches, or a small duffel with a soft profile about 16–17 x 9 x 8 inches to fit reliably under the seat used by cabin staff.
Laptop cases – specs and handling
Target a padded sleeve or slim messenger designed for 13–15″ computers; exterior dimensions (including handles and shoulder strap attachments) should not exceed 16 x 11 x 4 in. Use models with flat external pockets and no rigid wheels or long handles. Pack charger and mouse in separate flat pockets so the overall profile remains thin; keep total weight below ~8–10 lb for easy stow and retrieval.
Daypacks and small duffels – shape and materials that help
Choose soft-sided daypacks with tuckaway straps and no internal frame; aim for a compressed profile of about 17 x 13 x 6 in. Small duffels should be single-compartment, non-rigid base, and approximately 16–17 x 9 x 8 in when packed. Favor nylon or canvas that compresses, avoid hard panels or exposed hardware that extend length, and select designs whose handles lie flat so the bag slides under the seat.
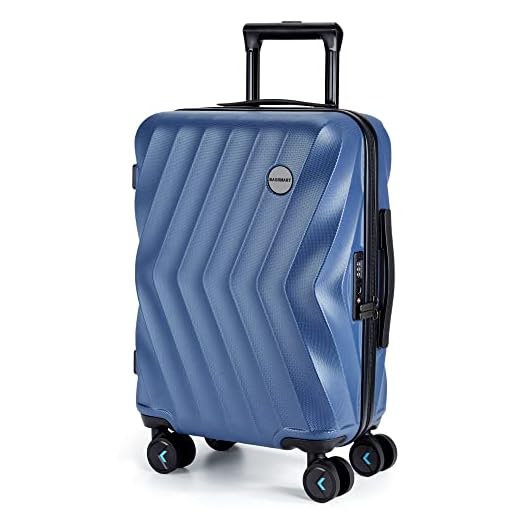
Packing checklist and common pitfalls: keep electronics in slim sleeves, place heavy items nearest the seatback, tuck belts and straps into zippered pockets, avoid wheeled attachments or oversized outer pockets, and test the packed bag against an 18 x 14 x 8 in reference (if available) – expandable zippers and bulky outer shells are the most frequent reasons staff will ask for gate check.
Packing techniques to compress and organize items to meet under-seat limits
Limit carry-on soft bag dimensions to 18″ × 14″ × 8″ (46 × 36 × 20 cm); wear the bulkiest shoes and a coat on board to free internal volume.
- Choose soft, compressible containers: use 1 medium compression cube (approx. 16″×11″×5″) for shirts, 1 small cube (11″×7″×3″) for underwear and socks, plus a slim electronics pouch. Compression cubes typically reduce bulk by ~25–35% versus loose packing.
- Packing order for maximum fit:
- Base layer – roll heavier items (jeans worn on plane if bulky) into a tight cylinder and place across the bottom to create a flat platform.
- Mid layer – place the medium cube of shirts vertically to use depth instead of width.
- Top layer – small cube with intimates, compression-folded fleece or merino layer, and a slim toiletry roll (clear quart-size pouch for liquids).
- Perimeter pockets – chargers, passport, boarding pass, and earphones for quick access.
- Outer strap or external pocket – collapsible water bottle and sunglasses case.
- Rolling vs. folding: roll T‑shirts and thin pants to save roughly 20–30% of space; stack rolls vertically inside cubes to maintain shape and allow visibility without emptying the bag.
- Shoe strategy: wear one pair on board; place the spare pair in a thin shoe bag at the very bottom or against the side; stuff socks/charging cables into shoe interiors to reclaim volume.
- Toiletries and liquids: transfer liquids to travel-size bottles (≤100 ml / 3.4 oz), store in a single transparent pouch at the top so it fits security rules and can be removed in seconds.
- Electronics and fragile gear: use a slim padded sleeve for laptop or tablet and place it vertically against the rear panel so it doesn’t add thickness to the bag’s front face.
- Garment selection for short trips (3–5 days): 3 shirts, 2 underwear, 2 socks, 1 pair trousers (wear), 1 lightweight sweater, 1 sleep set. Choose quick-dry fabrics to reduce quantity.
- Compression tools to avoid: vacuum bags can flatten contents but make reorganization at the gate hard and may prevent the bag fitting under the seat when rigid. Prefer soft-sided compression cubes with adjustable zippers or external strap compression.
- Final fit check: fully zip the bag and set it on a flat surface; measure height, width, depth with a rigid tape including any protruding handles; the bag should slide completely under a standard airline seat model or fit inside an 18″×14″×8″ test box.
- Last-minute space savers: swap hardcover books for an e-reader, empty refillable bottle after security, wear sunglasses/headwear instead of packing them, and transfer spare toiletries into shared travel containers.
Use the above sequence and pouch sizes to create predictable zones inside the permitted under‑seat envelope: weight/rigid near the body, compressible clothing in cubes, and quick-access items in outer pockets.
Gate process: staff checks, fees and actions if your rucksack is borderline
Quick directive: If an agent declares your rucksack borderline, immediately offer to move excess into pockets or a jacket, or request a paid overhead permit via the airline app to prevent boarding delays.
What staff will do: Agents perform a visual inspection, place the bag in a metal or plastic sizer, and ask you to demonstrate it fitting under the seat in front of you. If it doesn’t fit, they’ll decide between tagging it for gate-check, charging for an overhead bag, or asking you to place it on the ticket counter for checked baggage.
Measurement tolerance and verification: Expect a strict check at the gate – tolerance is usually minimal. The sizer enforces exterior dimensions only; compressible material that bulges may fail even if measured at home. If your rucksack looks overstuffed, staff will insist on a sizer test rather than take size claims at face value.
Fees you may face: Typical charges for adding an overhead allowance at the gate range roughly from $60 to $100, depending on fare class and route. Gate-check tags for items that won’t fit under the seat often cost $25–$50 or may be complimentary when the overhead bins are full. Checked-baggage fees initiated at the gate can be higher than online rates.
Payment and processing: Gate transactions usually accept card or mobile pay only; keep a credit/debit card ready. Buying an allowance via the airline app before reaching the counter can be cheaper and faster. If the agent offers a gate-check tag, you’ll receive a tear-off claim stub – keep it until you retrieve the bag.
Actions to take immediately if borderline: 1) Remove heavy or bulky items and carry them onboard (electronics, medications, documents). 2) Wear the bulkiest garment(s) over your clothes. 3) Transfer soft items into jackets or into carry-on pockets. 4) Compress straps, empty water bottles, and zip external pockets flat. 5) If time allows, purchase an overhead allowance in-app rather than contest at the counter.
When gate-checking is the best option: Choose gate-check if you want to avoid paying high overhead fees and don’t need immediate access to the bag during flight. Understand the risk: items checked at the gate go to cargo and may be unloaded at baggage claim or returned at the jetway after arrival.
Exceptions and goodwill considerations: Families with infant equipment, active-duty military with ID, and some elite-status flyers may get leniency. Always ask politely; agents have discretionary authority and sometimes will make exceptions based on flight load.
Prep to minimize gate friction: Carry a small tape measure or a collapsible luggage sizer, pre-organize critical items for quick removal, and purchase an overhead allowance via the carrier’s website if your pack approaches the allowed profile. For a compact water-shedding cover or small pool-friendly accessory reference, see best umbrella to put in pool.


