

Recommendation: For everyday use limit the payload to 10–15% of body mass; for trekking with a framed pack aim for 20–25% of body mass (trained carriers may manage up to ~30% for short periods); children under 12 should remain below 10% of their body mass.
Concrete examples: 60 kg person – daily: 6–9 kg (13–20 lb); trekking: 12–15 kg (26–33 lb); upper short-term limit: ~18 kg (40 lb). 70 kg person – daily: 7–10.5 kg (15–23 lb); trekking: 14–17.5 kg (31–39 lb); upper short-term limit: ~21 kg (46 lb). 80 kg person – daily: 8–12 kg (18–26 lb); trekking: 16–20 kg (35–44 lb); upper short-term limit: ~24 kg (53 lb).
Fit and load transfer: Use the hip belt to move roughly 70–80% of the mass onto the pelvis. Tighten shoulder straps so they stabilize but do not bear the majority of the load; chest strap should prevent strap slip without restricting breathing. Adjust load lifters (if present) so the pack’s top draws slightly toward the shoulders for balance.
Packing method that reduces strain: place the heaviest items close to the spine and just above the hip belt, lighter bulky items (sleeping bag, clothing) at the bottom, frequently accessed items near the top or hip-belt pockets, and water in an accessible front or side position to avoid repeated shoulder twisting. Use compression straps to keep the load compact and centered; balance left-to-right within 0.5–1 kg.
Structural limits and safety checks: verify manufacturer stated maximum payload and internal volume; inspect seams, frame, and straps before heavy use. Watch for signs of overload – persistent shoulder numbness, hip pain, gait change, or strap deformation – and reduce mass immediately. For extended trips, plan food/fuel resupply to avoid carrying unnecessary surplus.
Safe load limits for common pack types
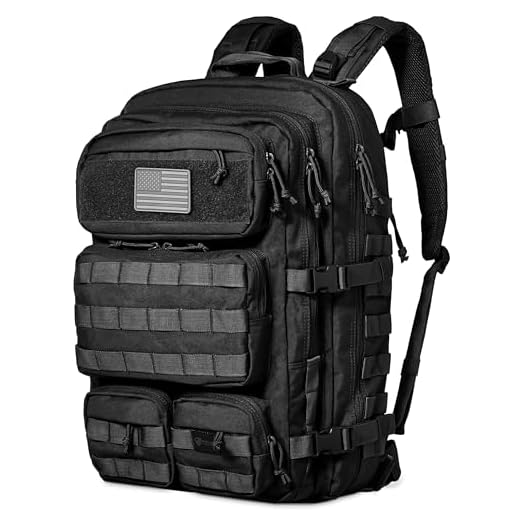
Recommended maximum loads – daypack: 5–9 kg (11–20 lb) ≈ 8–12% of user body mass; hiking pack (internal frame, multi-day): 14–18 kg (31–40 lb) ≈ 20–25% of body mass; school pack (children): ≤10% of child body mass for primary school, up to 10–15% for teens (typical range 3–7 kg / 7–15 lb); tactical pack (reinforced frame, short missions): 18–30 kg (40–66 lb) ≈ 25–35% of body mass, with a structural upper limit near 30 kg (66 lb).
Numeric guidance by type
Daypack – frameless or lightly framed commuter models perform best under 5–10 kg. Keep heavy items under 9 kg to avoid shoulder-strain and forward torso lean; use sternum strap and snug shoulder straps to stabilize load.
Hiking pack – use hip belt to transfer roughly 70–80% of the load to hips; 40–65 L packs for weekend trips typically carry 10–15 kg, 65–75+ L packs for multi-day trips 15–20+ kg. For spine comfort, place the densest items close to the upper lumbar area and keep total load within 20–25% of body mass for average hikers.
School pack – for children measure at home: empty pack + typical books; that total should not exceed 10% of child’s mass for elementary pupils. Prefer padded waist and wide shoulder straps; consider a wheeled alternative when totals approach 10–15% of body mass. See also best car seat compatible umbrella stroller for child-transport options that reduce carried loads.
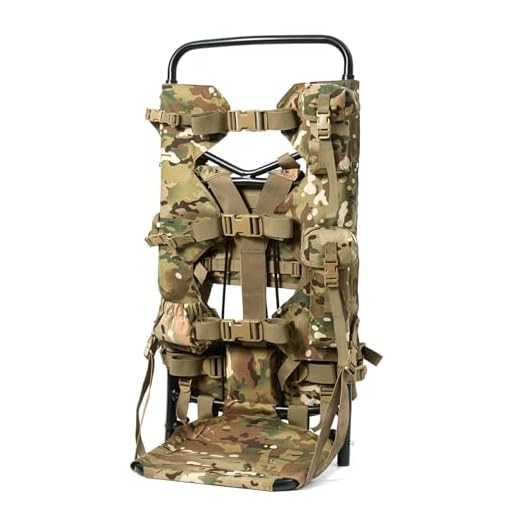
Tactical pack – designed for higher sustained loads if fitted with load-bearing hip belts and external frame. Recommended operational loads 25–35% of body mass for trained operators; restrict to short-duration missions above 25 kg and verify seams, frame rods and belt webbing before deployment. For travel that includes heavy gear, compare reinforced luggage at best luggage offer.
Fit and distribution rules
Use these checks: hip belt snug on iliac crest so hips take majority of load, load lifter straps at ~10–20° to pull pack top toward shoulders, heavy items centered close to torso between shoulder blades and lumbar, smaller items in outer pockets. Signs of overload: shoulder straps digging, pack rides low on hips, widened gait or forward lean; reduce carried mass or shift items into luggage when any sign appears.
Calculate Personal Carry Limit from Body Mass, Fitness, and Trip Duration
Aim for a carried load equal to 15–25% of body mass for standard multi-day outings; use 10–15% for single-day or novice participants; exceed 25% only with superior conditioning and minimal kit.
Step 1 – baseline percentage by fitness: sedentary/novice 10–12%; recreational/regular gym 13–17%; experienced hikers 18–22%; endurance-trained or military-level 23–30%.
Step 2 – convert to kilograms: baseline_load_kg = body_mass_kg × baseline_pct (expressed as a decimal). Example: 70 kg × 0.15 = 10.5 kg.
Step 3 – add fixed and consumable items: final_load_kg = baseline_load_kg + shared_gear_kg + personal_gear_kg + water_kg + food_kg. Use 1 kg per litre for water and estimate water use at 2–4 L/day depending on climate and exertion; food 0.6–1.0 kg/day depending on caloric needs and cooking method.
Adjustments by trip duration and logistics: single-day – use lower bound of baseline; 1–3 nights – use baseline; 4+ nights without resupply – add 1–2% of body mass per extra night beyond three, up to +5% total. If resupply is available, subtract expected resupply mass from final_load_kg.
Environmental and gear modifiers: cold weather add +10–20% for bulkier insulation and stove/fuel; technical routes add fixed masses (rope 2–3 kg, ice axe 0.5–1 kg, crampons 0.6–1 kg); group-shared items divide by party size.
Worked example: body mass 70 kg, recreational baseline 15% → baseline_load = 10.5 kg. Add water 3 L = 3 kg; shared tent 1.5 kg split between two = 0.75 kg; stove/fuel share = 0.4 kg; food 0.9 kg/day ×3 days = 2.7 kg. Final_load = 10.5 + 3 + 0.75 + 0.4 + 2.7 = 17.35 kg → 24.8% of body mass (near upper recommended limit).
Practical reductions: lower consumables via resupply, swap to lighter shelter (save 0.5–1.5 kg), consolidate cookware (save 0.3–0.8 kg), treat water sources as available to reduce carried litres. If final_load_kg exceeds desired percentage, prioritize cutting items contributing greatest absolute mass per utility.
Quick checklist for field calculation: record body_mass_kg; choose baseline_pct by fitness; list fixed personal gear masses; estimate water and food masses; compute final_load_kg and convert to percentage final_load_kg ÷ body_mass_kg ×100%. Target under your selected baseline range or apply the reductions above.
Quick at‑home tests to estimate a pack’s load capacity and spot structural weak points
Modular-fill static test
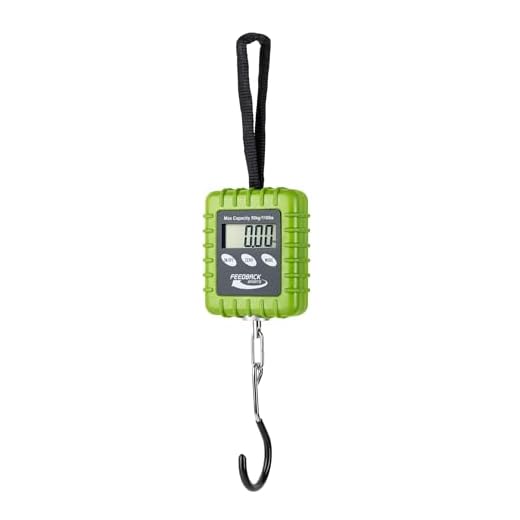
Begin with 1.5 L water bottles (≈1.5 kg / 3.3 lb each) as repeatable mass units. Place empty pack on a digital bathroom scale, record tare. Add bottles in 1.5–3 kg increments and record scale after each addition. Stop the test when any of these measurable failures appear: shoulder strap webbing stretches more than 15 mm, hipbelt foam compresses >10 mm under load, main seam opening exceeds 3 mm, or frame/boning bends visibly by more than 10° from neutral. Leave each incremental load on the pack for 20–30 minutes to reveal slow seam migration or fabric creep.
Dynamic simulation and stitch/zipper stress
Perform a motion sequence: wear the loaded pack at ~60% of the highest safe-seeming load from the static test (round down), walk 200 steps, climb 20 stairs, then perform 10 torso twists and 10 forward bends while wearing it. After the sequence, inspect: zipper teeth misalignment >2 mm, buckles with hairline cracks, bar-tack stitch separation >4 mm, and foam delamination visible along one or more seams. For strap attachment points, apply a quick-release pull (90° to the seam) with a hand pull force ≈30–40 kgf – if stitching shifts or webbing tears, mark the attachment as failed.
Additional expedient checks: press a straightedge along the backpanel under load to gauge frame rigidity (flex >15 mm under a 10 kg point load indicates weak frame), pour 1 kg of sand into a sealed bag to test zipper abrasion by sliding the bag across the zipper 10 times, and inspect interior seam tape for adhesive creep after 24 hours at 30–40°C (use a hairdryer at low setting for 5–10 minutes to accelerate observation). For cleaning advice or a mild detergent recommendation for stubborn fabric spots, see best hand dishwashing detergent find the perfect solution for sparkling clean dishes.
Packing and load‑distribution techniques to reduce back strain and prevent gear damage
Place the heaviest items within 10–20 cm of the spine at torso midline (roughly chest-to-waist height) to keep the center of mass close to the body and reduce lumbar loading.
- Order of placement:
- Bottom: compressible sleep system and soft bulk items.
- Mid-center (closest to spine): dense, heavy gear – fuel, food, water reservoir base, cookware; distribute so mass is centered, not offset.
- Top: light, bulky items – insulation layers, rain shell, map/guidebook pocket.
- Exterior pockets: frequently needed small items (headlamp, snacks, sunscreen); avoid storing anything heavy in external side pockets.
- Use dry sacks and padded sleeves: place electronics and fragile items inside the mid-center area surrounded by soft clothing for crush protection.
- Rigid items (tripod, tent poles) should be mounted outside or along the frame rails so they don’t press into internal seams or soft-shell gear.
Harness and strap adjustments for force transfer:
- Hipbelt position: seat the top edge on the iliac crest; the belt should transfer roughly 60–80% of the load onto the hips, shoulder straps taking the remainder.
- Load lifters: set at a 30°–45° angle from the shoulder straps to the pack body so the upper pack sits snug against the torso and the load presses toward the hips.
- Sternum strap: fasten at mid-chest to stabilize shoulder straps but leave full inhalation clearance; avoid overtightening that pulls the shoulders forward.
- Shoulder strap fit: allow 2–3 finger clearance between the top of the shoulder and the strap when standing relaxed; a snug seal without pressure points is the goal.
Stabilization techniques to prevent shifting and seam stress:
- Tighten main compression straps after packing so the internal center of mass moves closer to the frame and lateral sway is minimized.
- Cross-load heavy items symmetrically; offsetting a single heavy object increases torsion on the spine and stress on seams.
- Use internal dividers or rolled clothing as chocks around fragile gear to eliminate point impacts during drops or sudden movements.
- Attach long items along the frame with multiple tie points to avoid concentrated bending moments at a single seam.
On‑trail adjustments for terrain and comfort:
- Climbing: tighten load lifters and shoulder straps slightly to keep the pack forward and reduce hip slip; hips should still bear most of the load.
- Descending: loosen shoulder straps and let the hipbelt take more; this reduces forward pull and lowers the risk of shoulder fatigue.
- Use trekking poles to offload roughly 10–15% of perceived torso effort on long climbs or heavy days; short rests every 45–60 minutes help redistribute pressure points.
- Address hot spots immediately: shift small items, pad the contact area, or adjust strap tension rather than pushing on through pain.
Preventing structural damage to the rucksack and gear:
- Avoid concentrated point loads over internal seams – spread dense items and pad edges with foam or rolled clothing.
- Reinforce common failure zones (bottom panel, lower seams, daisy chains) with external tie points or webbing rather than stuffing to capacity.
- Store liquids upright in rigid bottles inside a protective sleeve to prevent punctures and to position mass centrally.
- Inspect load-bearing stitching and frame contact areas after heavy trips; repair minor seam separation with reinforced tape or stitching before the next outing.
FAQ:
How much weight can a typical daypack hold without causing damage or severe discomfort?
A standard daypack (20–30 liters) is usually built to carry light loads: about 5–10 kg (11–22 lb) is comfortable for most adults for several hours of use. The fabric, seams and zippers can sometimes tolerate higher loads, but comfort and long-term wear are the limiting factors. If you regularly carry more than 10 kg in a daypack, expect increased shoulder and neck strain and faster wear on stitching and zippers. For heavier loads choose a pack with a reinforced frame and a padded hip belt; those models are designed to move weight off the shoulders and reduce stress on seams.
How much weight should a child carry in a school backpack?
For children, keep the filled backpack below about 10–15% of their body weight. For example, a 30 kg (66 lb) child should carry no more than 3–4.5 kg (6.6–10 lb). Use both shoulder straps, tighten them so the pack sits close to the back, and add a padded hip or sternum strap if available. If schoolbooks and supplies routinely push weight higher than that, consider using a rolling bag, switching to a tablet where possible, or arranging a locker to reduce daily load.
Can overloading a backpack actually break it? What parts fail first?
Yes, repeated overloading shortens a pack’s lifespan and can cause sudden failures. Common weak points are seam threads, attachment points for shoulder straps or webbing, zipper tapes and the bottom panel. Frame stays can bend or deform in framed packs under excessive load. Failure often starts as stretched or fraying stitching, bent hardware, or zipper teeth that don’t align. To reduce risk: avoid sustained heavy loads, inspect seams and webbing regularly, keep sharp items padded inside, and repair small tears or loose stitching promptly before stress makes them larger.
How should I pack a backpack so the load feels lighter and stays stable while hiking?
Place the heaviest items close to your back and centered near your mid-back (about shoulder-blade level) so the center of mass stays near your own. Lighter items can go lower or farther from the back. Use the hip belt to transfer most weight to the pelvis; when adjusted correctly the hips will carry the majority of the load and shoulders only stabilize. Use compression straps to pull the load tight to the frame and prevent shifting. Distribute weight evenly side to side, and keep frequently used items (water, rain jacket, snacks) in accessible pockets.
What are the long-term effects of regularly carrying a heavy backpack, and what limits should adults observe?
Regularly carrying a heavy pack can produce muscle fatigue, chronic shoulder and neck pain, altered posture and increased spinal compression. Over months or years these stresses may contribute to disc strain, joint pain and compensatory gait changes. For adults on multi-hour hikes, many guides recommend keeping the pack weight below about 20–25% of body weight for sustained comfort; trained individuals can handle higher loads for shorter periods. To reduce long-term risk: choose a properly fitted pack with a sturdy hip belt, strengthen core and back muscles, take frequent rest breaks, and vary how and how long you carry heavy loads. If you develop persistent numbness, tingling or sharp pain, seek medical assessment.


