
Immediate recommendation: carry a 20,000 mAh USB‑C PD power bank (minimum 18W output), a compact 10W foldable solar panel for daylight topping, and a 1m USB‑C cable; charge your device to ~80% before leaving camp, switch the handset to low-power profile at 40% and top up with 20–30 minute boosts at midday if possible.
Numbers to plan around: modern handsets typically have 3,000–5,000 mAh batteries. Typical draw: standby 10–30 mA, light use 200–400 mA, active navigation + screen 800–1,200 mA. A 4,000 mAh phone running at an average 500 mA gives ~8 hours of runtime. A 20,000 mAh bank, assuming ~80% conversion efficiency, provides roughly four full charges for a 4,000 mAh cell (20,000 × 0.8 ÷ 4,000 ≈ 4). If temperatures drop below 0°C, expect capacity losses: ~20% at 0°C and ~40% near −10°C, so keep batteries warm inside clothing or an insulated pouch.
Practical settings: disable background app refresh and push sync, set maps and playlists to offline, reduce screen refresh rate and brightness to 30–40%, force GPS sample to 1 Hz or use waypoint logging instead of continuous routing, and turn off cellular data when only Wi‑Fi or offline apps are needed. Use airplane mode for long stretches without need for connectivity; enable periodic polling for messages rather than constant scanning.


Charging hardware and safety: prefer USB‑C PD chargers with 18–30W for fastest top-ups (many phones hit ~50% in 25–35 minutes on 18W). Carry at least one MFi or USB‑IF certified cable; avoid cheap cables that cause heat build‑up. Don’t rely on pass‑through charging overnight–it raises temperatures and reduces battery lifespan. Store spare batteries in waterproof pouches and check power bank state-of-charge visually; mark charging milestones (80%/40%) on your itinerary to reduce surprises.

On-route routine: start each day with the device at ~80%, use conservative settings for the morning navigation leg, perform a 20–30 minute midday boost if hiking speed allows, and finish evening tasks (photos, backups) after plugging into the power bank. For multi-day legs without reliable sunlight, pack two banks (e.g., 10,000 + 20,000 mAh) and ration use by prioritizing one device per bank and switching roles only when reserve falls below 30%.
Phone Power Strategies for Long Hikes
Carry a 20,000 mAh USB-C Power Delivery (PD) power bank (≥60 Wh) plus a 30W USB-C PD charger and a short 30 cm USB-C to USB-C cable; that combination will typically provide about 5–6 full charges for a 3,000 mAh smartphone and allow rapid top-ups between stops.
Set screen brightness to 15–30% and fixed timeout to 15–30 seconds. Disable background app refresh and push sync for mail; switch mail to manual fetch or hourly. Allow location only for active navigation apps and set maps to offline mode where possible. Turn off Bluetooth and Wi‑Fi scanning when not used.
Charging hardware and cable choices
Prefer PD 18–30W output for phones; PD 45W+ is useful if you also charge laptops. Choose cables rated for 3A+ (USB-C 22AWG or better) and keep them under 50 cm to reduce voltage drop. For solar panels, use a 10–20W foldable panel with an MPPT power bank or controller; expect ~6 peak sun hours to produce about 60–120 Wh (partial full charge for a 20,000 mAh bank). Use an inline USB power meter to verify real-world current and detect faulty cables.
Temperature, storage and charging routines
Battery capacity falls ~20–40% near 0°C; store batteries and phone inside clothing overnight and move them to pack exterior only when charging. If trip segments last multiple days without charging, charge the power bank fully each night and keep the phone at 30–50% during the day to reduce deep-cycle wear. For multi-day rest periods, store spare batteries at ~40–60% state of charge and check every 1–2 weeks.
| Power bank (mAh) | Approx. Wh (3.7V) | Est. full charges for 3,000 mAh phone (85% conversion) | Typical weight (g) |
|---|---|---|---|
| 10,000 | 37 Wh | ≈2–3 | 180–220 |
| 20,000 | 74 Wh | ≈5–6 | 320–380 |
| 30,000 | 111 Wh | ≈8–9 | 480–560 |
Estimate daily phone power draw to size your power bank (mAh per day)
Carry a power bank rated at roughly 1.6× your smartphone battery for a single full extra day; choose ~2.5–3× for consistent GPS, camera, or hotspot use.
Quick checklist to estimate daily mAh demand: (1) find phone battery capacity in mAh (e.g., 4000 mAh). (2) Add component drains using the per‑hour numbers below. (3) Add baseline idle drain (standby + background sync) and a 10% reserve for temperature/aging.
Typical per‑hour draws (average examples): screen (medium brightness) 300 mAh/hr; navigation (GPS with screen) +400 mAh/hr; streaming audio 120 mAh/hr; video streaming 500 mAh/hr; 4G data active +200 mAh/hr; voice call 300 mAh/hr; hotspot 600 mAh/hr. Baseline idle: 300–500 mAh/day.
Sample profiles (daily mAh totals before conversion losses): Light – idle 350 + screen 1 hr (300) + occasional data (150) = 800 mAh/day. Moderate – idle 400 + screen 3 hr (900) + navigation 1 hr (400) + streaming 1 hr (500) = 2200 mAh/day. Heavy – idle 500 + screen 6 hr (1800) + GPS 4 hr (1600) + hotspot 3 hr (1800) = 5700 mAh/day.
Convert required bank capacity (power bank mAh rating is at 3.7V cells). Use formula: required_bank_mAh = daily_phone_mAh ÷ (3.7/5 × efficiency). Use conversion factor 3.7/5 = 0.74 and conservative efficiency 85% (0.85), combined = 0.629. So required_bank_mAh ≈ daily_phone_mAh ÷ 0.629 (~×1.59).
Examples using the conversion factor: Light 800 mAh → bank ≈ 1270 mAh (recommend round up to 2000 mAh). Moderate 2200 mAh → bank ≈ 3500 mAh (recommend 5000–7500 mAh). Heavy 5700 mAh → bank ≈ 9050 mAh (recommend 10,000–20,000 mAh depending on number of days and device count).
To estimate number of full phone charges from a bank: usable_mAh_at_phone = bank_rating_mAh × 0.629. Charges = usable_mAh_at_phone ÷ phone_battery_mAh. Example: 10,000 mAh bank → usable ≈ 6290 mAh; with a 4000 mAh phone that yields ≈1.57 full charges.
Measure actual consumption for a personalized estimate: fully charge morning, note battery % and time of major activities (screen hours, GPS hours, streaming). Use phone battery stats or a third‑party app that reports mAh consumed where available; average over 2–3 days and plug into the formulas above.
For a non-technical detour: best aquarium in new jersey
Choose lightweight, fast-charging gear: USB-C PD bank, short cables, and adapters
Buy a USB-C Power Delivery bank with PD output ≥30W, capacity 10,000–20,000 mAh (≈37–74 Wh) and PD PPS support; pair it with a 15–30 cm, 60W-rated USB-C–USB-C cable and a compact 30–65W GaN wall charger.
- Power bank specs
- Capacity: 10,000 mAh (~37 Wh, typical weight 180–220 g) or 20,000 mAh (~74 Wh, typical weight 350–450 g). Do not exceed 100 Wh for airline carry rules.
- Output: single USB-C PD port 30W–45W for smartphones; choose 60W+ only if also charging a laptop.
- Protocol: PD with PPS (programmable voltage) for faster, lower-heat charging on modern phones.
- Efficiency: expect 85–92% DC-DC conversion; label usable Wh accordingly.
- Form factor: stick or brick style with metal casing for durability and heat dissipation.
- Cable selection
- Length: 15–30 cm (6–12 in) to minimize voltage drop and weight; avoid 1 m+ unless needed for specific use.
- Rating: 60W (3A) for phones; 100W (5A) with e-marker if planning laptop use.
- Connector: USB-C to USB-C for fastest PD charge; use USB-C to Lightning only for iPhones that require it for PD charging.
- Build: tinned-copper conductors, >20 AWG power wires, secure strain relief; thin ribbon designs add little bulk while keeping current capacity.
- Wall and car adapters
- GaN wall charger: 30W models weigh ~40–60 g; 65W dual-port models ~100–140 g. Pick a two-port GaN (one high-power PD, one USB-A) for versatility.
- Car charger: USB-C PD 30–45W for rapid in-vehicle topping-up; look for built-in temperature protection.
- Adapter use: avoid stacking adapters where possible–each adapter adds 3–8% conversion loss and extra failure points.
- Port and feature priorities
- One high-power USB-C PD port (30–45W) + one USB-A or secondary USB-C for accessories.
- LED or percentage fuel gauge for accurate remaining capacity.
- Short-circuit, over-current and thermal protection; IP or rubberized finish if exposed to moisture.
- Packing checklist (minimalist)
- PD power bank (10k–20k mAh, PD 30W)
- 15–30 cm USB-C–USB-C cable (60W or 100W e-marked if needed)
- 30–65W GaN wall charger (1–2 ports)
- USB-C to Lightning adapter or short native cable for iPhone users
Tip: test actual charge speeds before leaving – confirm the bank supplies advertised wattage with your device and that short cable + PD bank combo triggers the phone’s fast-charge profile.
Cut phone power use on trail: screen rules, GPS batching, and kill-list apps
Set display to a strict baseline: timeout 15–30 s, manual brightness locked at 20–40% in shade and 60–80% only in direct sun; turn off adaptive/auto brightness, gesture wake, double-tap wake and always-on display.
Reduce display demands: force 60 Hz (or lowest refresh available), enable dark/black theme on OLED panels, use full black wallpaper, enable grayscale or a low-power color profile. Expected draws: display ≈150–400 mA at moderate brightness; switching 120 Hz→60 Hz can cut display consumption by ~15–30% on supported devices.
GPS sampling strategy: set recording interval to match purpose – navigation: 1–5 s; performance/strava-style: 10–30 s; general hiking/logging: 60–300 s. Continuous 1 Hz GPS uses roughly 50–150 mA; moving to 30–60 s samples can reduce GPS-related drain by 80–95% while still preserving route fidelity.
Use batching and offline: choose apps that batch location fixes locally and upload only on Wi‑Fi or when you explicitly request sync. On Android enable “Allow batched location” or set a max wait time (e.g., 5–15 min) so the radio wakes less often; on iOS enable deferred location updates if the app supports it. Preload offline maps and map tiles to avoid live tile downloads.
Kill-list: identify and neutralize hungry apps – check system battery usage and wakelock stats; immediate actions: force-stop or uninstall social media apps (Facebook, Instagram, TikTok), streaming clients (Spotify, YouTube Music), weather widgets, and any messenger with auto-download enabled. Set remaining apps to “Background restricted”/“Battery optimized” and revoke background location (choose “While Using” only).
Network and sync controls: disable Background App Refresh/Auto-sync; set email to fetch manual or hourly; enable Data Saver and restrict background data per-app; disable Wi‑Fi/Bluetooth when unused. Cellular signal search in marginal areas can add 100–300 mA – switch to airplane mode when you don’t need connectivity, then re-enable location/GPS only when required.
Notification hygiene and media: turn off push notifications for non-essentials, disable auto-download of images/voice notes in messaging apps, and remove home-screen widgets that poll the network. For messaging, prefer plain SMS or lightweight web clients when possible.
Use built-in OS tools first: enable low power / battery saver at a chosen threshold (recommend 40–50% for multi-day trips), use app hibernation and “offload unused apps” where available. For advanced users: tools like Greenify can hibernate apps between uses; for most users, system battery optimizations plus aggressive background restrictions are sufficient.
Quick checklist: 1) Screen timeout 15–30 s; 2) Brightness locked 20–40% (raise only for short periods); 3) Refresh rate → 60 Hz; 4) GPS sampling 60–300 s for typical hikes; 5) Batch uploads and use offline maps; 6) Restrict/uninstall social and streaming apps; 7) Turn off auto-sync and auto-downloads; 8) Use airplane mode when passive.
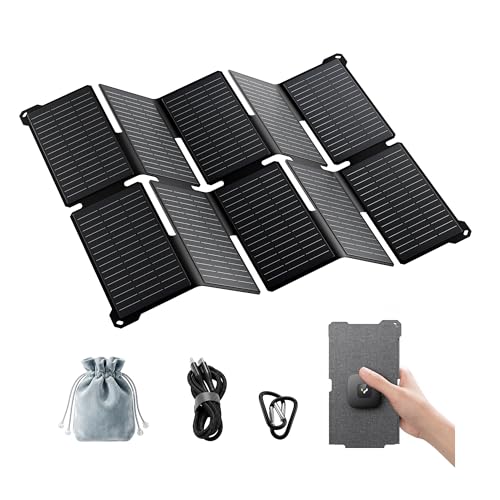
Solar charging in the field: panel wattage, mounting angles, and charging windows
Carry a 20–30W folding panel plus an MPPT-capable power bank; in open sun expect 50–80 Wh/day from 20–30W panels (real-world), enough for 3–5 phone charges depending on battery size and usage.
Panel wattage and practical energy math
- Energy estimate formula: Delivered Wh ≈ Panel_W × PeakSunHours × SystemEfficiency.
- Use conservative factors: PeakSunHours = 4–6 (mountain/clear sky); SystemEfficiency = 0.5 when clipped to pack or partially shaded, 0.6–0.75 for well-angled ground setup with MPPT.
- Examples:
- 10W panel, 5 peak hours, 0.6 efficiency → 10×5×0.6 = 30 Wh/day.
- 20W panel, 5 peak hours, 0.65 efficiency → 20×5×0.65 = 65 Wh/day.
- 30W panel, 6 peak hours, 0.7 efficiency → 30×6×0.7 = 126 Wh/day.
- Phone battery conversion: 3000 mAh ≈ 11.1 Wh (3.7V nominal). Allow USB boost and conversion losses: assume 60–75% net charging efficiency, so plan on 15–20 Wh delivered per full 3000 mAh charge.
- Rule of thumb:
- 10W panel (good mounting) ≈ 1 full 3000 mAh charge/day plus partials.
- 20W panel ≈ 2–3 full 3000 mAh charges/day.
- 30W panel ≈ 4–6 full 3000 mAh charges/day or enough to run small accessories and charge a power bank.
- MPPT vs PWM: MPPT controllers provide ~10–25% more usable energy under variable light and partial shade–choose an MPPT-equipped pack or inline regulator when possible.
Mounting angles, orientation, and charging windows
- Best hours: 10:00–15:00 local solar time produce the highest average power; peak output center around 11:30–13:30. Outside that window yield drops sharply.
- Tilt rules:
- For quick field setup set tilt ≈ latitude ± 15° seasonally: latitude −15° in summer, latitude +15° in winter. If unsure, use ~45° for mid-latitudes as a compromise.
- For maximum instantaneous power point, orient panel perpendicular to the sun’s rays (use phone compass/solar app to point directly at sun).
- Mounting methods and expected yield:
- Ground stake or rock-lay with correct tilt → 60–75% of rated output (best option).
- Rigged to trekking poles/mini-stand → 55–70% of rated output (lightweight, adjustable).
- Clipped to external pack while hiking → 15–35% of rated output (convenient but inefficient).
- Shade sensitivity: a single shaded cell string can drop output by 50–80%. Avoid dappled canopy; move panel into full sun or use multiple smaller panels separated to reduce total loss.
- Temperature effect: panel output falls ≈0.3–0.5% per °C above 25°C. Cool, clear mornings often give higher voltage; hot midday can slightly reduce power.
- Operational tips:
- Charge the power bank rather than the phone directly when sunlight fluctuates; then use the bank for stable charging.
- Align panels to track the sun during mid-day breaks; 5–10° adjustments per hour keeps output near peak.
- If weight is critical, prioritize 20–25W panels (≈300–450 g) for the best charge-per-gram compromise; 10W units (~150–250 g) are marginal but useful as a backup.
Further reading on unrelated gear and style: best looking motogp umbrella girl
Charge from vehicles and campsites: using USB ports, 12V inverters, and fuse checks
Use a USB-C PD car adapter rated 45W+ with a short (0.3–0.6 m) USB-C cable for the fastest and most efficient vehicle charging; expect ~85–92% DC–DC conversion efficiency versus ~60–75% if using a 12V→AC inverter plus a wall charger.
Quantify energy: a 4,000 mAh phone (≈14.8 Wh at 3.7 V) requires ~1.2 Ah from a running vehicle’s 13.8 V system assuming 90% adapter efficiency (14.8 ÷ (13.8×0.9) ≈ 1.2 Ah). If engine is off and alternator not charging, double-check battery state before multiple charges.
Vehicle USB ports: factory USB-A ports typically supply 5 V at 0.5–1 A (2.5–5 W) and USB-A “fast” ports 1–2.4 A (5–12 W). Aftermarket USB-C PD adapters provide 5–20 V at up to 3–5 A per port (15–100 W). Match adapter output to phone input: 18–45 W PD covers most modern handsets for <1 hour full recharge from 0–100%.
12V inverter guidance: use an inverter only if you must run AC chargers. Select pure sine wave for sensitive electronics. Estimated DC draw = AC wattage ÷ 12 V ÷ inverter efficiency. Example: 150 W load → ≈150 ÷ 12 ÷ 0.85 ≈ 14.7 A; fuse this circuit at ~20 A and use 12 AWG cable. For a 300 W inverter expect ~25–30 A draw and use 10 AWG with a 35–40 A fuse.
Wiring and fuses: place the inverter/battery main fuse within 18 inches (45 cm) of the battery positive terminal. Use blade or ANL fuses sized slightly above expected continuous draw (20% margin). Typical recommendations: phone-only charging via cigarette socket (<3 A) = inline 5 A fuse; multi-device or small inverter loads (≤150 W) = 20 A; larger inverter loads (200–400 W) = 30–50 A. Use correct gauge: up to 10 A → 16 AWG, up to 20 A → 14–12 AWG, up to 30 A → 10 AWG, up to 50 A → 8 AWG.
Quick fuse check routine: 1) turn off all accessories and ignition; 2) consult vehicle fuse diagram for “CIG/ACC” and accessory sockets; 3) visually inspect blade fuses for melted element or test continuity with a multimeter; 4) replace only with same amp rating and type; 5) if a replaced fuse blows immediately, remove added accessories and inspect wiring for short. For in-line or battery fuses, confirm correct placement and tight battery terminal connections.
Campsite shore power: most pedestals provide 120 V GFCI-protected outlets at 15 A or 20 A; RV sites may offer 30 A or 50 A pedestals. Use a GFCI-tested, outdoor-rated extension cord (14 AWG for 15–20 A). Plug a single phone charger or a multi-port USB charger (30–65 W) into shore power rather than using an inverter to reduce losses and idle draw.
Practical checks and safety: measure socket voltage under load – ~13.6–14.6 V indicates alternator charging, <12.4 V under load suggests battery-only and risk of discharge. Disconnect inverters and high-draw adapters when the engine is off; quality inverters draw 0.1–0.5 A idle and cheap units can draw 1 A+, which can drain a vehicle battery overnight.
Emergency charging procedures: power-sharing, hand-crank backup, and low-power checklist
If battery ≤30% and no solar or vehicle source available, reserve one phone as the navigation hub at ≥50% and conduct controlled power-sharing: short bursts from donors, rotate donors every 30 minutes, and use a buffer power bank when possible.
Power-sharing protocol
Step 1 – designate roles: one device is “nav” (map + compass apps), others are “comm.” Nav must remain ≥50% for route fixes; comm devices accept shared charge to reach ~30–40%.
Step 2 – connect: use USB-C to USB-C short cable (≤30 cm, AWG 24–28). For phone-to-phone reverse charging expect ~5W nominal (5V×1A) but real transfer to cell battery ≈300–500 mAh per 30 minutes due to conversion losses; plan transfers accordingly for common battery sizes (3,000–5,000 mAh).
Step 3 – donor thresholds and rotation: donor should not drop below 30% before handing off; rotate donors every 20–40 minutes to avoid over-depleting any single device and to average donor discharge. Monitor temps; pause if device exceeds ~40°C.
Step 4 – power bank as mediator: a USB-C PD bank with pass-through or bidirectional PD (18W input/output) makes sharing efficient. Charge bank first from any strong source, then use PD output to top multiple phones quickly. Store spare gear in an accessible pouch inside your pack (see best backpack lifetime warranty). Short cables reduce voltage drop and improve delivered current.
Hand-crank backup and low-power checklist
Hand-crank reality check: most hand generators produce 2–6W sustained with firm technique; realistic steady output ≈3W → roughly 5V @0.6A. Expected charge: 30–90 minutes of continuous cranking to add ~200–500 mAh to a phone battery (wide range due to device boost-converter efficiency). To add ~10% to a 4,000 mAh cell expect ~40–90 minutes of hard cranking; full charge requires many hours and is impractical.
Operational rules for crank use: connect crank to a small Li-ion buffer/battery pack with a 5V input when possible (buffer smooths output and increases conversion efficiency). Avoid direct crank-to-phone unless the device specifically supports it. Keep hand-crank sessions limited to 10–20 minutes per person; rest hands and swap operators to maintain steady power.
Low-power emergency checklist (apply immediately at ≤50%): 1) Enable system low-power mode and disable background app refresh; 2) Set screen brightness to 15–25% and timeout to 15 seconds; 3) Turn off LTE and cellular data; enable airplane mode and selectively re-enable Wi‑Fi only when needed for short bursts; 4) Disable continuous GPS; use offline maps and request fixes in bursts (e.g., 30–60 seconds every 5–10 minutes) – burst GPS reduces drain from ~200–400 mA continuous to ~20–80 mA average; 5) Turn off Bluetooth, NFC, and unnecessary sensors; 6) Kill or uninstall streaming, social, and cloud-sync apps – each can consume 50–200 mA when active; 7) Use battery percentage targets: pause nonessential use when a device drops below 40%, move to full emergency mode below 20%.
FAQ:
What’s the simplest way to keep my phone charged on a multi-day hike?
Bring one reliable power bank sized to match how many days you’ll be without mains power. A 10,000–20,000 mAh pack will usually top up a modern smartphone two to five times. Turn on the phone’s low-power mode, cut screen brightness, and disable background syncing for apps you don’t need. Carry a short, sturdy charging cable and a small adapter if your phone and bank use different ports. Charge the power bank fully before the hike and ration both phone and bank use so you always have a reserve for emergencies.
Can I depend on a small solar panel to keep my phone charged for a week of backpacking?
Solar panels can help, but they are weather-dependent and slower than mains or a power bank. A foldable 10–15 W panel can supply a phone some charge on a sunny day, but in cloudy or forested terrain output falls a lot. The usual approach is to pair a solar panel with a power bank: the panel tops up the bank during daylight and the bank stores energy for use at night or in shade. Look for panels that provide USB output and have smart charging or MPPT circuitry; choose a panel rated for real-world output (not only peak watts). Also factor in extra weight and the need to set the panel in sun for hours — for multi-day reliability, plan on both a power bank and a panel rather than the panel alone.
My phone drains fast in cold weather. What practical steps and gear will keep it charged and working during alpine backpacking?
Cold reduces battery capacity and cuts charging speed, so protect both the phone and any external batteries from low temperatures. Keep the phone in an inner jacket pocket close to your body when it’s not in use, and put spare power banks inside your sleeping bag or next to warm clothing at night. Use an insulated pouch or a neoprene sleeve to slow cooling when you have to carry a phone in an outer pocket. If you must charge in very cold conditions, warm the device to above freezing before connecting it; some batteries will refuse to accept charge below certain temperatures. Use low-power settings: disable unnecessary radios (Bluetooth, Wi‑Fi), reduce screen refresh and brightness, and limit background apps. For gear, a 20,000 mAh power bank with good cold-weather performance and USB-C Power Delivery is a solid compromise of capacity and weight; carry at least one fully charged spare rather than relying on one pack only. Avoid cheap, unlabeled batteries — pick a reputable brand and pack with over‑current protection. Finally, plan charging opportunities: top up devices whenever you have access to shelter or sunlight, and avoid running batteries to zero before night in the mountains. These steps will keep your phone usable and reduce the chance of being left without power when you need it most.


