Recommendation: use a replacement slider sized to the track gauge (#3 ≈ 3 mm, #5 ≈ 5 mm, #10 ≈ 10 mm). Required tools: flat-nose pliers, needle and strong thread (NYLON or polyester), seam ripper, small crimp-on stops, and a replacement slider matching separating vs non-separating design. Routine repairs restore smooth operation for light to medium load carriers.
Diagnosis procedure: inspect the closure type – nylon coil shows a spiral profile, molded plastic teeth are discrete, stamped metal teeth are individual. Measure tooth width with calipers or compare to kit labels. Check for bent teeth, missing stops, split sliders, and fabric tape damage. Note whether the slider still grips both halves or only one.
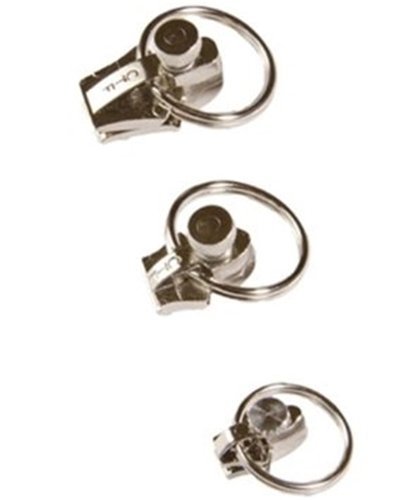
Quick remedial actions: to realign a bent tooth, open the slider past the damaged area and use flat-nose pliers to nudge the tooth back to line; if the slider has spread, remove top stop with pliers, pull slider off, replace with new slider and re-crimp top stop or sew a fabric stop. Missing pull tab? attach a small split ring or keyring as a temporary pull; replace pull with OEM-style tab for long-term use.
When teeth near the stop are missing, remove 2–3 teeth above the gap, install a new crimp-on stop and shorten the track; replace the entire track only when tape is torn or multiple teeth are destroyed. For heavy-duty packs choose metal-tooth or heavy-gauge coil rated for abrasion and loads; for water-resistant applications select closed-coil with protective tape and silicone-treated sliders.


Lubrication and longevity tips: apply paraffin wax or a graphite stick sparingly along the teeth/coil, avoid oil-based lubricants that attract grit. After repair, run the slider end-to-end 8–10 cycles under light tension to seat teeth and confirm smooth travel. Keep a compact repair kit (two slider sizes, crimp stops, pair of pliers, needle/thread) inside the carrier for field repairs.
Identify the problem: stuck slider, missing teeth, fabric jam, or broken pull
Immediate action: illuminate the track and perform one deliberate open–close stroke while holding surrounding fabric clear; if slider fails to move at least 5–10 mm under a gentle 1–2 N pull, begin targeted diagnostics.
Tools for inspection: magnifier, tweezers, needle-nose pliers, seam ripper, small flat screwdriver, caliper or ruler, compressed air, graphite pencil or silicone spray (one 1–2 short bursts from ~10 cm).
Stuck slider – detection and quick remedies: visible debris, folded material or corrosion usually causes binding. Measure engagement seam: close slider to within 30 mm of the stop and check tooth alignment; a lateral gap >0.5 mm indicates misalignment. Blow out debris, remove trapped thread with tweezers, then apply graphite (2–3 strokes) or a single light silicone spray and test 5 cycles. If the slider body is visibly crushed or the rails are splayed by >0.5 mm (use caliper), replace the slider assembly.
Missing teeth – assessment and options: count missing units and record their location. One isolated missing tooth near an end can often be tolerated; two or more consecutive missing teeth at mid-length usually prevents proper interlock and requires chain replacement or full unit swap. Identify chain size by tooth pitch: ~3 mm ≈ #3, ~5 mm ≈ #5; order matching replacement parts. Short-term workaround: create a new stop 20–30 mm before the defect by sewing a reinforced stopper or crimping a metal stop with pliers.
Fabric jam – how to free and prevent: pull fabric perpendicular from the teeth while holding slider steady; use a flat screwdriver to pry a folded edge free, then trim stray threads with a seam ripper. Clean the channel with compressed air and apply a tiny amount of silicone to reduce friction. To prevent repeat catches, stitch a 2–3 mm fold or sew a narrow bias tape along the fabric edge; allow any adhesive 24 hours to cure before cycling.
Broken pull/tab – replacement choices: measure the pull hole diameter. Durable quick fixes: stainless-steel split ring (6–8 mm), small keyring wire ≈1.5 mm, or a paracord loop 2–3 mm thick; add 10–15 mm of heat-shrink tubing for grip. If the pull hinge inside the slider is fractured, replace the slider sized to the chain (#3, #5, coil). Spare pulls and small hardware are often sold alongside stroller accessories – see best small umbrella stroller for big kid.
Free a stuck slider with lubricant and gentle back-and-forth motion
Apply a small amount of lubricant, protect surrounding fabric, then oscillate the slider 12–20 short strokes.
Recommended lubricants: graphite from a soft pencil (6B–2B), silicone spray with PTFE, beeswax or paraffin candle rub. For silicone spray: one 0.5–1 second burst from ~6 in (15 cm). For wax: rub a thin layer and remove visible excess with a dry cloth.
Before lubrication, remove surface grime: dab a cotton swab with isopropyl alcohol (70%) and wipe slider rails; wait 30–60 seconds for evaporation. Apply lubricant with a Q‑tip or narrow cloth to the slider body and the teeth/track directly above and below the slider. Allow 30–90 seconds for penetration for dry lubricants; 10–30 seconds for sprays.
Operate the slider in short, controlled motions: move it forward and back ~1–2 cm per stroke, keeping pressure light. Perform 12–20 strokes, pause, inspect for trapped fabric or teeth misalignment, then repeat up to three cycles. If resistance drops, stop after the next full pass to avoid over‑application.
Precautions: test any product on a hidden seam for colorfastness before application; do not use vegetable oil, cooking grease, or heavy petroleum products that leave stains. Protect fabric with a folded cotton cloth while applying lubricant and when using pliers. For cold conditions, warm the slider with a hair dryer on low for 15–30 seconds to loosen frozen residue before lubricating.
If the slider still binds after three lubricant cycles and inspection, do not force hard; inspect for jammed threads with a pin or tweezers and reapply a tiny amount of dry lubricant to the specific snag point before attempting further movement.
Realign or reshape a loose slider with pliers to restore grip on teeth
Immediate action: Use needle-nose or flat-nose pliers with padded jaws and a thin leather or denim shim; apply controlled inward pinches of 0.3–0.8 mm at the slider throat. Perform one adjustment, then run the slider 10–20 mm along the track to verify engagement; repeat up to 4–6 light adjustments until consistent tooth capture occurs.
Metal sliders: concentrate compression symmetrically on the two side walls just behind the funnel-shaped entry and at the rear gusset. For lateral offset, add a single light squeeze on the top face (about 0.2–0.5 mm) to re-center the rails. Plastic sliders: avoid heavy crimping; gently warm to roughly 50–60 °C with a hair dryer for 20–30 seconds and reshape using rubber-jawed pliers. If cracking or fragmentation appears, replacement is recommended.
Deburring and alignment check: remove sharp burrs on metal teeth with a jeweler’s file or 600–800 grit sandpaper–work longitudinally and remove minimal material. Verify alignment by holding the assembly vertically and observing the slider travel under light linear load (~3–5 N); smooth, uniform travel across >80% of the tested length indicates acceptable grip. Excessive binding after a squeeze means back off slightly.
Required tools: needle-nose pliers, flat-nose pliers, rubber-jawed pliers, thin leather/denim shim, calipers (or feeler gauge), jeweler’s file, 600–800 grit sandpaper. For pre-adjustment cleaning of surrounding fabric material consult best pressure washers for natural stone for suitable equipment recommendations.
Repair missing or bent teeth and reinforce the tape with simple sewing
If teeth are missing or bent, shorten the track past the damaged area, install a new metal stop and reinforce the tape with a sewn patch.
- Tools and supplies:
- Flat-nose pliers and small needle-nose pliers
- Replacement metal stops or crimp-on end-stops (6–8 mm width)
- Heavy-duty polyester or bonded nylon thread (tex 70–135 or upholstery thread)
- Hand sewing needles size 90/14 or 100/16, thimble; machine: denim/jean needle 100/16
- Nylon/Cordura patch or matching fabric patch (allow 2–3 cm overlap each side)
- Seam ripper, small metal file, awl for pilot holes, fabric cement (optional)
- Lighter or heat source for synthetic tape sealing (brief passes only)
- Assess damage: measure how many consecutive teeth are unusable. If more than 3–4 teeth in the center are missing, plan for track replacement; if damage is within 1–3 teeth near an end, proceed with shortening.
- Shorten and terminate the track:
- Use pliers to remove 1–2 teeth beyond the damaged section so the new end is clean. Leave ~5–7 mm of exposed metal teeth or at least 6 mm of tape beyond last retained tooth for a stop.
- Slide a metal end-stop onto the teeth, position it 3–5 mm past the last tooth, then crimp firmly with flat-nose pliers. Crimp in two stages: light squeeze to align, firmer squeeze to lock. Avoid crushing the tape.
- Trim excess tooth/tape if necessary. Seal synthetic tape edge with a 0.5–1 second pass of a lighter held 1–2 cm away; do not hold flame directly; test on scrap first.
- Realign bent teeth (metal):
- Cover teeth with a thin cloth to prevent scratching. Use flat-nose pliers and press gently to return each tooth to its original profile. Work incrementally–small adjustments per tooth.
- After reshaping, remove any burrs with a fine metal file and wipe debris away.
- Test closure by manually joining teeth to check smooth engagement; if teeth still gap, shorten and terminate as above.
- Reinforce frayed or weakened tape by hand sewing:
- Cut a fabric patch 2–3 cm wider than the damaged area. Round corners to reduce snagging.
- If using synthetic tape, apply a thin line of fabric cement to the tape and press the patch in place; allow cure time per product instructions.
- Thread a heavy-duty needle with double thread and knot. Use backstitch or small running stitch at 2.5–3 mm spacing for strength. For high-stress ends, add bartack-style box stitches (a 1 cm × 1 cm box with dense zigzag or multiple passing stitches).
- If sewing by machine: set stitch length 3 mm, use denim needle 100/16, sew twice around the patch perimeter and add bar-tacks every 8–12 mm where the pull will bear load.
- For very thick tape, pre-punch holes with an awl spaced 3 mm apart to guide the needle and reduce thread abrasion.
- Secure terminal area:
- Create a folded tab from the same patch material and stitch across the end of the tape to distribute load; stitch width should cover at least 1.5 cm of tape on both sides.
- Add two or three parallel rows of stitching (3–5 mm apart) across the tab for redundancy.
- If a metal stop was crimped earlier, stitch a small reinforcing box around that end to prevent tape tearing under tension.
- Final checks:
- Trim loose threads and apply a drop of clear fabric glue to end knots for extra security.
- Operate the closure manually through its full travel to confirm teeth alignment and smooth action; if rough spots persist, inspect for missed burrs or misaligned teeth and correct.
If damage is widespread across the track or in the middle section and shortening would render the opening unusable, replace the entire track assembly or consult a repair shop that can swap the full tape and teeth. Minor local repairs as described restore functionality and significantly extend service life for localized missing or bent teeth and frayed tape.
Replace a slider or stopper on a pack closure without replacing the whole assembly
Use a matched replacement slider and crimp-style metal or molded plastic stops sized to the tooth gauge (#3 ≈ 3mm, #5 ≈ 5mm, #8 ≈ 8mm) and the tooth type (coil vs. molded) for a durable result.
Required tools and consumables: needle-nose pliers, flat-nose pliers, small flat screwdriver, seam ripper, heavy nylon or upholstery thread, sharp sewing needle, replacement slider(s) and stop kit, a ruler or caliper, fray-preventing liquid (Fray Check or clear nail polish).
Measure tooth gauge by closing teeth and measuring across the width of the closed chain; match that to slider sizing stamped on replacement parts or product pages. Coil zips need sliders labeled “coil” or “nylon”; molded teeth need “nylon molded” or metal-specific sliders.
Procedure: remove the damaged top/bottom stop with flat-nose pliers or a small screwdriver by prying it open, slide the old slider off the tape, insert the new slider with the pull tab facing the same direction as the original, run the slider slowly to seat both sides of the teeth. Test through several full open/close cycles before installing new stops.
Install new stops by positioning the crimp stop 2–3 mm beyond the last engaged tooth, align squarely on the tape, and crimp firmly with flat-nose pliers until the stop compresses evenly. For extra security make two stops spaced 1–2 mm apart or hand-sew 6–8 tight passes of heavy thread over the tape end directly behind the stop; trim excess thread and seal with fray-preventing liquid.
Notes on separating closures: if the closure is separating (has pin-and-box at the bottom) and the slider is the wrong type, replace the pin-and-box set (available in repair kits) before adding a new slider; closed-end chains require only top stops and a compatible closed-end slider.
Temporary emergency stop options: fold the tape back and sew a thick bartack 6–10 mm from the teeth, or crimp a small split-ring or keyring through the tape beyond the last tooth as a temporary catch. Replace with a proper crimp stop at first opportunity.
Replacement sliders and stop kits are widely available at sewing suppliers and online marketplaces; sample resource for parts and kits: best fishing umbrella with sides.
FAQ:
My backpack zipper keeps separating after I zip it up. What usually causes this and how can I repair the slider so the teeth stay together?
Common causes are a worn or warped slider, damaged teeth, or a misaligned zipper tape. To check, zip the bag slowly and watch where the separation starts. If the slider rides past bent teeth, gently realign the teeth with a flat tool or small pliers. If the slider is loose, remove the top stop (or carefully pry off the old stop), slide the zipper fully open and pull the slider off. Replace it with a matching-size slider, or mildly compress the original slider’s back and front plates with pliers to tighten its grip — apply gentle, even pressure and test repeatedly so you do not pinch the teeth. After reattaching, reinstall or replace the stops so the slider cannot come off. Finish by lubricating the teeth with wax or a graphite pencil to smooth operation. If teeth are missing or heavily bent, replace the zipper or seek professional repair.
The zipper pull broke while I was out. What quick fixes will get me home, and how can I attach a durable replacement later?
For an immediate fix use a paperclip, keyring, small carabiner, zip tie, or a loop of cord or shoelace threaded through the slider hole. These options let you operate the zipper until you reach a proper repair. For a longer-lasting replacement buy a zipper pull kit, a replacement pull tab, or a short length of paracord with a knot. To attach paracord: thread it through the slider hole, fold it, and secure with a tight knot; melt the ends of synthetic cord to prevent fraying. Metal zipper pulls and branded replacement tabs slide on or clip in with pliers. If the slider itself is damaged, replace the slider rather than just the pull.
The zipper track on my backpack is sewn into the seam and the slider is stuck. Can I replace the whole zipper myself, and what tools and steps are required? When is a shop a better option?
Replacing a sewn-in zipper is doable at home but takes time and the right tools. Tools: seam ripper, heavy-duty sewing needle or industrial sewing machine, strong polyester or nylon thread, replacement zipper of the same tooth type (coil or molded) and length, pins or clips, pliers, and new top/bottom stops or small metal stops. Steps: 1) Remove stitching holding the old zipper with a seam ripper, keeping fabric intact. 2) Take out the slider and compare the old zipper type and length to purchase a match. 3) Position the new zipper so teeth align with the original seam lines; pin or clip it in place. 4) Hand-sew or machine-sew with reinforced stitches along the tape, backstitching the ends. 5) Add or crimp new stops to keep the slider from running off. Test the zipper several times under load and reinforce stress points with extra stitching or a small fabric tab. Choose a repair shop if the bag uses waterproof laminated fabric, has welded seams, contains internal frames, or if you lack a suitable heavy-duty machine; specialists can install factory-style zippers and preserve protective coatings. For high-value backpacks, professional replacement can extend life more reliably than a rush home repair.