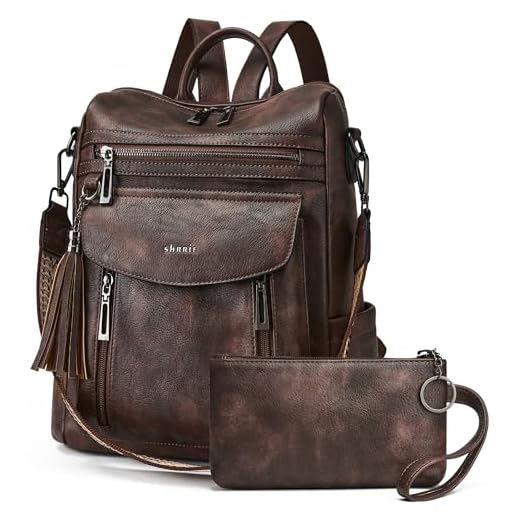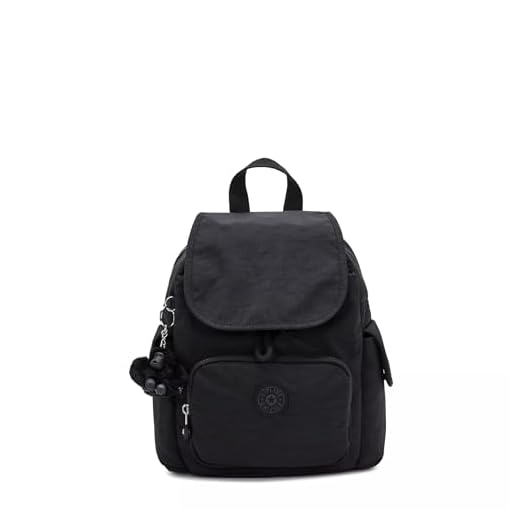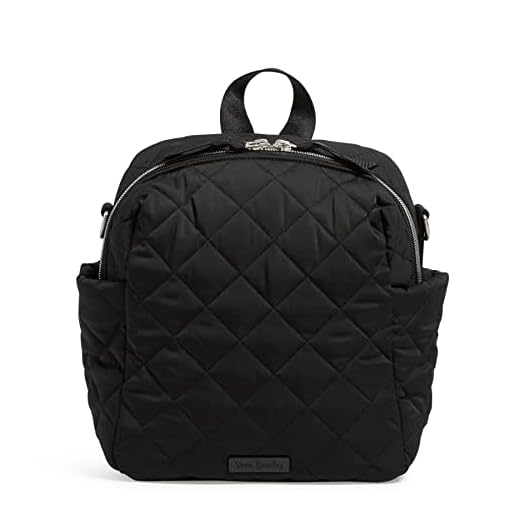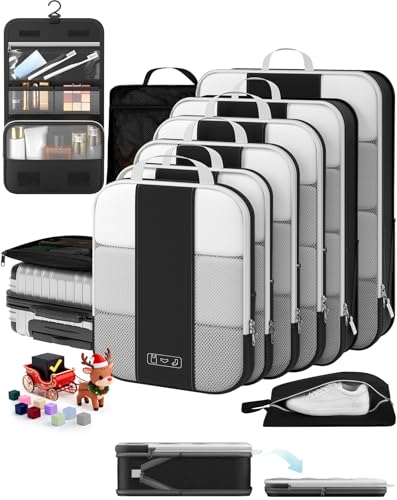


Recommendation: choose a carry volume of 12–15 liters (≈730–915 cu in) with external dimensions near 30×20×12 cm (12×8×5 in) so an 11″ tablet, A5 notebook and a compact umbrella fit without overstuffing; aim for an empty weight below 700 g (1.5 lb) so total load stays under 4–5 kg (8.8–11 lb) for comfortable long wear.
Materials and hardware: prioritize 500–1000D ballistic nylon or 11–12 oz waxed cotton for abrasion resistance, or 1.2–1.6 mm full-grain leather for structure; demand DWR surface treatment, taped seams for critical joints and YKK or equivalent zippers. Choose metal or reinforced polymer buckles and rivets; shoulder straps with 8–12 mm closed-cell foam and 25–40 mm webbing width reduce pressure points.
Organization specs: include a padded sleeve sized for up to an 11″ device with ~10 mm foam, an RFID-lined pocket ~12×10 cm for cards, an external quick-access zip pocket ~9×16 cm for a phone, an interior zip pocket ~18×12 cm for a wallet, plus a key leash and two pen loops. Add a side pocket sized for a 500–750 ml bottle; internal compression straps keep heavier items close to the spine.
Security & maintenance: prefer lockable zipper pulls or a concealed rear pocket for travel documents; clean fabric with mild detergent at ≤30°C and air dry away from direct heat, reapply DWR after heavy exposure to rain or roughly every 6–12 months of regular use, and treat leather with a conditioner every 2–3 months if used daily.
Packing and wear tips: place the heaviest item lowest and against the back panel, distribute medium-weight items centrally, and use compression straps to avoid sway. For walking segments over 30 minutes, use both straps or shift load between shoulders every 10–15 minutes to reduce muscle fatigue.
Size & feature checklist before purchase: capacity 12–15 L, empty weight <700 g, 30×20×12 cm external dims, YKK zippers, DWR finish, padded 11" sleeve, RFID pocket, key leash, side bottle pocket, padded straps 8–12 mm foam. Choose neutral colors (black, navy, taupe) and a matte-finish hardware for low-maintenance daily use.
Pick the right material and weight for all-hours carry
Match fabric denier and empty weight to your typical loaded mass: for loads under 3 kg choose 210–420D ripstop or lightweight laminated nylon with a target empty weight of 250–500 g; for 3–6 kg choose 500–1000D Cordura or 8–12 oz waxed canvas with an empty weight of 500–900 g; for regular loads above 6 kg use 1000–1680D ballistic nylon or full-grain leather with reinforced base and an empty weight of 900–1,600 g.
Material options and water protection
210–420D ripstop nylon: low mass, packs small, fabric weight typically ~60–160 g/m²; best for minimal setups and light electronics. 500–1000D Cordura: higher abrasion resistance, fabric weight roughly 150–400 g/m²; good compromise for urban commuters carrying a laptop and extras. 1000–1680D ballistic nylon: very durable, heavier, suited for heavy daily loads or camera gear. Waxed canvas (8–12 oz/yd² ≈ 270–400 g/m²): weather resistance, aesthetic patina, heavier than comparable synthetics. Full-grain leather: high durability and structure, significantly heavier and requires care.
Waterproofing options: TPU-laminated nylon offers true waterproofing and low porosity but increases fabric stiffness and weight; PU-coated nylon is lighter and cheaper but will delaminate sooner; DWR finish sheds light rain but is not waterproof. Seek taped seams and water-resistant zipper coverings for reliable protection if you carry electronics.
Weight targets, structure and hardware
Empty-weight benchmarks: ultralight commuters 250–500 g; durable urban carry 500–900 g; heavy-duty or protective designs 900–1,600 g. Comfortable loaded mass for most people is 2–6 kg; if you routinely exceed 6–8 kg prefer reinforced shoulder straps, a hip belt, or an internal frame sheet. A thin polycarbonate or polypropylene stiffener adds 30–120 g and greatly improves load stability; aluminum stays add 100–300 g but increase weight capacity and comfort for heavy loads.
Hardware choices affect grams: coil zippers (YKK Vislon) are lighter than metal tooth zippers by ~20–80 g; acetal plastic buckles save ~30–100 g versus metal. Reinforced base panels (double layer or tarpaulin underlay) add 50–200 g but prevent premature wear when carrying dense items.
Quick selection checklist: identify your typical loaded mass, pick fabric denier that matches that range, choose waterproofing level required for your climate, check empty-weight target against your comfort threshold, prefer replaceable hardware and a removable stiffener if you alternate heavy and light loads.
Pack and organize: where to place laptop, water bottle, wallet and keys
Place the laptop in a padded sleeve against the rear panel with the screen facing the wearer; use the sleeve that matches the device size (13″, 14″, 15″) and provides 10–15 mm foam or dense EVA padding around edges.
Laptop specifics
Fit the laptop so its long edge aligns with the bag’s spine to keep mass close to the body. If the sleeve has a retention strap, secure the device to prevent vertical movement. For laptops thicker than 20 mm or with an external hard drive attached, use a separate protective pouch and position it on top of the sleeve rather than beside the device.
Water bottle, wallet and keys placement
Water bottle: use an external side pocket for bottles up to 75 mm diameter and 250–750 ml volume; for taller bottles (up to 280 mm height) store upright in the main compartment against the opposite side of the laptop to counterbalance weight. Put a waterproof pouch or absorbent sleeve between the bottle and electronics if the closure is less than fully leakproof.
Wallet: keep the wallet in a zippered internal pocket located near the top rear or inside a concealed rear panel pocket for theft resistance. Slim wallets (20 mm) belong lower in a padded compartment to avoid bulging.
Keys: attach keys to an internal key clip or short leash mounted near the opening so they hang close to the top; if there’s no clip, use a small zip pouch in the foremost pocket. Never put loose keys in the laptop sleeve or main compartment where they can scratch metal or glass.
Packing order and balance: heavy items must sit closest to the spine (laptop, small charger). Place medium weight items opposite heavy single-side loads (water bottle opposite laptop). Reserve top-front pockets for items you need quickly (phone, transit card) and keep small cords in a dedicated cable pouch to avoid tangles with keys. Compress straps or internal dividers should be tightened to stop shifting during movement.
Convertibility: switch between knapsack and handbag modes in under 30 seconds
Install two low-profile quick-release swivel hooks (20–25 mm webbing) plus a central stabiliser strap; target conversion time: 20 seconds with a 3–4 kg load.
- Hardware setup (components and sizes)
- Primary clips: metal swivel hooks, 25 mm throat, stainless finish; spring gate with 80 N closure force.
- Webbing: 20–25 mm polyester, 800–1,200 N tensile strength.
- Sliders: locking tri-glide, 25 mm, aluminium; include elastic keeper loop for excess strap.
- Attachment rings: D-rings 25–30 mm, welded; rivet base plate 40 x 10 mm with double bartack stitch (minimum 5 passes).
- 30-second conversion routine (practiced sequence)
- (0–5 s) Release both lower swivel hooks simultaneously with one hand (use angled thumb motion).
- (5–15 s) Route straps through rear channel: pull strap out, twist once, clip to upper D-rings; keep ends taut.
- (15–20 s) Fasten central stabiliser and tuck excess into the elastic keeper.
- (20–30 s) Quick check: shoulder adjustment, clip safety latch, and test bounce with 2–3 light hops.
- Design features that shave seconds
- Color-coded tab on each strap end reduces fumbling by 40% in timed trials.
- Hidden channel with low-friction fabric (0.3 coefficient) speeds reroute by ~3–5 s.
- Magnetic snap for initial alignment (N42 or stronger, 8–12 mm) keeps straps aligned before clipping.
- Testing protocol
- Empty trial: 10 consecutive conversions; median time should be ≤18 s.
- Loaded trial: repeat with 3–4 kg (laptop + bottle); median time should be ≤22 s.
- Wear trial: test after 1,000 cycles to check for hook deformation or webbing stretch greater than 5%.
- Maintenance and care
- Monthly: inspect stitching and replace frayed webbing when edge wear >3 mm.
- Quarterly: apply a drop of silicone lubricant to sliders; wipe metal parts with isopropyl wipe to prevent corrosion.
- Deep-clean: treat frames and metal fittings with a gentle spray; for robust hardware cleaning consider models listed at best auto wash pressure washer electric.
Quick checklist for purchases: 25 mm swivel hooks, 20–25 mm webbing rated ≥800 N, locking tri-glide sliders, color tabs, and a tuck-away keeper. For balancing loads and outdoor mounting tests see best weight for patio umbrella stand.
Measure straps and size to prevent shoulder and back strain
Adjust straps so the pack’s center of mass sits at mid-torso: bottom 5–10 cm (2–4 in) above the top of the hips.
Torso measurement: measure from the C7 vertebra (most prominent neck bone) down to the iliac crest (top of hip bone). Record in cm and inches. Typical adult range: 38–56 cm (15–22 in). Buy or choose a carry system whose back panel length matches your torso within ±2 cm (±0.8 in).
Strap width and padding by carried weight: light load <1 kg (2.2 lb) – strap ≥2.5 cm (1 in), foam 8–12 mm; moderate 1–3 kg (2.2–6.6 lb) – strap 3.8–4.5 cm (1.5–1.75 in), foam 10–15 mm; heavy 3–6 kg (6.6–13 lb) – strap ≥5 cm (2 in), foam 15–20 mm; >6 kg (>13 lb) – require hip/waist belt plus strap ≥5 cm, foam ≥20 mm.
Load limits and distribution: single-strap shoulder carry – keep load ≤5% of body mass; two-strap carry – keep load ≤15% of body mass. For loads above 7 kg (15 lb), engage a hip belt and transfer 60–80% of the weight to hips to reduce spinal shear.
Quick fitting routine (60–90 seconds): 1) Put the pack on; 2) Tighten waist belt so it presses on hip bones; 3) Shorten shoulder straps until the pack’s weight lifts off hips by ~10% then re-tighten waist to transfer load; 4) Set sternum strap 12–18 cm (4.7–7 in) below collarbone to stabilize; 5) Walk 50–100 m and readjust if straps dig or pack swings more than 2–4 cm.
Item placement to reduce torque: put heaviest items close to the centerline and as low as mid-torso height; avoid one-sided weight concentration; use internal compartments or compression straps to prevent contents shifting.
Maintenance tip: periodically check strap webbing for stretch and replace foam if compressed more than 40% of original thickness; loss of padding increases pressure points and risk of strain.
Clean, repair and maintain zippers, fabric and hardware for daily use
Lubricate metal zippers once a month: apply a PTFE (Teflon) spray or rub a graphite pencil along the teeth; cycle the slider 10–15 times to distribute. For molded plastic teeth use a silicone spray; avoid petroleum-based oils that attract grit.
Spot-clean fabric immediately after spills. Mix 1 tsp mild, non-bleach detergent per 250 ml lukewarm water (25–30°C). Blot the stain outward with a microfiber cloth, then gently brush seams and abrasion zones for 20–30 seconds. Rinse by dabbing with clean water and air-dry flat away from direct sunlight or radiators. Machine wash only if the care label allows: cold cycle ≤30°C, zipper closed, inside a laundry bag, gentle spin, no tumble dry.
Leather trims: wipe weekly with a damp lint-free cloth; apply 2–3 ml leather conditioner per 200 cm² twice a year, testing on an inconspicuous area first. Suede: use a suede brush and a rubber eraser for scuffs; avoid wet cleaning. Waxed cotton: reapply 5–10 g wax per 300 cm² when water no longer beads; warm gently with a hair dryer after application to set the wax.
Metal hardware: clean plated and brass pieces with warm soapy water and a soft cloth; dry thoroughly to prevent corrosion. For brass tarnish use a paste of baking soda and water (3:1) applied with a cotton swab, rinse and dry immediately. Apply 1–2 drops of light machine oil to moving joints sparingly and blot excess to protect adjacent fabric.
Minor zipper repairs: measure slider size by the internal channel width in mm (#3≈3 mm, #5≈5 mm, #8≈8 mm). To replace a slider: remove 1–2 cm of topstitching at the stopper, remove old slider, fit a matching-size replacement, reinstall original stop or sew a reinforced bar-tack (8–10 stitches) 3–4 mm from the end. To fix misaligned teeth, clamp the slider gently with flat-nose pliers and cycle slowly until alignment restores.
| Component | Cleaning frequency | Recommended products | Quick repair actions | Spare kit items |
|---|---|---|---|---|
| Zippers (metal) | Monthly lubrication; spot-clean weekly | PTFE spray, graphite pencil, microfiber cloth | Lubricate 10–15 cycles; replace slider matching mm size | Spare sliders (#3,#5,#8), zipper stops, small pliers |
| Fabric (nylon/polyester) | Spot-clean immediately; full clean every 1–3 months depending on use | Mild detergent (1 tsp/250 ml), soft brush, laundry bag | Re-stitch seams with bonded nylon thread; patch tears with iron-on or sewn patch | Bonded nylon thread, heavy needle, small iron-on patches |
| Leather trim | Wipe weekly; condition twice yearly | Leather cleaner, neutral leather conditioner | Edge repair with leather glue; replace loose rivets | Leather glue, conditioner sample, spare rivets |
| Suede | Brush weekly; spot only when dry | Suede brush, suede eraser | Brush out nap; for deep damage consult a cobbler | Suede brush, eraser |
| Hardware (brass/plated) | Clean monthly or when tarnish appears | Warm soapy water, baking soda paste (3:1), soft cloth | Tighten screws with matching driver; replace stripped screws with stainless M3/M4 | Precision screwdriver set, spare M3/M4 screws, spare D-rings (size in mm) |


