Set target volume and load: choose 18–28 L for daily commuters, 30–45 L for weekend trips, 50–70 L for multi-day treks. Limit carried mass to 5–10 kg for urban use and 15–25 kg for trekking; place the heaviest items so the hip belt receives 60–80% of the load.
Record user measurements: measure torso length from the C7 vertebra to the iliac crest – common adult range 38–48 cm. Position the sternum strap 10–20 cm below the shoulder apex. Use shoulder webbing 40–60 mm wide for light loads, 60–80 mm for heavier packs; hip belt padding thickness 20–30 mm to distribute pressure across the greater trochanter.
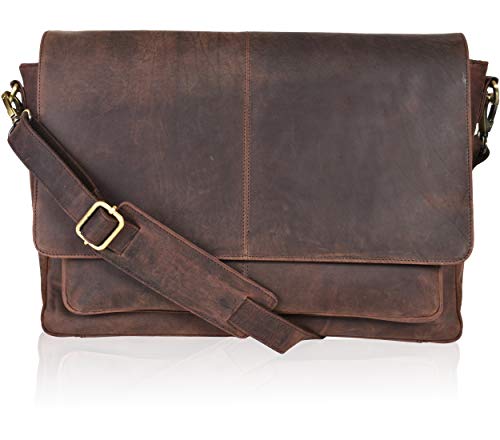
Specify materials and hardware: outer fabric: 500D Cordura for low-abrasion applications, 1000D or reinforced panels where abrasion is high; PU coating rated 1500–3000 mm hydrostatic head for weather resistance. Zippers: YKK #5 on pockets, YKK #8 or larger on main openings. Webbing: 20–30 mm for straps, 25–40 mm for hip belts. Use ladder-lock buckles and aluminum or reinforced polymer stays if expected loads exceed 15 kg.


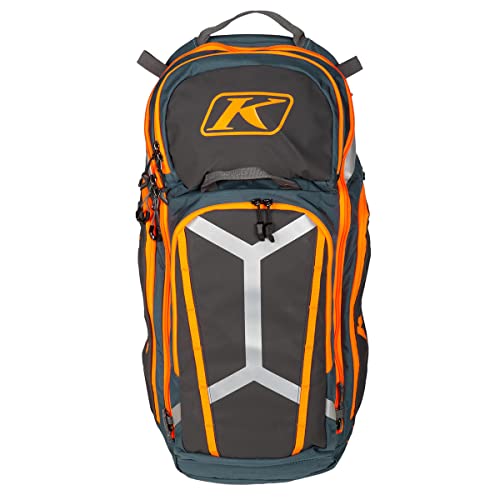
Organize internal layout by function: allocate 15–20% of total volume to a padded laptop/tablet sleeve; reserve 1.5–3 L for small-item organizer pockets (chargers, keys, pens). Include a hydration sleeve sized for 1.5–3 L reservoirs with a top hose port. Add 2–4 lateral compression straps adjustable 20–30 cm each and external lash points spaced ~30–40 mm for modular attachments.
Define construction tolerances and testing: use a seam allowance of 10–12 mm and stitch length of 3–4 mm; apply double-needle seams on load-bearing joints and bartack reinforcements at strap terminations. Back panel: closed-cell foam 8–15 mm with a lumbar pad 20–30 mm and a central vent channel 20–30 mm wide for airflow. Prototype and test at incremental loads of 25%, 50%, 75% and 100% of target mass to verify fit, strap comfort and seam integrity.
Calculate required volume and load capacity from a detailed gear checklist
Choose a carrying volume ≥ 1.25 × summed compressed volumes and a load rating ≥ 1.2 × total trip mass (including water and fuel); round both up to the nearest common model (e.g., 40 → 45 L, 10 kg → 12 kg).
-
Build the checklist with three columns: item name, mass (g), packed volume (L). Mark each item as compressible or rigid.
-
Apply realistic packed volumes:
- Down sleeping bag (compressible): 6–12 L
- Synthetic sleeping bag: 8–15 L
- Tent (two-person, poles in sleeve): 8–14 L
- Single-wall shelter: 4–8 L
- Sleeping pad (inflatable): 3–8 L
- Cook kit + stove: 1–3 L
- Clothing (layered, compressed): 6–12 L total
- Food: 0.9–1.4 L per day per person
- Water: 1 L = 1 kg and 1 L (carry actual liters needed)
- Extras (first aid, tools, electronics): 1–4 L
-
Classify compressible items and reduce listed volumes by expected compression factors:
- Down: packed at 30–50% of loft volume (use lower % for high-fill down)
- Synthetic: 40–65%
- Tents: 80–95% (limited compression)
-
Calculate totals:
- Total mass (kg) = Σ(mass_g) / 1000 + consumed consumables (food, fuel burn, water planned)
- Total packed volume (L) = Σ(adjusted volumes)
-
Apply safety margins and final selection rules:
- Volume target = Total packed volume × 1.25 (allowing for re-packing, added items, gear pockets)
- Load rating target = Total mass × 1.20 (rounded up to next available rating); add extra 2–3 kg if long trips or heavy rain gear expected
- Choose a carry system where loaded mass ≤ 20% of user body weight for comfortable multi-day trips (aim ≤ 15% for smaller or older users)
Example calculation:
- Checked items (compressed totals): shelter 9 L/1.2 kg, sleep system 12 L/1.3 kg, clothing 8 L/1.2 kg, cook+stove 2 L/0.7 kg, food (3 days) 3.6 L/2.1 kg, water carried 2 L/2.0 kg, extras 3 L/0.8 kg → Total volume 39.6 L, total mass 9.3 kg.
- Volume target = 39.6 × 1.25 = 49.5 L → select ~50 L model.
- Load rating = 9.3 × 1.20 = 11.16 kg → select pack rated ≥ 12 kg; for margin pick 15 kg-rated if long route or heavy wet gear expected.
Placement tip: allocate fixed-volume pockets for frequently accessed items (water, rain layer, map). For compact rain protection consider carrying a small umbrella such as best classy umbrella or a compact stick/golf option: best umbrellas compact stick golf.
Fabrics, laminates and hardware for waterproofing, abrasion resistance and target weight
Use a layered specification: midweight outer (500–1000D nylon/Cordura, roughly 300–700 g/m²) at high-wear zones, lightweight ripstop (70–210D, ~40–120 g/m²) elsewhere, and a waterproof laminate (TPU or DCF) on the face where wetting is unacceptable; finish with fully taped or welded seams and YKK VISLON #8–#10 on the main opening.
Fabrics and laminates
Choose by abrasion index and target grams per square metre. Typical practical ranges: ultralight laminated DCF (Dyneema Composite Fabric) 30–150 g/m² – waterproof and zero sewing hole leakage when welded; 70–210D nylon ripstop ~40–120 g/m² – light, moderate abrasion resistance; 500D Cordura ~300–400 g/m² – balanced durability/weight for everyday use; 1000D Cordura ~600–750 g/m² – maximum abrasion resistance for contact zones. Use heavier denier or patching (1000D) at base, shoulder lash points and compression strap anchors.
Laminate choice controls waterproof rating and flex-life: TPU laminates give high hydrostatic head and better flex-crack resistance than basic PU; target laminate specifications: 5,000 mm HH for prolonged showers, 10,000+ mm HH for sustained immersion. For completely stitchless panels use welded DCF or fully welded TPU laminates; if sewing is required, plan seam tape compatible with the laminate chemistry (TPU tape on TPU laminate, PU tape on PU coatings).
Coatings, DWR and seam strategy
PU coating on woven nylon gives abrasion buffer and easier sewing but adds weight and can delaminate under heat; expect added 50–200 g/m² depending on coat weight. Silicone coatings increase repellency and tear strength but complicate sewing and dyeing – use for roll-top or tarp-like panels. Choose PFC-free fluoropolymer DWR treatments for the face fabric and specify reproof interval (12–24 months under heavy use). Always specify seam treatment: welded for laminates, hot-bond tape for PU, and liquid seam sealer only as secondary protection.
Hydrostatic head targets: 1,000–3,000 mm for splash resistance (day use), 5,000 mm for prolonged downpour, 10,000+ mm for guaranteed waterproof performance. If relying on zippers rather than roll closures, pair an AquaGuard or taped YKK zipper with taped seams and a secondary storm flap.
Zippers and hardware: use YKK VISLON (injection-molded) #8–#10 for main compartments where tooth durability matters; use YKK AquaGuard (coated coil) for pockets where water-shedding and low friction matter (#3–#5). Buckles: ITW Nexus or Duraflex acetal for most closures; use aluminum or stainless steel for load-bearing buckles only when corrosion resistance and tensile strength justify the weight penalty. Webbing widths: 25 mm for small straps, 38–50 mm for shoulder straps and hipbelt load transfer; specify 25–30 mm ladder-locks for perimeter compression and 40 mm or wider for primary torso adjustments.
Stitching and reinforcement: use bonded nylon or polyester thread (Tex 70–92 range) with bar-tacks at all load points and minimum stitch density of 8–10 stitches/cm on shoulder/hip interfaces. For welded laminates remove sewn entries where possible; otherwise back those areas with a boning/patch of 500–1000D fabric to spread loads.
Weight budgeting rules of thumb: for a finished pack under 800 g, target shell fabrics <100 g/m² and laminated DCF panels; for 800–1,400 g choose mixed 210D ripstop + TPU laminate + reinforced 500D high-wear zones; above 1,400 g expect full 500–1000D Cordura external panels and heavier hardware. If internal gear includes electronics such as a camera, provide a sealed, padded pocket (waterproof zipper + TPU lining) sized to the item – example reference: best digital camera for 9 year old boy.
Frame, backpanel and strap geometry for load distribution and pressure-point elimination
Use an internal frame with dual aluminum stays or a continuous carbon frame sheet plus a segmented lumbar pad to shift 60–70% of carried mass onto the hips for multi-day loads (10–25 kg); reserve shoulders for stabilization and small load adjustments.
Frame placement: extend stays from about ~2 cm below C7 (base of the neck) to 2–3 cm above the iliac crest. Keep the frame sheet width in the lumbar region 80–120 mm to channel forces into the hipbelt while avoiding lower-rib contact. For aluminum stays use flat bars 6–8 mm thick; for carbon use 8–10 mm diameter rods or a 2–3 mm carbon sheet depending on desired flex.
Backpanel geometry: use 3 vertical foam columns, each 20–30 mm thick, with a central ventilation channel 30–50 mm wide and a mesh spacer of 10–15 mm between foam and skin. Foam density 180–250 kg/m³ (EVA or closed-cell) for balanced load distribution and recovery. Radiused foam edges 8–12 mm reduce edge pressure.
Shoulder straps: pre-curved S-shape with a vertical curvature radius of 120–140 mm. Padding 15–25 mm high-density foam; width 50–70 mm for day loads and 70–100 mm for heavy loads. Top anchor spacing (across the trapezius) 110–140 mm. Sternum strap should be adjustable vertically over a 50–100 mm range and sit approximately 5–15 cm below the clavicle when used. Load lifters anchored at the shoulder strap top should pull upward at 20–30° to bring the pack’s upper mass toward the torso.
Hipbelt and lumbar interface: center the hipbelt on the iliac crest; vertical pad coverage of 12–18 cm per side and pad thickness 25–40 mm with foam density 180–250 kg/m³. Shell curvature should match an iliac crest radius of 90–120 mm. For heavy loads use a 3D-contoured hipbelt with a load-bearing stiffener beneath the padding to prevent collapse and maintain force transfer.
Eliminate pressure points by tapering strap and pad edges, using rounded contact geometries and low-friction liner fabrics. Implement micro-adjustable anchors: shoulder-height adjustment range 40–60 mm, hipbelt rotation freedom 15–25 mm lateral travel to allow torso rotation without creating local shear spikes.
Validation checklist: with target load in place, tighten hipbelt fully and shoulders for comfort, then check for hot spots using a pressure mat. Aim for peak shoulder interface pressure 30 kPa and peak hip interface pressure 50–60 kPa; any localized spikes above these values require pad reshaping, wider straps or increased padding radius. Field test with 30–60 minute walks and adjust anchor positions until sustained comfort is achieved.
Create patterns, sew a functional prototype and run structured wear tests for fit and durability
Cut full-scale calico (130 g/m²) mockups with 5 mm seam allowances, 10 mm at strap anchor hems and 15 mm for rolled hems; mark all notches, zipper stops and foam cavities; produce three size grades (S/M/L) with chest strap anchor shifts of +15 mm per grade and hipbelt wrap increase of +20 mm per grade.
Use a paper master pattern and digitize to DXF for CNC cutting; maintain pattern tolerance ±3 mm. Add a 6 mm relief notch where curved seams meet stiff components to prevent puckering; transfer stitch lines and interface points to fabric with washable chalk and numbered tags for assembly tracking.
Sew functional prototypes with a walking-foot industrial machine: 110/18 or 120/19 needles for laminated or heavy-weave fabrics, bonded polyester thread Tex 40–70 for main seams, bonded nylon for high-wear points. Standard stitch length 3.0–3.5 mm on body seams, 2.5 mm for bartacks; use box-x or bar-tack reinforcement for strap anchors (box 25 × 25 mm with 6–8 mm stitch density) and a minimum of 16 mm bartack length at zipper ends.
Make three iterative builds: 1) calico mockup to verify geometry and load paths; 2) functional prototype with final materials and full hardware; 3) pre-production pilot run of 5 pieces to confirm repeatability. Accept dimensional variation ±5 mm between pilot units for release to wear testing.
Laboratory durability sequence: tensile test shoulder/hip anchors to 1,000 N static (no slippage), cyclic loading 10,000 cycles between 50–300 N at 1 Hz to simulate walking; seam tensile test per sample to 800 N minimum before rupture. Abrasion: Martindale or Taber equivalent to 10,000 cycles with visual rating (no holes larger than 3 mm). Zipper pull-off test 200 N static; water-testing reserved for coating section.
Field wear protocol: recruit 5 testers per size (total 15), mixed gender and torso lengths; use instrumented runs: days 1–3 urban commutes 20 km/day at typical load; days 4–7 trail pack at 60–70% of target carrying weight for 8 hours/day; repeat one week later under wet conditions. Log daily distance, load mass, perceived fit score (1–10) and note serviceability issues: seam opening, strap stretch, foam compression, zipper jams.
Quantitative pass/fail thresholds after 100 hours field use or 10,000 simulated cycles: shoulder strap stretch ≤ 12 mm; seam elongation ≤ 10% at primary seams; foam rebound ≥ 60% of original thickness; no structural failures at anchor points; zippers operate smoothly with <3 jam incidents per 100 cycles. If any threshold is exceeded, assign root cause and implement one corrective action per failure mode.
Common corrective actions and exact adjustments: increase reinforcement tape width from 16 mm to 25 mm at anchors; add a 1.2 mm webbing channel under strap base; change stitch pattern to a double-row 3.5 mm topstitch with 10 mm spacing; relocate strap anchor 10–15 mm closer to the pack centreline to reduce moment arm; increase bartack density by 20%.
Record every prototype with a unique ID, photo log of all seams, batch numbers for fabrics/coatings/hardware and a failure matrix listing mode, location, load at failure, and corrective action. Run the corrected prototype through the same lab and field sequences before approving changes for production tooling.