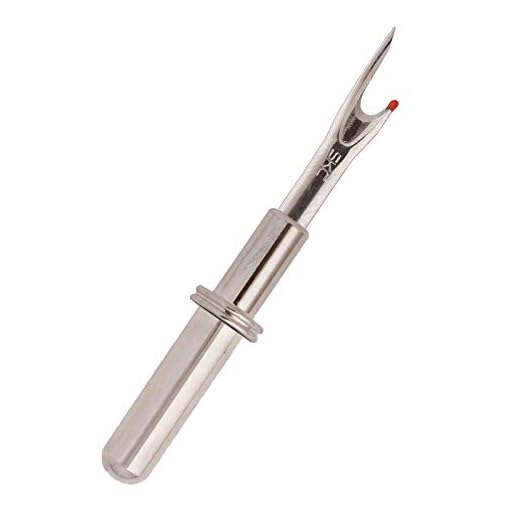


Tools: pointed seam ripper, curved embroidery scissors (15–25 mm blades), pointed tweezers, magnifying loupe (3–6×), low-temp iron, thin metal spatula or dental pick, cotton swabs, 70% isopropyl alcohol, textile-safe citrus adhesive remover, small vacuum crevice nozzle, nitrile gloves, soft nylon brush.
Stitched motif technique: turn the item inside out and secure the panel to keep fabric flat. Work under magnification; insert the seam ripper under a thread tail and cut every 6–10 stitches rather than long runs. For dense machine work (over 6 stitches per cm) expect 10–60 minutes: a 3 cm circular patch ≈10–20 minutes, a 10×10 cm panel ≈30–90 minutes. Pull cut threads through with tweezers, trim remaining loops with scissors while keeping blade tips parallel to the fabric to avoid holes, then vacuum loose fibers.
Adhesive-mounted piece technique: test heat tolerance at a hidden seam: for polyester/nylon cap iron at 60–80°C / 140–176°F; for cotton/canvas up to 120°C / 248°F. Apply heat through a press cloth for 8–15 seconds, then slide a thin spatula between backing and textile. If still bonded, dab a textile-safe citrus solvent at the edge, wait 2–5 minutes, then pry gently. Clean residue with 70% isopropyl alcohol. Avoid acetone on PU-coated or nylon surfaces – it can dull or melt synthetic finishes. Work with ventilation and gloves.
Finishing and repair: vacuum all loose fibers, brush remaining adhesive with a soft brush moistened with alcohol, launder per care label in cold water with mild detergent and air dry. Reinforce any weakened area with a small patch sewn in place: polyester thread (size 50–60), needle 80/12 for canvas or 70/10 for lighter fabrics; use backstitch for strength and finish knots on the interior panel. Expect total task time to scale with area and stitch density; plan tools and a clean workspace before starting.
Identify fabric type, stabilizer, and stitch patterns before you begin
Use a 10–30× loupe, bright directional LED, and a fine seam ripper to inspect fiber, backing layer, and stitch density before proceeding.
Fabric identification: perform a water-drop test (beaded water indicates synthetic, rapid absorption indicates natural), a controlled burn test on a clipped thread held with tweezers (cotton chars to gray ash, wool smells like burned hair, polyester melts into a hard bead), and a tactile check for coatings (PU/PVC feels slick and resists pin penetration). Always test on a seam allowance or inside pocket rather than a visible panel.
Backing detection: view the reverse under magnification – tearaway looks paper-like and peels, cutaway appears cloth-like and resists tearing, water-soluble dissolves into a sticky residue when wetted, and fusible adhesives show a thin shiny film that reactivates with low heat. Gently lift a corner of the backing with tweezers to estimate adhesion strength.
Thread and stitch patterns: identify thread by sheen and burn behavior (polyester = shiny + strong + melts, rayon = high sheen + frays, cotton = matte + chars). Classify stitch types: running stitch (single line), satin stitch (dense raised edges), and fill stitch (closely packed rows). Measure stitch spacing with a ruler: tight < 1 mm (difficult to undo), moderate 1–2 mm (manageable), loose > 2 mm (straightforward).
Underside assessment: heavy bobbin thread or dense bobbin packing increases snag risk and slows progress. Conduct a pilot test: unpick 5–10 stitches at an inconspicuous corner, then press with a cool iron to check for coating distortion, color bleed, or fabric weakening.
Essential tools and final checks: 10–30× loupe, sharp stitch ripper, curved micro-tweezers, flush snips, small spray bottle, cool iron, and a phone for reference photos. If loose fibers remain in seams after clearing, consider a targeted air tool such as the best backpack blower on market to extract debris without further handling.
Document the fabric type, stabilizer class, thread fiber, and stitch spacing before proceeding with any intervention so alignment and thread choices can be replicated if reapplication becomes necessary.
Assemble tools and workspace: seam ripper, micro scissors, tweezers, good lighting and magnification
Immediate setup
Prepare a 60–90 cm clear, flat surface with a non-slip towel or rubber mat; position the workpiece so the target area lies flat and accessible without twisting the item. Keep a small LED task lamp (5000K daylight, CRI ≥90) 15–30 cm above the work surface, delivering about 1,000–2,000 lux at the area of focus to reveal fine threads and stitch direction.
Recommended tools and organization
Seam ripper: choose a fine-point ripper with a 2–3 mm cutting tip and a protective ball end on the fork; a curved micro-seam ripper helps access curved stitch rows. Micro scissors: straight or slightly curved blades, blade length 2.5–4 cm, overall length 9–11 cm, razor-sharp tips for single-thread snips. Tweezers: stainless steel fine-point (100–125 mm) plus one angled-tip pair for lifting cut threads. Magnification: headband loupe 1.5–3× for hands-free work and a handheld illuminated loupe 2.5–6× for close inspection; a bench magnifier with 3–5× and built-in LED speeds repeated work. Accessories: magnetic tray for pins/scissors, small labeled zip bags for thread fragments, a lint roller or sticky pad for cleanup, and a small round dish for used needles and metal bits.
Arrange tools in a left-to-right sequence that matches your hand pattern (dominant-hand tools nearest). Use a low-profile clamp or binder clips to stabilize edges when needed. Store the kit in a compact tote or pouch sized 25×15×8 cm; travel shoppers may prefer models such as best travel totes bags for women to carry a complete set.
Work in 5–10 minute intervals with short, controlled cuts: lift the targeted stitch with angled tweezers, snip the thread with micro scissors close to the stitch without piercing the base fabric, then pull the thread out with fine tweezers. Keep a focused light and magnifier aligned as you progress to reduce accidental fabric damage and to keep small fragments contained for disposal.
Step-by-step stitch extraction: cut top threads and work through the lining to avoid holes
Cut only horizontal float threads with a 45° curved micro-scissor; preserve vertical anchor threads to keep fabric tension and prevent visible gaps.
Cut top threads
1. Secure the area with a small clip or low-tack tape on the right side to prevent shifting; work under 3–5× magnification and 5,000–7,000 lux illumination.
2. Identify floats: threads that run across the motif surface. Tip the scissors so the blade faces the fabric plane and slice the float at its midpoint; do not lift the blade vertically through the fabric.
3. For dense satin zones, make multiple targeted cuts about 1–2 mm apart, then tease out short segments with tweezers rather than attempting long pulls.
4. Keep a discard tray for clippings; pause every 30–60 seconds to inspect the right side for stray cuts that could form holes.
Access foundation threads through the lining
1. Flip the item and work on the wrong side through the lining: use a blunt-ended seam ripper to loosen knot points and a pointed pick to separate buried loops without piercing the outer face.
2. Gently pull out cut float remnants with curved tweezers while supporting the surrounding fabric with the non-dominant hand; remove one stitch column at a time to maintain stitch path integrity.
3. For thin or loosely woven textiles, place a small piece (≈2×2 cm) of lightweight fusible interfacing on the wrong side after partial clearance to hold fibers and reduce the chance of new holes while continuing.
4. If a tiny hole appears, avoid stitching immediately; press the area with a warm iron (low steam for synthetics) through a press cloth to close fibers, then reinforce on the wrong side with a fabric patch or water-soluble stabilizer before finishing extraction.
| Stitch type | Where to cut | Tool | Practical tip |
|---|---|---|---|
| Satin (dense) | Midpoint of surface floats, short segments | Curved micro-scissors + tweezers | Work 1–2 mm cuts; remove small chips to avoid snagging |
| Fill / Tatami | Along horizontal rows, then lift vertical anchors | Fine seam ripper + pointed pick | Rotate item to keep gravity pulling fragments away from fabric |
| Running / Straight | Cut at stitch centers | Micro-scissors | Pull gently from wrong side to expose anchors |
| Chain / Knotted | Loosen knot loop on wrong side first | Blunt seam ripper + tweezers | Undo knots rather than slicing whenever possible |
Reference note: unrelated product roundup for aquarium hobbyists – best aquarium filter for betta fish.
Detach adhesive backing and stabilizer gently
Support the area: insert a flat board or thick cardboard under the panel to keep seams flat; anchor the fabric a few millimetres outside the work zone with your thumb to prevent stretch while you work.
Tear-away stabilizer: work on the wrong side; grip the stabilizer edge with fine tweezers and pull at a shallow angle (10–30°) parallel to the fabric surface in short, controlled strokes; stop when resistance increases and use micro scissors to cut small sections rather than applying force.
Cut-away stabilizer: trim close to the stitch line with curved micro scissors, leaving 1–2 mm of material beneath the stitches to avoid nicking thread; place a rigid support under the stitches while cutting and then tease remaining fibers out with pointed tweezers.
Water-soluble stabilizer: soak in warm water 30–40°C (86–104°F) with a teaspoon of mild detergent per litre for 10–30 minutes; agitate gently by moving the fabric, do not rub or wring; blot excess moisture and lay flat to air-dry on a towel.
Fusible or adhesive-backed materials: warm the adhesive with a hair dryer on medium (≈50–60°C / 122–140°F) or a low-heat iron used through a pressing cloth; test heat on an inconspicuous spot first; slide dental floss or thin fishing line under a softened edge and saw while supporting the fabric edge with tweezers; peel at a 30–45° angle, slowly.
Removing sticky residue: test isopropyl alcohol (70–99%) on an unseen area; dab with a cotton swab until adhesive lifts, then wash the area with mild soap and water to remove solvent traces; for delicate or coated surfaces, use a silicone-based adhesive remover sparingly and test first.
When stitches pass through stabilizer: leave a 1 mm tail of stabilizer below each stitch loop; snip loop centers with micro scissors and extract tails with tweezers instead of pulling across the stitch line; support the seam with a finger to absorb tension while cutting.
Preventing seam stress: clamp adjacent material with low‑tack painter’s tape to stabilize edges, work in short sessions to allow fibres and adhesives to relax, and avoid pulling perpendicular to seams–pull parallel or slice small segments instead.
Quick tool & setting guide: curved micro scissors, pointed tweezers, dental floss or thin fishing line, hair dryer (medium), iron (start low and increase gradually), isopropyl alcohol for tests, pressing cloth/parchment; always test technique on a hidden patch before proceeding on visible areas.
Repair fabric holes, trim stray threads and clean residues to restore the pack
Use a patch that overlaps the damaged area by 8–12 mm and secure with heavy polyester or bonded nylon thread.
- Small holes (≤6 mm): apply clear PU repair tape or a fusible patch on the inner face, press firmly, then topstitch a 2–3 mm whipstitch or small zigzag for extra abrasion resistance.
- Medium holes (6–30 mm): cut a visible-side patch of matching fabric 12–20 mm larger than the hole; baste the patch by hand with 2–3 mm stitches, then machine-stitch a box with an X or a 3–4 mm zigzag around the edge using a 90/14 or 100/16 needle.
- Large tears (>30 mm): use a two-layer repair – inner stabilizer or scrap fabric of similar weight plus an outer reinforcing patch; sew multiple rows of parallel stitching 4–6 mm apart and reinforce high-stress points with bar tacks (6–8 mm length).
- Prepare edges: trim loose fibers to 1–3 mm using curved micro scissors; avoid cutting intact weave threads that carry load.
- Align weave: use tweezers to bring fabric edges together and pin or clip in place so the patch sits flat without puckering.
- Stitch selection: hand-sew with a sailmaker’s or upholstery needle for heavy fabrics; use 3–4 mm stitch length on machines for canvas, 2–2.5 mm for lighter ripstop nylon.
- Thread choice: pick bonded nylon or heavy polyester; Tex 70–92 or labeled “upholstery”/“outdoor” thread performs best for straps and high-wear zones.
- Finish: trim thread tails to 2–3 mm and lock ends with 2–3 small backstitches; apply a tiny drop of clear fabric glue at hidden knots to prevent loosening under motion.
Cleaning adhesive and stabilizer residues:
- Test solvents in a hidden spot. For general adhesive film, warm the area with a hairdryer set to low (about 40–50°C) to soften, then lift softened film with a plastic pick or fingernail.
- Clean sticky residue using isopropyl alcohol 70% on a cotton swab for woven cotton or nylon; blot gently and rinse with warm water and mild dish soap. Avoid solvents such as acetone on coated or PU-finished surfaces.
- Water-soluble stabilizer bits: soak the area in warm soapy water for 5–10 minutes, agitate with a soft toothbrush, then blot dry with a microfiber towel.
- Heat-activated adhesives: reheat briefly with an iron set to the fabric’s safe temperature while placing a pressing cloth over the area; peel softened adhesive with a blunt tool and clean residual film as above.
- Stubborn adhesive film on coated surfaces: use a citrus-based adhesive remover sparingly, wipe immediately, then neutralize with soapy water; always test first.
Final restoration and protection:
- Match color using a fabric marker or textile paint; apply thin coats and cure per product instructions to avoid stiffness.
- Reinforce seams near the repair by stitching a 6–10 mm topstitch line; add bar tacks at stress points such as strap anchors and pocket corners.
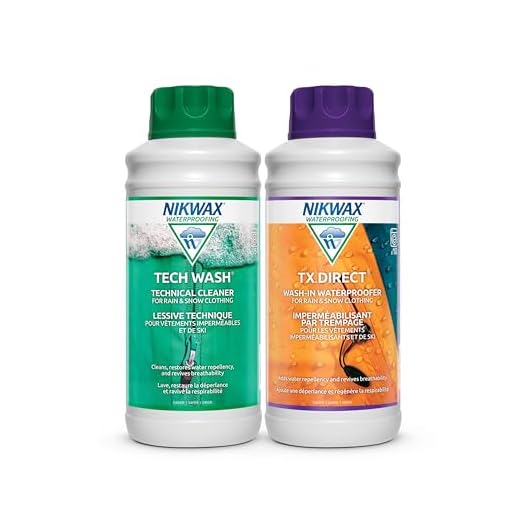
- Restore water repellency with a DWR spray (e.g., Nikwax TX.Direct or similar) applied only after the repair has fully cured; allow 12–24 hours for full bonding.
- Inspect after first use: check stitching tension and adhesive bond, tighten or reapply as needed. Carry a small repair kit (patches, bonded thread, micro scissors) for field touch-ups.


