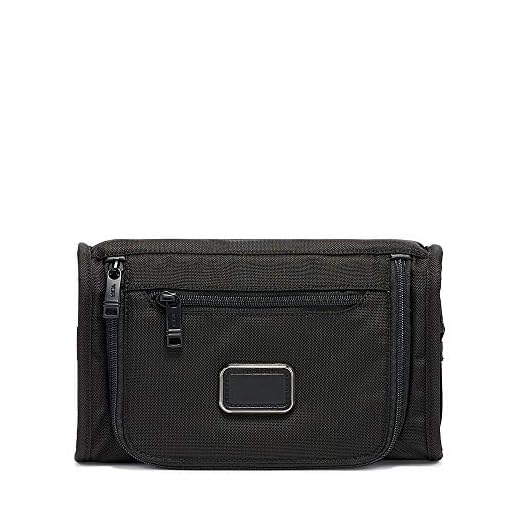

Use a dilute mild detergent mix – 1 teaspoon (≈5 ml) of pH-neutral liquid soap per 250 ml lukewarm water (30–35°C) – for targeted spot-washing of the nylon shell; empty pockets, unzip compartments, remove removable inserts, and test the solution on an inconspicuous seam for 30 seconds before treatment.
For light soil: blot loose debris with a soft-bristle brush or vacuum with a brush attachment, then apply the detergent solution with a microfiber cloth in short strokes; rinse the cloth and repeat until suds are clear. Avoid soaking any foam padding or fully immersing the pack to prevent delamination and prolonged drying times.
For oil or grease stains: sprinkle a small amount of cornstarch or talc, let sit 15–30 minutes to absorb, brush off, then treat remaining residue with a one-drop of dish soap diluted in 50 ml water; work from the stain edges toward the center and blot – do not rub aggressively.
Leather trim and trim stitching: do not wet. Use a damp (not soaked) cloth with a dedicated leather cleaner or a 1:10 dilution of neutral saddle soap; wipe and follow with a leather conditioner applied sparingly with a soft cloth. Metal hardware: remove sticky residues with a cotton swab moistened with 70% isopropyl alcohol; do not apply alcohol near glued seams.
Zippers and coated pulls: clear grit with a soft brush, then lubricate teeth lightly using paraffin wax or a dry PTFE zipper lubricant applied to the closed zipper and worked back and forth 8–10 times. Avoid oil sprays that attract dirt.
Odor control for interior lining: place an open container of baking soda inside each compartment for 12–24 hours in a well-ventilated area. For persistent mildew odor, mist a 1:4 white vinegar:water solution very lightly, air out for 24 hours, then repeat baking soda treatment; do not saturate lining.
Drying and storage: air-dry suspended or on a flat surface in shade with compartments unzipped; expect 12–48 hours depending on humidity. Store empty, loosely stuffed with acid-free paper, away from direct sunlight and heat sources to preserve fabric and trims. Schedule a gentle refresh every 3–6 months depending on use intensity.
Identify materials and gather care supplies for your specific model
Inspect the interior label and exterior panels and note exact materials: FXT or ballistic nylon, Cordura/polyester, PU- or PVC-coated fabric, genuine smooth leather, grained/bridle leather, suede/nubuck, neoprene, felted wool, or metal/plastic hardware types (zippers, plated brass, stainless steel, anodized aluminum, molded plastic). Photograph label and problematic areas for reference.
Material ID checklist
Touch test and visual clues: ballistic nylon = dense weave with slight sheen; Cordura = softer, matte weave; coated fabrics = water beads on surface; suede/nubuck = nap that rows when stroked; smooth leather = uniform grain and finished surface; vegetable-tanned/bridle = stiffer, waxy finish. For lining, pull back a seam to read fiber tag (nylon vs polyester). Note any water-repellent finish by sprinkling one drop of water on an inconspicuous spot – beads indicate DWR/PU coating.
Supplies & ratios
Gather: two microfiber cloths (one for application, one for drying), soft horsehair brush, soft nylon toothbrush, small suede brush and rubber eraser for nap recovery, vacuum with brush attachment, lint roller, cotton swabs, painter’s/masking tape, nitrile gloves, small spray bottle, plastic mixing bowl, and paper towels. Cleaning solutions: pH‑neutral detergent (use 1 teaspoon per 240 ml warm water), oxygen-based stain remover for organic stains (spot-test), leather care solution labeled for aniline/smooth leather (follow product instructions), leather conditioner (lanolin-free if possible), silicone-free mild soap for coated fabrics, rubbing alcohol only for ink in micro-quantities and strictly spot-tested, and baking soda or activated charcoal sachets for odor control.
Match supplies to material: ballistic/Cordura/polyester – pH-neutral detergent + soft brush; coated PU/PVC – microfiber + mild soap, avoid solvents and abrasives; smooth or bridle leather – dedicated leather solution, soft cloth, followed by conditioner; suede/nubuck – dry suede brush and eraser only, minimal moisture; metal hardware – damp microfiber then non-abrasive metal polish for stainless steel only; lining stains – diluted detergent or enzymatic spot treatment. Always perform a 15–30 minute spot test on an inconspicuous patch before treating visible areas and document results with photos.
Spot-treat ink, oil, food, and deodorant stains without discoloring fabric
Test any solvent on an inconspicuous seam or inside pocket for 15–30 seconds and blot dry before treating the visible stain.
Ink and grease/ oil marks
For ballpoint or ink-pen marks: use 70% isopropyl alcohol on a cotton swab. Dab–do not rub–starting from the stain perimeter toward the center; transfer ink onto the swab and replace it when staining ceases. Repeat short applications, then neutralize with 1 teaspoon mild liquid dish soap per 1 cup (240 ml) warm water and blot with a microfiber towel.
For fresh oil or grease: sprinkle cornstarch, baking soda, or talc over the spot, let sit 15–30 minutes to absorb oil, brush off with a soft brush, then treat remaining residue with the same dish-soap solution (1 tsp per 240 ml). Work from edge to center, agitate gently with a soft-bristled toothbrush, then blot with a damp microfiber to remove detergent.
Food and deodorant stains
Protein-based stains (milk, egg, blood): use cold water to flush first. Apply a commercially labeled enzymatic pretreatment following the product timing instructions, then rinse with cold water; avoid hot water prior to removing the stain.
Colored food (berries, tomato, wine): for colorfast fabrics, apply 3% hydrogen peroxide by dabbing briefly (10–60 seconds) and rinse; always test first. For delicate or dark fabrics, use a 1:4 white vinegar:water solution or the mild dish-soap mix described above, then blot until transfer stops.
Deodorant residue and yellow underarm marks: remove white residue by scraping gently with a plastic card, then dampen fabric with 1:3 white vinegar:water and blot. For yellowing on light fabrics, make a paste of 3% hydrogen peroxide + baking soda, apply for 10–15 minutes, then rinse thoroughly; test beforehand to avoid fading.
General rules: avoid chlorine bleach and heat drying until the stain is fully removed; keep moisture minimal to prevent dye migration; protect leather or metal trims by masking them off and treat only the textile areas; air-dry lying flat in shade. Use microfiber cloths, cotton swabs, a soft-bristle brush, absorbent powder, 70% isopropyl alcohol, 3% hydrogen peroxide, white vinegar, enzyme pretreaters, and mild liquid dish soap as your core kit. Photograph notable stains before and after treatment for records–see best digital camera features.
Hand-wash nylon and fabric compartments: safe detergent, agitation, and rinsing steps
Use a mild, pH‑neutral liquid detergent at a ratio of 1 tsp (≈5 mL) per liter of lukewarm water (30–35°C / 86–95°F); agitate by compressing and rolling each compartment 20–30 times, then rinse under cold running water until suds are gone (about 3–5 minutes per section).
Preparation: empty all pockets, unzip and open compartments fully, remove detachable inserts and straps. Close zippers that are not being washed to protect teeth and sliders. Test a hidden seam with one drop of the diluted solution for 10 minutes and blot to confirm no dye transfer.
Detergent choices: liquid baby detergent, mild wool/silk soap, or unscented Castile soap. Avoid bleach, fabric softeners, powder residues, enzyme-heavy sport detergents and solvent-based cleaners. For a standard kitchen sink (~8 L), measure ~40 mL of detergent; for a shallow basin (2–3 L), use 10–15 mL.
Agitation method: submerge the compartment or removable panel, press down firmly and release in a rolling motion 20–30 times; follow with gentle circular strokes of a soft sponge (10–20 passes) over seams and fabric faces. Use a soft-bristle toothbrush only on rigid seams and hardware areas, limiting contact to <30 seconds to avoid abrasion. Do not wring, slap or twist coated fabrics.
Soaking and dwell time: allow a short soak of 5–10 minutes for general soil; for heavier residue repeat the compress-release cycle once more rather than increasing soak time. Prolonged immersion can weaken adhesives and trim adhesives.
Rinsing protocol: rinse under a gentle cold stream or change rinse basin water 2–3 times until no suds remain. If running water is used, keep compartments open and flush for about 3–5 minutes per section. Remove residual moisture by pressing fabric between two clean towels until no more water transfers.
Drying and final checks: reshape compartments, prop open with rolled towels to allow airflow, hang or lay flat in a shaded, well‑ventilated area. Fan-assisted airflow reduces drying to 8–24 hours depending on thickness; thicker linings may take 24–48 hours. Close hardware only when fully dry. If any odors persist, repeat a single quick rinse with plain cool water.
Warnings: avoid hot water, machine agitation, tumble dryers and direct sunlight exposure on dyed fabrics; avoid household solvents and concentrated acidic solutions near coated areas. When in doubt, perform the wash on removable panels outside the main structure to reduce risk to trim and internal linings.
Drying, reshaping the pack, and caring for zippers and leather trim after laundering
Hang the pack upside down with main compartments open, use a low-speed fan and expect 12–48 hours to reach surface dry and 24–72 hours for full internal dryness (ambient humidity 30–60%, temperature below 40°C/104°F).
Drying and reshaping steps
- Empty all pockets, remove removable inserts and foam panels; unzip all compartments you can to promote airflow.
- Blot excess moisture with microfiber towels; press firmly but do not wring fabrics or leather pieces.
- Place absorbent towels or clean paper towel inside main cavities to draw moisture from seams; replace every 2–4 hours until surface dampness stops transferring.
- Do not use direct heat sources (radiators, hairdryers on high, tumble dryers). Sunlight will fade colors – if drying outdoors, use a shaded area or under a protective canopy such as a best patio umbrella that doesnt fade.
- For padded or molded panels, reshape by hand: compress slowly then release to let foam recover; prop rigid panels with rolled towels to retain original contour while drying.
- Stuff body and pockets with acid-free tissue paper or bubble wrap to maintain shape; avoid newspaper (ink transfer).
- Zip main zippers closed about 75% during drying to keep tracks aligned; leave secondary pockets open so they dry completely.
- Use silica gel packets in compartments during the final drying stage and for storage to reduce mildew risk.
Zippers, hardware and leather trim care
- After fully dry (24–72 hours), remove dust and grit from zippers with a soft toothbrush or compressed air.
- Apply a thin coat of silicone-based zipper lubricant or rub a beeswax/candle gently along teeth, then cycle the slider 10–15 times to distribute product. Avoid WD-40 and heavy oils that attract dirt.
- If a slider is loose, gently pinch the slider’s back plate with small pliers in 1mm increments until engagement is restored; test slowly to prevent breakage.
- Wipe metal hardware with a lint-free cloth; for light corrosion use a metal polish sparingly and buff immediately to remove residue.
- Leather trim: wait until completely dry. Test any conditioner on an inconspicuous patch. Apply a neutral pH leather conditioner sparingly (pea-sized amount on a soft cloth), rub gently, let absorb 15–30 minutes, then buff off excess. Repeat no more often than every 6–12 months depending on exposure and use.
- For suede or nubuck accents, avoid liquid conditioners; use a suede brush and rubber eraser block for stains and nap restoration.
- Store the item in a breathable dust bag, lightly stuffed to hold shape, with silica packets and away from damp basements or attics; when securing for travel, consider a reliable lock such as the best luggage combination locks.


