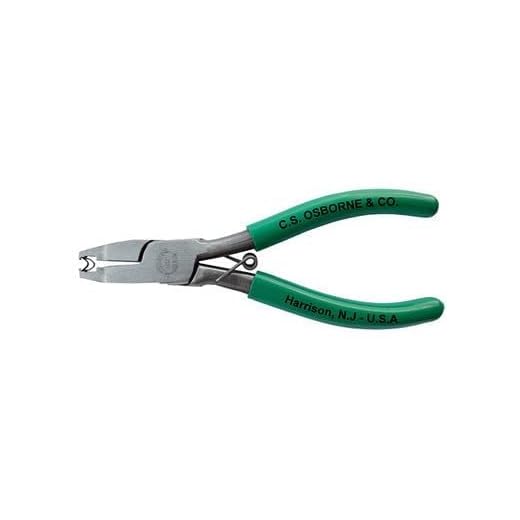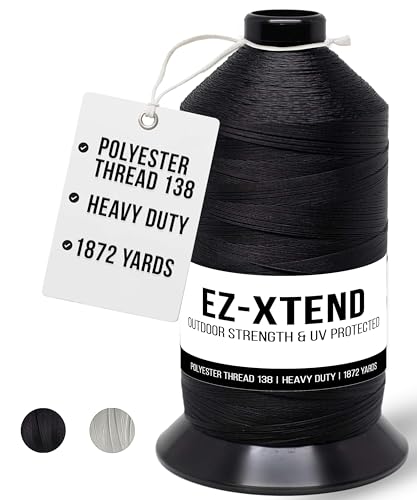


Immediate action: align both rows of teeth, seat the slider so the pull faces away from the open end, then secure a new metal top stop 3–4 mm from the tape edge or lock the tape with 4–6 tight passes of heavy-duty polyester thread to prevent the slider from running off.
Tools: needle-nose pliers, small flathead screwdriver, seam ripper, heavy sewing needle, heavy-duty polyester thread (40–60 weight) or waxed nylon/strong fishing line, replacement slider matched to tape width (common sizes: 3 mm, 5 mm, 8 mm), replacement metal stops or crimp beads, paraffin or graphite pencil for lubrication.
Procedure: gently remove any damaged stop with a seam ripper or small screwdriver; realign misaligned teeth by sliding a flat tool beneath the affected section and pressing teeth back into line; feed each tape half into the corresponding channel of the slider so the teeth mesh inside the slider; use pliers to crimp the new metal stop tightly 3–4 mm from the tape end (crimp depth ~0.5–1.0 mm); if using thread, sew across the tape close to the edge with 4–6 passes and tie off with a double knot hidden under a small dab of clear adhesive.
Practical checks and tips: confirm tape width before ordering a replacement slider (measure at the widest part of the teeth); if several teeth are missing near the end, position the new stop 6–8 mm from the last intact tooth to avoid slippage; cycle the slider 8–10 times to seat it, then apply a thin layer of paraffin or rub a soft graphite pencil along the teeth for smoother operation; replace a visibly deformed slider with an identical type (coil vs. molded tooth) to ensure correct engagement.
Identify fastener type and collect tools and replacement components
Match the fastener profile (coil/nylon, molded plastic, metal teeth) and slider size (approx. #3 ≈ 3mm, #5 ≈ 5mm, #8 ≈ 8mm) to replacement parts before ordering.
Identification checklist
Inspect the chain: a continuous spiral filament indicates a coil style; discrete injected teeth indicate molded plastic; folded metal teeth indicate brass or nickel metal. Measure the chain width with calipers where the slider engages (millimetres preferred) or read the stamped size on the original slider. Determine end type: closed-end (fixed stop), open-end/ separating (box and pin), or two-way (dual sliders). Note tape width (common: 15mm, 20mm) and whether teeth are sewn to the underside (invisible style).
Tools and parts to gather
Required tools and recommended specifications:
– Needle-nose pliers (6″ stainless), flat-nose pliers for stop crimping.
– Flush wire cutters or diagonal cutters for trimming excess chain or tape.
– Seam ripper and small scissors for thread removal; awl with 0.8–1.0 mm tip for aligning tape holes.
– Hand needles: heavy-duty upholstery/jean needles (size 90–110) and bonded nylon or polyester thread (30–92 Tex / 0.6–0.8 mm recommended).
– Replacement items: matching-size sliders (specify coil/molded/metal compatibility), top and bottom stops (metal crimps or molded plugs), box-and-pin set for separating ends, replacement tape segments if >50 mm of chain is damaged.
| Part | How to identify | Measurement / spec | When to replace |
|---|---|---|---|
| Slider | Match profile to chain type and stamped size | #3, #5, #8 (approx. 3/5/8 mm) | If slider teeth channel is deformed or missing |
| Top/Bottom stops | Metal crimps for heavy tape; molded plugs on lightweight tape | Crimp width ≈ tape width (15–20 mm common) | If stops are missing or crushed |
| Box & pin (separating) | Presence of separating end (box on one side, pin on other) | Match tape width and pin orientation | If separating function fails or pin bent |
| Replacement tape | Used when >50 mm of teeth/coils are distorted | Match tape width and color; pre-attached chain recommended | If multiple consecutive teeth fail or tape torn |
Order parts that match measured millimetres and chain type; keep one spare slider and a set of metal stops in the repair kit. If damage exceeds ~50 mm (≈2 inches) of chain, source a tape replacement rather than attempting piecemeal tooth repairs.
Remove the stop and old slider without damaging fabric
Secure the tape 10–15 mm past the metal stop with low‑tack masking tape to immobilize teeth and protect surrounding cloth.
-
Prepare a barrier: slide a thin piece of cardboard or folded painter’s tape between tape and lining to shield stitches and prevent seam‑ripper slips.
-
Metal stop removal (crimped type): grab the stop with flat‑nose pliers, then cut one crimped side with flush diagonal cutters at a 30–45° angle away from the tape. Pry the cut side open with the pliers and peel the stop off, leaving a 1–2 mm stub rather than stripping the whole metal bit; this avoids sharp edges that can fray the tape.
-
Plastic stop removal (moulded type): score the outer face with a sharp craft knife, then trim the bulk with flush cutters. Avoid pressing blade into the tape; perform cuts from the outside edge moving away from fabric.
-
Sewn stop or fabric end: open only the necessary 2–3 stitches with a seam ripper, working from the outside edge toward the stitch head. Place the protective cardboard beneath the stitch so the ripper won’t pierce the tape or lining.
-
Slider extraction: after the stop is cleared, hold the tape steady and gently rock the slider back and forth while pulling it along the chain; do not yank. If the slider resists, slightly spread its shoulders with two small screwdrivers or flat‑nose pliers by 0.2–0.5 mm–work in tiny increments to avoid deforming the channel.
-
Stuck slider on coil/nylon chain: warm the slider briefly with a hairdryer (5–10 seconds at low heat) to relax any hardened material, then attempt the rocking motion again. Protect fabric from the heat source.
Damage prevention checklist:
- Mask fabric 10–15 mm from the stop; never cut toward cloth.
- Use flush cutters for close cuts, flat‑nose pliers for prying, and a seam ripper only with a backing shim.
- Leave a small metal stub when opening crimped stops to avoid jagged edges that slice tape.
- If fraying appears, apply a single drop of fray sealant or clear nail polish to the tape edge after removal.
Re-seat the slider and engage teeth step by step
Align the slider so its wider throat faces the chain and position left and right teeth to overlap 4–6 mm inside the slider mouth before insertion.
Step sequence
Step 1: Secure the tape ends with clothespins or small clamps 30–50 mm from the slider area to prevent fabric movement.
Step 2: Insert one side of the teeth set straight into the lower gullet of the slider until the overlap reaches the 4–6 mm mark; maintain a 0–2° shear angle between the two halves.
Step 3: Feed the opposite side into the upper gullet while holding the slider perpendicular to the tape; do not twist the slider more than a hairline amount.
Step 4: With needle-nose pliers on the slider tail, pull the slider slowly 25–40 mm while steadying both tapes; steady pull speed ~5–10 mm/s prevents misalignment.
Step 5: If the slider does not engage after 3–4 mm of travel, stop, withdraw 2–3 mm, realign teeth visually, then repeat the pull with slightly increased pressure on the leading teeth (finger pad pressure 1–2 N).
Troubleshooting and finishing
If teeth splay or skip, compress the misaligned teeth rows gently with flat-nose pliers (apply 1–3 light squeezes) to restore profile before reattempting slider entry. Apply a thin film of paraffin or graphite lubricant to 20–30 mm of the teeth to ease initial engagement; avoid oil-based lubricants that stain fabric.
After successful engagement, inspect the top edge: install a crimp stop (aluminum or brass) 6–8 mm above the slider path; crimp firmly with flat-nose pliers until movement past the stop is impossible. File any sharp edges and stitch a 6–8 mm reinforcement bar tack 2 mm below the stop if original stitching was removed. Examples of close-up visual technique can be referenced at best digital camera for 250 dollars.
Sew new stops and reinforce the tape of the closure securely
Sew a sewn stop positioned 6–8 mm from the last engaged tooth using bonded polyester thread (size ≈ 69 / upholstery weight) with a bar-tack pattern of 8–12 passes to lock the tape permanently.
Materials and measurements
Required: heavy bonded polyester or nylon thread (approx. 0.6–0.9 mm diameter), size 90/14 or 100/16 sewing-machine needle (or sailmaker’s/curved leather needle for handwork), 10–12 mm nylon webbing strip (folded to 5–6 mm thickness) or a 12×12 mm ripstop patch, friction pliers, awl, small clamp. Machine stitch length 2.5–3.0 mm; hand-stitch spacing 2–3 mm. For metal-tooth fasteners, use crimp stops as a secondary retention point.
Procedure
Mark the stop location 6–8 mm from the last engaged tooth; mark on the tape edge and on the opposite side to keep alignment. If the tape frays, apply a thin bead of seam sealant and let cure 10–15 minutes before sewing.
Option A – machine bar-tack: place folded webbing or patch over the marked area, clamp, and run a rectangular bar-tack 10–12 passes across a 10–12 mm wide by 6 mm high area. Use a heavy presser foot, slow feed, and backstitch twice at both ends. Final stitch length 2.5 mm to produce dense reinforcement.
Option B – hand bar-tack: use doubled bonded thread and a sailmaker’s needle or palm thimble. Execute a box stitch with internal zigzag: drive 8–12 parallel stitches across the marked width, then stitch around the perimeter once to bury ends. Tie off with multiple half-hitches and melt thread tip if synthetic.
For metal stops: crimp factory-style stops immediately adjacent to the sewn stop for redundancy, then cover both with a small ripstop patch sewn across the tape to spread load. When crimping, use flat-nose pliers and inspect for tooth interference.
Finish: trim excess webbing to 1–2 mm beyond stitching, heat-seal cut synthetic edges briefly, and test by sliding the slider across the new stop 20–30 cycles under normal load. If stitching shows movement, increase passes to 12–14 or add a glued patch under the stitches and allow 24 hours cure.
Accessory reference for a small fabric patch option: best place for umbrella plant


