
Obtaining a replacement mechanism is your first step when faced with a non-functional closure on your travel gear. You can find these components at craft stores, online retailers, or specialty shops focused on luggage repairs. Ensure that you select a part that matches the size and style of your original mechanism for a seamless fit.
Gather necessary tools before beginning the installation. Utilize pliers, scissors, and a screwdriver to assist in the disassembly process. Carefully remove the old component by detaching it from the fabric, ensuring minimal damage to your bag. Once removed, revisit the new part, aligning it precisely with the existing fabric and securing it firmly.
Test the action of the new mechanism once attached. Adjustments might be required for optimal functionality. With a bit of patience and attention to detail, you’ll restore the functionality of your travel companion effectively, prolonging its life and usability.
Replacing a Lost Zipper Pull on Suitcases
To fix a suitcase with an absent pull mechanism, consider using a small loop of cord or string as an alternative. Thread the cord through the existing hole where the pull was attached and tie a knot. This simple method provides a functional grip for easy opening and closing.
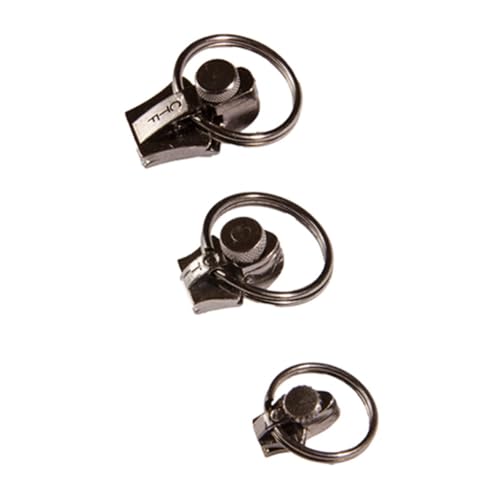
Selecting the Right Replacement Component
Look for compatible replacement pulls at craft or sewing stores. Ensure it fits your baggage’s design to maintain the aesthetic. Alternatively, various online platforms offer specialized pull solutions suited for travel gear.
Additional Protection for Your Baggage
After addressing the pull issue, consider getting a best rate umbrella policy. This can provide extra security for your belongings while traveling, safeguarding against unforeseen circumstances.
Identifying the Right Replacement Zipper Slider
Choose a compatible alternative by measuring the width of the teeth. Standard sizes are usually 5mm, 7mm, or 10mm. Most zippers have teeth that fit into these categories. Using calipers or a ruler ensures accurate dimensions for selection.
Examine the existing mechanism. Some devices operate with a pull tab, while others have a push-button feature. Recognizing this characteristic will guide you to the correct model.
Check the slider type: open-ended vs. closed-ended. Open-ended mechanisms allow for full separation of the two sides, suitable for bags like suitcases. Closed-ended variants are designed for jackets or pants, where a complete closure is necessary.
The material of the component also plays a role. Metal sliders are more durable but heavier, while plastic options are lightweight but less sturdy. Consider the primary use of the item to determine the best fit.
| Measurement Type | Common Sizes (mm) |
|---|---|
| Tooth Width | 5, 7, 10 |
| Slider Type | Open-ended, Closed-ended |
| Material | Metal, Plastic |
Lastly, match the color if aesthetics matter. Sliders come in various colors; ensuring a similar hue maintains the item’s visual appeal.
Gathering Necessary Tools for the Replacement Process
Acquire a set of pliers, preferably needle-nose, for precise handling of small components. Scissors will aid in trimming any excess fabric or thread around the area where the new component will be installed.
A flathead screwdriver can assist in prying open any stubborn areas without damaging the material. A seam ripper is also valuable for removing stitches if you need to access the area more thoroughly.
Ensure you have a small bowl or container on hand to keep screws and parts organized during the procedure. If you anticipate needing to attach or secure the new part with additional fasteners, having a set of sewing needles and strong thread on standby is advisable.
Before starting, verify the dimensions of the components to ensure compatibility. Check that you have the correct replacement part, as this significantly impacts the efficiency of the procedure. For optimal organization, consider creating a designated workspace free from distractions.
Gathering tools can be streamlined by utilizing a toolkit or storage case. If you also seek to manage other household equipment, exploring sources for practical items like the best cordless lawn mowers for medium lawns can enhance your overall maintenance repertoire.
Step-by-Step Guide to Remove the Old Zipper Slider
Begin by locating the top stop of the track, which is the metal or plastic piece that secures the teeth. Carefully use a pair of pliers to remove this stop, taking care not to damage the surrounding fabric.
Next, gently pull the teeth apart and slide the old mechanism off the track. If it’s stuck, apply a little pressure to wiggle it free, avoiding excessive force that could harm other components of the fastener.
Inspect the Track
After removing the worn-out mechanism, examine the track for any debris or damage. Use a soft brush or cloth to clean the area thoroughly, ensuring a smooth fit for the new component.
Prepare for Installation
Once the old element is off, ensure the track is aligned and straight. This step is crucial for seamless reassembly of the new piece, allowing for optimal functionality and durability.
Installing the New Zipper Slider Securely
To ensure a secure attachment of the new fastening mechanism, first, align the slider with the track of the fabric. Make certain the teeth of the track are properly engaged with the corresponding parts of the new component.
Utilize pliers to gently press the slider onto the track. Apply even pressure, avoiding excessive force that could damage the track or component. Check periodically to ensure the alignment remains accurate during the process.
Once the component is positioned, pull it up and down a few times to test its functionality. Look for smooth movement; if resistance occurs, adjust the alignment slightly. A well-installed component should glide easily without obstruction.
For added durability, consider applying a small amount of lubricant to the track. This will enhance the movement and longevity of the mechanism.
After successful installation, verify that the new part is securely attached by giving it a gentle tug. If it holds firm, you have completed the task correctly. For innovative designs and more options, explore the best luggage startups.
Testing the Zipper Functionality After Replacement
Ensure that the newly installed component operates smoothly before considering the task complete. Follow these steps for optimal testing:
- Check Alignment: Verify that the alignment of the teeth is correct. The tracks should be parallel and aligned properly.
- Test Opening and Closing: Gently slide the mechanism up and down multiple times. Observe if it moves without obstruction.
- Listen for Sounds: Pay attention to any unusual noises during operation, which could indicate misalignment or friction.
- Inspect for Gaps: Look for any spaces between the teeth when closed. Ensure there are no gaps that might prevent it from securing properly.
- Load Testing: Once opening and closing are satisfactory, place slight pressure on the track while moving the mechanism. This simulates real-world usage.
Conduct these assessments multiple times to guarantee that the mechanism is reliable. If any issues arise, consider adjustments or further inspection of the installation process.


