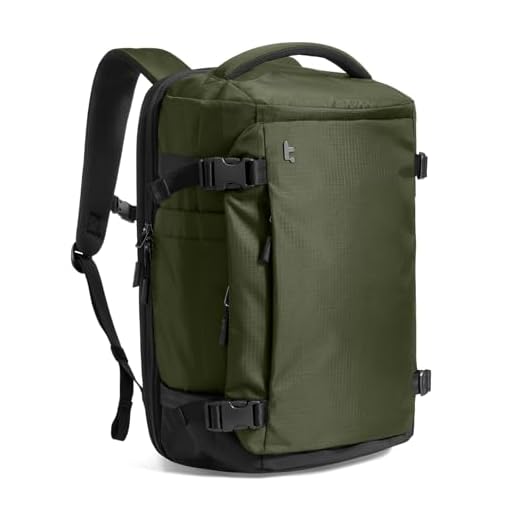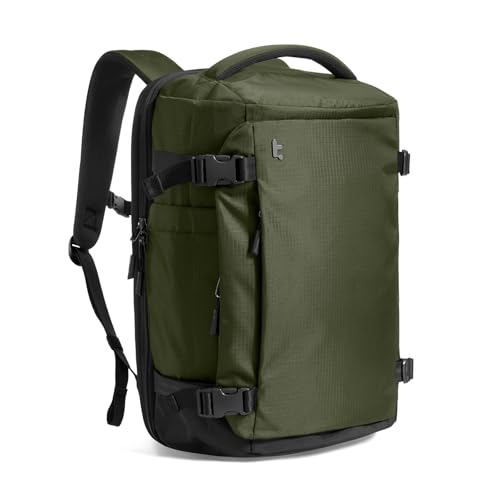


To craft a travel bag with a convenient pass-through design, begin with a durable fabric like ballistic nylon or canvas for enhanced longevity. Opt for a sturdy zipper that allows smooth access to the main compartment, ensuring it withstands frequent use.
Incorporate a panel on the back of the bag that facilitates easy attachment to carry-on items. This panel should feature a secure closure to prevent slippage during transit. Position it appropriately, allowing the bag to rest comfortably against your suitcase.
For added functionality, consider integrating internal pockets with elastic bands or mesh material. These compartments provide excellent organization for smaller essentials like chargers, travel documents, or toiletries. Ensure these pockets remain easily accessible when the main compartment is open.
Choose adjustable straps featuring padding for comfort while commuting. Reinforced stitching at stress points will enhance the bag’s durability, accommodating varied loads without compromising the structure. With careful selection of materials and thoughtful design, your travel accessory will offer both practicality and style.
Crafting a Versatile Travel Pack
Select a durable fabric, such as ripstop nylon or canvas, for the body of the travel pack, ensuring resistance to wear and tear. For added structure, consider using a fusible interfacing on the main fabric pieces.
Begin with the back panel. Cut a rectangle based on your desired dimensions, allowing extra inches for seam allowances. Incorporate padding between the outer layer and lining for comfort. For the connecting feature, measure and cut a strip to create an opening through which this pack can slide onto suitcase handles. Reinforce stress points with double stitching for strength.
Creating Functional Compartments
Design inner pockets tailored to your needs. Consider different sizes for organizing electronics, documents, and toiletries. Use mesh fabric for visibility and airflow. Attach these pockets securely to the lining using a zigzag stitch to prevent fraying.
Finishing Touches
Complete the project by adding adjustable straps. Use hardware such as D-rings and sliders for easy adjustments. Attach these with heavy-duty stitching. A top handle provides an alternative carry option. Finally, add a water-resistant coating to enhance the pack’s functionality in adverse weather conditions.
Choosing the Right Fabric and Materials
Select a durable nylon or polyester for the main body; these offer excellent abrasion resistance and water repellency. Denier ratings around 420 to 600 ensure strength without excessive weight.
For additional sections, consider using ripstop fabrics; their grid pattern enhances tear resistance. Integrate lightweight mesh for pockets or compartments, promoting breathability while keeping contents visible.
Choose a high-quality lining material. Polyester or nylon taffeta works well, providing a smooth interior that protects items and eases packing. Reinforce areas subject to strain with canvas or a heavier fabric to prolong life.
Use high-strength thread, preferably nylon or polyester, to withstand stress and maintain structural integrity. Ensure all zippers are robust, opting for water-resistant options for exposure to the elements.
Don’t overlook hardware; choose sturdy buckles and clips made from metal or durable plastic to ensure reliability. Look for padded sections made from EVA foam for comfort against the back.
Consider eco-friendly options like recycled nylon if sustainability is a priority. This decision supports environmental efforts without sacrificing performance.
Measuring and Cutting Fabric Pieces Accurately
For precise measurements, utilize a flexible measuring tape. Begin by determining the dimensions needed for all components of your design. Make sure to account for seam allowances, typically around 0.5 to 1 inch, depending on the construction method.
When marking fabric, use a fabric pencil or chalk to ensure visibility. Lay the fabric flat and measure twice to prevent mistakes. Cut straight lines by using a rotary cutter or sharp fabric scissors for clean edges.
| Measurement | Suggested Allowance |
|---|---|
| Main Body | 1 inch |
| Side Panels | 0.5 inch |
| Pockets | 0.5 inch |
Ensure that the fabric is pre-washed if it shrinks, keeping future fitting in mind. Lay all pieces out before cutting to visualize your final product and optimize fabric usage. Reference guides on best luggage to study abroad with for additional design ideas.
Assembling the Backpack Structure with Durability in Mind
Incorporate reinforced stitching at stress points to enhance overall strength. Utilize a cross-stitch or bar-tack method for straps and seams that experience high tension during use. This technique distributes stress evenly and reduces the risk of tearing under weight.
Layering for Strength
When assembling different components, consider layering for added stability. Use a combination of heavy-duty fabric and a lighter inner lining. This not only contributes to durability but also improves comfort during carrying. Ensure all layers are securely attached and avoid any loose ends that might fray after repeated use.
Strategic Support Elements
Incorporate a frame or stiffening panel in key areas such as the back and base of the design. This additional support helps maintain shape, prevents sagging under weight, and provides better weight distribution. Select lightweight materials like HDPE or fiberglass for these components to avoid added bulk.
Incorporating Functional Features like Pockets and Straps
Integrate multiple compartments to enhance organization. Consider adding a zippered pocket on the front for quick access to essentials such as travel documents or a smartphone. Mesh pockets on the sides can hold water bottles or smaller items, ensuring convenience during travel.
Incorporating padded straps significantly improves comfort, especially for extended wear. Design the shoulder straps with adjustable features to cater to varying body types and preferences. A sternum strap can also provide added stability and reduce strain on the shoulders.
Utilizing Additional Features
Don’t overlook the potential of a hidden back pocket. This space can securely store valuables like wallets or passports, minimizing the risk of theft. For those who enjoy outdoor activities, consider adding an attachment for items like an umbrella. The best universal golf umbrella holder can serve as a functional addition that enhances utility.
When organizing the interior, include slots or dividers for electronic devices. This can protect fragile items like tablets or cameras. For tech enthusiasts, integrating a pocket for a camera, prioritized for protection, can add significant value. Consider solutions that cater to devices such as the best digital camera for 250 pounds. These compartments should be cushioned to absorb any impact during travel, ensuring your gear remains intact.
Finishing Touches: Securing Seams and Adding Hardware
To ensure durability and aesthetics, double-stitch all critical seams with a straight stitch or a zigzag stitch. For extra strength, consider using a reinforced seam method, particularly in areas that experience stress, such as strap attachments.
Seam Sealant Applications
Apply seam sealant or fabric glue to raw edges after stitching. This step prevents fraying and enhances water resistance. Choose a sealant compatible with your fabric type, and allow sufficient drying time before further handling.
Hardware Selection
- Fasteners: Opt for quality zippers that can handle heavy usage. Look for heavy-duty options with metal teeth. Securely attach them using sturdy thread, and reinforce stress points.
- Strap Adjusters: Choose adjustable buckle systems that can easily accommodate various sizes. Ensure they are securely stitched into place for reliability.
- Carabiners: Incorporate carabiners for added functionality. Attach them to looped sections to allow for easy access to keys or other items.
Finalize the design by adding eyelets or grommets where necessary, particularly for ventilation or to secure straps. These elements not only serve a practical purpose but also add an appealing visual detail.
Before the final assembly, check all attachments for stability. Conduct a thorough inspection to ensure no loose threads remain, and trim any excess fabric to maintain a clean finish. These details culminate in a product that is not just functional but also visually appealing.
FAQ:
What materials do I need to sew a luggage passthrough backpack?
To create a luggage passthrough backpack, you’ll require several materials. Start with durable fabric, such as canvas or nylon, which can withstand wear and tear. You’ll also need a lining fabric, interfacings for added structure, and webbing for straps. Don’t forget zippers and possibly buckles for securing compartments. Other tools include scissors, a sewing machine, thread, and pins or clips to hold the fabric together while you sew.
Can I modify an existing backpack to create a passthrough feature?
Yes, it’s absolutely possible to modify an existing backpack. To add a passthrough feature, you need to create an opening on the back panel of the backpack. Carefully remove part of the fabric without damaging the overall structure. Then, stitch a sleeve or a pocket that allows the backpack to slide over the handle of a suitcase. Ensure that your modifications maintain the backpack’s durability and aesthetic appeal.
What steps should I follow to sew my own passthrough backpack from scratch?
To sew a passthrough backpack from scratch, begin with a design plan, outlining the size and compartments you want. Next, cut the fabric and lining according to your pattern pieces. Sew the main body, adding pockets where needed. Create the passthrough slot on the back panel by sewing a pocket that fits over suitcase handles. Assemble the straps and attach them securely. Finally, add any zippers or additional features, and finish by reinforcing stress points. Don’t forget to turn it inside out and check that all seams are secure before using your new backpack.
What are some common mistakes to avoid while sewing a luggage passthrough backpack?
While sewing a luggage passthrough backpack, there are several common pitfalls to be aware of. First, ensure you measure properly; inaccurate measurements can lead to an ill-fitting backpack. Another mistake is neglecting to choose the right fabric; using flimsy material can affect durability. Skipping the use of interfacing can result in a lack of structure in the backpack. Additionally, be cautious during assembly; rushing can lead to uneven seams or missing pockets. Lastly, always double-check your stitching and reinforce areas that will endure the most stress, such as straps and the passthrough slot.


