
To replace the worn or damaged elastic straps on your travel bag, gather a few essential tools: scissors, new elastic material, a sewing needle, and thread. Cut the new elastic to the appropriate length, slightly longer than the original, to ensure a secure fit.
Begin by removing the old straps carefully, using scissors to cut any stitches holding them in place. Once removed, align the new elastic with the attachment points on the case. Secure it temporarily with pins to check its fit before sewing.
Stitch the new elastic securely to the travel case, ensuring it is tight enough to withstand regular usage but not so tight that it restricts movement. Use a straight stitch and go over the attachment points multiple times for added durability. After sewing, trim any excess elastic for a clean finish.
Repairing the Elastic Components for Travel Cases
Begin with removing the damaged elastic component. Use scissors to cut the old piece carefully without harming surrounding parts. Measure the length needed for replacement, ensuring it is slightly shorter than the original to maintain tension.
Select a durable material for the new elastic section, such as nylon or silicone, which resists wear over time. Cut a piece to the measured length and prepare to thread it through the existing slots or guides.
Utilize a safety pin for easier threading. Attach the pin to one end of the elastic and feed it through the designated path in the casing. Once in place, secure both ends tightly to prevent slippage and test the resilience by applying pressure.
If available, consider using fabric glue or stitches at the attachment points for enhanced stability. Allow any adhesive to cure completely before testing functionality.
Finally, inspect the new component for snugness and check for any potential points of wear. Regular maintenance checks can prolong the lifespan of these elastic support systems.
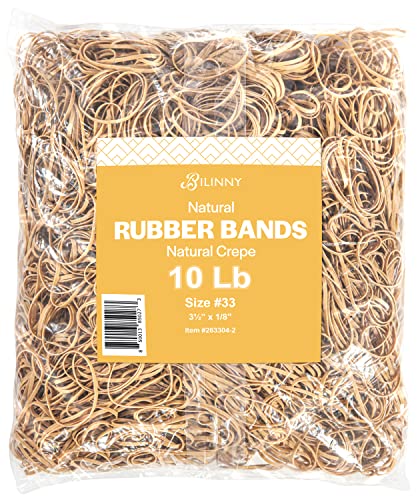
Identifying the Type of Rubber Bands Used
Begin by assessing the dimensions of the existing elastic solutions on your suitcase. Measure the width and thickness accurately to find replacements that fit snugly.
Materials to Consider
- Natural latex: Flexible and durable, suitable for high-tension situations.
- Synthetic rubber: Offers a variety of properties, including UV resistance and temperature stability.
- Polyurethane: Known for its elasticity and abrasion resistance, ideal for heavy use.
Common Types and Their Uses
- Flat elastic strips: Often used for securing items; check thickness for compatibility.
- Round cords: Provide flexibility and restored shape; suitable for varying loads.
- Heavy-duty versions: Designed for extreme conditions; verify tensile strength for longevity.
Review product specifications before purchasing new components to ensure they suit your needs. Avoid mismatches that could lead to rapid wear or failure during use.
Gathering Necessary Tools and Materials
Gather the following items before proceeding with the repair:
- Replacement elastic straps: Select durable options that match the existing ones in length and elasticity.
- Scissors: Ensure they are sharp for precise cutting of old or faulty sections of the cords.
- Screwdriver: A flathead or Phillips head may be needed, depending on the specific attachment points.
- Pliers: Useful for gripping and manipulating small components during the installation process.
- Measuring tape: Essential for measuring the correct length of new straps.
- Strong adhesive or glue: Consider a robust type if the design requires sticking parts together.
With these tools and materials on hand, you will be prepared for an efficient replacement process.
Removing the Damaged Rubber Bands
Begin by locating the point where the worn-out elastic is affixed. Use a flathead screwdriver or a similar tool to gently pry up any clips or fasteners holding it in place. If adhesive is employed, carefully peel away the material using a heat gun or hairdryer to soften the glue, making it easier to remove without damaging the surrounding components.
Once the old elastic is free, inspect the area for any debris or residual adhesive. Clean the surface thoroughly using rubbing alcohol or a suitable adhesive remover. This ensures a smooth installation of the new material later on.
Pay attention to alignment and placement as you detach each segment to aid in the installation of the replacement functions. If portions of the elastic are difficult to remove, consider cutting them with scissors to expedite the process.
Finally, dispose of the damaged elastic properly. Ensure that all remnants are cleared away to prepare for the installation of the new elastic material.
Installing New Rubber Bands Correctly
Align the new elastic pieces with the designated grooves in the casing. Ensure the orientation matches the original setup to avoid misalignment during use.
Begin pressing one end of the elastic into the groove, maintaining tension. Gradually work your way along the circumference, securing the piece firmly. Use your fingers or a flat tool to push the elastic deeper into the channel if needed.
If the assembly includes multiple sections, repeat this process for each segment, ensuring a snug fit without overstretching. A properly fitted piece will prevent slipping and potential damage during travel.
After installation, manually rotate the casters to verify that movement is smooth and unimpeded. Adjust any misaligned pieces immediately to enhance functionality.
Finally, inspect all connections and ensure they are secure before using your travel equipment. This step ensures reliability and prolongs the lifespan of the assembly.
| Step | Action |
|---|---|
| 1 | Align the elastic correctly with grooves. |
| 2 | Press one end and work along the circumference. |
| 3 | Check casters for smooth movement post-installation. |
| 4 | Secure all connections before usage. |
Testing Functionality After Replacement
After installation of new components, it is crucial to conduct thorough checks to ensure optimal performance. Start by giving the equipment a gentle push to observe the movement. It should glide easily across various surfaces without any unusual noises.
Weight Assessment
Next, load the gear with a realistic weight. This simulates actual usage, revealing how the new parts handle under pressure. If the unit sways or tilts excessively, consider revisiting the installation process.
Surface Traversal
Evaluate the item on multiple terrains, including smooth floors, carpets, and uneven surfaces. Each environment may provide insights into how well the new components function. Ensure stability and control during transitions. For added convenience during outdoor activities, check for compatibility with accessories like the best weld 7 ft yellow umbrella or tools such as the best cordless lawn mower for slopes.
Upon completion of these tests, evaluate the findings. Consistent performance indicates successful installation, allowing you to use the equipment confidently.
Preventive Maintenance for Longevity
Regularly inspect the components to identify any wear or damage. Clean any debris or dirt that may accumulate around the rolling mechanisms. This ensures smooth movement and reduces unnecessary strain on the parts.
Lubricate moving joints with a suitable product to enhance performance and reduce friction. A small amount can significantly extend the lifespan of the elements.
Store the travel accessories properly when not in use; avoid placing heavy items on top to prevent undue pressure on components. Consider using a best crossbow backpack for organized storage and easy accessibility.
Monitor for misalignment; if parts appear askew, make necessary adjustments immediately. This will prevent further damage and costly repairs down the line.
By incorporating these routine checks and care techniques, the durability and functionality of your travel gear can be significantly enhanced, ensuring a smoother travel experience.


