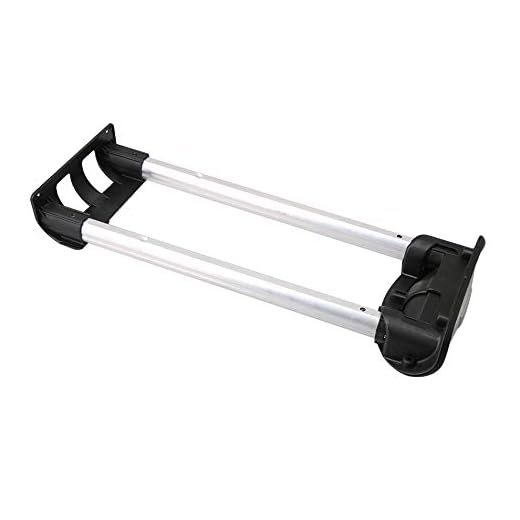


Identify the specific fastener that requires attention; often, a simple visual inspection reveals the damaged component. Gather your tools: a suitable driver, replacements from a hardware store, and possibly pliers for better grip.
Carefully remove the broken part without damaging the surrounding material. If required, apply a small amount of lubricant to ease the process. Insert the new component, aligning it precisely without forcing it into place.
Once secured, test the integrity of the connection by gently applying pressure. Ensure that the new assembly holds firmly and is flush with the surface. For added longevity, consider reinforcing nearby areas with adhesive tape or similar materials.
Instructions for Fixing Hardware on Premium Travel Cases
Begin by gathering the proper tools, including a screwdriver that matches the head of the fastener needing adjustment. A magnetic tray can assist in keeping small parts organized.
Identify the area where the component is detached or compromised. If applicable, remove any protective covers or panels to gain access to the affected section.
Carefully unscrew the faulty fastener, ensuring not to damage surrounding materials. If resistance is encountered, applying a penetrating oil may help loosen it.
Once the old fastener is removed, take a new one that fits the specifications required. Check for the length and diameter to ensure a proper fit. Align it accurately before inserting.
With the new fastener in position, tighten it gently but securely to avoid stripping the threads. Replace any removed covers and verify the integrity of the repair.
After the adjustment, test the functionality of the affected area to confirm that the component is stable. If issues persist, consulting professional repair services may be necessary.
Identifying the Right Screw Type for Your Hartmann Luggage
Begin by checking the manufacturer’s specifications or user manual for details on the correct fasteners used in your item. Many premium bags use proprietary components, so ensure compatibility before procurement.
Materials and Dimensions
Examine the material of the existing fasteners. Stainless steel or brass are common for durability against wear. Measure the diameter and length of the fastener accurately; utilize calipers for precision. Standard sizes often range from M2 to M5, so a comparative chart may assist in identifying the appropriate option.
Head Type and Drive Style
Review the head style of the fastener. Options can include Phillips, slotted, or Torx. If the original component is damaged, take a picture for reference or consult a hardware store for visual guidance. Selecting the right drive style ensures correct insertion without stripping threads.
Substituting the correct type will enhance longevity and maintain the integrity of your bag during use. Prioritize quality to avoid recurrent issues.
Tools Needed for the Screw Replacement Process
For this task, gather the following items to ensure a smooth process:
- Precision screwdriver set: Includes various sizes to fit different fasteners.
- Magnetic tray: Useful for keeping small parts organized and preventing loss.
- Replacement fasteners: Ensure you have the correct type specified for your item.
- Pliers: Helpful for gripping stubborn components if needed.
- Flashlight: Provides visibility in hard-to-see areas.
- Lubricant: To ease the process if encountering rusted or stuck parts.
Always check the condition of your tools before starting. A reliable screwdriver set is crucial for minimizing damage to the fasteners. For additional maintenance accessories, refer to the best cargurus pressure washer reviews if you need cleaning solutions for other equipment.
Step-by-Step Guide to Removing the Old Screw
Begin with the appropriate screwdriver that matches the head of the fastener. Ensure a secure grip on the handle for maximum control during the unscrewing process.
Apply pressure downwards while turning counterclockwise. Start with a gentle turn to assess resistance; if it’s stuck, consider using a penetrating oil to loosen it. Allow the oil to sit for a few minutes before attempting to turn again.
If you encounter stripping, use rubber bands or a screw extractor for better grip. Position the extractor into the existing head and turn slowly to extract the remnants.
Once removed, inspect the area for any debris or damage before installing the new component. Regular maintenance can help prevent future complications.
For related purchases, you might find useful items at best patio umbrella online stores.
Installing the New Fastener and Ensuring Stability
Align the new fastener with the pre-drilled hole to ensure a perfect fit. Using your fingers, gently insert it before applying a tool for tightening. Maintain steady pressure to avoid stripping the plastic or metal around the hole.
Once the fastener is in position, utilize the appropriate tool for securing it. Turn clockwise until snug, ensuring not to over-tighten, which can compromise the integrity of the material. A firm grip without excessive force is ideal.
After installation, test the stability of the newly fitted fastener by applying gentle pressure. This step is critical to ensure it holds securely and functions as intended under normal use conditions.
If necessary, check other fasteners in the same area to confirm their integrity and carry out any additional maintenance. Consistent care prevents future issues and extends the lifespan of your gear.
Finally, consider exploring useful accessories such as the best subcompact umbrella for added convenience during your travels.


