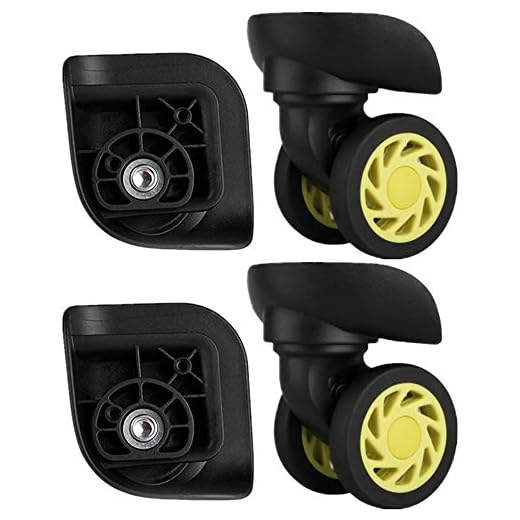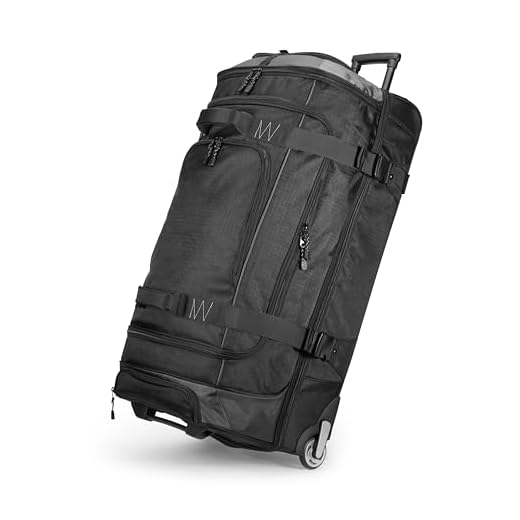


To tackle a malfunction with your travel case’s castors, gather essential tools: a screwdriver, replacement wheels, and possibly a set of pliers. Inspect the current attachments to determine the method of removal. Most often, wheels are secured with screws that can be easily unscrewed. Ensure you keep the screws in a safe location for reattachment.
Next, carefully detach the damaged or worn-out rotating components by unscrewing them from the casing. If the wheels are riveted in place, you may need to drill out the rivets, so consider having a replacement rivet handy for securing the new ones. Align the new wheels with the pre-drilled holes to guarantee a snug fit.
Once the new rolling parts are in position, fasten them with the screws or rivets, ensuring they are tightly secured for optimal performance. After installation, give them a test roll to confirm they glide smoothly across surfaces. This straightforward process can enhance your travel experience significantly.
Replacing Wheels on Travel Bags
Gather the necessary tools: a screwdriver (usually Phillips), replacement wheels, and optional pliers for stubborn screws. Ensure the new wheels match the original ones for compatibility.
Removal Process
- Empty the travel bag completely to prevent damage during the process.
- Turn the bag upside down to access the wheel assembly easily.
- Locate the screws securing the wheels; typically found at the bottom corners.
- Unscrew each wheel firmly, taking care not to strip any screws. Keep the screws for new wheels.
- Remove the old wheels and inspect the mounting points for any debris or damage.
Installation of New Wheels
- Align the new wheels with the mounting points.
- Secure each wheel with the screws removed earlier, tightening them adequately.
- Check the stability by gently shaking the bag; ensure there’s no wobble.
- Flip the bag back to its upright position and give it a test roll.
Identifying the Right Replacement Wheels for Your Atlantic Luggage
Choosing suitable replacement casters requires precise measurement and attention to detail. Follow these steps to ensure compatibility:
- Measure the diameter: Use a ruler to determine the wheel’s diameter. Typically, wheels range from 3 to 5 inches.
- Check the axle size: Assess the width and length of the axle where the wheel attaches. Common sizes are 5mm and 6mm.
- Identify the mounting style: Note how the wheel connects, whether with screws or clips. This affects the selection process.
- Examine the material: Choose between hard plastic and rubber wheels. Rubber offers better shock absorption and silent operation.
- Look for the load rating: Ensure the replacement options can withstand the weight you typically carry.
Research various retailers that specialize in travel accessories for comprehensive choices. Keep the dimensions handy when shopping. For additional insights, you might also explore topics like how can a candle start a fire, as understanding different mechanisms might enhance your repair skills.
Tools Needed for Wheel Replacement on Atlantic Luggage
Gather the following tools to efficiently perform the replacement of your travel case’s mobility components:
- Phillips screwdriver
- Flathead screwdriver
- Pliers
- Replacement wheels compatible with your bag
- Small utility knife (if applicable)
- Measuring tape (for accurate wheel size verification)
Tool Functionality
Understanding the purpose of each tool will enhance your workflow:
| Tool | Purpose |
|---|---|
| Phillips screwdriver | Used for removing screws securing the wheel assembly |
| Flathead screwdriver | Assists in prying off any stuck or tight components |
| Pliers | Helpful for gripping and pulling out stubborn parts or screws |
| Replacement wheels | New components that ensure smooth function |
| Utility knife | Used for cutting any adhesive or securing material, if needed |
| Measuring tape | To confirm the diameter and width of the existing wheels |
Preparation
Before proceeding, ensure all tools are at hand and in good working order. This preparation will facilitate a smooth and organized replacement process.
Step-by-Step Guide to Removing Old Wheels from Atlantic Luggage
Begin by laying your travel case on a flat surface, ensuring easy access to the underside. Inspect the mounting area of the existing casters for screws or rivets that secure them in place.
Use a screwdriver or a drill, depending on the type of fasteners, to remove the screws holding the wheels. Be cautious not to damage the material of the compartment.
If rivets are utilized, a rivet removal tool will be necessary. Carefully drill out the center of the rivets, allowing for their complete detachment from the casing. Ensure safety goggles are worn during this process.
Once all fasteners are removed, detach the old casters from the base. Inspect the area for any remaining debris or damage that may need addressing before installing new components.
For added convenience, utilize this opportunity to clean the surrounding area to maintain optimal performance. After removal, you may refer to resources for appropriate replacements, such as best luggage storage gare du nord.
Installing New Wheels on Atlantic Luggage: A Detailed Process
Select appropriate replacement casters that match the measurements and design of your existing ones. Ensure compatibility with your piece to avoid any issues during installation.
<p.Start by positioning the suitcase on a stable surface, preferably on its back or side, to access the underside easily.
<p.Remove the screws or fasteners securing the existing casters. Use a screwdriver or socket wrench, depending on the type of hardware used. Store these screws in a container to prevent loss.
<p.Carefully detach the worn-out casters from their mounting points. If they are stuck, gently wiggle them back and forth until they come loose. Avoid using excessive force that might damage the structure.
<p.Align the new casters with the mounting holes. If necessary, adjust their position slightly for correct fitting.
<p.Secure the replacement units with the retained screws, tightening them firmly without over-torquing, as this may strip the holes.
<p.Once the installation is complete, test the mobility of the suitcase by rolling it forward and backward. Check for any unusual noises or resistance that might indicate improper installation.
<p.If everything functions correctly, position the suitcase back on its functional side. If problems arise, double-check installation for any missed steps or misalignments.
Testing and Ensuring Proper Functionality of New Travel Case Rollers
After replacing the rollers on your travel case, conduct a thorough inspection to confirm their performance. Begin by rolling the case on various surfaces, such as smooth flooring and carpet, to assess functionality. Make sure the new attachments glide effortlessly without any resistance or wobbling.
Check for stability by placing weight inside the travel case. This helps evaluate if the new components can support the load while maintaining smooth movement. Observe any unusual sounds during this test; grinding or squeaking noises may indicate misalignment or improper installation.
Inspect the mounting points for any signs of looseness. If the attachment screws or bolts shift out of place, retighten them as necessary. Ensure any locking mechanisms function properly, preventing unintended disengagement while in use.
After these assessments, consider a brief trial run by maneuvering the case through typical travel scenarios, including tight spaces and curbs. This ensures comprehensive reliability. Finally, repeat these checks periodically to maintain optimal performance during your travels.


