For a seamless travel experience, utilize templates specifically designed for generating identification labels that suit your adventure. These customizable frameworks allow you to input necessary details such as your name, travel dates, and contact information, enabling easy identification of your belongings.
Begin with a compatible software tool or online service that offers robust label-making capabilities. Many can be found free of charge and typically have user-friendly interfaces. After selecting a template that appeals to your style, focus on personalizing the layout by adjusting sizes, colors, and fonts to ensure maximum visibility.
Ensure your data is legible and prominently displayed, using bold fonts for your name and a larger size for important details. After finalizing your design, choose a quality printing method. High-resolution output on durable materials, like thick paper or adhesive film, can withstand the rigors of travel and maintain clarity throughout your trip.
Steps for Creating Travel Identifier Stickers
Utilize an online template to facilitate the design of personalized travel identifiers. Many websites offer free options, allowing you to select sizes and formats that suit your needs.
Materials Required
Gather sturdy cardstock or label sheets suitable for your printer. Opt for weather-resistant materials if your trip involves outdoor activities.
Design Tips
Incorporate bright colors and large fonts for visibility. Include essential information, such as your name, phone number, and destination. Adding a fun graphic or logo can enhance recognition.
Consider rounding the corners of each sticker to prevent them from peeling off easily. Once designed, use your printer settings to ensure the highest quality output.
After printing, cut out each identifier carefully. Laminating them can add durability, especially for multiple uses.
Selecting the Right Materials for Printing
Opt for synthetic materials like durable vinyl or plastic to enhance resistance against wear and moisture. These substrates ensure longevity and maintain the appearance of your identifiers under various conditions.
Consider using cardstock if a more traditional feel is desired. Pair this with a protective laminate to prevent damage from spills or tears. A glossy or matte finish can add an appealing touch, enhancing visual impact.
For eco-conscious options, explore biodegradable papers, which offer sustainability without compromising on quality. Ensure they have a substantial weight for sturdiness, while still allowing for vibrant colors and clear text.
Evaluate your ink choice carefully–UV resistant inks can prevent fading from exposure to sunlight. Additionally, ensure that the ink adheres well to your selected material to prevent smudging or running.
Lastly, test samples of each material with your designs to ascertain compatibility, ensuring optimal results during production. This step will provide insights into color reproduction and the overall finish.
Designing Your Carnival Luggage Tag Template
Focus on creating a visually appealing layout that reflects the festive spirit. Begin with the dimensions – a standard size like 2.5″ x 6″ works well. Incorporate bold colors, fun graphics, and easy-to-read fonts for clarity.
Follow these guidelines for an effective design:
- Incorporate Theme Elements: Add motifs like confetti, balloons, or your event’s logo to enhance the festive vibe.
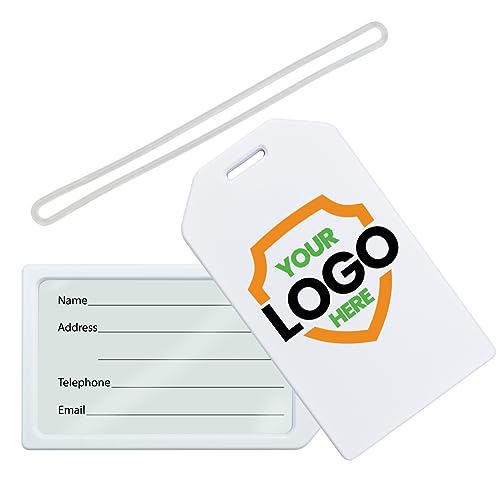
- Include Essential Information: Reserve space for names, addresses, and contact details. Use legible fonts; avoid overly decorative styles that reduce readability.
- Visual Hierarchy: Ensure the most critical information stands out. Use size and color contrast to prioritize details.
- Use Placeholder Text: When finalizing the layout, use sample text to visualize how it looks once filled out.
- Explore Color Combinations: Pick colors that complement each other, ensuring they match your overall theme.
Emphasize durability. If opting for paper, select thicker cardstock. For a more resistant option, consider synthetic materials that withstand wear.
Before finalizing, print a sample to check for errors and adjust colors or layout as needed.
As you finalize your design, explore practical accessories that complement your travel experience. Check out the best bank fishing waist pack or the best rust proof umbrella stand base for enhanced convenience during your adventures.
Choosing the Best Printer Settings for Quality Output
Select a resolution of at least 300 DPI (dots per inch) for sharp visuals and clear text on your creations. This setting guarantees vivid colors and intricate details, making the final product appealing and professional.
Utilize the photo or high-quality paper setting on your device. These options optimize ink distribution, resulting in a polished finish. Avoid using standard settings, which may compromise the output quality.
For paper type, select the specific material being used, such as glossy or matte options, in the printer preferences. This ensures that the ink adheres correctly and that colors appear as intended, enhancing the overall look.
Ensure color management is accurately configured. Use the printer’s profile that corresponds to your media type, which aids in achieving precise color reproduction. Consider printing a test page to confirm that colors match your design expectations before proceeding with the final batch.
Maintain an adequate level of ink. Check the cartridges routinely, as low ink can lead to streaking or faded results. Invest in quality ink that complements your selected paper for the best output.
Keep your printer clean and well-maintained. Regularly perform maintenance tasks, such as print head cleaning, to avoid any blockages that might affect the quality of your designs.
Cutting and Finishing Your Printed Labels
After the ink has dried, precision cutting is vital for achieving professional-looking identifiers. Use a sharp paper cutter or rotary trimmer for clean edges, ensuring uniformity across all pieces. Aim for a final dimension that fits standard bag accessories.
Recommended Cutting Techniques
Manual methods provide control, while electric trimmers can handle larger volumes efficiently. If choosing scissors, consider non-stick or crafting scissors to minimize paper pulling and tearing. Always stack and align your sheets before cutting to maintain consistent sizing.
Sealing and Protective Finishes
Add a finishing touch to enhance durability. Employ clear laminating sheets to protect against moisture and wear. Optionally, consider corner rounding tools for a polished look. A quick test is advised before large-scale application to ensure compatibility with your materials.
| Cutting Tool | Best Use |
|---|---|
| Rotary Trimmer | Precision cutting of multiple sheets |
| Scissors | Detail work and smaller batches |
| Paper Cutter | Rapid cutting for larger stacks |
For great additional inspiration during your crafting, visit the best aquarium in Louisiana, which showcases creativity in different forms.
Tips for Attaching Luggage Tags Securely
Choose sturdy fasteners such as plastic loops or metal clips to ensure a firm grip on your identifiers.
Prioritize visibility: Attach the identifier where it can be easily seen, preventing loss during transit.
Consider using a protective sleeve to shield from wear and tear, enhancing durability.
- Double-check that all elements are securely attached before departure.
- Utilize strong adhesive if choosing to stick tags onto bags, ensuring they don’t peel off.
For added security, thread the identifier through a zipper pull or secure it with a knot if using fabric cords.
Regularly inspect tags for signs of damage during travel, replacing them as necessary to maintain clear identification.
Store additional tags in your carry-on to have replacements handy if needed before reaching your destination.
FAQ:
What materials do I need to print carnival luggage tags?
To print carnival luggage tags, you will need a few essential materials. First, gather sturdy cardstock or glossy paper that can withstand wear and tear. Make sure to have a printer that can handle this type of paper, ideally a color printer for vibrant designs. You may also want to have a paper cutter or scissors to trim the tags to the desired shape and size. Additionally, consider using a hole punch for the tags if you plan to attach them to luggage with string or ribbon.
How do I design my carnival luggage tags before printing?
Designing your carnival luggage tags can be a fun and creative process. You can use design software like Adobe Illustrator, Canva, or even Microsoft Word to create your tags. Start by choosing a template or creating a custom size that suits your needs, typically around 2.5 x 4 inches. Incorporate colorful graphics, fun fonts, and important information such as your name, contact number, and any unique identification details. Remember to leave space for a hole punch if you’ll attach the tags with string. Once you’re satisfied with the design, save it in a format compatible with your printer.
Can I print my carnival luggage tags at home, or do I need to go to a print shop?
You can definitely print your carnival luggage tags at home if you have access to a suitable printer. Just ensure that you use high-quality paper and adjust the printer settings for the best results. However, if you want a more durable finish or larger quantities, visiting a professional print shop could be a better option. They often have specialized printers and materials that provide a polished final product. Whichever route you choose, make sure to test print one tag first to check for any design or alignment issues.
What should I include on my carnival luggage tags?
When creating your carnival luggage tags, include essential information that will help identify your luggage. This should typically include your name, phone number, and email address. You might also want to add a fun tagline or carnival theme that reflects the occasion. Some people choose to include their address, but be cautious with personal information. It can be beneficial to include a unique identifier, such as a reference code or a small image to help distinguish your bag. Lastly, remember to use a font size that is legible, ensuring it can be easily read by others.