
To achieve a neat finish, crease the printed sheet vertically down the center, ensuring that the information remains legible on both halves. This step helps maintain a compact structure, making it easier to manage during your trip.
Next, fold the edges inward towards the center line. Aim for equal widths on both sides to create a balanced appearance. This technique not only enhances organization but also ensures that the labels fit securely into a designated pocket or holder.
Once the sides are secured, fold the entire section again, this time horizontally. This helps to reduce visibility while storing and protects the printed details from wear and tear. The final result should be a small, manageable piece that can be efficiently attached to your baggage.
Folding Techniques for Cruise Identification Labels
Begin with the label face down. Carefully align the edges to create a clean crease. Fold the bottom edge upwards, ensuring that the top part remains intact. This method keeps the information visible when attached to the suitcase.
Next, fold the top section to meet the bottom edge, allowing for easy attachment to the handle. This compact arrangement minimizes the chance of tangling or damage during transit.
For added stability, consider a small adhesive strip to secure the edges after folding. This ensures that it remains intact throughout your travels, providing peace of mind and organized identification.
Additionally, using a clear plastic sleeve can protect the printed information while simplifying the attachment process. This option helps you quickly swap out labels if necessary while maintaining clarity.
Lastly, maintain a consistent folding process for all identification labels to streamline packing and retrieval upon arrival at destinations. Consistency contributes to a more organized experience when managing your belongings.
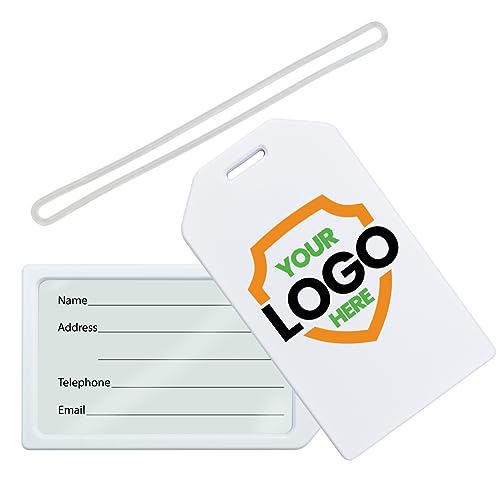
Choosing the Right Paper for Tags
Select smooth, durable paper or cardstock for your identification markers. Consider a weight of 200-300 gsm for a sturdy feel without being overly thick.
Water-resistant or synthetic materials are preferable for outdoor use, providing protection against splashes and unexpected weather conditions.
To ensure ink visibility, opt for a matte or semi-gloss finish; glossy surfaces can make text harder to read.
For enhanced durability and longevity, choose paper that is tear-resistant or backed with a laminate coating, preventing wear and damage during transit.
Verify printer compatibility with your chosen material. Test a single sheet before mass printing to avoid wastage.
Below are recommended paper types and their characteristics:
| Paper Type | Weight (gsm) | Water Resistance | Finish |
|---|---|---|---|
| Cardstock | 250-300 | No | Matte/Semi-gloss |
| Water-resistant Synthetic | 200-250 | Yes | Matte |
| Standard Paper | 80-120 | No | Gloss |
| Laminated Paper | 250-300 | Yes | Glossy |
Always remember to prioritize readability and durability in your selection process.
Measuring and Cutting the Travel Identification
Measure the dimensions of the identification structure based on standard sizes, typically 4 inches by 2 inches. Use a ruler or straight edge for precision. Mark the cutting lines clearly with a pencil or pen, ensuring they are straight and even.
Select a sharp pair of scissors or a precision cutter for a clean cut. Follow the marked lines carefully to avoid jagged edges, which can compromise the overall appearance and functionality. If working with thicker materials, a utility knife may provide better results.
After cutting, check each piece for consistency in size to maintain uniformity when they are attached. If you notice any uneven edges, trim them before proceeding to later stages. This attention to detail ensures a polished finish that represents your needs well.
Consider using quality materials that suit your specific requirements for durability. For larger projects, investing in a reliable trimmer might also simplify the task. For those with additional garden tasks, exploring options like the best cordless lawn mower for large lawns can enhance efficiency in yard maintenance.
Always prioritize safety while cutting; keeping fingers away from the blade during the process is essential. Additionally, make sure your workspace is well-lit and free of clutter to minimize distractions and increase safety. This organization allows for an easier and more focused crafting experience.
Folding Techniques for Neatness
Begin with a clean, flat surface to ensure accuracy. Align the printed item correctly, making sure all edges match up. Use a bone folder to create crisp, precise creases, which helps maintain a tidy appearance.
Utilize a straight edge or ruler while marking fold lines for consistency. Measure carefully to avoid uneven sections, enhancing the final look. When making folds, press down firmly to secure each section as you progress.
For items designed to be displayed, consider creating a triangular format by folding corners inward. This method enhances visibility and organization. If aiming for compactness, employ a rolling technique, wrapping the item tightly while maintaining alignment, to minimize space usage.
After securing each fold, consider using adhesive strips or double-sided tape to keep the sections in place. This ensures that everything stays neat during transport. Additionally, label each piece clearly post-folding for quick identification.
Securing Tags to Prevent Loss
To ensure identification remains intact, utilize sturdy fasteners like plastic loops or metal clasps. These options adhere securely to your bags while allowing easy attachment and detachment as necessary.
For additional security, consider wrapping the attachments with clear tape to prevent fraying or failure during transit. This precaution adds durability and minimizes potential loss.
Using waterproof materials to protect information from moisture is vital. Laminating your identifiers can shield them from damage and keep them legible throughout your travels.
Be cautious about legibility. Use bold fonts and clear printing for all details. Position the identifiers in visible spots, preferably on handles or along the sides of your bags, to make reading them easier.
Lastly, a dedicated pocket or pouch on your personal item can house these identifiers securely during your travels. For those who prefer style, check out the best luxury backpack womens for fashionable options that keep necessities organized while protecting important information.
Tips for Personalizing Luggage Tags
Incorporate vibrant colors and bold patterns to make your identifiers stand out. Consider using personalized designs that reflect your personality or interests; this adds a unique touch to your markers.
Add your name, contact number, or email in a fun, eye-catching font. Combining a mix of typography can enhance visibility while ensuring your information remains clear.
Use stickers, stencils, or decals to embellish your identifiers. These additions can range from travel-themed graphics to your initials, creating a more distinctive appearance.
Integrate a waterproof laminate over the printed details to protect them from wear. This ensures that your personalized information stays intact, regardless of environmental factors.
Consider using a color-coding system for your markers based on travel destinations or types of trips. This offers a quick visual way to identify what’s what while keeping your belongings organized.
Experiment with different shapes and sizes of the identifiers instead of standard rectangular forms. Unique designs make it easier to spot your items in a sea of common styles.
Add small charms or clips that dangle from the corners. This not only personalizes but also provides a tactile element that can be felt during handling.
Write a fun travel quote or slogan on your personalized markers to express your travel spirit and inspire yourself and others around you.
Testing Tag Durability Before Travel
Conduct rigorous tests on your identifiers before departure to ensure resilience against wear and tear. Begin by selecting a sample of the material used for your identifiers, replicating the size and design of the final versions.
To evaluate strength, carry out the following assessments:
- Tear Test: Pull the sample at both ends to determine resistance to tearing. Aim for a minimal occurrence of fraying.
- Water Resistance: Submerge the identifier in water for a brief duration. Observe any signs of damage or degradation upon removal.
- Heat Exposure: Place the tags in a warm environment, like near a radiator. Check if the material warps or changes shape.
- Weight Test: Attach a small weight to the tag and observe if it holds securely without sagging or detaching.
After testing, document your findings. Adjust materials or designs based on performance. Utilize reinforced edges or waterproof coatings if necessary. Ensuring product longevity can save you from future inconveniences while traveling.
If possible, run your identifiers through typical handling scenarios, such as buffeting or contact with other items. This can help predict real-world durability. Prioritize performance to guarantee a hassle-free experience during transportation.
FAQ:
What materials do I need to fold cruise luggage tags properly?
To fold cruise luggage tags correctly, you typically need the tags themselves, which are often made of durable paper or plastic, and a pair of scissors if you need to trim the tags for a better fit. Some travelers also find it helpful to have a ruler or straight edge for creating clean folds. Finally, tape or a stapler can be useful if you want to ensure the tags are secured after folding.
Can I fold cruise luggage tags without damaging them?
Yes, you can fold cruise luggage tags without damaging them by using gentle techniques. Start by reading any instructions provided with the tags to locate the designated fold lines. If there are none, you can use a flat surface to make creases lightly without applying excessive pressure. This way, the tags remain intact and functional. It’s a good idea to test folding a sample tag first, especially if the tags are made from a thicker material.
What are the steps involved in folding cruise luggage tags correctly?
To fold cruise luggage tags accurately, follow these steps: First, place the tag flat on a surface; look for any existing perforations or fold lines that may guide you. Next, gently fold the tag along these lines, ensuring not to apply too much force to avoid ripping the material. If the tag has a plastic sleeve or holder, you may need to slide the tag in after folding it. Finally, if needed, secure the ends with tape or a staples to keep everything in place during travel. After folding, attach the tags to your luggage securely to avoid any loss or damage during your cruise.


