Yes, a photography support device can be transported in the hold of an aircraft. However, it is essential to adhere to specific airline rules and regulations. Check with your carrier beforehand as policies may vary significantly. Most airlines permit such items, as long as they comply with size and weight restrictions.
Proper packaging is crucial. Ensure the support device is securely cushioned to withstand handling. Consider using a padded case or bubble wrap to minimize the risk of damage during transit. Additionally, remove any detachable parts to streamline the size, making it easier to fit within the airline’s baggage dimensions.
Be aware of customs regulations in your destination country. Certain regions may have restrictions on equipment used for photography, so it’s advisable to research any specific guidelines. Being informed helps avoid complications upon arrival and ensures a hassle-free journey.
Transporting a Camera Stand in Checked Bags
A camera stand can be transported in your airline’s cargo hold without issue, as airlines typically allow such items in their checked sections. Ensure the equipment is securely packed to prevent damage during transit. Using a dedicated case or padded wrap is advisable. Check with your airline for specific weight or size restrictions that could apply to this equipment.
Be mindful of the design; certain types featuring metal components or visible mechanisms may raise security concerns. If possible, include a note indicating its function to expedite screening. If traveling internationally, familiarize yourself with regulations in your destination country regarding professional gear.
For protection, consider using bubble wrap or foam padding in addition to a case. Reinforce corners and any movable sections where breakage is possible. Carrying documentation, such as receipts or warranty information, might also be beneficial if any questions arise during travel inspections.
Lastly, if equipped with quick-release or detachable parts, disassemble them during packing to minimize space and lower the risk of damage. Proper preparation will ensure your photography equipment arrives intact at your location.
Airline Policies on Tripods in Checked Baggage
Each airline has its own guidelines regarding the transportation of photo equipment, including stabilizing devices for cameras. It’s essential to review the specific policies of your airline before traveling to prevent any issues at the airport. Generally, most carriers allow such gear in the hold, provided they fit within size and weight restrictions.
General Rules
Typically, the dimensions for checked items should align with the airline’s stipulated limits, which often range from 50 to 70 pounds for bag weight and 62 linear inches for combined measurements. Packing a stabilizer within larger bags can be a strategic approach to ensure adherence to these parameters. Some organizations recommend using padded covers or cases to protect the equipment during transit.
Recommendations
Prior to departure, consider contacting the airline directly for confirmation on any restrictions or additional fees. It may also be advantageous to familiarize yourself with the specific regulations applicable at your destination. For extra protection, tools like a best pressure washer telescoping extension wand can aid in securing loose parts. Always label your equipment with contact information to recover it easily, should it get misplaced.
Best Practices for Packing a Tripod Safely
Wrap the equipment in bubble wrap or soft cloth to provide cushioning against impacts. Securely fasten all adjustable components to prevent movement during transport.
Compact Storage
Disassemble any removable parts, such as heads or legs, to minimize size. Place smaller pieces in pockets or compartments within a larger bag to ensure they are not damaged.
Protective Cases
Utilize a sturdy case designed for transportation, featuring internal padding. Choose cases that offer waterproof or weather-resistant protection, safeguarding against environmental factors.
Label the exterior of the case with contact information, making it easier for airline staff to identify ownership in case of misplacement.
Consider investing in a hard shell or aluminum variant for maximum durability. Ensure that the chosen case complies with airline specifications to avoid added fees or complications.
Finally, review contents before traveling and keep any essential items within easy reach to streamline access during security checks.
Alternatives to Checking a Tripod
Consider carrying a tripod in your hand luggage to ensure its safety and accessibility. This option keeps your equipment close at hand during travel, minimizing the risk of damage.
Invest in a compact model designed specifically for travel. Lightweight tripods with folding mechanisms reduce bulk and fit easily into overhead compartments.
If hand carrying isn’t feasible, explore renting a tripod at your destination. Many photography shops offer rental services, allowing you to use high-quality equipment without the hassle of transport.
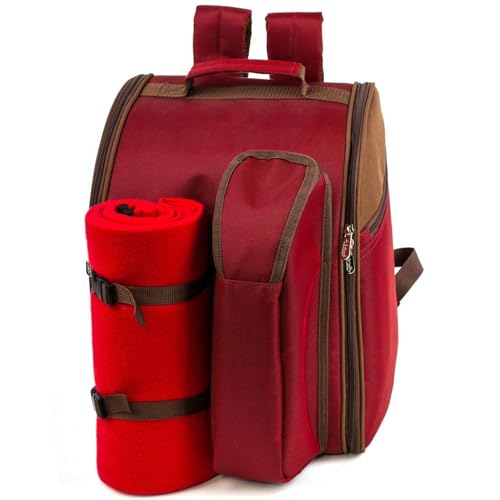
Consider using a padded case or specialized backpack designed for camera gear. Such products provide extra protection and often include compartments for essential accessories, ensuring everything is secure.
For those utilizing public transport, look for collapsible options that can be adjusted without taking up much space. This flexibility is advantageous when moving between locations.
Utilize resources to find the best quality umbrella in Australia or the best luggage denier for additional protective gear.
What to Do if Your Tripod Gets Damaged
Immediately inspect the unit for any visible issues. If components are broken or missing, take detailed photographs of the damage. This documentation will be crucial for any warranty claims or insurance discussions.
Contact Your Insurance Provider
If you have personal property insurance or travel insurance that covers equipment damage, notify your provider as soon as possible. Provide them with the documentation, including photographs and a detailed account of the circumstances surrounding the damage.
Reach Out to the Manufacturer
For products under warranty, contact the manufacturer. Many companies offer repair services or replacements for defective items. Include all relevant details such as the model number, purchase date, and evidence of the damage.
| Action | Details |
|---|---|
| Inspection | Check for visible damage and document with photos. |
| Insurance Contact | Report damage to your insurance provider with documentation. |
| Manufacturer Support | Reach out for warranty claims or repair options. |
| Local Repair Shops | Consult local repair services for assessments and costs. |
Consider researching local repair shops that specialize in photo equipment. They can often provide faster service and may offer competitive pricing compared to manufacturer repairs.
Assess the integrity of any remaining components before deciding whether to continue using the equipment, as safety should be a priority. If repairs are not feasible, explore options for replacement or upgraded models that may better suit your needs.
Traveler Experiences: Tripods in Checked Luggage
Many travelers have shared their firsthand experiences regarding the handling of photographic supports in hold baggage. Here are some insights worth noting:
Common Outcomes
- Several passengers reported receiving damaged equipment after their bags were checked. Breakable components were particularly vulnerable to impact.
- Keep an eye on your belongings upon retrieval. Occasionally, items have been lost during transit or mistakenly sent to different destinations.
- Users have noted that gear made of lightweight materials tends to suffer less damage compared to heavier alternatives.
Best Practices from Travelers
- Wrap each component in clothes or bubble wrap for added cushioning.
- Label your bags clearly with contact information in case of loss.
- Use robust cases designed for travel to protect valuable photography gear.
- Some recommend securing with straps or bungee cords to prevent movement within the case.
Since experiences vary widely, travelers should weigh the risks and consider alternative options. Safety measures taken can significantly reduce the chances of encountering issues.
FAQ:
Can I bring a tripod in my checked luggage?
Yes, you can include a tripod in your checked luggage. Just ensure that it is securely packed to prevent any damage during transit. It’s advisable to remove any detachable parts, such as quick-release plates, and store them separately if possible.
Are there any special restrictions for bringing a tripod in checked luggage?
Generally, there are no specific restrictions for tripods in checked luggage. However, it’s recommended to check with your airline for any individual policies. Some airlines may have limitations on size or weight for checked bags, which could affect your ability to carry larger tripods.
Should I declare my tripod when checking in my luggage?
It’s not usually necessary to declare a tripod specifically when checking your luggage. However, if your tripod includes any expensive components or is particularly valuable, you might consider informing the airline when checking in, just to ensure proper handling during your journey.
What is the best way to pack a tripod for checked luggage?
To pack a tripod for checked luggage, start by disassembling it if possible. Wrap the legs in bubble wrap or a soft cloth for extra protection, and use a sturdy bag or case that can withstand rough handling. Consider placing it in the center of your luggage surrounded by clothes for cushioning. This method helps safeguard your tripod against potential damage.