I recommend a compact rigid case around 55 x 40 x 20 cm (about 22 x 16 x 8 in) and an empty weight below 3.5 kg. That size fits most carry-on policies, slides into overhead bins easily and reduces chances of gate-checking. Look for a polycarbonate shell, reinforced corners, smooth 360° spinners and a telescoping handle that locks at multiple heights.
If you plan to check a suitcase, stick to a maximum linear dimension of 158 cm and a weight at or under 23 kg to avoid excess fees. Buy a fare that includes at least one checked bag when traveling with heavy winter clothing or outdoor gear; pre-purchased checked allowances are often cheaper than airport purchases.
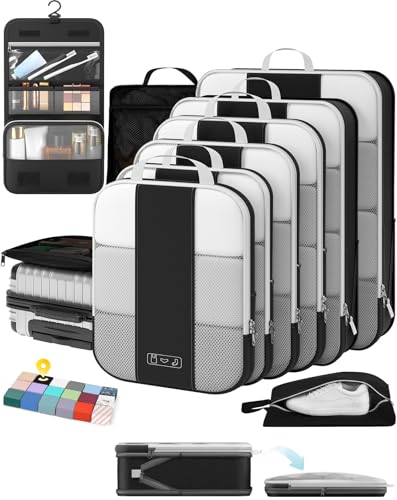
Pack wet items in waterproof dry bags and dedicate a small boot bag for muddy hiking shoes. Keep liquids in 100 ml containers inside a clear pouch and place fragile electronics in padded compartments. Power banks must travel in the cabin only; limit capacity to ≤100 Wh unless you obtain explicit carrier approval for cells between 100–160 Wh.
Select a case with replaceable wheels, a reinforced wheel housing and a manufacturer warranty of at least five years if you expect rough handling on gravel roads or volcano-adjacent terminals. Choose luggage with an integrated organiser or include compression cubes to maximize usable volume while staying within weight targets.
Recommendation: choose the 20″ hardshell spinner with tare weight under 3.5 kg and external dimensions ≤55 × 40 × 20 cm (wheels and handle included) to meet Reykjavík carrier cabin limits
Typical empty mass of comparable 20‑inch models: 2.9–3.6 kg (6.3–8.0 lb); internal volume ~35–40 L. Weigh the case fully packed at home using a hanging scale and measure external size including wheels and extended handle to avoid gate rejection. Place bulky clothing and heavier items near the base and use compression cubes to maximize usable volume without bulging zippers.
Checked-bag and weight practicalities
Standard checked-piece allowance on many economy fares is 23 kg (50 lb); confirm allowance tied to your fare on the carrier website before arriving at the airport. If you expect to check the spinner, choose the larger model with reinforced corners and a sturdy wheel assembly; consider adding a soft wrap or plastic film to minimize scratches from gravel at Keflavík and regional ground handling.
Battery, security and damage-prevention tips
Remove external lithium power banks from any checked piece and carry them in the cabin–most carriers permit batteries up to 100 Wh without approval and require prior authorization for 100–160 Wh. Photograph the case (all sides, wheels, telescopic handle) before check-in and again upon arrival; register serial number with the manufacturer when available. Use a bright ID tag, secure zippers with a TSA‑accepted lock, and buy trip-specific baggage protection that covers abrasion, broken wheels and repair or replacement costs. If planning domestic connections on smaller turboprops, expect tighter carry limits and inspect wheel housings after each transfer.
Do popular hard-shell carry-ons meet Icelandair cabin baggage limits?
Short answer: many hard-shell carry-ons from that brand exceed Icelandair’s published cabin allowance of 55 × 40 × 23 cm (including wheels and recessed handle); choose the compact 21.7-inch model or a soft-sided bag strictly under 55 × 40 × 23 cm and within your ticket’s weight limit.
Dimensions comparison
Icelandair cabin allowance (standard economy): 55 × 40 × 23 cm (21.7 × 15.7 × 9.1 in) including wheels and recessed handle. Typical hard-shell models sold as “standard carry-on” measure about 21.7 in tall (≈55 cm) while the larger “bigger carry-on” models measure ~22.8 in (≈58 cm). The larger model will exceed the 55 cm length and risk gate refusal or forced check-in.
Practical checks and recommendations
Measure the external height with wheels and handle in stowed position, and weigh the bag fully packed on a household scale. If packed dimensions are at or above 55 × 40 × 23 cm, swap heavy items to a permitted personal item, choose the smaller hard-shell variant, or pick a compliant soft-sided bag. At the gate, expect staff to measure and weigh carry-ons; if oversized you’ll likely be asked to gate‑check the bag (fees and procedures vary). Keep valuables and fragile items in the personal item to avoid damage if gate-checked.
How to carry and declare the removable battery pack on flights with Iceland’s carrier
Keep the removable power pack inside carry-on baggage; spare lithium-ion batteries must not be placed in checked baggage.
Battery rating rules: ≤100 Wh – allowed in cabin without carrier approval. 100–160 Wh – allowed in cabin only with prior carrier approval, maximum two spare batteries per passenger. >160 Wh – forbidden from passenger aircraft.
Convert mAh to Wh using: Wh = (mAh ÷ 1000) × V (most power banks list nominal voltage as 3.7 V). Examples: 10,000 mAh ≈ 37 Wh; 20,000 mAh ≈ 74 Wh; 27,000 mAh ≈ 99.9 Wh.
Declaration steps: if pack is rated between 100 and 160 Wh, contact the carrier by phone or email at least 48 hours prior to departure and request written approval stating permitted quantity and the flight number. At airport check-in present the pack and any approval documentation; answer security questions and remove the pack if requested.
Packing and terminal protection: keep the pack installed in its removable sled only when carried inside cabin; if removed, isolate terminals with electrical tape, use original protective caps or place each unit in a separate plastic pouch. Never allow loose batteries to touch metal objects or each other.
Quick checklist
1) Verify Wh printed on the pack or convert from mAh.
2) If 100–160 Wh, obtain carrier approval ≥48 hours before travel and bring written confirmation.
3) Pack the pack in carry-on, protect terminals, limit spares to two (100–160 Wh) per passenger.
4) Present the pack and documentation at check-in and security when requested; follow staff instructions on handling or removal.
Protect hard-shell suitcase and wheels against Keflavík baggage handling: packing & reinforcement tips
Apply 2–3 layers of self-adhesive stretch wrap over the entire shell and wheel housings prior to check-in; add a 3 mm corrugated plastic sheet on major impact faces (corners, front, back) and secure with gaffer tape.
Wheel care: if wheels detach, remove and place inside main compartment wrapped in bubble wrap; if fixed, slide a 15–20 mm closed-cell foam sleeve over axle area, clamp with stainless zip ties, then overwrap with stretch film to block grit and reduce abrasion.
Shell reinforcement: install 4–6 cm wide aluminum or polycarbonate edge strips along the inner zipper flange to disperse point loads; apply 25 mm gaffer tape externally along the zipper seam to reduce prying and to keep zipper teeth aligned during handling.
Interior cushioning: create a 5 cm clothing buffer around fragile items and position heavy rigid objects at the wheel end to act as sacrificial impact absorbers; use dual-layer packing cubes and a 10–15 mm foam sheet beneath electronics and camera gear.
External add-ons: fit a 50–75 mm wide cargo strap across the case with a welded stainless buckle; attach molded wheel-guard plates over housings using rivet-style clamps or heavy-duty zip ties; add an elastic rain overwrap to cut down scuffs during conveyor transfers.
Handling tactics at check-in: request a ‘FRAGILE’ tag and minimal transfer handling from the counter agent; opt for gate-check when possible; photograph exterior serial numbers and existing scuffs prior to drop-off to document condition.
On-the-ground repair kit: pack 1 roll 25 mm gaffer tape, 6 stainless zip ties (150 mm), a 30×200 mm aluminum strip, two 50×150 mm foam pads and a small rivet tool with 10 rivets to perform rapid reinforcement at the carousel.
Also check a compact daypack option best small backpack for cycling to protect essentials during transfers and a youth-sized radial case suggestion best luggage for teen when choosing backup baggage; legal travel status notes at how can a daca recipient get a green card.
Damage, delay or loss claims: required documents and submission timelines
File a Property Irregularity Report (PIR) at the carrier’s baggage desk before leaving the terminal and keep the original paper with the reference number and agent name.
Required documents
- Original PIR copy with reference number and staff contact.
- Boarding pass and passport or government ID.
- Checked-bag tag(s) and check-in receipt showing weight and tag numbers.
- Booking confirmation or itinerary containing the PNR/booking reference.
- Date-stamped photos of external damage, internal contents, and an object that shows scale.
- Itemized list of damaged or missing contents including approximate purchase dates and original prices.
- Original purchase receipts or certified copies proving value; if unavailable, at least two independent price references (links or invoices).
- Repair estimate or final invoice from a repair shop when repairs are pursued.
- Police report when theft is suspected, with incident number and contact details.
- Completed carrier claim form, signed contact details and bank/payment information for settlement.
- All correspondence with carrier staff, stamped receipts from any emergency purchases, shipping receipts when replacement items are returned to the carrier.
Timelines and step-by-step process
- At airport: report missing, delayed or visibly damaged checked suitcases to the carrier’s baggage office and obtain the PIR before exiting the terminal.
- Damage: submit a written claim plus required documents within 7 days of receiving the case. Include PIR, photos, itemized contents list and receipts or repair estimates.
- Delay: keep emergency purchase receipts; submit a written claim within 21 days counted from the date the bag was placed at your disposal. If the bag is returned later, include all delivery documentation and original PIR.
- Loss: if the case is not located within 21 days after arrival, the carrier will typically consider it lost. Submit a loss claim immediately after that 21-day period; attach PIR, proof of value, and a full contents inventory.
- Documentation retention: retain originals of receipts, repair invoices and the damaged article until the claim is closed or the carrier requests disposal/inspection. Keep copies of every submitted file and send electronic copies via the carrier’s recommended channel (email link or online portal) with delivery confirmation.
- Follow-up: reference the PIR number in all communications; if the carrier requests additional evidence, supply it within the deadline stated in their acknowledgment. If no acknowledgment arrives within two to four weeks, resend the claim using tracked delivery and keep proof of submission.