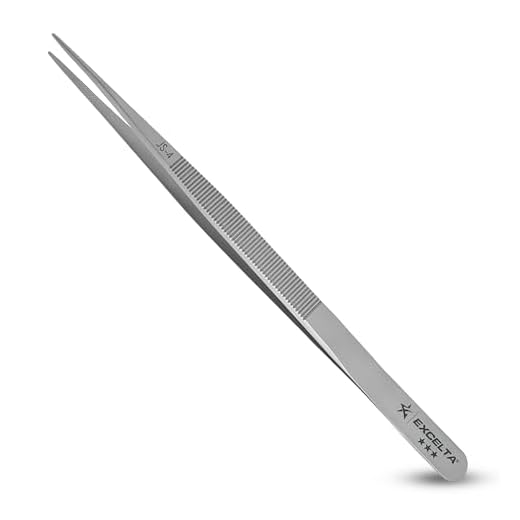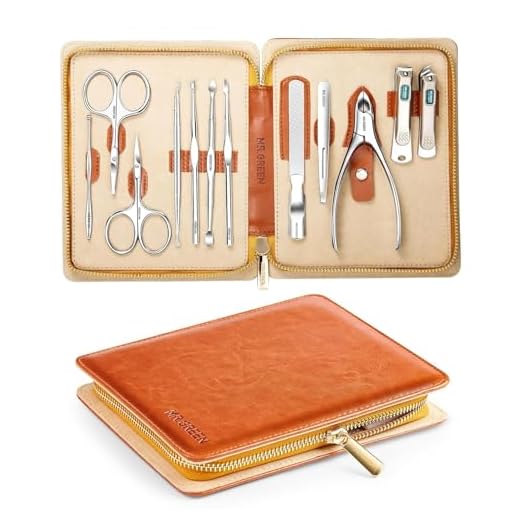


Recommendation: Small manicure shears with blades shorter than 4 inches (≤10.16 cm, measured from pivot to tip) are permitted in carry-on; metal forceps are allowed; any grooming implement whose blade exceeds 4 inches must be placed in checked baggage.
U.S. Transportation Security Administration permits pointed-tip scissors under 4 inches; most other national security agencies apply a similar limit for scissors-type tools. Simple metal forceps or similar pinching tools are normally acceptable in cabin bags; piercing or locking cutters that exceed the length limit are restricted to checked bags.
Practical steps: measure blade length before packing; store small grooming implements inside a clear toiletry pouch to speed inspection; cover sharp edges with protective caps or tape; if an item is queried at the security checkpoint, follow the officer’s instruction to move it into checked baggage or to dispose of it.
Regulations differ by carrier; national rules vary by airport. Check the airline’s prohibited items list plus the departure airport security page prior to travel; if uncertain, consign questionable tools to checked baggage or ship them ahead via a courier service.
Are manicure shears permitted in carry-on by TSA, EU, UK security?
Recommendation: Store small grooming shears with blade length under 4 inches (10.2 cm) in carry-on for US departures; for EU or UK departures prefer blades ≤6 cm, otherwise place in checked baggage.
TSA rules: grooming shears with blade length of 4 inches (10.2 cm) or less, measured from pivot to tip, are allowed in cabin; precision forceps are permitted without a stated size limit; items with pointed or razor-sharp tips may be refused by screeners.
EU guidance: Most national authorities permit small grooming shears with blades up to 6 cm, measured from pivot to tip; member-state variations exist, airports may impose stricter limits, security officers hold final authority. UK Civil Aviation Authority: blades shorter than 6 cm acceptable in cabin; tools with longer blades must travel in checked baggage.
Practical steps: measure blade length before packing; keep grooming tools in a protective sheath or rigid case; choose rounded-tip designs when possible; replace steel instruments with disposable emery boards or electric manicure devices that enclose cutters for carry-on; when uncertain, move items to checked baggage to avoid screening delays.
Additional travel tip: consider compact sun protection for arrival destination; see best beach umbrella for shade for a compact option suitable for beach trips.
Permitted blade length & shapes for shears in cabin baggage
Immediate guideline: U.S. TSA allows blades shorter than 4 in (10 cm) measured from the pivot; UK regulators commonly set a 6 cm (2.36 in) limit, while many EU authorities apply similar short-blade thresholds or local variations.
Shape rules: blunt or rounded tips face fewer objections at security; sharply pointed tips increase the likelihood of denial, additional screening, or requirement to place the item in checked baggage.
Practical recommendations
- Measure from the pivot point to the blade tip along the cutting edge; record both cm and inches for certainty.
- Prefer folding, locking shears with a rounded tip and a closed position that prevents accidental injury.
- If blade length exceeds the strictest known limit on route, place the item in checked baggage before reaching the security checkpoint.
- Keep items in a protective sleeve or case to show intent of safe storage when asked by officers.
- For international itineraries, verify rules for origin, transit, destination airports plus the carrier’s policy prior to travel.
- When in doubt, swap for a blunt-ended grooming tool or single-use emery boards kept in the cabin bag.
How to measure correctly
- Lay the tool flat with blades closed.
- Place ruler at the pivot center; measure straight to the tip along the outer edge.
- Convert measurement: 1 in = 2.54 cm; compare with 4 in (10 cm) U.S. benchmark and 6 cm (2.36 in) common UK/EU benchmark.
How to pack cuticle shears, precision forceps for faster security screening
Place cuticle shears, precision forceps inside a clear, resealable plastic pouch; cover cutting edges with a rigid sheath or heavy adhesive tape; position pouch in the outermost compartment of cabin baggage for immediate visibility at the security tray.
Step-by-step packing
Measure cutting-edge length before packing; if the longest blade exceeds 4 inches, stow in checked baggage. Wrap sharp tips with foam tubing or folded microfiber; secure with tape to prevent movement. Use a purpose-made metal tool case with rounded corners when available; if using a hard case, place the clear pouch on top so contents are plainly visible during X-ray inspection.
Quick checklist to speed screening
1) Clear resealable pouch, labeled “grooming tools” for quick ID. 2) Blades sheathed, tips taped or foam-padded. 3) Pouch in outer compartment of cabin baggage, not buried under clothes. 4) Place pouch in the tray separately during X-ray to avoid secondary inspections. 5) If carrying replacement disposable files, store them adjacent to the pouch for single-tray presentation. For unrelated travel cleaning supplies reference see best automotive soap for pressure washer.
Pinching tools in carry-on: magnetic, pointed or blunt – which types cause issues?
Prefer blunt-tipped, non-magnetic forceps for cabin carriage; sharp points and strong magnets trigger secondary screening and have higher risk of confiscation.
Magnetic models: small accessory magnets usually pass through metal detectors without problem, but items containing high-strength neodymium magnets are often flagged. Strong magnets can attract other metal objects, damage onboard electronics if loose, and some carriers restrict them entirely – place such items in checked baggage where allowed by the airline.
Pointed tips: straight, needle-like ends or serrated biting edges are treated as piercing implements. Security staff evaluate tip geometry and accessibility; exposed sharp points increase likelihood of removal. Opt for rounded, slanted or flattened tip profiles to reduce scrutiny.
Blunt and coated designs: rounded stainless-steel ends, plastic- or rubber-coated tips, ceramic blunt heads, and folding models with a locking cover are the lowest-risk choices. These designs shorten screening time and are less likely to be retained.
Integrated tools and length: multi-tool assemblies that include blades, saws or long rigid handles usually fall into the prohibited-tool category. Long metal forceps with a solid grip surface can be considered offensive and inspected more closely.
Practical checklist: select blunt or covered tips; avoid integrated high-strength magnets; use folding models with tip guards; store items in a clear pouch or protective case and keep them accessible for inspection; when uncertainty exists, move the item to checked baggage per carrier policy.
Transit and connecting flights: what to do when rules differ between airports
If itinerary passes through a jurisdiction with stricter screening, place all metal grooming implements in checked baggage or send them ahead by courier before departure.
Verify applicable rules before departure
Check three authoritative sources: carrier policy, departure-airport security page, and transit-airport security page. If any of the three explicitly prohibits specific metal grooming items in cabin, treat that prohibition as binding for the entire connection. For international-to-domestic transfers that require immigration and customs clearance (examples: arrival into the United States, certain UK entries), expect mandatory re-screening under the destination country’s rules.
Packing and in-airport actions to avoid confiscation
When stricter rules are likely: 1) Move grooming shears, small blades, and pinching tools into checked baggage and secure them in a rigid case; 2) If checked options are not available, purchase disposable alternatives at origin airport duty-free or at the connecting hub retail outlets; 3) For tight connections that require a terminal change with security re-entry, allow at least 90–180 minutes to re-clear screening and to transfer items to checked baggage if required. If unsure, contact the carrier’s transfer desk immediately upon arrival at the connecting airport to confirm whether retention in the sterile zone is permitted or if re-screening will occur.
Extra measures: photograph valuable grooming implements and keep receipts in checked bags to facilitate recovery if items are held; ship rare or expensive pieces to destination using tracked courier if confiscation risk is high; avoid declaring restricted items at security unless requested, since declaration typically results in removal from cabin.
If security confiscates manicure items: steps to follow and reclaim options
Request an incident report and property tag at the checkpoint immediately; retain boarding pass, passport/ID and purchase receipts.
Collect on-site evidence: name and badge number of screening officer, screening lane or checkpoint ID, exact time and date, detailed description of the seized grooming implement, and a printed or written confiscation receipt. Photograph personal effects and any visible tag attached to the item before leaving the area.
Contact the airport lost & found desk and the screening authority without delay. For United States incidents, contact the Transportation Security Administration Contact Center at 1‑866‑289‑9673 or via their website to request an incident reference and status update. For UK or EU locations, locate the airport operator’s lost property office and the national civil aviation authority contact page for complaint procedures.
If the item appears to have been surrendered to airport police or customs rather than screening staff, request the file/reference number and the specific unit handling property. Record contact names, station phone numbers and any case numbers provided.
File a formal appeal or complaint when the on-site supervisor’s response is unsatisfactory. Include: scanned incident report, photos of the item, boarding pass, flight number, receipts or proof of purchase, serial numbers (if present), and a concise chronology. Submit electronic copies via the screening authority’s designated complaint portal to ensure timestamped receipt.
If the screening operator reports disposal, evaluate recovery and compensation options: airline claim forms if crew or ground staff later handled the item; travel insurance claim with proof of value; or small-claims court where demonstrable negligence by the security operator exists. Maintain all original documentation for claims.
Some airports offer return-by-post from lost property for a handling and postage fee; expect processing times of 2–8 weeks. Verify accepted payment methods and identity verification requirements before authorizing shipment. If a third-party courier is used, insist on a tracking number.
For international transfers, contact lost property offices at both departure and arrival airports and inform the airline. If customs seized the implement, follow customs reclaim procedures of the relevant country; customs offices often require separate forms and provide different retention periods.
If recovery is important, escalate to the national aviation authority if local channels produce no result after 30 days. For high-value items, consult a solicitor about jurisdictional recovery options and evidence preservation.
Preventive recordkeeping: photograph grooming implements before travel, register serial numbers with a personal document (email to self), and pack non-prohibited items in checked baggage to avoid checkpoint loss.
| Channel | Typical action | Recovery window (typical) | Required documents | Notes |
|---|---|---|---|---|
| Airport lost & found | Hold for identification, return in person or post | Same day to 90 days | ID, boarding pass, incident reference | Some airports charge handling/postage |
| Screening authority (e.g., TSA) | Record incident, may destroy prohibited items | Immediate if destroyed; otherwise variable | Incident report, flight details | Operators often dispose items deemed prohibited |
| Airport police / customs | Evidence hold or legal seizure | Varies by legal process | Official reference, ID, customs paperwork | Different reclaim rules apply for customs seizures |
| Airline | Intermediary assistance or claim handling | 7–60 days | Boarding pass, receipts, incident details | Useful when ground staff handled the item after screening |
| Travel insurer / small claims | Compensation request or legal action | Depends on policy or court timeline | Proof of value, incident report, correspondence | Successful claims require strong documentary evidence |


