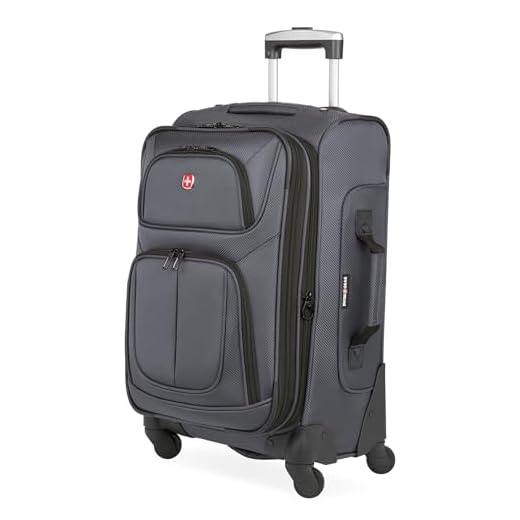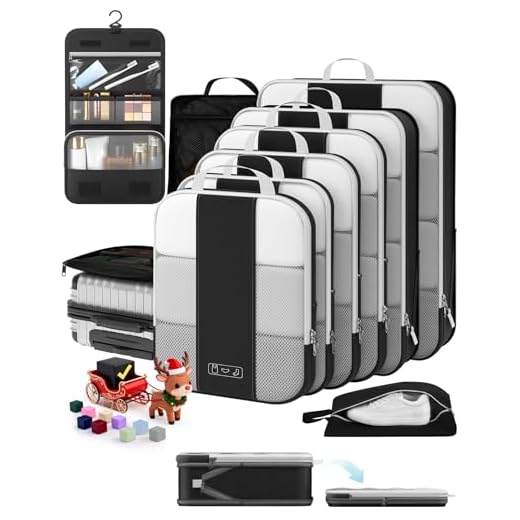


Buy a hard-shell 20–22″ spinner built from 1.0–1.6 mm polycarbonate or a milled-aluminum frame if you prioritize impact resistance; insist on TSA-approved locks, modular double-row ball-bearing wheels that can be replaced without special tools, and a manufacturer’s warranty of at least three years.
Sizing and weights: For carry-on select 20–22″ (45–55 L) with an empty weight target of 2.5–3.5 kg. For checked bags choose 24–28″ (65–110 L) with empty weight 3.5–5.5 kg. Compare internal volume-to-weight ratio: aim for ≥12 L/kg for carry-on and ≥18 L/kg for checked to maximize usable space while staying under airline limits.
Construction details to verify: shell thickness (polycarbonate 0.8–1.6 mm; ABS is lighter but less impact-resistant), reinforced corner ribs or internal honeycomb structure, YKK or equivalent zippers, anodized aluminum telescopic handles with checked-cycle ratings (look for ≥5,000 extension cycles), and polyurethane wheel treads on sealed bearings. Expansion zippers add 10–20% capacity but reduce structural stiffness; removable/internal compartments should be stitched and bar-tacked at stress points.
Warranty, service and testing: confirm that the warranty explicitly covers wheel replacement, handle breakage and zipper failure; check for a spare-parts network or authorized service centers in your region. Prefer models with published lab tests (drop tests from 1.2–1.5 m, wheel-load tests of 50–100 kg, handle-cycle specs). If buying online, require seller photos of serial-numbered units or factory test reports.
Practical buying steps: inspect an in-store demo for wheel smoothness and handle wobble, run a 360° spin test on flat floor, and unzip/zip fully to check alignment. Price bands: budget $50–120 (basic materials, limited service), mid $120–300 (better shells, replaceable modules), premium $300+ (aluminum or engineered polycarbonate, extended service). For frequent travel choose models with documented replaceable modules and easy field repairs rather than the lightest possible empty weight.
“It” brand: build and performance verdict
Recommendation: Choose “It” suitcases when you need lightweight polycarbonate or ABS shells, four-wheel spinners that glide under load, and a warranty that covers frame and zipper defects.
Construction details: common shell materials include 100% polycarbonate blends (0.6–1.0 mm thickness) and ABS/polycarbonate mixes for budget models. Telescopic handles use two-stage aluminum tubes; wheel assemblies are usually dual-spinner with sealed bearings. Zippers vary between coil and YKK-style metal teeth; metal-reinforced corners appear on select items.
Performance metrics
| Model type | Material | Typical empty weight (kg) | Typical price (USD) | Warranty |
|---|---|---|---|---|
| Carry-on hard-shell | Polycarbonate | 2.2–3.2 | 80–160 | 2–5 years (limited) |
| Medium check-in | ABS/PC blend | 3.5–5.0 | 100–200 | 2–5 years (limited) |
| Large expandable | Polycarbonate or ABS | 4.5–6.5 | 120–250 | 2–5 years (limited) |
User feedback summary: aggregated ratings commonly fall between 3.8 and 4.3 stars on retail platforms; positives focus on weight-to-durability ratio and rolling behavior, negatives concentrate on zipper failures and cosmetic scratches after heavy airline handling.
Who benefits most
Frequent flyers seeking light, maneuverable cases and budget-conscious travelers prioritizing price over premium materials will find a good match. Business users who need robust protection for electronics should select rigid polycarbonate models with reinforced corners; family travelers who overload cases should opt for reinforced frames and replaceable wheels.
Practical checks before purchase: verify wheel replacement availability, confirm warranty terms in writing (what parts and shipping are covered), test handle stability in-store if possible, and compare shell thickness and hinge design rather than relying on brand alone.
Construction and shell materials: testing impact resistance and scratch behavior
Choose polycarbonate shells with wall thickness of 0.9–1.2 mm for carry-on pieces and 1.2–1.8 mm for checked pieces; this range typically yields the best compromise between impact absorption and weight.
Impact testing protocol and pass/fail criteria
Run three controlled tests: corner drop, face drop and concentrated-mass impact. Use these parameters: corner drop 1.5 m (simulate conveyor/handling), face drop 1.0 m, and a 0.5 kg steel sphere dropped from 1.2 m for concentrated impact (impact energy ≈ 5.9 J). Acceptable outcomes: no through-cracks, residual permanent deformation ≤5% of shell thickness, telescoping handles retain full travel and locking, and zippers or latches continue to operate smoothly. For accelerated lab confirmation, request ISTA 3A or ASTM D4169 cycle reports showing survival of repeated 10-cycle drop sequences at the stated heights without structural failure.
Material behavior under these tests: polycarbonate typically flexes and returns with minor surface marks; polypropylene tends to bend without cracking but may retain creases; ABS commonly fractures at lower-energy impacts; aluminum panels dent or crease rather than crack–expect visible deformation but intact attachment points when shell thickness is ≥1.0 mm and corners are reinforced.
Scratch testing and finish recommendations
Use a Taber abrasion test (CS-10 wheel, 500 g load) as a baseline: ≥500 cycles before visible matte-change indicates acceptable resistance for travel use; >1,000 cycles suggests superior abrasion resistance. For real-world checks, run a metal-key scratch across a concealed area–matte/textured finishes hide micro-scratches better than high-gloss. Recommended factory finishes: matte textured polycarbonate, textured polypropylene, or anodized aluminum (anodic layer 10–20 µm) combined with a clear polyurethane or TPU topcoat of 25–50 µm to raise abrasion-cycle performance and limit oxidation.
Design features that reduce impact and scratch damage: monocoque/injection-molded shells distribute forces more evenly than multi-panel assemblies; continuous internal frame or reinforced corners (metal or reinforced polymer inserts) prevent stress concentration at latches; recessed hardware and flush-mounted wheels reduce contact scratches. When evaluating a case in person, press firmly at the center to assess flex recovery, inspect corner reinforcements visually, and check whether the finish masks or shows fingernail-level abrasion.
Wheels and telescopic handle: simple tests for smoothness, wobble and long-term wear
Recommendation: Roll the case 10 m on smooth tile with a 10 kg load; travel should require a single-handed push and remain free of stutters, grinding or repeated rebounds.
Smoothness test: Roll forward and back at normal walking speed for 10 m each direction on tile, low-pile carpet and asphalt. Acceptable behaviour: continuous rotation with no audible grinding and no sudden drops in speed. Measurable limits: side-to-side play at the wheel axle ≤2 mm, axial endplay ≤1 mm. Replace bearings if play exceeds those values or if noise increases noticeably compared with baseline.
Wobble and alignment: With the case upright and handle extended to full length, grip the top and push gently from one side then the other; lateral movement at the handle top should be under 3 mm. For the wheel set, spin each wheel by hand: wobble visible at 30 cm distance implies bent axle or loose fastener. Check wheel runout by marking a point on the tread and rolling 5 m to see if the mark deviates more than 5 mm from a straight path.
Load and fatigue checks: Attach a 5–10 kg weight inside, extend the handle fully and cycle extend/retract 50 times; listen for clicks, binding or loss of positive lock. For wheels, roll 200 m over mixed surfaces and then inspect for flat spots, tread separation or bearing heating. If locking fails or wheel performance degrades during these cycles, expect reduced service life.
Fastener and replacement inspection: Prefer models with screw-mounted wheels (Torx T10–T15 or hex M4 screws) rather than riveted assemblies. Tighten loose screws to 4–6 Nm; rivets require professional replacement. Confirm available spare parts by checking the manufacturer’s parts list or service panel before purchase.
Maintenance tips: Clean grit from wheel channels with a thin screwdriver, then apply a dry PTFE or silicone spray to bearings and sliding tubes; avoid heavy lubricating oils on plastic bushings. Re-torque wheel screws after 50 km of cumulative travel.
Failure signs to inspect after testing: loud grinding, intermittent locking, handle telescoping that does not stay at set heights, wheel tread separation, visible axle bending or cracked hub material. If any of these appear within the first 200 km of use, seek warranty repair.
Quick household cross-check: unrelated topic guidance available at are you supposed to refrigerate red wine.
Fastenings, zippers and seals: how to inspect for alignment, pull strength and water ingress
Use a 0–50 N spring scale and a set of calipers as primary tools; target measurements and pass/fail thresholds are given below.
Alignment and mechanical integrity
- Tape-to-teeth alignment: close the zip and run a 150 mm steel ruler along the tape. Maximum lateral tooth offset ≤0.5 mm. Visible gaps or teeth stagger >0.5 mm = fail.
- Slider centering: with the zip closed, slider should sit flush with both tape edges. Measured gap between slider skirt and tape ≤0.3 mm. Larger gap indicates incorrect slider or worn stops.
- Stitching and tape attachment: stitch pitch along tape ≤4 mm; double stitching at ends and stress points. Loose threads or stitch pitch >6 mm require repair.
- Stops and end-caps: fixed stops must prevent slider overshoot. Under a 20 N axial pull on closed slider, end stops must hold without deformation.
Pull strength, smoothness and endurance
-
Initial pull test (single pass): attach spring scale to slider tab, pull at steady 100 mm/min. Acceptable starting force ≤6 N; continuous drag ≤15 N. Any sudden spikes >25 N indicate snag or misaligned teeth.
-
Cycle test (bench): perform 500 open/close cycles at moderate speed. Re-test drag: increase in continuous drag ≤20% acceptable. Jamming, skipped teeth or slider detachment = fail.
-
Tensile check of chain: clamp each tape 100 mm from zipper and apply axial load using a hand winch or rated spring scale. For medium-duty travel cases, chain separation under 400 N is a fail; heavy-duty designs target >800 N. If no test rig is available, hang a 40 kg weight for 30 s – visible tape stretch or tooth separation = fail.
-
Locking sliders and combination locks: with lock engaged, apply 50 N lateral force to closed slider for 15 s; any movement of slider or opening indicates defective lock.
Simple home tools: 0–50 N spring scale, digital calipers, steel ruler, 1 kg–50 kg weights (or gym plates), stopwatch.
- Accept/fail quick checklist: alignment ≤0.5 mm, start pull ≤6 N, continuous ≤15 N, no increase >20% after 500 cycles, chain holds expected load for product class.
Water ingress checks
- Paper-towel spray test: place a dry white towel inside the case under the closed seal. Spray zipper area from 30 cm for 60 s with a 200–300 ml/min shower head (or use a 1 L spray bottle in ~4 bursts). No wetting of towel = pass for light rain resistance; any damp patches locate leak path.
- Immersion-edge test: submerge zipper area 20–30 mm for 10 s (only for water-resistant coated zips). If inner lining shows water penetration or zipper floods, sealing tape or weld is inadequate.
- Repeated exposure: repeat spray test 5 times with drying between cycles. Progressive leakage or salt-like residue on seals = seal coating failure.
- Visual surface check: water-resistant zips normally have a continuous polyurethane coating; cracking, flaking or gaps in the coating indicate likely ingress even if a single spray passed.
Document failures with photos and measurements (mm, N, cycle count, test method) for claims or repairs.
Internal layout and capacity: measuring usable volume, weight and packing tips for real trips
Measure usable volume before packing: take internal maximum length × width × height in centimetres, calculate (L×W×H)/1000 to get litres, then subtract 8–12% to account for linings, dividers and internal pockets; record empty case mass on a scale and note airline weight limits (common checked limits: 23 kg / 50 lb, some international routes 20–32 kg).
Typical empty-case mass and internal volumes for reference: small wheeled cabin hard-shell 2.2–3.5 kg, internal 30–45 L; soft carry-on 1.8–3.0 kg, internal 28–40 L; medium checked polycarbonate 3.5–4.5 kg, internal 55–80 L; large checked aluminium 4.5–6.0 kg, internal 90–120 L. Use these figures to compute maximum packable payload: allowed gross weight minus empty mass = net payload.
Measuring usable capacity when pockets/organisers are fixed: remove any removable divider, measure main compartment only, then measure secondary pockets separately and add them as usable volume reduced by 10% to allow for irregular shapes. For soft-sided cases expect a usable-volume gain of 5–15% with compression; for hard-shell units expect very little extra beyond stated internal dimensions.
Packing density benchmarks: clothing and soft items average 0.25–0.35 kg per litre; shoes average 0.8–1.6 kg per pair and occupy 6–12 L; toiletry kit (travel-size) 1–2 L and 0.5–1.5 kg; laptop/tablet sleeve volumes 1–4 L. Use these to estimate whether a given internal volume will keep you under weight limits.
Placement rules to protect contents and improve handling: place heaviest items over or just forward of the wheelbase or bottom edge for wheeled cases; distribute mass centrally along length to reduce bending moments on telescopic handles; pad fragile items with clothing in a middle layer rather than at corner seams.
Packing techniques with quantified gains: packing cubes reduce wasted air and speed organisation–expect 10–20% space efficiency improvement; vacuum compression bags can add 20–30% usable space for soft bulk but add weight and may wrinkle garments; rolling garments typically saves ~10–15% volume for casual fabrics, while flat folding or garment folders preserves crease-sensitive clothes with ~5–10% higher volume.
Practical checks before travel: weigh packed case with a portable scale and compare to airline allowance; if over, remove items equivalent to the case empty mass subtraction example: empty mass 3.2 kg, allowance 23 kg → 19.8 kg packable. For 68 L internal volume that equals ~0.29 kg per litre maximum packing density; adjust by item density tables above.
Small organisational rules that reduce bulk and weight: use single-purpose mini kits (one 2 L clear bag for liquids), limit footwear to two pairs (reserve heaviest pair to wear), select synthetic quick-dry garments (lower mass per packed volume), and replace heavy glass bottles with airline-compliant travel dispensers. Keep a 500–800 g margin below the limit to allow duty-free purchases and airport scales variability.
Warranty, repairs and returns: verifying coverage, claim steps and common manufacturer remedies
Recommendation: register new case within 30 days, save original receipt and order confirmation, and photograph exterior and interior with time-stamps before first use.
Inspect warranty document for specific coverage lines: manufacturing defects, wheel or caster failure, zipper malfunction, telescopic-handle defects, shell cracking and water ingress often sit under separate clauses. Typical terms seen in the market: 2-year limited, 5-year limited, lifetime-limited (lifetime usually applies to original purchaser and excludes airline damage and cosmetic wear).
Claim workflow: 1) Photograph the defect (close-ups + context shots + serial/model plate). 2) For carrier damage file a claim with the carrier within 7–14 days for visible damage and within 21 days for concealed damage; include boarding passes, baggage tags, and photos. 3) Submit manufacturer claim through their web form or dedicated email with model, serial, receipt and full photo set. 4) If repair required, ship with tracked service and keep tracking number; retain copies of all communications and RMA numbers.
Common manufacturer remedies: on-site or send-in repair, replacement of faulty components (wheels, handle assemblies, zipper sliders), full unit replacement, prorated refund or store credit. Typical response window: initial acknowledgement within 10–21 business days, repair turnaround 2–8 weeks; expedited service sometimes available for a fee.
Cost and responsibility: many brands waive repair parts and labor for valid warranty defects but expect buyer-paid shipping unless policy states prepaid return label. Non-warranty repairs usually billed; request an estimate before authorization. Keep all repair invoices for future disputes.
If a claim is denied request a written explanation with clause citation, then escalate: contact retailer for purchase-channel support, open a credit-card dispute if denial lacks substantiation (observe card issuer time limits, commonly 60–120 days), and file complaint with local consumer protection agencies or pursue small-claims court with documented evidence.
Recordkeeping rules: retain purchase receipt, serial number photo and repair invoices for at least the warranty term plus one year; store digital backups in cloud and a physical copy in travel documents. Before discarding replaced parts photograph them and request return or disposal confirmation.
For additional protection pack a compact emergency kit and consider supplemental insurance: include best survival kit backpack among travel items where allowed, and review best place to buy umbrella policy to cover scenarios not handled by manufacturer or carrier.


