US (TSA): dressmaker pins and knitting implements are explicitly listed as permitted in carry-on baggage. Expect X‑ray inspection; present items packed so sharp points are contained. Small scissors may also be carried if blade length is under 4 inches measured from the pivot.
EU / UK and other jurisdictions: most airport security bodies allow small stitching pins in cabin bags, but enforcement and carrier policies vary. Verify the departure airport and airline rules via official sites before travel; at the check‑in desk staff can offer to transfer items to checked baggage.
Practical checklist: use a hard plastic or metal case or original blister pack; cap or tape any exposed points; keep the case in an outer compartment for quick removal at security; if transporting items for professional use, carry proof of purpose (invoice, business card) and be prepared for confiscation if an agent deems the item unsafe.
Permitted stitching implements in cabin baggage: TSA vs EU
Place pins, embroidery tools and knitting accessories inside a rigid, closed case; both TSA and EU security permit most pointed stitching implements in cabin baggage when sheathed and accessible for inspection.
TSA (United States)
- Dressmaker pins & safety pins – allowed in cabin baggage if secured in a container.
- Embroidery, quilting and machine stitching tools – permitted when stored safely (cases recommended).
- Knitting and crochet accessories (straight, circular, double-pointed types and hooks) – allowed, metal or wooden.
- Seam rippers, awls and similar small pointed tools – typically allowed when cased; loose sharp blades (single-edge replacement blades) are prohibited.
- Scissors – blades shorter than 4 in (≈10 cm) from the pivot are allowed in carry-on; longer blades are not permitted.
EU (Schengen / common airport practice)
- Pins and small stitching implements – generally permitted in cabin baggage if contained safely; airport security may request removal for inspection.
- Knitting and crochet accessories – commonly allowed, though a few airports apply extra scrutiny to long metal rods; pack in a case to reduce risk of confiscation.
- Seam rippers and small awls – usually permitted when stored in a protective holder.
- Scissors – many EU authorities permit blades up to 6 cm (measured from pivot); national variations exist, so verify the specific airport/security website before travel.
Practical guidance: use a rigid container, avoid loose sharp items, place long or heavy sharp tools in checked baggage where permissible, and present stitching implements separately at security if asked.
How to pack and secure stitching pins for x‑ray screening
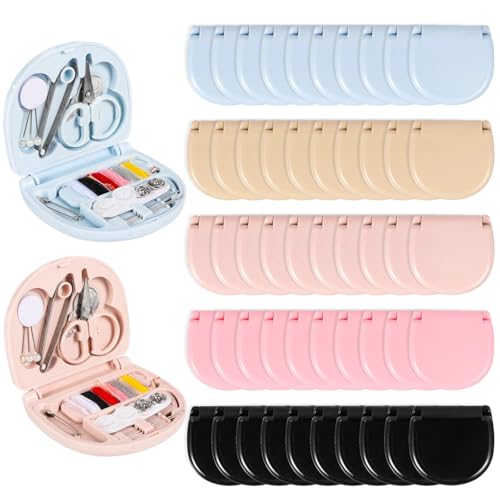
Pack pins in a rigid, transparent case with all points covered; use commercial needle cases or a small hard plastic box roughly 10×6×2 cm.
Prevent movement by inserting pins into foam strips, a magnetic strip, or dedicated slotted panels; secure the case lid with tape or a rubber band to avoid accidental opening during screening.
Covers for tips: slide silicone tubing, pencil erasers, small corks, or heat-shrink tubing over points and fix with electrical tape. For long pins, bundle with masking tape every 2–3 cm to avoid splaying.
Place the sealed case inside a single clear resealable bag (approximately 1 L) and position it near the top of the carry-on for rapid access. Keep it separate from dense textiles to reduce overlapping shadows on x‑ray images.
Label the bag plainly (example: “pins – sharp items”) and retain original retail packaging when available; visible, orderly presentation shortens secondary inspection time.
If a checkpoint requests inspection, present the closed case for visual check rather than unpacking loose items. For destinations with stricter controls, move pins to checked baggage before departure.
What to Say and Show if Security Asks About Pins or Stitching Tools
Present the kit in a clear, zip-sealed pouch and place the case on the inspection tray; open the case calmly and point to each item while naming it (for example: “embroidery pins,” “thimble,” “small embroidery scissors”).
Have these documents ready in printed form: purchase receipt showing item descriptions, original manufacturer packaging, a close-up photo of the in-progress textile project, and a class or workshop confirmation email printout. Also carry a simple inventory list with item counts and descriptions to hand to the officer.
Use short, factual statements when speaking: “Personal craft pins for textile repair,” “Stored in plastic tubes and a locked metal case,” “Project photo and receipt available.” Avoid jokes or metaphors about weapons; never handle items in a way that could appear aggressive.
Physically show safety features first: capped tips, plastic or cardboard tubes, sheathed scissors, and a commercial case with foam inserts. If pins are inside tubes, slide one tube out and hand it over intact so the officer can inspect without touching loose sharp points.
If the officer requests verification of purpose, offer the project photo, class confirmation, a business card, or a printout of an online sales page (Etsy/shop link or portfolio). For students or artists, placing tools inside a structured pack helps – see best backpack for art students and consider models listed at best backpack brands for college for secure internal organization.
If items are not permitted at the checkpoint, request a supervisor and obtain a written explanation or confiscation receipt. Ask about immediate alternatives: transfer to a checked bag at the airline counter, gate check, or secure storage at the terminal. Keep receipts and photos to support a later appeal.
Remain composed, hand over documentation promptly, and follow staff instructions for inspection; clear, verifiable evidence of legitimate craft use speeds resolution and minimizes delays.
When to place stitching pins in checked baggage or buy replacements at destination
Recommendation: Stow pins and other sharp stitch tools in checked baggage for long trips, multi‑leg itineraries, quantities over ~20 items, or whenever tools include awls, thimbles with spikes, or blades; opt to buy replacements at destination for short trips, minimal needs (fewer than ~10 pins), or when rapid access during travel is required.
Choose checked transport if any of the following apply: >1 connecting flight, travel through countries with stricter screening protocols, project-critical work that cannot be interrupted, or a kit that includes metal cutters/awls. Checked containment reduces the risk of confiscation at security checkpoints but increases exposure to baggage handling loss; balance by placing a compact emergency kit in carry items only when permitted by local rules.
Choose purchase at destination when: itinerary under 48 hours, only basic mending needed, light carry requirements, or access to urban retail. Major chains and sources by region–Michaels/Jo‑Ann/Walmart (US), Hobbycraft/John Lewis (UK), large urban craft stores or markets (EU), local online marketplaces and same‑day couriers–usually stock pins, thimbles, and basic kits. For supplier research and regional buying options consult retailer guides such as are there any british made fridge freezers (example of regional sourcing research).
Quick decision checklist
Prefer checked baggage: more than ~20 items, tools with blades/awls, multi‑leg/international connections, critical project deadlines.
Prefer buying at destination: trip ≤48 hours, single short flight, minimal mending, ability to visit craft retailers or order same‑day delivery.
Risk and cost tradeoffs
Weigh confiscation likelihood against replacement cost and time lost. Typical replacement sets cost $3–$12 (basic pins/thimble) in major cities; specialty or vintage items cost substantially more and merit checked transport and insured packing. If checked bags are risked for loss, photograph high‑value items and declare them on travel insurance if applicable.