Pack one standard cabin bag no larger than 10 x 16 x 24 inches and one personal item that fits beneath the seat – a common under-seat envelope is roughly 16 x 13 x 8 inches. Items exceeding the stated dimensions are typically taken at the gate and placed in the aircraft hold, so keep essentials and valuables in the smaller item you bring aboard.
Gate agents verify acceptance with a rigid sizer frame: if the bag fits entirely inside, it boards with you. At home, use a tape to capture three overall dimensions: height (top to bottom, include wheels/feet), width (side-to-side, include pockets), and depth (front-to-back, with handles zipped or stowed). Always include external hardware in your totals.
Practical adjustments that reduce size: collapse telescoping handles, tuck in external straps, prefer soft-sided bags that compress, and avoid overpacking outer pockets. For borderline cases, transfer a few items into the personal item to meet the carrier’s limits without needing gate check.
Ticket allowances permit one cabin bag plus one under-seat item per passenger; extra or oversized pieces follow checked-bag procedures and may be handled at the gate. For sports equipment, instruments or strollers consult the carrier’s specific provisions before arriving at the airport to prevent surprises.
Exact onboard bag size limits and precise steps to size your bag including wheels and handles
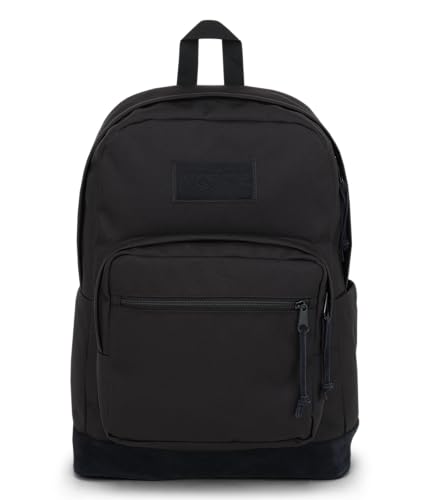
Maximum permitted cabin bag: 10 x 16 x 24 inches (25 x 40 x 61 cm) – these figures include wheels, side handles and retractable pull handles. Personal item guideline: up to 18.5 x 8.5 x 13.5 inches (47 x 22 x 34 cm) and must fit under the seat in front of you. No published weight limit, but the item must be stowable in the overhead bin or under-seat compartment.
Step 1 – prepare the bag: pack it as you will for travel, close all zippers, and collapse any telescoping handles to their lowest position (airlines count protruding hardware and external pockets as part of dimensions).
Step 2 – set on a flat surface and use a rigid tape measure: record width (widest side-to-side), depth (front-to-back including wheel housings) and height (bottom of wheels to highest fixed point with retractable handle down). Round each measurement to the nearest half-inch and compare against the allowed 10 x 16 x 24 inches.
Step 3 – verify with common problem points: measure with wheels on the ground (they add 1–2 inches to depth), include any external quick-grab straps or bumpers, and count sewn-on name tags or large buckles. If a soft-sided bag compresses, press it into the shape you’ll use in the bin before measuring.
If any dimension exceeds the limit: swap to a bag with tuck-away handles or recessed wheels, remove superficial straps/pucks that add bulk, or select a soft-sided case that compresses into the bin. As a last resort gate-check or check at the counter to avoid refusal at boarding.
Small accessories: use a compact tape measure with both inches and centimeters; test fit by sliding the packed bag into a box sized 10 x 16 x 24 inches to simulate an overhead bin. For travel gear recommendations and a handy shade option for outdoor pre-flight waits see best square solar umbrella panel.
Personal item vs. standard cabin bag: dimensions and placement that matter
Always count wheels and fixed handles toward the outer envelope for an overhead-sized suitcase; for an under-seat personal item, size the packed profile that will slide beneath the seat in front of you.
Record three outside dimensions: longest side (length), tallest point (height) and front-to-back thickness (depth). Include wheel housings, fixed side handles, external pockets and any rigid corners in those numbers. For soft-sided items, measure when fully packed and zipped.
Telescoping handles: measure with the handle fully stowed if it retracts flush; if the handle sits proud of the shell even when closed, include that extra height. Wheels: include the full wheel diameter plus housing, not just the bag body.
Under-seat placement matters more than raw numbers for a personal item. Test orientation options: flat (lying on its largest face), on its side, and upright. Many bags that exceed a depth spec when upright will fit under a seat when laid flat or rotated 90°.
Shape control tips: remove detachable straps and exterior clips before boarding; transfer rigid items (e.g., toiletry bottles, laptops in hard cases) so the bag compresses; use soft packing cubes to keep a predictable profile. For structured briefcases, choose one with a slim front-to-back dimension rather than extra width.
Practical checks before you leave home
Wrap a tape around the three axes and write the numbers on a tag; compare against the airline’s published envelope at the gate rather than guessing.
Simulate stowage: place the packed personal item under a low chair or a coffee table at home to mimic under-seat clearance; for overhead bags, stand the packed case upright and note any protrusions that would prevent sliding into a bin.
Gate-time tactics
If gate agents ask, present the bag in the orientation you expect to store it (flat for under-seat, upright for overhead). If a bag just squeezes in, remove removable items or reorient contents rather than checking it at the desk.
Using the gate sizer: when staff check your bag and the procedure at boarding
Present any onboard bag at the gate sizer before boarding if you are in a late group or overhead bin space looks limited.
Staff commonly verify bags at three moments: during the boarding-pass scan, just before stepping onto the jet bridge, or when loading space runs low and agents call for tighter enforcement. Triggers for inspection include late boarding groups, full overhead bins, oversized or hard-shell cases, and gate announcements asking for gate-checked items.
Typical inspection steps: an agent will ask you to place the item into a metal frame sizer (wheels and handles included). Soft-sided pieces can be compressed slightly; rigid shells cannot. If the item fits fully within the frame without forcing, it remains with you. If it sticks out, the agent will apply a gate-check tag and take it to the aircraft hold.
If asked to gate-check, remove valuables, medication and fragile items before handing the bag over; attach a visible contact card inside and outside. Tagged items are either handed back at the aircraft door on arrival or routed to baggage claim depending on aircraft type and airport logistics – expect retrieval method to be announced at deplaning.
Practical preparation: collapse telescoping handles, tuck in external straps, use compression-friendly packing for soft-sided items, and keep a small foldable bag for essentials you’ll need if your item goes to the hold. Move quickly and cooperate with gate staff to avoid boarding delays.
If your bag exceeds allowed dimensions: gate-check, check-in alternatives, and timing to avoid issues
Immediate action
If your suitcase is over the airline’s onboard-size limit by more than about 1 inch, check it at the ticket counter or purchase a checked-tag at a kiosk before boarding begins; waiting until gate boarding risks forced gate-checking and delays. Move medications, travel documents, electronics and valuables into your under-seat item before handing the bag to agents.
Gate-check procedure and what to prepare
Notify the gate agent as soon as staff begin boarding if the item won’t fit overhead. Agents will tag the bag, take it at the jetway or at the aircraft door, and either place it in hold stowage or route it to baggage claim; retrieval varies by airport. Remove fragile items, label the outside with name and phone, and keep the gate-check receipt until you reclaim the bag. Liquid containers larger than carry-on TSA limits must be packed appropriately; keep prescriptions and small electronics with you.
If the bag is only marginally over-sized (1–2 inches), soft-sided bags squeezed into the bin are sometimes accepted; if rigid dimensions exceed bin depth or width by more than a few inches, expect gate-checking.
Check-in alternatives and timing to avoid last-minute problems
Options to avoid gate issues: 1) Prepay and check at the ticket counter or curb-side drop; 2) Use a self-service kiosk to tag and drop the bag well before boarding; 3) Repack into a compliant soft-sided bag or redistribute items into your under-seat item. Recommended arrival windows: at least 90 minutes before domestic departures and 120 minutes for international flights when you expect to check oversized items or need time to repack. For early morning or busy travel days add 30 minutes.
Expect surcharges for checked items that exceed standard checked-bag limits: most carriers enforce a 50 lb (23 kg) weight limit and a 62 linear-inch (length+width+height) maximum; overweight or oversized fees commonly run around $75 per offending bag and extremely heavy or very large items may be refused. Prepaying at the counter or online avoids gate surprises and speeds boarding for everyone.
Repacking tips to gain a few inches: remove or collapse telescoping handles, switch to a soft-sided shell, shift shoes and bulky clothing into your under-seat item, use compression packs, and place bulky outerwear on your person. If transporting gardening supplies or heavy outdoor gear, consider specialized containers and consult product guidance such as best soil for hawaiian umbrella tree and equipment recommendations like best pressure washer for large areas.
Step-by-step home size-check for cabin bag compliance and quick verification tools
Do a full-size check at home at least 24 hours before travel using a cardboard template or phone AR and mark any items that need repacking.
- Gather tools: flexible cloth tape or ruler, rigid yardstick, large flat cardboard, marker, utility knife or scissors, string, packing scale (optional), smartphone with AR ruler or a handheld laser distance meter (optional).
- Prepare bag in travel-ready configuration (zippers closed, external pockets zipped, handles stowed or extended as you will carry it to the gate). Place the bag upright on a flat surface.
- Cardboard-template technique:
- Lay cardboard on the floor and trace the bag’s outline while it stands upright. Mark the topmost and bottommost points for height on the cardboard edge.
- Cut out the template and fold it to match the bag’s depth; tape into a box shape if needed. Slot the template into a doorway or inside a large shipping box to see if it fits the airline’s published maximum dimensions.
- String-and-ruler quick check:
- Wrap a piece of string around the bag along each axis (height, width, depth) and cut the string at the join.
- Lay each string against a ruler or tape on the floor and read the length to record external dimensions.
- Smartphone AR method:
- Open an AR ruler app, calibrate on a flat surface, tap the four corner points along length and width, then tap top and bottom for height. Save screenshots for reference.
- Double-check height by targeting the highest external point (wheels, top zip, or handle if normally stowed). Use app readouts as a quick verification, not a single source.
- Laser distance meter:
- Place device on the floor directly in front of the bag and point at the highest external point to get an instant height reading; repeat for depth and width by repositioning the device.
- Box-fit simulation:
- Use an empty cardboard box cut to the airline’s published limits or borrow a large shipping crate. Place the bag inside to confirm fit without relying on numbers.
- Final at-home adjustments:
- Remove non-essential items from external pockets to reduce depth, shift heavy items into checked bags, use compression straps to shave a few inches, and swap to a softer-sided bag if you anticipate tight fits.
- Weigh the bag on a home scale if fees or handling depend on weight.
- Tool-speed tradeoffs: cardboard template (10–20 minutes, highest reliability), string+ruler (5–10 minutes, low-cost), AR app (2–5 minutes, convenience varies by phone), laser meter (<2 minutes, most accurate for single-axis readings).
- When to act: run the check 24–48 hours prior; if any dimension exceeds the airline’s published maximum, repack or switch bags the same day to avoid airport delays and extra fees.