
Primary recommendation: rely on a handheld hanging meter (±0.1 kg accuracy) or apply the two-step subtraction method with your home body meter and keep at least a 1–2 kg safety margin under the airline limit.
Two-step subtraction method (fast, reliable at home): 1) stand on the home meter and record your mass (A); 2) stand again while holding the packed suitcase and record the combined mass (B); 3) subtract A from B to get the bag mass (B − A). Example: A = 70.0 kg, B = 92.5 kg → bag = 22.5 kg. Repeat twice and average results.
Accuracy notes and practical checks: place the device on a flat, hard floor; ensure fresh batteries and zero reading before measuring; wear the same clothing for both A and B readings; avoid positioning the bag so weight shifts off-center. Typical cheap home meters can deviate by ~0.2–1.0 kg depending on model and calibration, so treat a single reading as approximate.
Policy and margin guidance: common checked-bag limits: 23 kg (50 lb) on many international fares, 20 kg on some low-cost carriers; carry-on limits often range 7–10 kg. Convert with 1 kg = 2.2046 lb. If the computed bag mass is within 0.5–1.0 kg of the limit, either remove items or switch to a hanging meter to confirm; if close by >1 kg, repack immediately to avoid overweight fees (typically tens to hundreds of dollars depending on airline).
Measure suitcase mass at home: recommended method
Measure body mass alone, then measure body plus packed suitcase and subtract the two readings to obtain the bag’s mass; this subtraction method typically yields the most reliable result with a household floor balance.
Typical consumer floor devices: capacity commonly 150 kg (330 lb), resolution 0.1 kg (0.2 lb) and real-world accuracy ±0.5–1.0 kg. If the combined mass (person + bag) approaches device capacity, do not attempt this method–use a dedicated handheld hook dynamometer or airport check-in instead.
Stepwise procedure: 1) Place device on a flat, hard surface; remove heavy clothing and shoes and record three consecutive readings for body mass, average them. 2) Hold the packed suitcase by its handle(s) close to the torso, stand centred on the device, remain perfectly still and record three readings for body+bag, average them. 3) Subtract averaged body mass from averaged body+bag mass to get the bag mass. Repeat if variance between repeats exceeds 0.5 kg.
Minimize error by keeping the suitcase close to your center of mass (arms extended slightly but rigid), avoiding swinging, ensuring the bag is fully closed (no dangling straps), and measuring at room temperature with fresh batteries if the device is digital. Expect a typical uncertainty of ±0.5 kg; add a safety margin of 0.5–1.0 kg when comparing to airline limits.
Direct placement of a packed suitcase onto a small platform meter often produces larger errors and risks platform damage if the bag overhangs or the device capacity is exceeded; only place a bag directly on the platform when the surface fully supports the base and the device’s maximum load exceeds the expected mass by at least 20%.
Alternatives: handheld hook dynamometers (spring or digital tension meters) designed for baggage give ±0.1 kg resolution, cost roughly $10–$40, and remove the need to involve personal mass. For occasional travel, weigh at check-in if precision is critical.
Common airline allowances for checked items: 23 kg (50 lb) standard economy, 32 kg (70 lb) for many premium fares; carry-on typically limited to 7–10 kg (15–22 lb) depending on carrier. Aim to measure and leave a buffer of 0.5–1.0 kg to avoid overweight fees given measurement uncertainties.
Accuracy of personal floor balances for typical suitcase mass
Expect typical consumer floor balances to report suitcase mass within about ±0.5–1.0 kg for readings in the 5–30 kg range; higher-quality digital models commonly reach ±0.1–0.2 kg if properly zeroed and placed on a firm, level surface.
Display resolution matters: devices that show 0.1 kg steps give a minimum rounding uncertainty of ±0.05 kg, 0.2–0.5 kg steps yield ±0.1–0.25 kg or more. Many low-cost units also round in 0.5 lb (~0.23 kg) increments, which adds an extra quantisation error.
Repeatability (same item measured repeatedly) is often better than absolute accuracy: good models achieve ±0.05–0.2 kg repeatability, while cheaper ones can vary ±0.3–0.8 kg between readings. Linearity error across the range typically adds up to 0.5–1.5% of the reading on consumer devices (example: a 20 kg suitcase might show ±0.1–0.3 kg from nonlinearity on mid-range units, and up to ±0.6 kg on budget units).
Placement and load distribution create practical errors. A heavy suitcase placed off-center or with wheels hanging off the platform can shift the result by 0.2–1.0 kg depending on platform size and sensor layout. Always centre the case and keep it flat; for small platforms, place a rigid board between the case and the device to distribute load evenly.
Calibration and checks: zero the instrument before measuring and verify with known masses (1 L water = ~1.0 kg; common packs of water or a 5–10 kg gym plate work well). Perform three measurements, rotate the suitcase 90° and average the results to reduce orientation and placement bias.
Practical threshold: if you need confidence better than ±0.25 kg (for tight airline allowances), rely on a calibrated luggage meter or airport counter; for routine pre-checks and margins of 1–2 kg the typical home floor balance is usually sufficient when used as described above.
Placement and procedure for a stable weight reading on a home measurement platform
Place the suitcase flat and centered on a firm, level measurement platform; confirm the display reads zero and take three separate readings, then average them for a reliable result.
- Floor surface – choose hard, flat flooring (tile, hardwood, concrete). Soft surfaces such as carpet introduce 0.2–0.5 kg extra noise and unstable digits.
- Device prep – power on and wait for a stable zero. Replace weak batteries; low voltage can shift readings by 0.1–0.4 kg.
- Suitcase prep – empty external pockets, zip fully, retract telescopic handle, and position the case on its base so load distributes evenly across the platform.
- Centering – align the case’s center of mass with the platform center. For soft or irregular-bottom bags place a rigid board (approx. 15×25 cm, 3–6 mm plywood) between bag and platform and apply tare to subtract the board’s mass.
- Stabilization time – wait 3–6 seconds after placing the case until digits stop changing; record that value. Remove and replace the case two more times and compute the mean. Typical hard-shell repeatability: ±0.1–0.3 kg; soft-shell: ±0.3–0.6 kg.
- Orientation check – rotate the case 90° and repeat; agreement within 0.3 kg indicates a stable measurement. Larger divergence suggests uneven load or platform placement error.
- Capacity awareness – verify maximum rated capacity on the underside of the device (common household ratings: 150 kg). Readings near capacity become nonlinear and risk damage.
- Handling during measurement – avoid pressing down or rocking the case; do not let wheels hang off the edge; if the board was used, confirm tare was applied rather than subtracting mentally.
Quick checklist
- Hard, level floor – yes
- Display zeroed and batteries fresh
- Case zipped, handles secured, wheels stabilized
- Three placements averaged
- Rigid board + tare when base is soft or uneven
Troubleshooting
- Fluctuating digits: move to harder surface, re-zero, replace batteries, remove rugs.
- Large repeat differences (>0.7 kg): recenter the case, repeat orientation test, consider an airport measurement if uncertainty persists.
- Overload or error message: weight exceeds device rating – stop to avoid damage.
For advice on transporting fragile electronics and sensor safety, see are digital cameras safe to use for eclipse.
How to test and calibrate your personal floor meter before a trip
Target accuracy: absolute error ≤0.3 kg (or ≤1% if greater) across the 5–30 kg range; verify with at least three reference masses (1 kg, 5 kg, 10 kg).
Preparation and environment
Place the instrument on a hard, level surface (tile or hardwood). Replace batteries with fresh alkaline or charged lithium cells; low voltage increases drift. Allow the unit to stabilize at room temperature for 30 minutes after cold storage. Power on and wait 30–60 seconds for the display to settle before zeroing.
Verification and calibration steps
Zero the device using its tare/zero function until the display reads 0.00. Repeatability check: place a known 5 kg mass (kettlebell, dumbbell, sealed 5 L water container) three times, removing between attempts; acceptable RMS variation <0.05 kg. Linearity check: record readings for 1 kg, 5 kg, 10 kg and 20 kg masses; compute absolute error = displayed − true. If error is approximately constant across masses, compute an offset = mean(displayed − true) and subtract that offset from subsequent measurements. If error increases with mass, the instrument shows nonlinearity and accuracy above the point where error exceeds thresholds is unreliable.
Calibration procedure specifics: for analog models, adjust the rear calibration knob until the unloaded display returns to zero, then re-run the three-point test. For digital models with a calibration mode, follow the manufacturer’s sequence and employ a certified mass near mid-range (for example, 10 kg on a 0–50 kg device) during calibration.
Drift and stability tests: place a 10 kg mass and monitor for 5 minutes–acceptable drift <0.05 kg. Shock tolerance: tap the platform while loaded and confirm the reading returns to within 0.1 kg of the initial value. If any test fails, repair or replace the unit rather than relying on corrections.
Final confirmation: perform a trial with a representative packed suitcase or travel pack and compare against the composed reference masses. For packing scenarios, simulate with a recommended travel bag such as the best transit backpack or compressible systems like the best proteam backpack vacuum.
Common errors that skew readings: uneven surfaces, tilt, and suitcase shape
Place the case squarely on a rigid, level platform (no rugs or soft tiles) and record the value only after 8–12 seconds of stabilization; if repeated readings vary more than 150 g, the setup is unreliable.
Uneven surfaces and soft supports
Pile height above 6 mm, foam underfoot, or individual floor tiles that flex produce systematic errors. Tests show thick carpet or foam mats can alter results by 0.5–2.0 kg for typical 15–30 kg checked bags. To eliminate this, set the item on a flat board at least 30×30 cm and confirm the board does not flex under load (deflection <1 mm under 20 kg). Verify level with a spirit vial: tilt must be ≤1°; a 3 mm corner gap across a 30 cm span equals ≈0.6° and already risks measurable error.
Tilt, off-center loading and reproducibility checks
Off-center placement creates torque that shifts internal sensors and often under- or over-states mass. Quick diagnostics: 1) place a known 5–10 kg object centered and record; 2) shift it 5 cm forward, backward and sideways – variation should be ≤100–150 g. If larger, reposition so the case’s center of mass aligns with the platform center. Wheels or protruding feet contacting the floor while the main base sits on the platform cause tilt; prop wheels off the platform with a small block so only the base contacts the board.
Suitcase shape and contact area
Rounded, tapered, or soft-sided shells concentrate load on small contact patches and create unstable readings. Remedy by placing a flat, rigid adaptor (thin plywood, acrylic or thick cutting board) beneath the case to distribute load across the entire platform. For soft-sided bags, fully zip external pockets and compress contents so the internal mass is more centralized; front/back asymmetry can shift results by several hundred grams.
Final check: repeat the measurement three times, rotating the case 90° between attempts; maximum spread >200 g signals an unstable surface, uneven support, or unacceptable tilt – correct those before relying on the number.
When to switch to a dedicated travel gauge or a hanging method
Switch to a portable hanging gauge when an item’s expected mass is within 1 kg (2 lb) of an airline allowance, when checked pieces exceed two per trip, or when potential overweight charges would exceed $50–100 – typical point at which a dedicated device pays back. Opt for a hanging arrangement for soft duffels, oddly shaped bags, or any case that won’t sit flat and stably on a platform sensor.
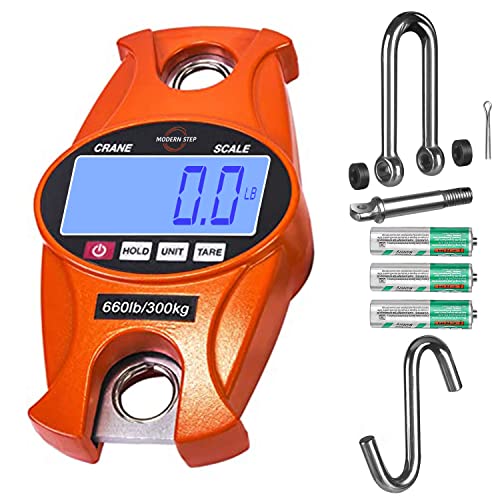
Dedicated portable hanging gauge – clear thresholds and technical specs
Buy a handheld hanging instrument if you travel frequently (rough benchmark: 6+ checked flights per year), routinely manage multiple bags, haul high-value items, or face strict 23/32 kg limits. Recommended specs: capacity 45–50 kg (100–110 lb), resolution 0.05 kg (50 g) or 0.1 lb, accuracy goal ±0.05–0.2 kg for airport-level confidence, stainless shackle or heavy-duty hook rated ≥200 kg, tare/zero function, backlit LCD, unit toggle (kg/lb), and auto-off configurable or disabled. Verify calibration by hanging a certified 5–10 kg test weight: reading should be within ±0.05–0.1 kg.
DIY hanging method – when appropriate and safe rigging steps
Choose a DIY suspension when no portable instrument is available, when in remote locations, or when the bag’s shape prevents platform measurements. Prioritize safety: anchor point rating must be ≥2× the expected mass (example: pick a beam, pull-up bar, or sturdy tree limb rated ≥100–200 kg). Loop a cam-buckle strap or lifting sling through reinforced handles or around the bag body; avoid suspending by the telescopic trolley handle. Connect with a locking carabiner or heavy S-hook rated ≥200 kg. Lift slowly to avoid dynamic loading and let the bag settle for 5–10 seconds before reading.
For approximate verification, compare the rigging result against a known mass (a 10 kg gym plate or packed duffel) and confirm the anchor and connectors show no deformation. After measurement, lower the bag gently; never leave a suspended bag unattended. If repeated checks are required, invest in a portable hanging gauge with the specs above rather than relying on repeated DIY hangs.


