To modify the length of your crossbody carrier, first gather the necessary tools: a pair of scissors, a ruler, and a lighter or fray check to prevent fraying. Measure the desired length using the ruler, and mark the point where you plan to cut. Ensure this measurement aligns with your comfort level.
After cutting, use the lighter or fray check on the cut end to seal the fabric and prevent any fraying. This is a crucial step in maintaining the integrity of the material. If your shoulder support has multiple adjustment points, consider utilizing these options for a more precise fit without cutting.
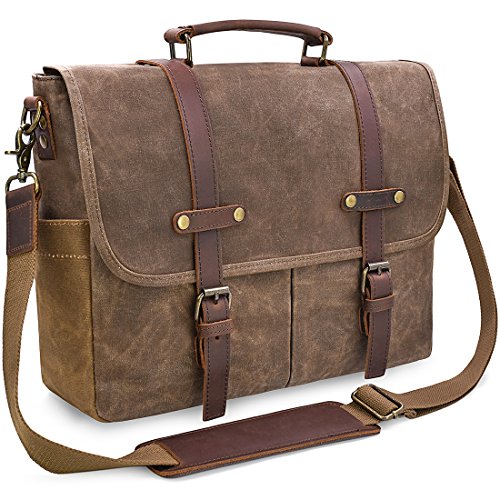
Additionally, if your carrier features a sliding mechanism, simply adjust it by pulling on the mechanism to loosen or tighten the strap. This allows for quick adjustments without any need for cutting. Regularly check the adjustments to ensure a comfortable fit during use.
By following these steps, you can easily achieve a customized fit that enhances the overall comfort and functionality of your accessory.


Adjusting Your Crossbody Carrier’s Length
For optimal comfort, maintain a proper fit by altering the length of your shoulder support. Follow these steps for efficient adjustments:
- Identify the adjustment mechanism–this could be a buckle, slider, or loop. Familiarize yourself with its operation.
- For sliding mechanisms, simply pull the shoulder support to your desired length. Make sure the adjustments are symmetrical for balance.
- When dealing with buckles, release the tension before pulling the end of the support through the buckle to tighten.
- Test the adjusted length by trying on the carrier. Ensure it rests comfortably against your body and allows for easy access to the contents.
Using Accessories
If your carrier lacks adjustable features, consider using an accessory such as a strap extender or a clip. This method facilitates additional customization for a better fit.
For high-quality options, explore the best luggage ever barracuda collection, which offers various adjustable solutions to simplify your travel experience.
Assessing Your Strap Length Needs
Begin by determining the ideal distance from your shoulder to the intended carrying position. Measure from your shoulder to your hip while standing. This measurement will provide clarity on how much excess material needs adjustment.
Considering Usage Scenarios
Evaluate how you plan to utilize the carrier. For commuting, a snug but comfortable fit is preferable to prevent shifting. When cycling or walking, ensure it sits securely against your body without impeding movement.
Personal Preference
Reflect on your comfort preferences. Some individuals favor a tighter fit for stability, while others might opt for more slack to allow freedom of movement. Test various length adjustments while wearing the carrier to find what suits you best.
Take note of your clothing style as well. A thicker jacket may require a longer length, whereas summertime outfits might benefit from a tighter fit.
Ultimately, a well-fitted carrier enhances both comfort and accessibility, allowing for efficient daily use.
Choosing the Right Tools for Adjustment
For precise modification of your carrier’s suspension system, select the following tools: a pair of scissors or a cutting tool sharp enough to handle fabric, a lighter for melting synthetic edges to prevent fraying, and a needle and thread for re-sewing any stitching that may need reinforcement after cutting. If available, a seam ripper can assist in carefully removing stitches without damaging the material.
Additional Tools
A measuring tape can be invaluable for verifying the desired length. An adjustable clamp or a heavy-duty clip will secure the strap while working, ensuring accuracy in adjustments. Heat-shrink tubing or fabric adhesive can also be used for additional stability of the material after modifications. Always wear safety gloves when using sharp tools to prevent injury.
Maintenance Check
After completing the adjustment, inspect all attachment points for wear and tear. This will enhance the longevity of your accessory and ensure all components function correctly during use.
Step-by-Step Guide to Shortening the Strap
Begin by laying the carrier flat on a surface, ensuring the strap is extended fully. Identify the point where you wish to adjust the length, ideally a midpoint that allows for comfort when worn.
Use a measuring tape to verify the current length and determine the desired length. Mark this measurement clearly on the strap with a fabric-safe marker or chalk.
For a plastic adjuster, gently detach the end of the strap from the buckle, taking care not to damage it. Slide the strap through the buckle to create your desired length, then reattach it securely.
If the strap consists of fabric, cut excess material carefully, leaving an extra inch for stitching. Use sharp scissors for a clean cut to avoid fraying. Apply fabric sealant along the newly cut edge to prevent unraveling.
For straps equipped with a metal clasp, release the clasp to remove the fabric. After cutting to size, feed the end back through the clasp, ensuring a tight fit. Secure with stitches or a durable adhesive, as necessary.
After making adjustments, test the new length by wearing the carrier. Ensure it sits comfortably on your body, then proceed to make any final tweaks if necessary.
Testing the New Length for Comfort
Ensure the adjusted length suits your body type and usage scenario. Wear the bag with your chosen attire, allowing for a realistic assessment. Stand upright and perform movements such as walking, bending, and reaching to gauge if the new dimensions prevent discomfort or imbalance.
Pay attention to where the load rests on your side or hip. A comfortable fit should distribute weight evenly without digging into your skin or causing strain. If the bag feels secure without excessive slippage or tightness, the adjustments are likely successful.
Additionally, consider any items you commonly carry inside. Ensure the bag maintains its shape and accessibility during movement. A practical test-run, such as a short walk or errand, can help evaluate overall functionality.
If issues arise, revisit the adjustment steps or consider alternative configurations. For those interested in maintenance supplies for your bag, check out the best pressure washer o rings for tips on preservation and care of materials.
Maintenance Tips for Your Carrying Strap
Regular cleaning prevents dirt buildup and extends the lifespan of your carrying accessory. Use a damp cloth with mild soap to wipe down the surface. For stubborn stains, a soft brush may be utilized. Ensure to air dry completely before using again.
Storage Recommendations
Keep your item in a cool, dry place to avoid moisture damage or mold growth. Avoid hanging the accessory for extended periods, as this can distort the shape of the adjustable component.
Hardware Inspection
Periodically check the connectors and adjustment hardware for signs of wear. If screws are loose, tighten them gently. Replace any broken elements to maintain functionality and safety.
Applying a small amount of lubricant on moving parts helps to keep the mechanism smooth. Only use products designed for textiles to avoid staining.