Utilize an adjustable strap or a carabiner clip to effectively secure your hydration carrier. Ensure that the strap is firmly attached to one side of your satchel, allowing for easy access while on the go.
In addition to straps, consider using mesh pockets commonly found on bags for storing your hydration vessel. These pockets are designed to hold items snugly, minimizing the risk of spillage during transit.
If your bag lacks dedicated compartments, an elastic band or string can create a makeshift holder. Wrap the material around your hydration carrier and the bag’s strap or body to create a secure fit. This method provides flexibility without compromising accessibility.
Remember to balance weight distribution; place your container on the opposite side of your essential items to maintain comfort while carrying. This positioning helps prevent strain on your shoulders and back.
Securing Hydration Container to Your Satchel
Utilize side pockets specifically designed for drink containers, if available. These compartments often feature elastic or mesh that ensures a snug fit.


For bags lacking designated spaces, consider these methods:
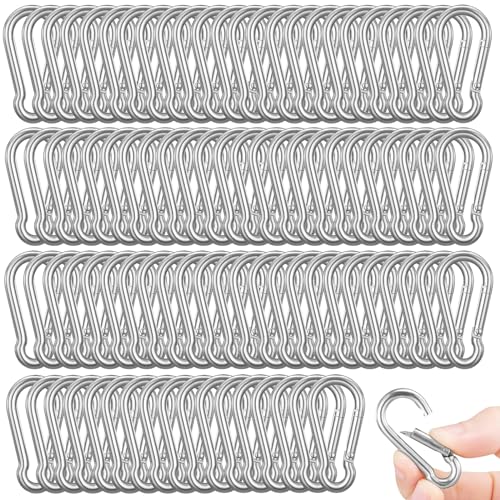
Using Carabiners
Attach a lightweight carabiner to the strap of your satchel. This allows for easy connection of the hydration vessel. Choose a small, sturdy option to minimize added bulk. Ensure the clasp is secure to avoid accidental drops.
Employing Straps or Velcro
If your satchel has removable straps, use these to secure the container. Wrap the strap around the base of your vessel and fasten it back to the bag. Alternatively, sew a piece of Velcro onto your bag and corresponding Velcro onto the vessel for a customizable hold.
| Method | Advantages | Disadvantages |
|---|---|---|
| Carabiner | Easy to use, minimal bulk | May not fit all container types |
| Straps/Velcro | Secure fit, customizable | May require minor alterations to the bag |
By implementing these techniques, keep your essential hydration within easy reach while on the move.
Selecting the Right Container for Your Carrying System
Prioritize materials that ensure insulation and durability. Stainless steel or BPA-free plastic options provide a good grip and withstand daily use, while glass models can be a stylish yet fragile choice.
Volume Consideration
Choose a size that meets your hydration needs without adding unnecessary bulk. Common capacities range from 16 to 32 ounces. Consider activity duration and frequency of use when making your selection.
Design Features
- Look for flip-top or straw lids for quick sips.
- Integrated carrying handles or loops facilitate secure placement on various attachment points.
- Anti-slip surfaces enhance grip, making it easier to handle during activities.
For personal security while on the go, consider checking how can a felon defend himself for useful tips that promote safety in various environments.
Finalize your choice based on aesthetic appeal, functionality, and compatibility with your carrying gear.
Choosing Attachment Methods: Clips, Straps, or Pockets
For optimal convenience, select the right method for securing your hydration source. Clips are ideal for quick access, allowing you to easily detach the container with one hand. Look for durable, spring-loaded clips that can withstand wear. Consider models with a safety lock feature to prevent accidental release during movement.
Straps offer a flexible option, providing a snug fit against your carry item. Opt for adjustable straps with robust buckles to accommodate various sizes of containers. Some straps have padding for added comfort and to avoid slip, ensuring the accessory stays in place while you are on the go.
Pockets can be a practical alternative, especially if your carry item has built-in compartments. Choose external pockets that are designed to fit a range of sizes snugly. Ensure the pocket construction is reinforced to prevent wear and tear, and check for drainage holes if moisture is a concern.
Matching the attachment style to your activity is key. For cycling or hiking, prioritize quick-release options. For daily commutes, compartments may suffice. Evaluate your needs to find the most suitable approach to keeping hydration within easy reach.
How to Securely Fasten the Water Container to Your Carrying Solution
Utilize adjustable straps with buckles or Velcro to ensure a snug fit. Position the container vertically to prevent spillage and facilitate balance. Integrate side pockets specifically designed for this purpose, if available, to simplify access. For extra security, consider employing carabiners; they provide a robust hold without adding excessive bulk.
Prioritize the alignment of the container’s opening away from the main compartment to reduce the risk of leaks affecting other items. Regularly check the fastening mechanisms for wear and tear to maintain reliability. When engaging in more active pursuits, double-check the connection points to avoid unexpected drops.
Experiment with various securing techniques, adjusting them based on the size and shape of the container, ensuring maximum efficiency. For those frequently outdoors, investing in specialized carriers may be advantageous, similar to how one selects the best umbrella tilt brackets for stability. Additionally, assessing your hydration needs can guide you toward selecting the best umbrella for older adults when planning outings.
Adjusting the Attachment for Comfort and Accessibility
Position the carrying device in a manner that ensures it’s within easy reach without having to disrupt your overall load. Aim to attach it on the side closer to your dominant hand for seamless access while on the move.
Experiment with different heights to find a comfortable level that doesn’t interfere with the movement of your arm. A method hanging too low can lead to awkward motions, whereas placing it too high might make retrieval cumbersome.
Consider the angle at which it sits. Adjust it so the spout or opening aligns with a natural hand position, allowing for quick sips without awkward tilting. Use elastic straps or adjustable clips to maintain a secure hold while permitting slight movement.
Ensure that securing methods do not dig into your body when shouldering the item. This might involve repositioning or choosing cushioned attachments that alleviate pressure points.
Regularly reassess the setup, especially after long periods of use. Modifications based on comfort and accessibility can improve your experience greatly, especially during active pursuits.
Maintaining the Attachment and Ensuring Stability
Regularly check the connections to confirm they remain secure during use. If any fasteners appear loose, tighten them before your next outing. Cleaning the attachment points is equally important; dirt can cause wear over time, leading to failure. Use mild soap and water to remove grime, ensuring the integrity of the components.
Consider reinforcing the hold by adding additional clips or straps if you often carry heavier loads. This redundancy will minimize the chance of slippage. Pay attention to the balance of your load, as uneven weight distribution can lead to instability, affecting your comfort during use.
For those who prefer pockets, ensure they provide a snug fit. If the enclosure is too loose, consider layering with fabric or padding to prevent movement while on the go. Additionally, garters or elastic bands can serve as supplementary security, holding the container firmly against the fabric of your carryall.
Adjust and reposition attachments as needed when experiencing discomfort or accessibility issues. This adaptability will enhance usability without compromising the security of your hydration vessel.