

Prioritize gathering quality fabric featuring a textured design that embodies elegance. Aim for a sturdy yet flexible material, ensuring that the final creation holds its shape while remaining practical for everyday use.
Select a reliable pattern that complements the dimensions you envision. Consider elements like pocket placement and strap length to maximize functionality without compromising aesthetic appeal.
Utilize high-quality thread and appropriate needles tailored for your fabric choice to prevent fraying. Accurate measurements and careful cutting will significantly influence the outcome; therefore, double-check everything before starting the assembly.
Incorporate additional elements such as internal compartments or decorative stitching to elevate the overall look. With precise techniques and attention to detail, you can craft an accessory that combines style and usability, perfect for any occasion.
Creating a Chic Crossbody Carry
Select sturdy fabric with an attractive design for the outer layer. Quality is key; choose a medium-weight material suitable for daily use. Gather your supplies: lining fabric, interfacing, thread matching your chosen colors, a zipper, and adjustable straps.
Planning Dimensions and Components
Determine appropriate dimensions based on your needs. A common size is 12 inches wide by 10 inches tall for the main section. Include a generous seam allowance of ½ inch. Here’s a breakdown of components:
| Component | Dimensions |
|---|---|
| Main body | 12″ x 10″ (cut 2 pieces) |
| Lining | 12″ x 10″ (cut 2 pieces) |
| Interfacing | 12″ x 10″ (cut 2 pieces) |
| Straps | 3″ x 24″ (cut 2 pieces) |
Assembly Process
Interface the outer fabric to provide stability. Align and pin the outer pieces, then stitch around the edges, leaving a small opening for turning. After turning right side out, press edges for a neat finish.
Attach lining in the same fashion, inserting it inside the outer layer. Secure the top edge by topstitching. For the adjustable straps, fold and stitch along both edges to create a polished look. Finally, attach these to your piece using reinforced stitching for durability.
Selecting the Right Damask Fabric for Your Bag
Prioritize a high-quality textile that combines durability with aesthetic appeal. Opt for a fabric with a sturdy weave, ensuring it can withstand daily wear and tear. Look for a weight that strikes a balance between being substantial enough for structure while still allowing for comfortable handling.
Color and Design Selection
Choose a color palette that complements your personal style. Rich tones can enhance the overall sophistication, while lighter shades may add a fresh and trendy vibe. Assess the patterns carefully; intricate designs should align with your intended use, ensuring versatility across different settings.
Texture Considerations
Evaluate the surface feel of the material. A smooth texture might be ideal for a refined look, while a slightly raised pattern can add visual interest. Consider how the fabric will interact with other elements in your ensemble or surroundings. Additionally, ensure it’s easy to clean, especially if it will be used frequently.
For practical needs, materials that are water-resistant can be advantageous. This characteristic not only protects the contents but also prolongs the fabric’s lifespan. Recipients of your creation will appreciate practicality, similar to products like the best diaper bag backpack with changing station that incorporate clever features.
In the case of mobility, consider the fabric’s weight. Lightweight options enable easy carrying, making your design user-friendly. Note how fabrics drape and hold shape; this affects the final silhouette of your crafted item. For those seeking a balance of elegance and utility, look to options that mirror the functionality of the best economical umbrella stroller.
Gathering Necessary Sewing Supplies and Tools
Compile the following items for your crafting project:
- Fabric: Choose a suitable material with a charming motif for visual appeal.
- Thread: Select a color that matches or complements your textile choice for a seamless look.
- Needles: Invest in high-quality sharp needles appropriate for your material’s thickness.
- Scissors: Obtain fabric scissors for clean cuts and a pair of smaller scissors for thread trimming.
- Measuring tape: Use a flexible tape to accurately measure your pieces before cutting.
- Chalk or fabric marker: Utilize these tools to mark cutting lines and pattern outlines accurately.
- Ruler: Aid in drawing straight lines and measuring dimensions precisely.
- Pin cushion and pins: Keep pins organized and readily accessible to secure fabric layers during assembly.
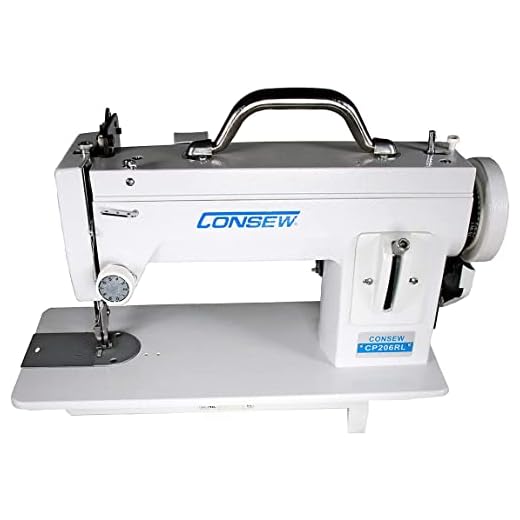
- Sewing machine: Ensure your machine is in good working order and includes a zigzag stitch for added strength.
- Iron and ironing board: Prepare to press seams flat for a polished appearance.
Storage and Organization
Arrange your supplies in a dedicated sewing box or container:
- Keep threads organized on spools or in a thread case.
- Store fabric pieces folded neatly to avoid wrinkles.
- Separate tools in compartments to streamline your workflow.
Safety Precautions
Be mindful of safety while working with sharp tools:
- Always cut away from your body when using scissors.
- Store needles and pins in a cushioned pincushion to prevent accidents.
- Exercise caution while operating the sewing machine, particularly around the needle area.
Creating a Pattern for Your Hipster Bag Design
Begin with a clear sketch of your desired shape and dimensions. Use thick paper or poster board to draft a full-scale model of your piece. Ensure to include seam allowances, typically around half an inch, to accommodate stitching.
Define the compartments and pockets: consider functionality for items this carry-all will host. Use a ruler to measure distances accurately, marking lines for each section on your pattern.
Selecting the Right Tools
Utilize a set square for precise right angles and a compass to craft circular features, if desired. A rotary cutter can make cutting fabric easier and cleaner than traditional scissors. Ensure your cutting mat is placed underneath to protect surfaces.
<h3.Testing the Pattern
Before using the final fabric, create a mock-up with less expensive cloth, like muslin. This sample will allow you to examine the fit and shape, making adjustments as necessary. Pin the mock-up together to visualize the final design effectively.
This method supports the creation of a tailored and stylish item that aligns with your vision, ensuring confidence in the crafting process.
Sewing Techniques for a Durable Messenger Bag
Utilize a zigzag stitch along the raw edges to prevent fraying and enhance durability. This technique reinforces seams while providing stretch, which is particularly beneficial for heavy fabrics.
Consider using double stitching, especially for areas that will undergo additional stress, like strap attachments. This method increases strength and longevity.
Implement interfacing on the outer layer to add structure and support. Fusible options work well, as they can be easily adhered to the fabric, ensuring a crisp finish.
Incorporate bar tacking at stress points, such as the top of the straps or pockets. This technique involves stitching back and forth in a small area, which secures these high-tension seams effectively.
Opt for reinforced corner seams, which can significantly enhance the stability of the structure. This involves sewing across the corners at an angle, adding extra fabric for strength.
Using a walking foot can assist in handling multiple layers, preventing shifting and ensuring even stitching. This is especially useful for layered materials, enhancing overall precision.
Adjust your tension settings on the sewing machine based on the thickness of the fabric; this ensures consistent stitching and prevents puckering.
Pre-wash materials to pre-shrink them and to remove any finishes that may impede the sewing process. This precaution avoids distortion after washing.
Adding Functional Elements: Pockets and Straps
Incorporate a variety of pocket sizes to enhance utility. For example, a large front pocket can be ideal for quick-access items like a phone or keys, while smaller internal pockets can keep essentials organized. Using a contrasting fabric or a complementary color for the pockets can add an aesthetic touch as well as improve visibility of contents.
Designing and Positioning Pockets
When planning pocket placement, consider accessibility and balance. Place the larger pocket at the front for easy reach, while smaller ones can line the inner walls for added functionality. Make sure to secure pocket edges with double stitching to prevent fraying and enhance durability.
Creating Adjustable Straps
Opt for adjustable straps to accommodate different wear styles. Use webbing or sturdy fabric for the strap, attaching it securely at both ends. Incorporating a slider mechanism allows for easy length adjustments. Reinforce strap attachment points to handle weight without tearing the fabric.
Finishing Touches: Lining and Closure Options
Select a lining fabric that complements your exterior material. A lightweight cotton or polyester blend works well, adding durability and a pleasant feel. Consider bright colors or patterns to create a contrast with the outer design.
For lining installation:
- Cut the lining pieces following the same dimensions as your main fabric.
- Pin the lining to the interior edges, right sides together.
- Sew along the edges, leaving an opening for turning.
- Turn the project right side out and close the opening by hand-stitching or using invisible stitches.
Closure mechanisms significantly affect functionality. Here are common options:
- Zippers: Create a secure and seamless look. Choose a size suitable for your design.
- Magnetic snaps: Provide easy access and a clean finish. Install them during the lining attachment process.
- Hook and loop tape: Offers adjustable closure, ideal for varying contents. Position it at the top edges.
Incorporating a flap can enhance your design, providing an additional layer of security. Consider using a contrasting fabric or a solid tone to stand out from the exterior.
Lastly, ensure all edges are clean and finished to prevent fraying. Bias tape or serging can be effective for this. For a fun touch, explore adding a small pocket on the lining side, perfect for keeping smaller items organized.
While focusing on your project, don’t forget to check out the best aerodynamic toys for dogs for any furry companions who might want to join you during your crafting sessions!


