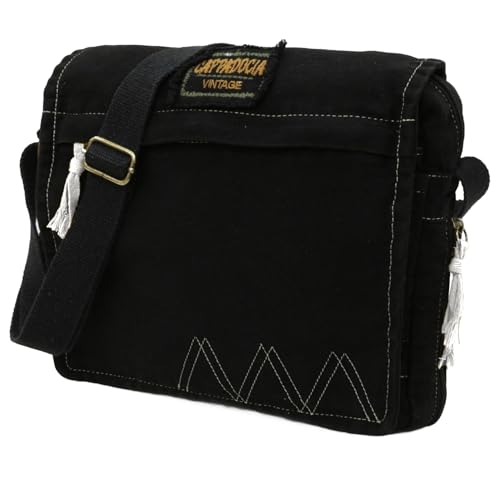


Begin with high-quality fabric, such as cotton or canvas, which offers durability and style. Cut two pieces for the body, each measuring approximately 12 by 10 inches. This size ensures ample space for essentials without becoming cumbersome.
Choose a sturdy strap material, like webbing or leather, cut to about 45 inches for a comfortable fit across the body. Consider adding adjustable hardware for versatility, allowing customization based on personal preference.
Align the cut fabric pieces with the right sides facing each other. Pin them securely and stitch along the edges, leaving a gap for turning right side out. Ensure to backstitch at the beginning and end of your seams for added strength.
After turning the piece right side out, press the fabric to achieve a smooth finish. To create depth, add a flat bottom by folding the corners inward and sewing across the triangles formed, giving your creation a polished look.
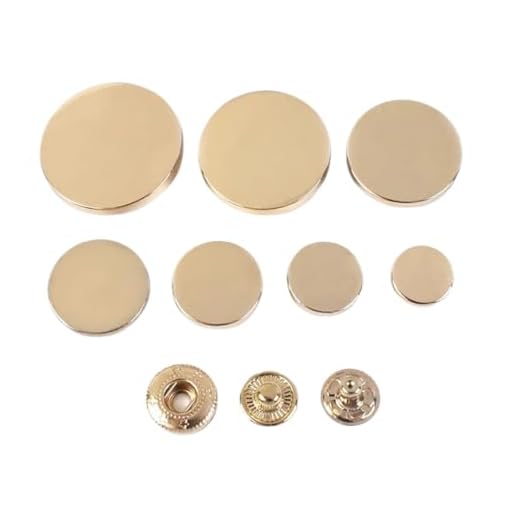
For functional closure, install a magnetic snap or button at the top opening, ensuring easy access to your belongings. Finally, attach the strap securely to the sides–double-checking the stitching for durability will ensure your new accessory withstands daily use.
Constructing the Strap and Compartment
Create a comfortable strap by cutting a strip of fabric measuring 3 inches wide and the desired length, typically 40-50 inches. Fold the strip in half lengthwise, pressing to create a crease. Open it up and fold the long edges towards the center crease, then refold along the original crease. Secure edges with pins and stitch along both sides, ensuring durability.
Design the main compartment by cutting two rectangular pieces of your chosen fabric, each approximately 10 inches by 8 inches. Interface one piece for added structure. Align the wrong sides together, then stitch along the sides and bottom, leaving the top open. For a professional finish, consider adding a lining using a similar method with a lightweight fabric.
Incorporate a flap for closure by cutting a piece 10 inches wide and 6 inches tall. Fold it down to find the center and attach it to the front of the compartment, securely sewing it in place. This addition not only enhances aesthetics but also serves practical purposes.
Utilize magnetic snaps or Velcro for secure closure, positioning them strategically to ensure ease of access while maintaining a sleek profile. Attach the strap to each side of the structure, positioning it at approximately 3 inches from the top, providing a balanced look and comfortable usage.
Selecting the Right Materials for Your Tote
Choose durable fabric, such as canvas or ripstop nylon, which withstands daily wear and can support weight. Look for water-resistant options to protect contents from moisture.
For inner lining, consider cotton or polyester to provide a lightweight yet sturdy barrier. These materials also offer ease of cleaning and enhance overall durability.
Straps should be made from thick webbing or leather, ensuring comfort and sturdiness for carrying. Add padding to the strap for extra comfort during prolonged use.
Consider hardware such as zippers and buckles; opt for metal or high-quality plastic to ensure longevity and reliability in securing the opening.
Interfacing can add structure and stability, particularly for the sides and bottom. Look for fusible options for ease of attachment and seamless support.
Measuring and Cutting Fabric Pieces Accurately
Use a clear ruler and a rotary cutter for precise measurements and clean edges when preparing fabric components. Establish accurate dimensions based on your design by double-checking measurements to avoid miscuts.
Before cutting, lay the fabric flat on a cutting mat. Ensure the grainline is aligned with the cutting tools to maintain the fabric’s stability and shape. Pin or weight the fabric in place to prevent shifts during the cutting process.
For rectangular or square pieces, derive the following standard sizes:
| Piece | Dimensions (inches) |
|---|---|
| Front panel | 12 x 10 |
| Back panel | 12 x 10 |
| Sides | 4 x 10 |
| Base | 12 x 4 |
| Strap | 2 x 48 |
After marking the dimensions, cut along the lines carefully. Taking your time here ensures smooth edges and accurate shapes. If you’re using patterned fabric, plan your cuts to maximize the design’s visibility.
Lastly, don’t forget to add seam allowances. A standard ¼ to ½ inch is recommended depending on the sewing technique, ensuring a snug fit and preventing fabric fraying.
Assembling and Sewing the Bag Components Together
Begin linking the cut fabric pieces by placing them right sides together, ensuring edges align perfectly. Pin these sections in place to maintain stability while working. Start with the main body, attaching any pockets or compartments before securing the sides and bottom pieces. This order helps in achieving a more organized layout, making it easier to incorporate elements like zippers or magnetic closures.
Stitching Techniques
Utilize a straight stitch for most seams, keeping a consistent seam allowance–usually around 1/4 inch–to maintain uniformity. For added durability in stress areas, consider using a zigzag stitch or reinforce seams with a second pass. Make sure to backstitch at the start and end of each seam to secure the threads effectively.
Finishing Touches
Once all components are sewn together, turn the project right-side out and check for any puckering or uneven edges. Trim excess fabric as necessary to ensure a clean finish. Topstitch along the edges for a polished look and increased strength. Lastly, attach any straps or adjustable components, making adjustments for desired lengths. For additional supplies, visit the best place to buy a large umbrella or check out the best luggage for airtravel checked for travel-friendly accessories.
Adding Finishing Touches and Personalization Options
Consider adding hardware elements like magnetic snaps or decorative clasps to elevate the design. These not only enhance functionality but also contribute to the overall aesthetic.
Customization can reflect personal style. Embroider initials or a unique design on the exterior to make it truly yours. Use embroidery software or hand-stitch details for a personal touch.
Limited edition fabrics or contrasting linings elevate the appearance. Choose fabrics in patterns or colors that resonate with your personality, making the finished product stand out.
For an additional flair, incorporate patches or pins. These can enhance the look and serve as conversation starters, allowing for further creativity.
Don’t forget to consider pockets. Different sizes and placements can be added based on your specific needs. Interior pockets for essentials or exterior ones for quick access add utility.
Lastly, while personalizing, be mindful of proportions and balance. Too many embellishments may overshadow the bag’s structure. Aim for harmony between style and functionality.
For those capturing memorable moments, consider using the best digital camera for 250 pounds to document your creative process and finished product.
FAQ:
What materials do I need to sew a small messenger bag?
To create a small messenger bag, you will need several materials. Firstly, choose a durable fabric for the outer layer, such as canvas or denim, as well as a complementary fabric for the lining, like cotton. You will also require interfacing for added stability, a magnetic snap or a zipper for the closure, and webbing or fabric for the strap. Don’t forget to have matching thread, scissors, pins, and a sewing machine on hand for assembling your bag.


