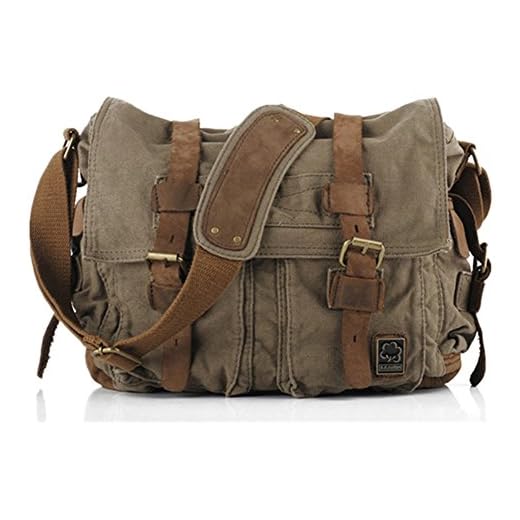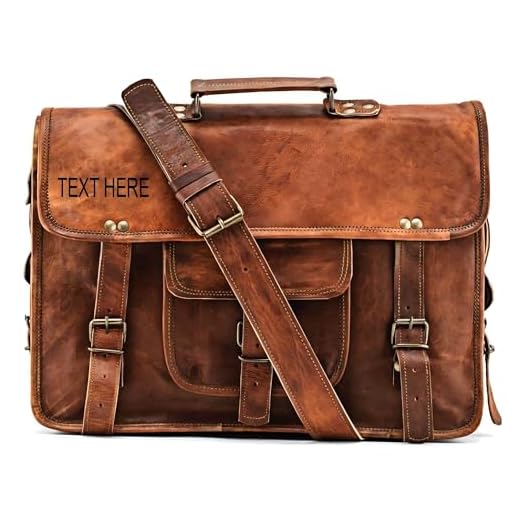


Choose durable fabric like canvas or denim for a lasting creation. Start with a rectangular cut measuring approximately 16” by 12” for the main compartment. This size accommodates everyday items comfortably. Consider adding a lining for aesthetics and sturdiness; a cotton blend works well.
For the flap, opt for a piece measuring around 12” by 8”. This provides ample coverage while maintaining ease of access. Secure the flap with a magnetic snap or a button to keep contents safe. Reinforce the corners with extra stitches for added strength.
Crafting straps from thick webbing or leather not only enhances durability but also comfort during wear. Cut two strips of 2” by 36” for adjustable straps. Attaching D-rings at the sides allows flexibility in carrying styles. Ensure that all hardware fittings are robust to withstand daily use.
To add unique flair, consider embellishments such as patches, embroidery, or personal monograms. This personal touch transforms a simple accessory into a statement piece. Finally, always double-check measurements and test any closures before final assembly to guarantee satisfaction.
Selecting the Right Materials for Your Bag
Opt for durable fabrics that can withstand daily use. Consider alternatives like canvas, nylon, or leather, each offering distinct benefits:
- Canvas: Lightweight and robust, it is ideal for a casual look while being water-resistant when treated.
- Nylon: Known for its water resistance and tear strength, this material suits those who need extra protection from the elements.
- Leather: Offers a classic aesthetic; however, regular maintenance is required to keep it in top condition.
The choice of lining also affects durability. Look for materials such as polyester or ripstop nylon. These are both lightweight and resistant to wear. Reinforce stress points with stronger fabrics or additional stitching to enhance lifespan.
At the same time, don’t forget about the straps. Cotton webbing or padded nylon can improve comfort, especially for longer wear. Adjustable straps ensure a perfect fit, accommodating personal preferences.
Keeping the intended use in mind is crucial. If carrying heavy items, prefer a heavier fabric that distributes weight efficiently. If commuting by bike, explore options like the best messenger bag for motorcycle riding, specifically designed to balance weight distribution and stability.
Finally, familiarize yourself with eco-friendly materials such as recycled polyester or organic cotton. Factors like sustainability can enhance the function while being kind to the planet.
For those opting for an ergonomic design for daily use, consider features that facilitate comfort, especially for activities like commuting. Checking options like the best backpack for running to work can provide insight into materials that effectively marry comfort and durability.
Measuring and Cutting Fabric Pieces
Use a measuring tape to determine the dimensions needed for each section. Measure the width and height for the main compartment, flap, strap, and any internal pockets. Allow for seam allowances, typically 0.5 inches (1.25 cm) on all sides, to ensure pieces fit together well.
For accuracy, lay fabric on a flat surface. Use a rotary cutter and cutting mat for clean edges. Alternatively, scissors can be used, but ensure they are sharp. Mark the fabric with tailor’s chalk or a fabric marker before cutting to maintain precision.
When cutting patterns, align them with the grain of the fabric. This prevents distortion over time. Cut each piece carefully, ensuring to label them to avoid confusion during assembly.
For multi-layered designs, stack layers neatly and cut simultaneously for uniformity. Always check that the fabric pieces fit together before proceeding to the next steps.
Assembling the Main Structure of the Carrier
Align the pre-cut panels with the right sides facing each other. Pin the edges securely to prevent shifting during stitching.
Utilize a straight stitch for sewing along the edges, ensuring a seam allowance of about 1/4 inch. Backstitch at the beginning and end to reinforce the seams.
After stitching, trim excess fabric to reduce bulk, especially at the corners. For a cleaner finish, consider using pinking shears or a serger if available.
To create depth, fold the bottom corners of the main piece inward, measuring a few inches from each side. Stitch across this folded section to form a box shape, which will provide structure.
If adding internal pockets, sew them onto the main piece before completing the assembly. Align them according to your design, leaving enough space for securing items effectively.
Press the seams open with an iron to flatten them. This not only enhances appearance but also helps in accurate alignment for the next steps.
Attach any additional features, such as straps or closures, before completing the sides. Make sure these are securely fastened to ensure durability during use.
Finish by sewing the top edges, ensuring all components are neatly enclosed. Reinforce any high-stress areas, such as where straps attach, for increased strength.
Creating and Attaching the Strap
For an optimal carry experience, it’s important to choose a durable, adjustable strap. Use nylon webbing or cotton canvas for robustness. Length should range from 40 to 60 inches, depending on personal preference.
Measuring and Cutting the Strap
Measure the desired length and cut the material accordingly. Ensure to add an extra inch for seam allowance. If opting for adjustable features, consider using two equal lengths for the strap that can be connected with hardware. Mark the cutting lines clearly to maintain precision.
Attaching the Hardware
For securing the strap, use D-rings or clips that match the weight of the bag. Attach D-rings to the sides of the bag with strong stitching, using a box stitch for added strength. If using clips, ensure to sew on a sturdy tab for the clips to attach easily.
| Material | Recommended Width | Adjustment Type |
|---|---|---|
| Nylon Webbing | 1 to 2 inches | Adjustable |
| Cotton Canvas | 1 inch | Fixed |
| Leather | 1.5 inches | Adjustable |
After attaching the hardware, test the stability by pulling on the strap gently. For additional comfort, consider padding the shoulder area if using a wide strap. This will enhance the overall functionality of the holder.
Incorporating Pockets and Compartments
Plan the layout before adding storage options. Begin with measuring available space realistically to avoid overcrowding. Consider including a large main compartment to hold bulkier items, and add smaller pockets for organization.
For multifunctionality, use different sizes of pockets. A zippered pocket on the interior provides security for valuables, while an open slip pocket can hold items like a phone or wallet for quick access. It’s wise to position pockets where they won’t interfere with the main opening or each other.
For external storage, consider a front pocket with a flap or magnetic closure. This design enhances accessibility and protects contents from falling out. Side pockets can also be beneficial for items like water bottles or umbrellas.
Use contrasting colors or patterns for pocket materials to create visual interest. Strengthen pocket edges with additional stitching, or use bias tape for a polished finish.
Attach all compartments securely, ensuring they bear weight without tearing. Reinforce stress points with extra fabric or rivets for added durability. Remember to account for the bag’s overall balance; the arrangement of pockets can impact how comfortable it feels while worn.
Finishing Touches and Personalizing Your Creation
Incorporate unique elements like patches or embroidery to showcase your style. Select fabric paint or iron-on decals for quick customization.
Add hardware upgrades such as decorative buckles or unique zippers to enhance your creation’s visual appeal while maintaining functionality.
Consider interior organization through attractive lining that contrasts with the exterior. This not only improves aesthetics but also adds a layer of protection.
Explore closures like magnetic snaps or decorative clasps for practicality and a stylish finish. Choose elements that resonate with the overall theme of your design.
For an additional personal touch, incorporate your initials or a meaningful quote on a label to make it distinctly yours.
Lastly, ensure your creation goes through a thorough cleaning process to maintain its longevity, much like the guide found here: how to make a carbon dioxide scrubber. Protect it from dust and dirt to preserve its unique features.
FAQ:
What materials do I need to make a cross body messenger bag?
To create a cross body messenger bag, you’ll need a few key materials. Start with sturdy fabric such as canvas or denim for the main body of the bag, as these provide durability. You’ll also need a lining fabric, which can be a lighter cotton or polyester for a clean finish. Additionally, gather a strap material like webbing or leather, and some hardware like a buckle or clasp. Don’t forget sewing supplies like threads, pins, and a sewing machine. If you’d like to add pockets, consider using a contrasting fabric for a stylish look.
Can I customize the size of my messenger bag, and how?
Yes, you can easily customize the size of your messenger bag! Start by determining the dimensions you want for your bag. Generally, a messenger bag can range from about 12 to 18 inches wide and 10 to 14 inches tall. Use these measurements to cut your fabric pieces, keeping in mind to add seam allowances (usually about 1/4 to 1/2 inch) to your cuts. You can also adjust the strap length based on your comfort preference, ensuring it sits nicely across your body. To ensure a good fit, you may want to create a paper pattern before cutting your fabric.
What type of sewing machine is best for making a cross body messenger bag?
A sewing machine with a strong motor and the ability to handle thicker fabrics is ideal for making a cross body messenger bag. Look for a machine that has various stitch options, including straight and zigzag stitches, which can help with reinforced seams. A walking foot attachment can also be beneficial, as it helps to evenly feed layers of fabric through the machine without slipping. If you’re an advanced sewer, consider a machine that offers more advanced features such as automatic buttonholes and programmable stitch lengths.
How do I attach the strap securely to my messenger bag?
Attaching the strap securely is crucial for the bag’s functionality. First, determine where you want the strap to be attached—typically at the sides or back of the bag. You can use D-rings or swivel hooks for added security. Create sturdy anchor points by sewing a square or X pattern over the fabric where the strap connects, reinforcing the area. If you’re using hardware, make sure to follow the instructions for attaching them properly. Finally, test the bag’s weight capacity by gently pulling on the strap to ensure it can withstand everyday use.
What finishing touches can I add to personalize my messenger bag?
To personalize your messenger bag, consider adding unique touches such as embroidered designs, fabric patches, or even fabric paint. You can also add functional elements like external pockets, a magnetic snap for easy access, or a zipper for additional security. Don’t forget to choose complementary fabrics for the lining that reflect your style. Adding a tag or label with your name or a favorite quote can also make the bag truly yours. Lastly, think about embellishments like buttons or decorative stitches to give your bag a distinctive look.


