
Utilize durable closures to construct a stylish and practical carrier that accommodates daily necessities. Begin with a selection of robust closures, preferably heavy-duty options that can withstand wear and tear, providing longevity and reliability.
The base structure should incorporate a combination of sturdy fabric and reinforced stitching to support the weight of contents. Measure and cut the fabric into precise dimensions, ensuring that both the width and height suit your usage requirements.
Attach the closures along the top edge for easy access. Consider adding additional compartments using smaller closures or fabric sections, enabling better organization of smaller items. Secure everything with strong thread or fabric adhesive, reinforcing points of stress for added durability.
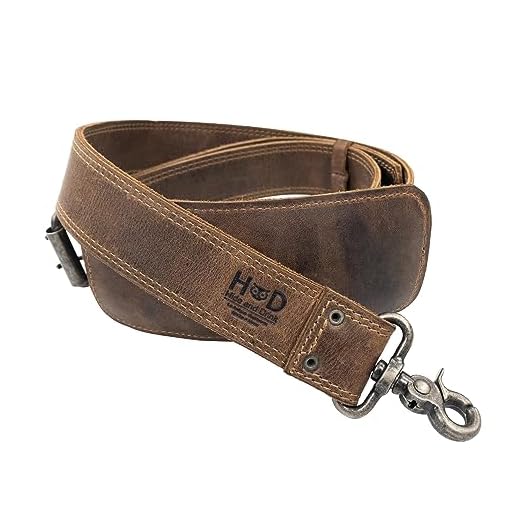
For comfort, include adjustable straps made from the same fabric or a complementary material. These straps should offer versatility in length, allowing for a customized fit according to personal preference.
Finish the design by incorporating personalization elements such as patches or fabric paint, transforming a simple creation into a unique expression of style.
Selecting the Right Zippers for Your Project
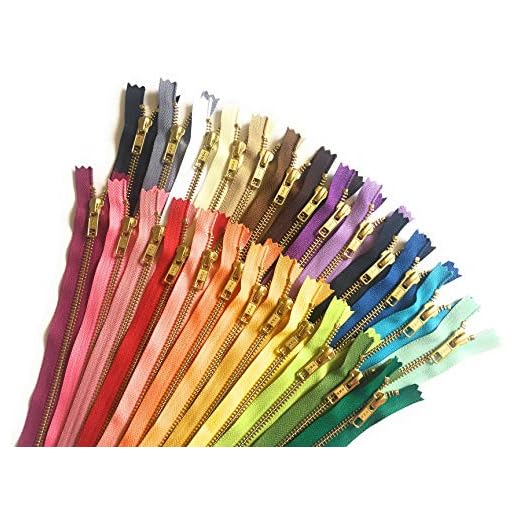
Opt for sturdy zippers made from nylon or metal for durability and reliability. They withstand wear and tear, ensuring functionality over time.
Consider the type of teeth; rectangular or plastic teeth provide different aesthetics and functions. Plastic zippers are lightweight, while metal adds a vintage touch.
For smooth operation, choose a quality slider. Look for those with visible lubrication or a smooth glide test. Avoid those that seem tight or catch easily.
- Length: Measure your design’s intended openings precisely. Standard lengths are available, but custom options exist for unique dimensions.
- Color: Select shades that complement your design. Neutral colors offer versatility, while bold hues can make a statement.
- Finish: Matte finishes provide a subtle look, while glossy finishes enhance visual appeal. Choose based on your overall aesthetic.
Think about zipper type: separating, closed-end, or invisible. Each serves different functions, so evaluate your project’s specific needs.
Before making a final choice, consider testing the zipper with your materials. This ensures compatibility and that it meets performance expectations.
Preparing Zippers for Assembly
Ensure each component is clean and free from debris before commencing assembly. This step prevents any obstructions during usage.
Trim any excess tape on the sliders for a neat finish. This modification allows for smoother operation and a polished look.
Test all sliders on the zippers individually. Verify they glide effortlessly along the teeth, identifying any that may require adjustment or replacement.
Use a fabric that complements the closure elements, ensuring aesthetic harmony. This choice enhances the overall appeal of the finished product.
Consider reinforcing the ends of the openings. A simple stitch can eliminate fraying and extend durability, particularly with frequent use.
For a professional touch, reinforce any stress points using rivets or bar tacks. This adds strength and longevity to the assembly.
Once satisfied, gather references for securing your design. Resources like the best luggage by bed bath and beyond can provide inspiration and guidance.
Final verification involves checking compatibility with other components of your creation, ensuring that all elements align properly.
Keep in mind the value of portability. If you plan on frequent travel, look into resources such as the best smallest travel umbrella for adaptation ideas that enhance convenience.
Constructing the Bag Body from Zippers
Begin by laying out your selected fasteners to establish the desired dimensions for the item. Aim for a combination that balances functionality and aesthetics. Align the closures in rows, ensuring they connect effectively to create a sturdy structure.
Use a strong, heavy-duty thread to stitch the fasteners together. Create a pattern by alternating colors or sizes, enhancing visual interest. Overlock the edges to prevent fraying and improve durability.
Incorporate additional fabric panels if necessary for reinforcement or to add pockets. These panels can be sewn strategically, utilizing existing fasteners as part of the design. This adds both style and utility.
Consider integrating small loops or D-rings at the sides for attaching straps, facilitating versatility in carrying methods. Such additions not only elevate functionality but also contribute to the overall look.
As you finalize assembly, check for any wear on the fasteners to ensure smooth operation. A properly constructed unit will not only serve its purpose but also stand out as a unique piece.
For those maintaining lawns, exploring options like best cordless lawn mower for large lawns may enhance the gardening experience while complementing your crafting projects.
Adding Straps and Fasteners to Your Carrying Companion
Choose durable materials for straps, such as nylon or canvas, to ensure strength and longevity. For a simple adjustable strap, use webbing and a slider buckle, allowing for easy length adjustment to achieve desired comfort.
Attach the straps securely by sewing them directly to the body of the creation at reinforced points. Double-stitching these areas enhances durability under load. Consider integrating D-rings or O-rings for added versatility in securing straps. These can facilitate quick attachment and detachment of the carry handles.
If opting for a shoulder strap, ergonomically designed padding improves comfort during extended use. An optional detachable feature can provide flexibility when carrying lighter loads or switching to a more casual handle style.
For fasteners, magnetic snaps or hook-and-loop tape offer convenient closure solutions. Position them strategically near the top for easy access while maintaining security. Ensure that any closure method selected aligns with the opening design to promote seamless functionality.
Consider adding decorative elements, such as unique hardware or reflective strips, for both aesthetics and safety. These additions can enhance visibility and personal style, making the carry item stand out while ensuring practical use.
Finishing Touches and Personalizing Your Creation
Incorporate unique embellishments to elevate your design. Consider adding decorative patches or fabric paint to express personal style. Choose patterns or images that resonate with your aesthetic for a customized look.
Durable Linings
Choose a lining material that complements the exterior while enhancing durability. Fabrics such as canvas or nylon provide strength and protection, preventing wear and tear. Ensure the lining is securely stitched to avoid fraying.
Hardware and Accessories
Select complementary hardware like clasps, rings, and adjusters in colors that contrast or match the main elements. Metal options such as brass or stainless steel provide a stylish finish while ensuring longevity. Consider adding a personalized keychain or charm for an individual touch.
For additional functionality, integrate compartments using smaller zippers or pockets. This allows for better organization and accessibility of items. Tailor the internal layout to cater to specific belongings, maximizing usability.
Finishing touches create a more polished feel. Use edge paint on cut seams for a refined appearance, ensuring longevity and resistance to fraying. This small detail significantly impacts the overall look.


