
Remove all parts before beginning the cleaning process. This includes any reservoirs, tubes, and removable pockets. Rinse the exterior and interior thoroughly with cool water to eliminate any debris and residues.
For deeper sanitation, use a mild soap solution. Create a mixture of warm water and a gentle detergent. Soak a cloth or sponge in this solution, then gently scrub the fabric, paying close attention to areas that may have absorbed sweat or dirt. Avoid harsh chemicals that could damage the material.


Rinse the pack with cool water again to ensure all soap is removed. Allow it to air dry completely in a well-ventilated area, keeping it out of direct sunlight to prevent fading. For storage, ensure it is completely dry to prevent any development of mold or odors.
Cleaning Your Hydration Belt
Begin by removing all contents, including reservoirs and any small items stored inside. Inspect for any remaining liquid and empty completely. Next, use a damp cloth with mild soap to wipe the exterior thoroughly, paying attention to zippers and pockets where dirt may accumulate.
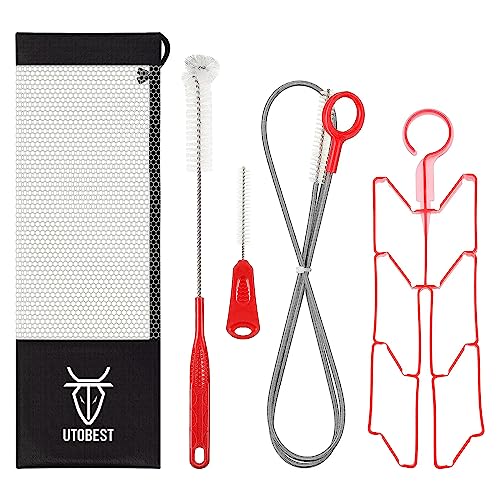
Inner Reservoir Care
Detach the bladder from its compartment and rinse it with warm water. Create a solution of water and a few drops of dish soap, filling the bladder. Shake gently to ensure the soapy water reaches all areas. Rinse multiple times with clean water until all soap residue is gone. Allow it to air dry completely before reassembling.
Additional Tips
For stubborn stains, a mixture of baking soda and water can effectively lift discoloration without harsh chemicals. Ensure that any straps and adjusters are cleaned as well; a toothbrush can help clean hard-to-reach areas. Store the hydration device in a cool, dry location to prevent mold and bacteria buildup.
Remove All Contents from the Pack
Begin by thoroughly emptying the entire storage area of the carrier. This means taking out any bottles, snacks, or personal items that may have been stowed inside. Ensure that you check every compartment, including hidden or smaller pockets.
Next, inspect the exterior for attached gear or straps that may need to be detached. Any additional items must be removed to facilitate cleaning and ensure no debris is left behind.
Storage Items
Make a checklist of items stored in the carrier to avoid losing anything. Once emptied, place all items in a designated area so they can be easily accounted for after cleaning.
Inspection for Damage
While the carrier is empty, examine it for signs of wear and tear. Look for any frayed fabric, broken zippers, or damage to clasps. Addressing these issues before cleaning will ensure longevity and optimal performance.
Check Care Instructions on the Tag
Always refer to the label attached to the gear for specific cleaning guidelines. These instructions are tailored to the materials used and ensure durability and performance.
Common Symbols and Their Meanings
| Symbol | Meaning |
|---|---|
| ✗ | No machine wash |
| ☀️ | Air dry away from direct sunlight |
| Hand wash only | |
| Close all zippers and fasteners |
Additional Considerations
Follow any temperature settings indicated on the tag. Heat can damage materials. If using detergents, choose mild ones to preserve fabric integrity and color.
Hand Wash with Mild Detergent
Fill a basin with lukewarm water and add a couple of drops of a gentle detergent. Submerge the gear fully, allowing the solution to penetrate the fabric. Use a soft cloth or sponge to gently scrub any stained areas, focusing on spots that may have collected dirt or residue.
Rinse thoroughly under running water to remove any detergent traces, ensuring that the inside compartments are also free from soap. Squeeze the excess water gently without wringing to prevent damage to the material. Lay it flat on a clean towel to absorb more moisture and reshape it as needed while air-drying in a shaded area, avoiding direct sunlight which can cause fading.
Air Dry the Pack Properly
After cleaning, place the equipment in a well-ventilated area to allow for thorough drying. Avoid direct sunlight as this can lead to fading or damage to materials over time.
Positioning the Gear
Lay the item flat on a clean, dry surface or hang it on a drying rack. Ensure that all compartments are opened up to enhance airflow inside, preventing any moisture from being trapped.
Time Required for Drying
Typically, complete air drying may take 24 to 48 hours, depending on humidity levels. Regularly check for any residual dampness before storage to maintain the integrity of the item.
For faster drying, gently dab any excess moisture with a clean, absorbent cloth prior to air drying, but avoid wringing out the fabric to prevent any structural damage.
Inspect for Damage After Washing
Once your gear is clean, carefully examine it for any signs of damage. This step is crucial to ensure its continued functionality and comfort during use.
Check for the Following Issues:
- Tears or Rips: Look for any fabric tears that may compromise the integrity of the item.
- Zipper Functionality: Test all zippers to confirm they open and close smoothly without snagging.
- Seams: Inspect seams for fraying or separation, as these areas are typically under stress during use.
- Straps and Buckles: Examine straps for wear and buckles for proper functioning to ensure a secure fit.
If any issues are discovered, consider repairing them before the next use to prevent further deterioration. For temporary fixes, adhesive patches or fabric repair tape can be useful. Additionally, if you require temporary storage after washing, check out the best luggage storage near penn station for options that keep your gear safe until the next adventure.
Store the Pack Correctly After Cleaning
Ensure that the cleaned item is completely dry before storing it. Any residual moisture can lead to mold growth and unpleasant odors.
Here are some recommendations for proper storage:
- Find a cool, dry place to store the item, away from direct sunlight and heat sources.
- Ensure the compartments are open to allow airflow, preventing any trapped moisture.
- Avoid folding the item tightly; instead, store it flat or hang it if possible to maintain its shape.
- Consider using a breathable bag or container if storage is in a humid environment.
- Regularly check the condition of the item during storage, especially if storing for an extended period.
For further maintenance, consider exploring the differences between oil vs oilless air compressor which one reigns supreme to keep your gear in optimal condition.


