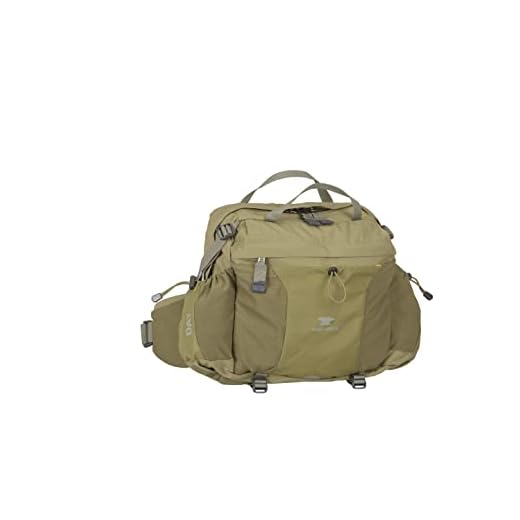

The hip strap needs to sit comfortably on the top of your hip bones. Adjusting it to this position allows for effective weight distribution, minimizing strain on your back and improving overall stability during your outdoor activities. Ensure the strap is snug but not overly tight, allowing for free movement while still securing the load.
To find the perfect fit, stand upright and adjust the buckle so that the strap rests flush against your body. The ideal angle is parallel to the ground, providing maximum support without hindering your natural posture. Remember that everyone’s body shape is different, so take the time to customize the fit for your specific frame.
Perform a test walk with the backpack loaded to gauge comfort and functionality. Check for any chafing or discomfort around the waist area, making further adjustments if necessary. Fine-tuning the position will enhance your overall experience while hiking or camping, ensuring that you’re ready for your next adventure.
Optimal Position for the Hip Support on Your Backpack
Place the hip support over the top of your pelvis, ensuring it is level with the hip bones. This alignment facilitates better load distribution and enhances comfort during extended use.
Adjusting the Fit
Follow these steps for proper adjustment:
- Loosen all straps before attempting to fit.
- Put on the backpack and allow it to settle into place.
- Pull the main adjustment straps until the support makes firm contact with your hips.
- Check to ensure the weight is transferred from your shoulders to your hips.
Testing the Comfort
Once adjusted, walk around with the loaded unit. Assess for any pressure points. If discomfort arises, readjust the placement slightly higher or lower as necessary.
Understanding the Purpose of the Waist Component
Primarily, the purpose of the hip attachment is to transfer weight from the shoulders to the hips, significantly enhancing comfort during prolonged use. This function alleviates strain on the upper body, allowing for better endurance on treks.
This portion also stabilizes the overall load, ensuring that equipment remains secure and properly distributed. A well-fitted component ensures minimal movement, reducing the risk of injury caused by excessive swaying or shifting during activity.
An additional advantage of this feature is the accessibility it provides. Many designs include pockets, facilitating easy access to essentials such as snacks, maps, or other small items without removing the main container.
Furthermore, correct adjustments can enhance posture. By aligning the load appropriately, it encourages a natural stance, which can lead to improved performance and reduced fatigue.
Lastly, for those tackling diverse terrains, this accessory secures the pack closely, preventing it from bouncing or hindering mobility, which is crucial for a successful experience.
Identifying Correct Waist Belt Position on Your Body
Place the lumbar support across your hip bones for optimal weight distribution. The attachment should sit snugly below your natural waistline, allowing for comfortable movement without impairing mobility. Ensure the strap is adjusted to keep the weight primarily on your hips rather than your shoulders.
To verify the fit, stand upright and pull the straps tight enough that they hold the load steady but not excessively compressing your abdomen. You should be able to breathe freely without restriction. When seated or bending, the harness should remain secure and not shift upwards.
Check that the padding makes contact with your body, distributing pressure evenly. Adjust to eliminate any gaps between your body and the gear. If you can fit more than two fingers between the adjustment and your body, it’s too loose.
Experiment with various adjustments while wearing your load to determine what feels best. Personal comfort preferences differ; some may prefer a higher position for greater upper body support, while others benefit from a lower alignment for enhanced stability. Pay attention to how your body responds during different activities.
Regularly reassess the fit, especially during extended use, as shifts occur with movement and weight distribution. Adjust as necessary to maintain a balanced load and support your body efficiently.
Adjusting the Waist Belt for Optimal Load Distribution
To achieve the best load distribution, ensure that the fitting mechanism is snug against your hips. This position allows the majority of the weight to rest on the pelvic area instead of straining your shoulders and back.
Positioning the Attachment Points
Locate the adjustment points on the sides and rear. Pull the straps to tailor the fit, which should create a snug yet comfortable grip around your body. Keep the pack high on your back, allowing the load to sit directly above your hips, facilitating better weight transfer.
Testing for Comfort and Stability
Once adjusted, conduct a brief test by walking around with the pack. Ensure that it does not slide down or move excessively. A well-secured pack should feel stable and balanced as you shift your weight. This balance prevents fatigue and enhances your overall experience.
For more travel essentials, explore the best luggage set samsonite for your adventures.
Common Mistakes When Positioning the Support System
Incorrect height placement is a frequent issue. Many individuals position the harness too low on the hips, leading to discomfort and imbalance. Align the support structure so it rests comfortably on the top of the pelvic bones to ensure stability.
Another mistake is not adjusting the straps after putting the gear on. Straps may shift during the loading process, causing misalignment. Always check and fine-tune the adjustments once you have the gear in place to maintain an even weight distribution.
Overtightening can impede mobility and circulation. Ensure that the straps are snug but allow for some freedom of movement. Aim for a fit that secures the load without restricting your movements.
Ignoring the weight of the load can lead to poor support positioning. Ensure the equipment is evenly distributed and that heavier items are packed closer to your back. This keeps your center of gravity aligned, minimizing strain.
Common Misconceptions
A common misconception is thinking that tighter means better. In reality, a too-tight setup can lead to fatigue and discomfort over prolonged use. Strive for a balanced fit that keeps the pack close but comfortably allows for mobility.
Lastly, failure to adjust for body shape often results in discomfort. Everyone’s body is unique; make necessary adjustments to accommodate your specific anatomy for optimal performance.
| Mistake | Correction |
|---|---|
| Incorrect height placement | Align with pelvic bones |
| Not adjusting after loading | Check and fine-tune adjustments |
| Overtightening | Allow for some movement |
| Packing incorrectly | Distribute weight evenly |
| Ignoring body shape | Adjust for your anatomy |
For those tackling a DIY project like repainting wood surfaces, consider using the best pressure washer to remove paint from wood for improved efficiency.
Tips for Ensuring Comfort with Waist Belt Placement
First, ensure the gear’s padding aligns with your hip bones for stability. This can significantly enhance comfort during use.
- Adjust the fit while wearing a loaded setup. Test different positions to find what feels secure without constricting movement.
- Experiment with different layering. A thicker garment may alter the contact points, impacting overall comfort.
- Check the load distribution frequently. A balanced weight can reduce strain on your joints.
After securing the attachments, ensure they are snug but not overly tight. Monitor communication with your body; any pain could indicate a need for adjustment.
- Stand up straight and evaluate how the weight feels.
- Engage in minor movements to check for any discomfort.
- Readjust as necessary based on these observations.
Keep in mind the terrain you’ll traverse. Uneven surfaces may call for a more tight fit while smoother trails might allow for a looser arrangement. Always be proactive in monitoring how adjustments affect your experience.
How to Test Belt Position During Hiking
To check the effectiveness of your load-bearing strap, perform a simple field test. First, wear your gear normally and load it as you would on an expedition. Begin with a few minutes of walking on flat terrain before progressing to inclines.
Pay attention to pressure points around your hips. You want the support to encompass your pelvis without causing discomfort. If there are pressure marks or significant discomfort, reposition the strap lower or higher, depending on your body’s shape.
Movement Observation
While on the move, assess how the equipment shifts. Proper placement should allow for minimal movement, keeping the weight stabilized near your center of gravity. If the outfit sliding or bouncing during motion becomes disturbing, adjustments are necessary to secure a snug fit.
Feedback from Peers
Engage with fellow hikers for their input. Sometimes, others can visually identify issues with your setup that you might overlook. Share your experience on adjustments to gather insights and enhance your approach.
Finally, complete your hike and evaluate fatigue levels after the excursion. A correctly adjusted harness minimizes strain and enables prolonged comfort. If you notice fatigue disproportionately affecting your hips or lower back, reconsider the positioning of the support mechanism.


