


Capacity & dimensions: target 20–25 liters; external size ≈ 45 × 28 × 18 cm; empty weight 450–700 g. Fabric: 500D Cordura or 420D nylon with a 1,000 mm PU coating on the face fabric and taped seams at high-stress points. Fasteners: YKK zippers and reinforced 16–20 mm webbing on attachment points. Color preference: choose a scarlet or crimson shell if visibility is required; select a darker ruby or maroon shade for lower staining and UV fade resistance.
Organization & comfort: one main compartment with internal divider, padded sleeve for up to 15.6″ laptops (fits devices up to 39 × 27 cm), front admin pocket with key clip and slim wallet pocket, two exterior stretch bottle pockets and a small valuables pocket with zipper. Shoulder straps: 8–12 mm dual-density foam, length adjustable 30–45 cm. Back panel: ventilated foam channels 12–18 mm deep; hip belt 30–40 mm removable for short treks. Carry load: recommend 8–12 kg maximum for sustained comfort; sternum strap with quick-release and integrated whistle.
Durability, care & buying checklist: inspect stitch density at 8–10 stitches per cm on load seams; check zipper operation under a 3–6 kg test load. Warranty: prefer brands offering ≥2 years. Price range: $50–$180 depending on materials and hardware. Maintenance: hand wash or machine gentle inside a laundry bag, cold water, mild detergent; air dry away from direct sunlight; reproof PU surfaces after heavy exposure to rain (approx. every 12 months). If zippers stick, apply a dry silicone lubricant sparingly.
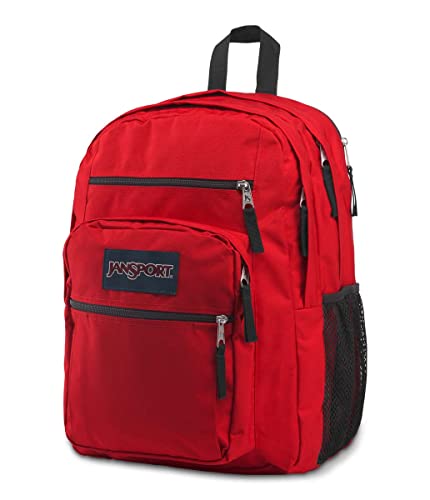
Crimson daypack: selection, maintenance and visibility
Choose a 20–25 L crimson rucksack made from 500D Cordura or 210D ripstop nylon, with YKK zippers, a padded 15–16″ laptop sleeve, ventilated mesh back panel and a sternum strap; target empty weight: 600–900 g.
- Capacity guidance:
- Daily commute: 15–25 L (laptop + charger, lunch, water bottle)
- Student use: 20–30 L (textbooks, tablet, stationery)
- Light hike: 25–35 L (extra layer, snacks, first-aid)
- Materials and waterproofing:
- 500D Cordura or 600D polyester with PU coating for abrasion resistance
- Look for hydrostatic head ≥ 2,000 mm for rain protection; taped seams for better sealing
- Waterproof roll-top models for full weatherproofing if you carry electronics outdoors often
- Fit and ergonomics:
- Shoulder strap width: 40–60 mm with 10–15 mm foam padding
- Load distribution: keep packed weight under 20% of body mass for all-day comfort
- Adjust sternum strap to chest level to reduce strap slip; use waist strap for loads over 6–8 kg
Packing organization (practical metrics):
- Central compartment: reserve 60% of internal volume for bulk items (sweater, notebook)
- Front pocket(s): 20% for quick-access items (keys, phone, mask)
- Side mesh: one 0.5–1 L water bottle per side; measure bottle diameter up to 7 cm for snug fit
- Laptop sleeve: allow 1–2 cm clearance beyond device dimensions to avoid compression at seams
Care routine (step-by-step):
- Empty all compartments; remove loose debris with a soft brush.
- Spot treat stains with mild liquid detergent diluted 1:40 in cold water; test a hidden seam first.
- Hand wash: submerge briefly in cold water, agitate gently around seams and zippers; do not soak for more than 10 minutes.
- Rinse thoroughly; squeeze excess water without wringing; reshape and air dry in shade to avoid pigment fading.
- Restore water repellency with a wash-in or spray-on treatment formulated for synthetic fabrics (follow manufacturer dose on label).
- For stubborn marks on coated surfaces, use a soft nylon brush and repeat spot treatment rather than machine cycles.
Small repairs and kit contents:
- Carry a repair kit: 20–25 mm replacement buckle, 1 m of 20–25 mm polypropylene webbing, heavy nylon thread, curved upholstery needle, fabric repair tape (iron-on or adhesive) and a multi-tool.
- Temporary fixes: use strong adhesive tape for seam splits; Tenacious Tape-style patches for worn areas; replace webbing ends with heat-fused finish to prevent fray.
- Zipper care: lubricate sliders with dry silicone or zipper wax; replace broken sliders with size-matched parts (check original teeth size).
Visibility and safety upgrades:
- Add 3M reflective strips (25 mm width) across the upper panel and shoulder straps for low-light detection.
- Attach a lightweight LED clip-on light rated ≥50 lumens to the rear loop for night commutes; use flashing mode for higher noticeability.
- Use a high-visibility rain cover in contrasting neon color for heavy rain or urban cycling.
Selecting fabrics and coatings to preserve scarlet hue and resist stains
Specification: choose solution-dyed high-tenacity polyester (500–1000D) or solution-dyed nylon 6,6 (1000D Cordura) combined with a fluorine-free silicone DWR at 3–6 g/m² and a TPU laminate (30–50 µm) at high-wear panels to maintain color depth and repel oily soils.
Colorfastness: target AATCC/ISO ratings – crocking (AATCC 8) dry 4–5, wet ≥3.5; washfastness (ISO 105-C06 / AATCC 61) grade 4–5 after 5 home-laundering cycles; lightfastness equivalent to Blue Wool 6–7 or ΔE ≤3 after 100 hours xenon-arc exposure (ISO 105-B02). Solution-dyed fibers (pigment in polymer) typically meet these targets; piece-dyed constructions require UV stabilizers and pigment selection with high lightfastness indexes (inorganic or metal-complex pigments preferred for scarlet tones).
Coating selection: prefer TPU laminates for abrasion resistance and minimal yellowing (30–50 µm). Avoid soft PU facecoats alone on exterior panels where hue retention is critical, since some polyurethanes show yellowing under UV and heat. For DWR, specify a silicone-based fluorine-free formulation or a fluorine-free dendrimer hybrid when PFAS restrictions apply; apply at 3–6 g/m² for factory finishes and recommend consumer reproofing sprays at similar add-on rates.
Stain-resist strategy: achieve oil repellency rating AATCC TM 118 of 7–8 on treated surfaces for strong resistance to hydrocarbons; for water-borne stains aim for AATCC 22 spray rating 90+%. Use low-surface-energy topcoats (silicone or fluorine-free variants with amphiphobic properties) plus an encapsulating TPU layer at high-risk zones to prevent oil penetration into dye sites.
Trim and assembly: match solution-dyed thread and webbing to avoid differential fading or bleeding. Use hotmelt seam tape (50–120 µm) that has passed 50 home-wash cycles without delamination. Select zippers and hardware with non-reactive platings (PVD or powder-coated stainless) to prevent staining from metallic corrosion; specify seam strength >200 N and abrasion resistance >30,000 Martindale cycles for outer panels.
Maintenance and consumer care: label washes at ≤30 °C with neutral pH detergents (pH 7–9), no chlorine bleach or optical brighteners; machine tumble-dry low or iron through cotton at max 120–140 °C for 30–60 seconds to reactivate DWR. Recommend reproofing after ~20 wash cycles or when spray rating drops below 70%. For fresh oil stains, advise blotting, applying low-foaming degreasing agent diluted 1:10, gentle agitation, then rinse; test solvent spot-cleaners on concealed seams first.
Quality control protocol: require supplier certificates for solution-dyed batches, run batch tests – AATCC 61-2A (home laundering) x5 cycles, AATCC 8 crocking, AATCC 118 oil repellency, xenon-arc 100 h with spectrophotometric ΔE measurement. Release criteria: ΔE ≤3 vs initial, crocking dry ≥4, oil repellency ≥7, no visible delamination or color bleed at seams after 5 wash cycles.
Pocket layout and packing checklist for a work or school commute
Keep transit essentials in the front quick-access pocket: transit card in a clear sleeve (3×8 cm), phone, one pair of wireless earbuds, house and office keys on a short lanyard. Place items so the card and phone sit nearest the zipper for single-hand taps and scans.
Organizer panel configuration: pen slots for 2 pens and 1 mechanical pencil, a slim card pocket for ID and bus pass, a 9×12 cm zip mesh for cables and receipt stubs, and a small coin pouch (4×6 cm). Use elastic or Velcro straps to prevent loose nibs and clips from scratching electronics.
Main compartment layout: padded laptop sleeve positioned against the pack’s rear panel for spine-side load bearing; specify sleeve for 13–15″ devices. Place a flat document sleeve (A4 or 9×12 inch) in front of the laptop. Stow a tablet (9–11″) in a dedicated slip or between notebook and laptop to avoid pressure points.
Side and bottom pockets: one side for a bottle up to 750 ml (insulated bottle fits best), opposite side for a compact umbrella (folded length ≤ 25 cm). Use a bottom compartment for lunch box up to 700–900 ml or a change of shoes; protect textiles with a waterproof liner when carrying food.
Internal security and small-item strategy: keep a slim power bank (10,000 mAh, flat profile) in a zip mesh near the top for quick reach; store charging cable coiled to 1 m and secured with a strap. Place sunglasses in a rigid case in an upper pocket to avoid crushing. Use color-coded pouches: cables (grey), toiletries (blue), stationery (green) for faster visual sorting.
Emergency kit and hygiene: compact kit: 6 adhesive bandages, one antiseptic wipe, 4 ibuprofen tablets in a small resealable bag. Hygiene pack: hand sanitizer 30 ml, 8 tissues, spare mask folded to 7×10 cm. Store both in a zip mesh near the front for immediate access.
Clothing and weather items: lightweight rain shell compressed to 25×18 cm in a waterproof pouch; thin knit sweater rolled and placed above lunch to add insulation without shifting load. For cold seasons add thin glove liners in a small pocket.
Stationery and school/work gear: A5 notebook (148×210 mm) upright in main compartment; two pens + one highlighter in organizer; USB drive in a labeled pocket. For classes, include a folder for loose handouts (max 10 sheets) to prevent creasing.
Weight, balance and packing order: load heaviest items (laptop, lunch) close to the rear panel and low; medium-weight items (notebook, sweater) above them; light and frequently used items (phone, pass, keys) in front pockets. Aim for carried load ≤ 10–12% of body mass for daily comfort. Keep center of mass within 10 cm of the torso to reduce shoulder strain.
Daily and weekly checklist before departure: 1) Charge phone and power bank to ≥ 80%. 2) Refill water bottle. 3) Pack lunch and seal in leakproof container. 4) Verify transit card is accessible and not expired. 5) Check first-aid/hygiene kit contents and replace used items. 6) Fold rain shell and confirm compact fit. Completing these six items takes under five minutes when pouches are pre-designated.
Removing ink, mud, and oil stains from nylon and heavy cotton
For fresh pen ink on synthetic fabric: blot immediately with a white paper towel–do not rub. Apply 70–90% isopropyl alcohol with a cotton swab from the back of the stain toward the front; replace swabs as they pick up color. Rinse under cold running water, then work in 1 teaspoon liquid dish soap per 250 ml warm water with a soft-bristle brush for 60–90 seconds. Machine wash on a warm cycle (30–40°C) with color-safe detergent; hang to air-dry (do not tumble until stain is gone).
Permanent marker or printer ink on heavy cotton: test on an inconspicuous seam for 30 seconds. If no dye transfer, blot with 90% isopropyl alcohol, then apply a sodium percarbonate soak (15 g per litre warm water) for 30–120 minutes depending on stain age. Rinse, launder on 40–60°C if fabric label allows, and air-dry. If dye bleeds during the test, stop solvents and use enzyme laundry pretreatment plus oxygen bleach cold soak.
Mud: allow to dry completely, then knock off loose grit outdoors and brush with a soft dry brush. Pre-soak cold 15–30 minutes to loosen clay, then apply a paste of powdered detergent (1 tablespoon) + warm water (2 tablespoons) and agitate gently with a brush. Rinse; if residue remains, repeat once or follow with a 30–60 minute oxygen-bleach soak (15 g/L) at 30–40°C for nylon, up to 50–60°C for heavy cotton if colorfast.
Oil and grease: for fresh oil, sprinkle baking soda or cornstarch to absorb for 15–60 minutes, brush off, then apply concentrated liquid dish soap directly and work with a soft brush for 1–2 minutes before rinsing with warm water. For set-in automotive or machine oil on heavy cotton, apply mineral spirits on a white cloth to lift oil (test first), blot outward, then treat with dish soap and an oxygen-bleach soak. Do not use acetone or nail-polish remover on nylon; those solvents can damage synthetic fibers.
Tools and monitoring: always perform a colorfastness check on an inside panel for 30 seconds and blot with a white cloth; if dye transfers, restrict treatment to cold water, soap and oxygen bleach. Use white cotton rags, paper towels, cotton swabs, a soft toothbrush, and non-metal scraping tool for dried dirt. Never tumble-dry until stains are fully removed–heat sets ink and oil. For replacement or larger luggage needs with stain-resistant finishes see best luggage sets spiner.
Repairing torn seams, broken zippers, and strap hardware step by step
Use bonded nylon thread (Tex 70–210) with a size 18/125 or 90/14 heavy needle for thick woven or ripstop fabrics; use bonded polyester thread for lightweight synthetic packs. Match thread color closely and test stitch tension on a scrap before repairing the item.
Seam repairs (small tears to full seam failure)
- Tools and prep:
- Seam ripper, sharp scissors, curved upholstery needle, thimble, awl, sewing machine (optional), fabric clips.
- Remove loose threads, trim frayed edges to a 3–5 mm straight line, and clean fabric with a mild detergent solution; allow to dry fully.
- Hand method (for field repairs):
- Use a ladder stitch or backstitch: place stitches 3–4 mm apart, penetrating 4–6 mm from the fabric edge. Tie off with three half-hitches and melt knot end slightly if using synthetic thread.
- For long tears, reinforce with a 25–40 mm wide patch on the inside: cut patch 20–30 mm larger than the tear, apply a thin bead of urethane-based fabric adhesive (e.g., seam grip), press flat, then sew a 6–8 mm topstitch along the patch perimeter.
- Sewing machine method:
- Use a heavy-duty needle (size 18/125), straight stitch, stitch length 3–4 mm. Double-stitch the seam with a second row 6–8 mm from the first to form a load-bearing channel.
- If the original seam tape is present, remove and replace with 12–18 mm seam tape bonded with heat-activated adhesive or sewn over both layers.
- Load-bearing reinforcement:
- For shoulder straps or hip-belt connections, sew a box with an X (box-x) at least 25 x 25 mm using heavy thread; use rivets (6–8 mm shaft) or bartack stitches every 5 mm for additional strength.
Zippers and strap hardware
- Diagnose zipper type: coil (nylon), molded plastic, or metal. If slider has teeth skipping but teeth intact, replace slider first.
- Slider replacement:
- Obtain correct width slider (measure tape width in mm; common sizes: 5 mm, 8 mm). Remove top stop with pliers, slide old slider off, install new slider, then crimp a new top stop or stitch a bar tack to retain it.
- If teeth are misaligned on coil zippers, realign by running a flat-nose plier gently along the coil while closing the slider slowly.
- Broken teeth or severely damaged zippers:
- Replace the entire zipper: unpick the seam 10–15 mm beyond the zipper ends, remove zipper tape, sew in a new zipper with 3–4 mm stitch length, backstitch ends. Use a zipper foot and reinforce ends with bartacks or short rivets where fabric layers meet.
- Strap hardware repair (D-rings, tri-glides, side-release buckles):
- Match hardware width to webbing: common webbing widths 15 mm, 20 mm, 25 mm, 38 mm. Replace with metal if original plastic failed under load.
- To replace a sewn-in tri-glide, thread webbing through new hardware, fold webbing back 25–40 mm, secure with box-x stitch or two parallel bartacks spaced 6–8 mm apart. Melt synthetic webbing end cleanly with a hot knife or lighter and press to seal.
- If rivets hold hardware, remove rivets with a center punch and drill (use a pilot bit), install new rivets of the same diameter and shaft length; use a hand or arbor riveter rated for the rivet size.
- Quick field fixes:
- Temporary slider: use a small paperclip or split ring to hold two zipper pulls together until a replacement arrives.
- Buckle tooth fractured: replace side-release buckle with same-width unit; thread webbing through new buckle and secure with a reinforced stitch or industrial adhesive plus stitches for redundancy.
For bulk cleaning equipment recommendations used before major refurbishing, consult best pressure washers to start a business.
Adding reflective tape and rechargeable LEDs for night visibility
Apply 25–50 mm prismatic reflective tape in horizontal bands on the main flap and along both shoulder straps, then fit two USB-C rechargeable clip-on LED beacons (20–60 lm, 6–20 h run-time) to the strap D-rings for active visibility.
Placement & attachment
Mark tape locations with a removable fabric pen: one 25–50 mm strip across the upper third of the front panel, one per shoulder strap centered 5–8 cm from the top edge, and optional vertical accents along side seams. Leave a 5–10 mm gap from seams to avoid stress during wear. For fabrics with tight weave use 25 mm; for thicker outer shells use 50 mm.
For adhesive-backed prismatic tape use a cold-roll application: clean surface with isopropyl alcohol (70%), press tape with a 50–100 N roller, then sew a 3–4 mm perimeter stitch with bonded polyester thread (tex 60 or 90). For heat-activated tape follow manufacturer’s temperature chart (typical: 140–160 °C for 2–3 s using a small heat press or iron with a cotton cloth barrier). Reinforce high-stress areas with a 25 mm overlap and triple backstitch every 5 cm.
Rechargeable LED selection & wiring
Choose two clip-on beacon lights rated IPX4+ with magnetic or carabiner mounts. Recommended specs: 20–60 lumens steady, 80–150 lumens peak flash, 6–20 hours in flashing mode, USB-C charging, battery 200–1,000 mAh. For higher side visibility add a thin 5 V LED strip (SMD 5050, 60 LED/m) powered by a 2,200–5,000 mAh removable power bank for 3–8 hours.
Install beacons on strap D-rings or stitched webbing loops located 12–18 cm apart to create a visible silhouette. Route strip LEDs inside a stitched channel on the lower side panels; use 3 mm silicone tubing over solder joints and a small waterproof connector (IP65) for the power lead. Place batteries inside an accessible internal pocket with a cable exit grommet; do not sew through batteries or switches.
| Component | Recommended spec | Placement | Expected run-time | Estimated cost (USD) |
|---|---|---|---|---|
| Prismatic reflective tape | 25–50 mm, glass-prismatic, adhesive or heat-activated | Top flap, shoulder straps, side accents | Permanent (stitch + adhesive) | 5–15 per m |
| Clip-on rechargeable beacon | 20–60 lm, USB-C, IPX4 | Strap D-rings or webbing loops | 6–20 h (flash) | 10–35 each |
| 5 V LED strip (SMD 5050) | 60 LED/m, silicone-sleeved, IP65 | Lower side panels inside channel | 3–8 h with 2,200–5,000 mAh bank | 8–25 per m + 10–30 power bank |
| Fasteners & consumables | Bonded polyester thread, heat-shrink, grommets | Attachment points, cable exits | Durable under normal use | 5–20 total |


