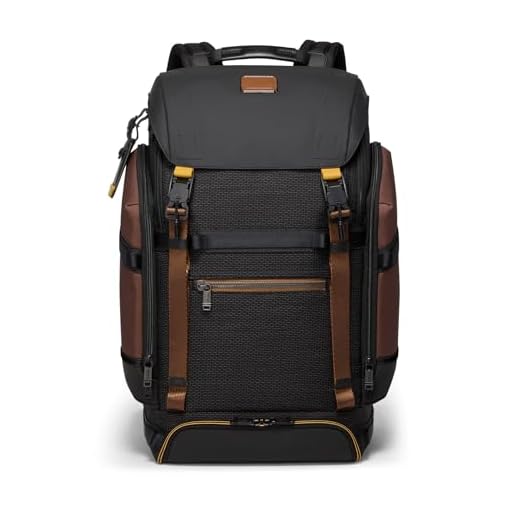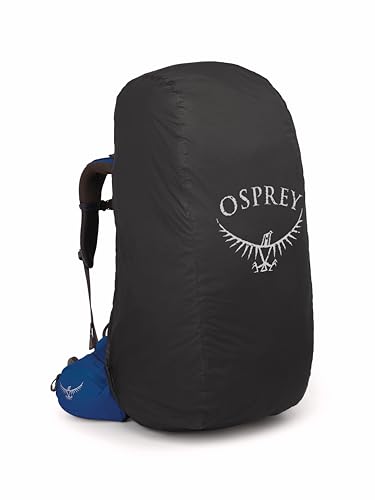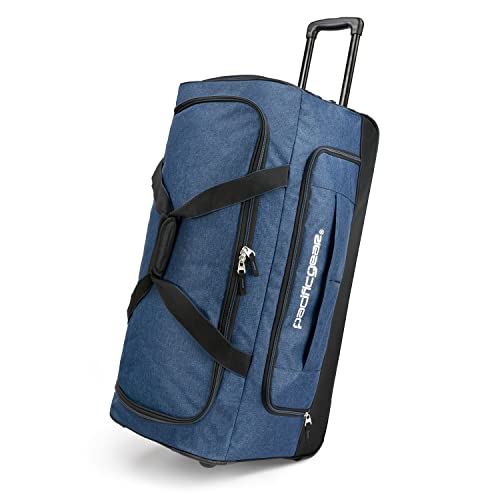


Recommendation: treat a soft-sided travel pack as water-resistant at best; carry a rain cover or internal waterproof sleeve for laptops, cameras and documents when encountering heavy precipitation or wet transit.
Materials and construction matter: coated ballistic-style nylon and DWR-treated textiles shed drizzle and splashes. Hard-shell polycarbonate or composite cases provide much higher resistance to driving rain and brief water exposure. Soft designs commonly lack welded seams and typically use standard zippers, which permit water ingress along stitching and zipper teeth.
What to check on the spec sheet: explicit mention of DWR or “water-repellent” finish, sealed or water-resistant zippers, seam sealing, and any IPX or liquid ingress rating. If none of those appear, assume limited moisture protection and plan accordingly.
Simple field upgrades that increase protection: apply a spray-on DWR after cleaning (reapply every 6–12 months depending on wear), store electronics in a roll-top dry sack or waterproof sleeve, add silica gel packets to main compartments, and keep a compact rain cover in an external pocket for quick deployment. For boat travel or prolonged exposure choose a welded-roll closure bag or a hardside case instead of soft textile gear.
Quick at-home check: sprinkle water over the exterior, pour a cup in several areas and inspect the interior for damp spots; test the zipper areas carefully. Customer support and product pages often clarify whether a model is rated for heavy weather; ask for specific ingress-performance details if not listed.
Final recommendation: rely on coated nylon for everyday light rain, but combine it with a rain cover or internal waterproof liner when facing sustained downpours, marine conditions or situations where electronics must remain dry.
Protection and maintenance for premium travel packs
Recommendation: pick a model built from coated ballistic nylon or coated poly fabric with factory DWR and water-shedding zippers, and always carry a dedicated rain cover plus internal dry sacks for electronics.
- Materials and factory treatments
- Common face fabrics: ballistic nylon, Cordura or coated polyester; factory DWR repels light rain but is not a permanent barrier.
- Zippers and seams: exposed teeth and unsealed seams allow moisture entry; some lines offer laminated or storm-flap protection–prefer those for wet routes.
- Simple field test (2–3 minutes)
- Place the pack on a flat surface; drop or spray ~30 ml of water onto the outer panel from ~30 cm.
- If beads form and roll off within 30–60 seconds, the finish is active; if fabric darkens and remains wet, reapply a DWR or use a cover.
- Maintenance routine
- Wash: use a technical fabric cleaner (e.g., Nikwax Tech Wash) by hand or gentle machine cycle; avoid household detergents and bleach.
- Restore repellency: apply a spray-on or wash-in DWR treatment (e.g., Nikwax TX.Direct) after cleaning; expect reproof after 6–24 months depending on use.
- Drying and storage: air-dry fully; store empty and ventilated to prevent mildew; insert silica packs in damp climates.
- Leather/trim care: keep leather trims dry and treat with a neutral leather conditioner; do not use fabric DWR on leather.
- Upgrades and quick fixes
- Seam protection: apply a flexible seam sealer to interior seams for improved resistance.
- Zip protection: fit a storm flap or use zipper lubricant to reduce water penetration.
- External cover: compact rain covers rated for heavy rain provide the simplest, most reliable barrier.
- Packing strategy for wet conditions
- Electronics: double-bag sensitive items in waterproof dry sacks or padded waterproof cases.
- Clothing: use compression dry bags to keep gear dry and organized.
- Emergency kit: pack a lightweight tarp or emergency poncho that can be rigged over the pack.
- When to seek professional service
- Large leaks, damaged laminated panels or failing internal frames–take the item to an authorized repair center for panel replacement or re-lamination.
For unrelated gear and hobby tips see best air stone for fish tank.
Which models carry water-resistant labels versus fully water-impervious claims?
Quick recommendation: choose Alpha 3, Alpha Bravo or Voyageur series when you need splash and light-rain protection; seek items explicitly described as coated, seam-sealed, or supplied with a rain cover if you require full water-impervious performance.
Models commonly marketed as water-resistant / water-repellent
Alpha 3 – ballistic nylon with a factory-applied water-repellent finish; marketed for everyday weather protection, not submersion.
Alpha Bravo – similar ballistic constructions with durable coatings and reinforced zippers; resists rain and splashes but lacks sealed seams.
Voyageur (women’s line) – lightweight nylon or polyester with DWR treatment; good for commuter use and light showers.
Harrison and leather lines – natural leather or full-grain treatments; these offer minimal moisture resistance unless specifically treated afterward.
Where true water-impervious claims appear and how to verify
Explicit full-impervious statements are rare and usually limited to specialty pieces: coated tarpaulin duffels, wet/dry pouches, or limited commuter models listed with seam sealing and laminated fabrics. Look for spec language such as “coated nylon/PVC,” “laminated exterior,” “seam-sealed,” or an included rain cover.
Before purchase confirm three things on the product page or tag: (1) exact material and coating type (PU/PVC/laminate vs. standard DWR), (2) whether seams and zippers are sealed, and (3) presence of an IP rating or manufacturer note about submersion. If none of these appear, treat the item as water-resistant only and plan for an aftermarket rain cover for heavy exposure.
Choose FXT ballistic or PU/TPU‑laminated fabric with DWR plus water‑resistant zippers for best liquid repellency
FXT ballistic nylon (the maker’s high‑density nylon weave) delivers the strongest baseline resistance to abrasion and splashes; look for descriptions listing “FXT” or “high‑denier ballistic nylon” on the spec sheet.
Polyurethane (PU) laminates and thermoplastic polyurethane (TPU) coatings are applied to face fabrics or linings to prevent wetting and penetration. Models that state “PU‑laminated” or “TPU‑coated” will shed liquid far better than untreated nylon or polyester.
Durable water‑repellent (DWR) finishes are applied to outer yarns to force water to bead and run off. Expect either traditional fluorocarbon DWR or newer PFC‑free formulas; product tags or care pages usually specify which is used.
For near‑impermeable protection, seek laminated exterior panels or molded shells (polycarbonate or hard ABS) and sealed seams. TPU/PVC‑laminated canvas and welded seams stop capillary wicking that plain stitched seams allow.
Hardware matters: water‑resistant zipper assemblies (AquaGuard‑style or PU‑coated zippers), covered zipper garages, and taped or taped‑and‑welded seam construction significantly reduce entry points for moisture.
Leather trims are typically treated with protective finishes; when full leather panels are present, check for “sealed” or “treated” in the materials list and avoid untreated suede in wet conditions.
Quick checks before purchase: material listed as FXT/high‑denier ballistic or PU/TPU‑laminated, DWR treatment noted, zippers described as water‑resistant/AquaGuard or taped, and seams called taped or welded. To restore repellency later, apply a spray DWR and avoid machine washing to preserve coatings and laminates.
How to test a pack’s liquid resistance at home without damage
Use a controlled low-pressure spray plus internal white-paper indicators; avoid immersion.
Materials
1) Spray bottle (fine mist or adjustable nozzle), filled with room-temperature tap water (200–500 ml).
2) Plain white printer paper or clean kitchen paper towels, folded to fit each compartment and pocket.
3) A ruler or tape measure (for consistent spray distance); kitchen timer or stopwatch.
4) Soft microfiber cloth for drying, and a small LED flashlight to inspect seams and linings.
Step-by-step procedure
1. Empty the pack, remove removable inserts and laptop sleeve, unzip all compartments and pockets. Insert folded white paper into the main compartment and every pocket you want to test; label papers with a marker so you know which pocket was tested.
2. Close zippers and flaps as they would be in normal use. Set the spray bottle to a gentle stream or mist. Maintain a 30 cm (12 in) distance from the fabric; hold the bottle perpendicular to the panel being tested.
3. For general rain simulation: spray each exterior panel evenly for 10–15 seconds while sweeping horizontally to cover seams and zipper areas. Wait 5 minutes, then inspect the internal paper for any damp spots using the flashlight.
4. For focused seam and zipper checks: concentrate the spray on each seam and around zipper teeth for 12–15 seconds at 15–20 cm (6–8 in). Re-check the corresponding internal paper after 5 minutes. Mark any damp areas.
5. To simulate heavy exposure without submersion: run a gentle stream from a faucet at 20–25 cm distance across the top flap or front pocket for 5 seconds, then inspect interior paper after 2–5 minutes.
6. Do not fully immerse the pack or pour water directly into zippers. Full submersion can damage internal linings, seam tape and any warranty coverage.
7. If paper shows moisture, dry the area with a microfiber cloth, open seams and pockets to air-dry at room temperature, and use a cool (not hot) hair-dryer setting from 30 cm if faster drying is needed. Avoid temperatures above 40°C (104°F) that can degrade fabric coatings.
8. For recurring checks, repeat tests after cleaning or applying any treatment (e.g., DWR spray). If leaks appear at seams or zipper junctions, test after applying a commercially available seam sealer or zipper lubricant following manufacturer instructions.
Notes: Use white paper only as an indicator–do not place electronics or unprotected valuables inside during testing. Record which panels leaked and their locations before attempting any repairs or treatments.
Routine care and cleaning to preserve a bag’s water repellency
Reapply a DWR spray (Nikwax TX.Direct Spray-On, Grangers Performance Repel Plus or Atsko Silicone Water-Guard) every 6–12 months or after 3–5 heavy rain exposures; always wash off dirt and oils before treatment.
Quick-clean after each wet or dirty outing: shake out debris, wipe exterior with a microfiber cloth dampened with a solution of 1 teaspoon mild liquid detergent per 1 litre (34 fl oz) of lukewarm water, then rinse cloth and wipe again to remove residue. Let air-dry fully before storage or reproofing.
Deep clean every 4–6 months or when visible soiling appears: use a specialist cleaner (Nikwax Tech Wash for synthetic textiles; Grangers Performance Wash) following product label. Machine wash only if the product care label permits: use a gentle cycle, cold water, no fabric softener, and a second rinse to eliminate soap. Do not use bleach, harsh solvents, or household stain removers with optical brighteners.
Reproofing protocol: after the pack is spotless and completely dry, spray 20–30 cm (8–12 in) away using 2–3 even passes to cover the surface. Wait 10–15 minutes for dwell, then lightly work the treatment into seams and high-wear zones with a soft brush or gloved hand. Activate some DWRs with low heat: tumble on low for 10–15 minutes if fabric label permits, or use a warm iron (max 110°C / 230°F) with a cotton cloth barrier. Avoid heat on leather, bonded laminates and polyurethane-coated panels.
Spot-stain removal guidance: for oil-based stains pre-treat with a small amount of dish soap placed on a soft brush, agitate gently, then rinse. For mud, let dry fully and brush off before wet cleaning. For mildew, apply a 50:50 mix of white vinegar and water to affected area, wait 10 minutes, rinse thoroughly, and dry in shaded airflow.
Hardware and trim care: keep zippers free of grit by brushing with a soft toothbrush; lubricate slider teeth with a thin film of zipper wax or graphite stick when friction increases. Avoid spraying DWR directly onto leather or metal; protect those areas with masking before application. For leather trim, use a leather cleaner/conditioner per manufacturer instructions and skip DWRs.
Drying and storage: air-dry in shaded, well-ventilated area; typical full-dry time for a wet pack is 6–24 hours depending on humidity and layer thickness. Store unpacked with a small cushion or paper to retain shape, inside a breathable cotton bag at 10–20°C and 40–60% relative humidity. Avoid sealed plastic containment that traps moisture and promotes mold growth.
When to seek professional service: extensive coating failure, delamination, or persistent wicking after multiple reproofs indicates factory-level repair or replacement needed; consult an authorized repair center or the manufacturer’s service options.
| Task | Frequency | Recommended product(s) | Notes |
|---|---|---|---|
| Quick wipe | After each wet/dirty use | Microfiber cloth, mild detergent | 1 tsp detergent per 1 L water; rinse cloth and wipe again |
| Deep clean | Every 4–6 months | Nikwax Tech Wash, Grangers Performance Wash | Gentle machine cycle only if label allows; no softeners |
| DWR reapplication | 6–12 months or after 3–5 heavy rains | Nikwax TX.Direct Spray-On, Grangers Repel Plus | Apply from 20–30 cm; heat-activate per product and fabric guidance |
| Zipper maintenance | As needed | Zip wax, graphite lubricant | Brush out grit first; avoid silicone sprays on slider internals |
| Leather trim | Every 3–6 months | Leather cleaner/conditioner | Do not expose to DWR sprays or machine washing |
Suggested entertainment during long drying cycles: best new tv series umbrella academy
Does the manufacturer’s warranty or repair service address water-related damage?
Short answer: Liquid exposure is generally excluded from standard limited warranties unless an inspection proves the failure resulted from a manufacturing defect; repairs for moisture-related harm are usually offered as paid service options.
Typical limited-warranty scope: coverage targets defects in materials and workmanship (broken hardware, seam failures caused by poor assembly, adhesive or stitch defects). Damage caused by external liquids – spills, immersion, airline handling in wet conditions, or improper cleaning – is treated as accidental or wear-and-tear and is normally outside free-warranty repair remit.
Immediate actions to preserve any warranty/repair options: stop using the item, blot and air-dry without heat, take high-resolution photos of all affected areas plus any product ID tags or serial numbers, keep the original receipt or order confirmation, and avoid home repairs that modify fabric, linings, stitching, or labels (those void many warranties).
How the brand’s repair service commonly handles moisture claims: submit photos and proof of purchase to customer support for an initial assessment; the authorized repair center performs a physical inspection and issues a written estimate. Common paid fixes include seam resealing, zipper replacement, patching, lining replacement, and re-application of protective coatings; pricing depends on material, extent of corrosion or staining, and parts availability.
To maximize the chance of a warranty remedy: register the product if registration was offered at purchase, report issues within the stated warranty period on your paperwork, document that usage followed manufacturer care instructions, and preserve original tags. If the service denies coverage, request a formal denial letter explaining the technical reason.
If coverage is denied or the repair quote is high: request escalation to a senior service agent, compare the authorized repair estimate with local leather/fabric repair specialists, and check whether your payment card or travel insurance includes purchase protection for accidental or liquid damage – those channels sometimes reimburse repairs or replacement.
Practical note: for future purchases, consider an extended accidental-damage plan or retailer protection that explicitly lists liquid exposure; those plans close the gap between manufacturing warranties and accidental-moisture incidents.
Practical add-ons and DIY treatments to increase water protection
Keep a fitted rain cover in the external pocket for immediate, full-coverage protection when exposure is expected.
Add-on gear
- Pack rain cover: choose 30D–70D ripstop with PU coating or TPU laminate, fully seam-taped, with elastic hem and buckle for secure fit.
- Roll-top dry liner: a 10–20L TPU roll-top liner for the main compartment or a padded laptop sleeve prevents liquid reaching electronics.
- Internal dry pouches: keep valuables in 1–3L zip-lock style TPU pouches; label sizes for quick use.
- Zipper storm flap: removable Velcro or sew-on storm flap that covers primary zippers; use a 2–3 cm overlap and stitched anchor points at ends.
- Seam tape kit: heat-activated polyester/PU tape for internal seam reinforcement; choose 12–25 mm width for narrow seams and 25–50 mm for panel seams.
- Neoprene or silicone rain sleeve for laptop: thin, form-fitting sleeve reduces splash ingress through the laptop compartment opening.
- Quick-repair items: Tenacious Tape, adhesive-backed hem tape, and a small tube of urethane-based seam sealer for field fixes.
DIY treatments and application rules
- Cleaning first: use a soft brush and mild soap or a technical wash (e.g., Nikwax Tech Wash). Rinse thoroughly and allow fabric to reach damp, not saturated, before treatment.
- DWR spray (synthetic repellent): apply 2–3 thin coats from 20–30 cm, 30 minutes between coats; allow 24–48 hours cure at room temperature. Use fluoropolymer or PFC-free formulas labeled for nylon/Cordura.
- Wax treatment (canvas/cotton blends): rub melted beeswax/paraffin evenly, then heat with a hairdryer until wax sinks in; expect slight darkening and increased stiffness. Reapply annually with moderate use.
- Seam sealing: inside seams–clean, dry, apply urethane or silicone seam sealer in a thin bead, smooth with a flat tool, cure 24 hours. For taped seams, use heat-activated seam tape with a household iron on the lowest safe setting–test on scrap first.
- Zippers and sliders: add a small external storm flap or glue a narrow strip of tape along the zipper cover. Lubricate sliders with a silicon or Teflon-based zipper lubricant; avoid grease that attracts dirt.
- Edge and hardware protection: coat webbing ends and exposed stitching with clear seam sealer to prevent capillary wicking; avoid applying sealant to leather or metal hardware–cover them before treatment.
- Spot test: apply any product to a hidden area, wait full cure, inspect for color change, stiffness, or finish alteration before treating the whole item.
Cautions: avoid sprays or waxes on suede/leather trims unless product specifies compatibility; do not exceed low heat when using an iron or heat gun; remove foam back-panels and detach metal accessories before treating; reapply repellents after heavy laundering or persistent exposure.


