

Hand-laundering preferred. When handling a technical daypack from an outdoor brand, remove aluminum frame, detachable hipbelt, sternum strap and hydration reservoir before any wet-cleaning. If opting for a washer, select a front-load unit, cold water (30°C/86°F), delicate cycle and low spin; secure all zippers, fasten Velcro tabs and place pack inside a large mesh laundry bag or pillowcase to limit abrasion.
Use a mild, non-bleach detergent at minimal dose – roughly one teaspoon per 5 liters of water or manufacturer-recommended amount for delicates. Avoid fabric softeners, solvent-based stain removers and bleach. For visible spots, pre-treat with diluted soap and a soft brush, then rinse until suds disappear to protect water-repellent finishes.
Drying must be air-only. Hang pack upside-down with compartments open in a shaded, well-ventilated area until webbing, foam pads and stitching are completely dry (typically 24–48 hours). Do not tumble-dry, expose to direct heat or leave damp in a confined space. Reassemble components only after complete dryness and inspect zippers, seam integrity and DWR performance; reproof with a suitable spray or wash-in product if water no longer beads.
Quick checklist: empty all pockets; remove metal or sharp items; close zippers and small buckles; test colorfastness at a hidden seam; follow printed care label when present; prefer hand-launder for unknown models.
Safe laundering method for a manufacturer’s technical pack
Hand-launder preferred; permit front-load washer only when hipbelt, removable frame sheet and padded harness detached, pockets emptied, and delicate cycle with cold water selected.
Preparation: unzip all compartments, clear debris, unclip hydration hose, remove reservoir, brush coarse dirt with soft nylon brush, treat visible stains with small amount of mild liquid soap or specialized gear cleaner; let product sit 10–15 minutes before rinsing.
Detergent and chemicals: use low-suds, pH-neutral liquid cleaner formulated for technical fabrics (example: Nikwax Tech Wash or similar); avoid bleach, fabric softeners, solvent-based cleaners and powdered detergents that can leave residue or damage DWR, foam and webbing.
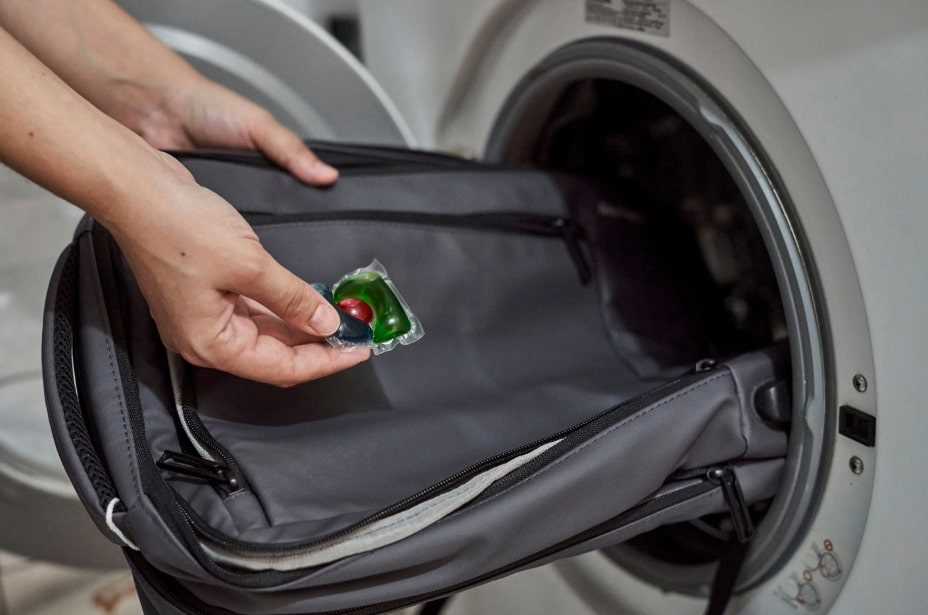
Washer protocol: prefer front-loader over agitator-style top-loader; enclose pack inside large zippered pillowcase or mesh laundry bag to limit abrasion; set cycle to delicate, cold water (≤30°C / ≤86°F), slow spin (≤400 rpm), minimal cycle time; use one-third of normal detergent dose for light soil, full dose only for heavy soiling.
Drying and reshaping: reshape while damp, stuff with dry towels to preserve volume and shoulder geometry, hang by shoulder straps or lay flat across wide bar to distribute weight; avoid direct sunlight and heat sources; do not tumble-dry or place near radiator.
Post-care: reattach hipbelt and harness only after complete drying; check plastic frame, load-bearing seams, foam pads and buckles for cracks or delamination; treat zippers with dry silicone lubricant and inspect stitching; store in cool, ventilated area.
Warranty guidance: consult maker’s care guide printed on product tag or online manual before any machine laundering; machine use can void warranty when damage to internal frame, foam or fabric is traceable to agitation or heat exposure.
Locate and follow care label and manufacturer warnings
Read sewn care label before any cleaning or stain treatment; follow symbol instructions and written cautions exactly.
Find label inside main compartment, under lid, within hipbelt pocket, or along internal seam near back panel; common symbols indicate hand-clean, do-not-bleach, do-not-tumble-dry, line-dry, do-not-iron, maximum water temperature 30°C/86°F, and mild-detergent only.
If label specifies clean-by-hand-only or do-not-immerse, remove detachable hipbelt, sternum strap, hydration bladder, and any metal or plastic inserts prior to service; use a soft brush or sponge with cold water and gentle soap; avoid aggressive agitation and elevated heat that can delaminate PU coatings, degrade glued seams, or warp internal frame components; dry fully in shaded, well-ventilated area.
Manufacturer warnings often mention warranty-void conditions for misuse, temperature limits for adhesives, seam-tape care, and cautions about solvent exposure; record model name and serial number from inner tag and consult official support pages or contact customer support for model-specific guidance.
Reference unrelated reading at best anthias for reef tank.
Remove hipbelt, sternum strap, reservoir and any detachable parts before laundering
Remove hipbelt, sternum strap, reservoir and all detachable components prior to any laundering process.
- Hipbelt – unclip side buckles by pressing center tab; slide webbing from retention loops; unzip or detach zip-off interface if present; remove foam pads and hipbelt pockets for separate cleaning.
- Sternum strap – slide adjuster off harness webbing or unclip strap from chest ladder; detach whistle, emergency tool or attachment hardware for individual care.
- Reservoir – pull bladder from sleeve, disconnect bite valve from hose, unscrew quick-connect if equipped; empty remaining water and rinse with lukewarm water (30–40°C) plus a small drop of mild dish soap.
- Frame stays and hardware – remove internal aluminium or plastic stays where possible; keep metal pieces dry and separate to avoid corrosion.
- Small accessories – remove removable pockets, raincover, tool loops and lash points; place tiny items in mesh bag for gentle handling to prevent snagging.
- Bladder cleaning: fill with warm water and mild soap, swish for 1–2 minutes, then rinse until no suds remain. For persistent odor or mold, use manufacturer-safe cleaning tablets or a baking-soda solution (2 tbsp per liter), soak 30 minutes and rinse thoroughly.
- Bladder drying: hang upside down with mouthpiece open; prop opening with clean utensil or small hanger to allow airflow; allow 12–24 hours or until fully dry before storage.
Hand-wash harness and hipbelt using a soft brush or sponge, mild soap and cool water; avoid aggressive scrubbing of foam or mesh; rinse thoroughly. Air dry flat or hung in shade for 24–48 hours; avoid prolonged exposure to direct sun and heat sources to prevent fabric fading and foam degradation.
- Reassembly: confirm all components are completely dry. Thread webbing back through original channels, reinsert frame stays in correct orientation, reconnect reservoir hose and test bite valve for leaks. Engage buckles and perform a quick load check prior to next use.
Pre-clean: empty pockets, brush off dirt, and treat stubborn stains safely

Empty all pockets, unzip compartments, turn pack inside out, and shake out loose debris outdoors or over trash.
For dry soil or mud, allow complete drying, then remove crusted material with a soft-bristled brush or nylon shoe brush; follow with vacuum using brush attachment to pull fine grit from seams and foam channels. For sand, zip closures, invert, and tap; compressed air helps remove trapped grains from mesh pockets.
Stain removal recipes: mix 1 teaspoon mild liquid detergent per 250 ml lukewarm water for general spots; apply with soft cloth, work gently in circular motions for 30–60 seconds, then blot with clean water. For oil/grease, use a single drop of grease-cutting dish soap directly on stain, wait 5–10 minutes, agitate lightly with soft toothbrush, rinse thoroughly. For protein stains (sweat, blood), use cold water and an enzymatic laundry spotter following product label; avoid hot water for protein set-in stains.
For dye/ink, dab 70% isopropyl alcohol onto a cotton swab and transfer pigment outward from edge toward center; do not rub vigorously. For stubborn discoloration, prepare oxygen-based soak: 1 tablespoon per liter warm water, submerge stained panel for up to 30 minutes, rinse well afterward. Always perform spot test on an inconspicuous seam or inside pocket for 10 minutes to confirm colorfastness and coating integrity.
Avoid abrasive tools since these may strip water-repellent coating. Skip wire brushes, harsh solvents, bleach, or stain removers containing acetone. After spot treatment, blot excess moisture with microfiber towel and air-dry pack flat or hung in shaded, well-ventilated area; avoid direct sun and heat sources. Lubricate zipper teeth with dry silicone or paraffin stick once fabric is dry to restore smooth operation.
For gear upgrades and travel cases, review best luggage on qvc.
Washer settings to use and avoid: cycle type, water temperature, detergent choices
Use a front-load washer on gentle or delicate cycle with low spin; set water temperature to cold (≤30°C / ≤85°F) and add mild, pH-neutral liquid detergent formulated for technical fabrics.
Cycle selection
Select gentle/delicate or hand-wash cycles only. Aim for short durations (20–30 minutes) and low spin (400–800 rpm). Choose no-spin or extra-rinse options when foam panels, welded seams, or aluminum frames are present. Avoid heavy-duty, bulky, or high-agitation cycles and long soak programs.
Temperature and detergent
Keep water at cold or cool levels (≤30°C / ≤85°F). Temperatures above 40°C / 104°F increase risk of adhesive failure, shrinkage, zipper delamination, and loss of DWR coatings. Use liquid detergents without enzymes, optical brighteners, or added whiteners; dose according to load weight and product instructions. Do not use powders, bleach (chlorine or sodium percarbonate oxidizers), fabric softeners, stain-removers with strong alkalis, or heavy-duty sports detergents designed for deep-cleaning rubber or grease.
| Setting | Recommended | Avoid |
|---|---|---|
| Cycle type | Gentle / Delicate / Hand-wash | Heavy-duty / Bulky / High-agitation |
| Water temperature | Cold / Cool ≤30°C (≤85°F) | Warm or hot >40°C (>104°F) |
| Spin speed | Low 400–800 rpm or no-spin | High spin >1000 rpm |
| Detergent type | Mild liquid, pH-neutral, no enzymes | Powder, bleach, fabric softener, enzyme/optical brightener formulas |
| Load size & extras | Single item or couple of small items; use mesh bag or pillowcase for light protection | Overloaded tub, heavy items, tumble-dryer cycles |
Air-drying and reassembly: how to dry, reshape, and reinstall frame and padding
Air-dry all removed components fully: target 24–48 hours in warm, ventilated shade; allow up to 72 hours under high humidity. Aim for fabric surface to feel dry to touch and foam padding to regain >95% of original loft before any reinstallation.
Drying technique and timing
Lay pads flat on a clean mesh rack or hang vertically for faster drainage. Open all pockets and liner zippers, separate removable panels, and unclip hydration sleeves to expose interior. Use a low-speed fan to increase airflow; avoid direct sunlight and radiant heaters. For foam inserts thicker than 20 mm, add 12–24 hours to drying time. Use a moisture meter or press-test: if no water transfers to a white cloth after firm press, dryness is acceptable.
Reshaping pads and frame components
To restore foam contour, compress padding gently by hand, then allow return to full loft while suspended or laid flat. For molded frames, inspect for warps–place frame on flat surface; any gaps over 2 mm along spine channel indicate misalignment and require heatless realignment. Do not apply temperatures above 40 °C to foam or bonded seams. Clean attachment points with a damp cloth and mild soap residue-free rinse before reassembly.
Reinstall frame and padding only after confirming dryness and seam integrity. Align frame into channel, seat lower end first until click or full engagement; slide foam panel into its pocket and route straps through original webbing paths. Hand-tighten all buckles and hardware evenly; load-test with 10–15 kg for 5–10 minutes to confirm fit and absence of slippage. Final inspection: check for odor, remaining damp spots, and secure fastenings. For child-specific carrying systems consult manufacturer specs or refer to a trusted resource such as best infant hiking carrier.


