
Required internal dimensions: a conventional US letter sleeve is 8.5 × 11 in (21.6 × 27.9 cm); A4 is 21.0 × 29.7 cm. To slide a document sleeve in vertically, aim for an interior height ≥29.5 cm and interior width ≥23 cm. Depth of the main compartment can be minimal for a single sleeve (<2 cm), but allow 4–6 cm if you also carry a notebook, charger and water bottle.
Capacity guidance: for one document sleeve plus a thin laptop or tablet, choose a compact daypack around 10–15 L; for multiple files, binder or a thicker organizer, move to 18–25 L. If a product spec lists a dedicated laptop pocket for a 13″ device, that pocket typically clears an A4 sleeve height-wise – verify the pocket’s internal height in the spec sheet before purchase.
Packing tips: use a slim plastic or zip document sleeve, place it against the padded back panel to keep it flat, avoid stuffing bulky items in front compartments that force bending, and measure your document (including the sleeve) against the manufacturer’s internal measurements rather than external dimensions. If uncertain, request exact interior measurements or test with a printout of an 8.5×11 or A4 sheet before finalizing the choice.
Can a Compact Daypack Accommodate a 9×12 Document Sleeve?
Recommendation: Choose a compact daypack whose usable interior measures at least 13.0 in (33 cm) height × 10.0 in (25 cm) width to carry a standard 9×12 document sleeve flat and protected.
- Standard sleeve dimensions: 9.0 in × 12.0 in (23 × 30.5 cm).
- Minimum interior dimensions for flat carry: Height ≥13.0 in (33 cm); Width ≥10.0 in (25 cm).
- Depth guidance:
- Thin sleeve or single folder: Depth ≥2.0 in (5 cm) sufficient.
- 1″ spine binder or slim portfolio: Depth ≥3.0 in (7.5 cm) recommended.
- Multiple sleeves or thicker binders: Depth ≥4.0 in (10 cm) or choose capacity ≥22 liters.
- Laptop sleeve check: an internal 15″ laptop compartment typically accepts a 9×12 sleeve flat; a 13″ compartment may be borderline depending on orientation.
- Measure interior usable height from base to top zipper; measure width between side seams and depth from back panel to front panel.
- Add clearance: allow ~0.5 in (1.3 cm) on each side and ~0.5–1.0 in (1.3–2.5 cm) above the sleeve for easy insertion and removal.
- Inspect top opening and taper: if the opening narrows below 9 in (23 cm), the sleeve may need to be inserted diagonally or won’t slide in flat.
- Confirm construction: flat back panel and rectangular main compartment preserve paper shape better than highly curved or rounded interiors.
Packing best practices: place the document sleeve against the back panel or inside the laptop compartment, use a rigid backing board inside the sleeve for extra stiffness, avoid overfilling adjacent pockets to prevent pressure marks, and secure with internal compression straps where available.
Measure the interior: where to check height, width and depth for a document sleeve
Allow 1/2–1 in of extra room beyond the paper or sleeve dimensions; then measure three interior axes and two opening details.
-
Height (vertical clearance)
- Measure from the internal base (lining seam at bottom) straight up to the highest point of the closed top (zipper seam or flap peak). Record center and both side measurements; curved tops can reduce usable height by ~0.5 in at edges.
- Target values:
- Letter paper (8.5″×11″): internal height ≥ 11.5–12.0 in
- 9×12 document sleeve: internal height ≥ 12.5–13.0 in
- A4 (≈8.27″×11.69″): internal height ≥ 12.0 in
- Check any internal padded sleeve separately – its opening often sits 0.25–0.75 in lower than the compartment rim.
-
Width (side-to-side)
- Measure across the interior at the base where items will sit, not across the exterior. Include internal dividers or pockets that reduce usable width.
- Recommended clearances:
- For single document sleeve: width ≥ document width + 0.5 in (e.g., 9.5–10.0 in for a 9″ sleeve)
- If inserting binders or multiple sleeves, add their combined thickness plus 0.5 in clearance.
- Note zipper overlap or interior pockets can shave 0.2–0.6 in off usable width near the opening–measure there if you’ll insert items through the top only.
-
Depth / gusset (front-to-back)
- Measure the flat base thickness and the maximum gusseted depth (press the side panels outward to simulate a full load).
- Suggested depth targets:
- Single sleeve or thin papers: 0.25–0.5 in
- 1″ binder or several stacked folders: 1.25–1.5 in
- Multiple books and binders: 3–4 in or more
- Check how seams/padding reduce internal depth by measuring inside lining rather than external fabric.
-
Opening geometry and insertion angle
- Measure zipper length or flap opening width – a clamshell/full-zip that opens near 180° needs less extra height than a narrow top-only opening.
- If the sleeve pocket sits at an angle, test with an actual document: angle reduces required vertical clearance; measure diagonal insertion space if pockets are tilted (or slip paper in to test directly).
-
Practical checks
- Use a rigid ruler or tape measure against the lining; measure while the bag is empty and again with a mock load (stacked paper) to confirm real-world clearance.
- Account for padding: add 0.25–0.5 in to all axes if inserts are padded.
- Test insertion through the actual opening rather than relying only on internal numbers – some compartments accept items only at a reduced opening height.
Record all measurements in inches and compare against the document sleeve’s nominal size plus the 1/2–1 in buffer; if any axis falls short, the item will not easily slide in even if exterior dimensions look close.
Match document size to daypack: Letter, A4 or Legal – which files slide in upright
Recommendation: For reliable upright insertion choose a daypack with an internal sleeve height at least 13–20 mm (0.5–0.8 in) taller than the document long side; use a width clearance of 15–25 mm (0.6–1.0 in) and a sleeve depth of 10–30 mm (0.4–1.2 in) depending on paper thickness.
Quick size table
| Document type | Trim (W × H) | Recommended min. sleeve height | Recommended min. interior width | Recommended min. sleeve depth | Remarks |
|---|---|---|---|---|---|
| Letter | 8.5 × 11 in / 216 × 279 mm | 295 mm (11.6 in) | 235 mm (9.3 in) | 10–20 mm (0.4–0.8 in) | Portrait insertion straightforward in most daypacks with a document sleeve or 13″ laptop pocket. |
| A4 | 8.27 × 11.69 in / 210 × 297 mm | 310 mm (12.2 in) | 235 mm (9.3 in) | 10–20 mm (0.4–0.8 in) | Same width as Letter; taller height needs slightly deeper sleeve than many older school packs. |
| Legal | 8.5 × 14 in / 216 × 356 mm | 375 mm (14.8 in) | 235–245 mm (9.3–9.6 in) | 15–30 mm (0.6–1.2 in) | Requires a tall compartment (often only in full-height daypacks or dedicated vertical document sleeves). |
Practical recommendations
Choose a model whose listed internal pocket heights match the table values; a 13″ laptop sleeve usually accommodates Letter/A4 but not Legal. If the pack has a rear wall sleeve, confirm that laptop padding doesn’t reduce usable height below the recommended minimum. For thicker file organizers (accordion or ring binders) increase sleeve depth by 10–20 mm and add extra height clearance if the binder spine is rigid. When shopping, compare the pack’s internal measurements to the document long side plus the clearance values above rather than relying on nominal external dimensions.
Step-by-step test: insert a document sleeve, locate pressure points and verify closure
Insert the document sleeve upright with the spine leading and stop the moment the bottom edge contacts the base; do not force past initial resistance.
Insertion sequence
1. Open all closures completely and fold back any flap. Hold the carrier steady by its top handle with one hand; use the other to guide the sleeve.
2. Align the sleeve’s spine to the interior back panel seam (centered within the compartment). Maintain a 10–15° tilt toward the rear panel to avoid the front lip and corner gussets catching.
3. Advance until the sleeve bottom meets the compartment floor. If resistance appears more than 15 mm above the floor, withdraw and inspect; do not push beyond that point.
4. For rigid files: allow 5–10 mm vertical clearance between the sleeve top and closure to accommodate fabric thickness and zipper bulk. For soft folios: 3–5 mm clearance is adequate.
Detecting tight spots and weak points
1. Partial-insert tactile run: insert the sleeve halfway, then slide it back 10–20 mm while palpating seams, zipper stops and internal pockets. Sharp friction, localized bunching, or a sudden stop indicates a pressure point at that location.
2. Visual check: with sleeve halfway in, look down into the compartment under bright light. Check for fabric pleats, puckering at seams, and misaligned zipper teeth around the mouth.
3. Corner test: insert and deliberately angle the sleeve toward each bottom corner; if either corner resists or causes fabric to bulge more than 8 mm, that corner will abrade or stress the sleeve during use.
4. Thickness test: measure the combined thickness of sleeve plus contents. If total thickness exceeds interior depth by more than 3 mm, expect repeated strain on closure hardware.
Closure verification and dynamic checks
1. With the sleeve fully inserted and typical contents inside, close the compartment slowly. If the zipper or flap requires more than medium finger pressure to engage, reduce load or use a different orientation.
2. Secure-closure metric: when zipped or latched, gaps should remain under 7 mm along the seam under light compression (press both sides with palms until materials compress ~10 mm). Gaps above 7 mm indicate loose closure; inability to close without >3 kg hand force indicates excessive tightness.
3. Motion simulation: wear the carrier, walk briskly for 5–10 minutes with the sleeve inside and a 1–1.5 kg additional test weight on top. After the walk, re-check for shifting (>20 mm shift is unacceptable), new abrasion marks, or zipper stress.
4. Cycle durability: open and close the compartment 10 times while the sleeve is inside; inspect zipper alignment and seam tension after the 5th and 10th cycle.

If you need an unrelated quick maintenance guide during testing (pump up an accessory tire or test a small pump), see how to inflate tires with an air compressor.
Protect documents: use sleeves, clipboards or rigid inserts to prevent bending
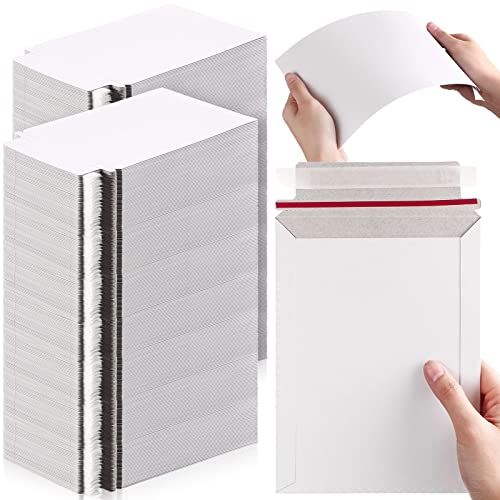
Carry critical pages inside 9×12 in (229×305 mm) clear polypropylene sleeves, backed by a 2–3 mm rigid insert and lodged against the pack’s rear compartment for the flattest ride.
Use sleeve materials and thickness by purpose: general daily protection – polypropylene 4–6 mil (0.10–0.15 mm); archival or long-term storage – polyester/Mylar 5–7 mil (0.13–0.18 mm). Choose acid-free, PVC‑free products for certificates or photographs.
Match sleeve size to paper: US Letter (216×279 mm) → 9×12 in sleeves; A4 (210×297 mm) → sleeves ≥225×310 mm; Legal (216×356 mm) → 9×15 in sleeves. Add 10–15 mm clearance on height and width to avoid curling when placed inside a constrained compartment.
Rigid backing options: corrugated polypropylene (fluteboard) 2–3 mm for low weight and flex-resistance; PVC foamboard 3–5 mm for firmer support; acrylic or polycarbonate 2 mm for maximum stiffness (heavier). Sandwich sleeves between two inserts for multi-document stacks.
Low-profile clipboards: choose slim plastic or aluminum boards with recessed spring clips to avoid a pronounced bump under zippers. A clipboard clipped to the document sleeve keeps single sheets flat and lets you secure the assembly with a small elastic strap or binder clip along the short edge.
Water and abrasion protection: use zip‑top sleeves or resealable poly bags for rainy conditions; for extra abrasion resistance, place sleeve+insert inside a thin portfolio with a flap or snap closure. Mark contents with a removable label or write on a small index card tucked into the sleeve.
Quick pre-trip checklist: 1) sleeve size ≥ paper size +10 mm; 2) backing thickness 2–3 mm for daily carrying (upgrade to 3–5 mm for heavy loads); 3) secure clip or elastic to stop lateral movement; 4) place assembly against the rear panel, not the front pocket.
If it won’t slide in: slim document sleeves, removing bulky items or choosing another carry option
Recommendation: replace any rigid 3-ring binder or hardcover report with a 2–4 mm polypropylene document sleeve or a slim zippered wallet – this typically reduces pack depth requirement by 15–35 mm (0.6–1.4 in) and allows an upright insertion without stressing the closure.
Slim document options: clear poly sleeves (0.2–0.5 mm each) in a stacked packet, a slim report cover with no metal fasteners (3–6 mm total), or a low-profile accordion file capped at 10–12 mm thickness. For multiple sheets use a single folded folio or a plastic envelope rather than multiple folders with tabs; target stack thickness ≤12 mm (0.47 in) for tight compartments.
Remove or relocate bulky contents: common volume hogs – insulated bottles (60–90 mm diameter), lunch containers (30–70 mm), large power banks (18–25 mm), camera gear, and hard cases. Swap to a collapsible bottle, transfer food to a thin lunch wrap, move charger and battery to an outer pocket or a small tech pouch clipped to an exterior strap.
Repack strategy: place the slim document sleeve against the back panel or against a rigid laptop sleeve, then layer soft items (clothing, thin notebook) between documents and closure. If the bag has a compression strap, reduce internal volume by cinching it 10–20 mm to compress soft goods without bending papers.
When a carrying swap is required: choose a tote with an internal gusset ≥80 mm and height ≥340 mm for A4/Letter documents; a messenger bag with a dedicated sleeve and 20–30 mm depth will accept thicker packets; a slim briefcase or portfolio often provides a rigid spine that keeps pages flat while using less internal height than a rucksack-style option.
If using an external attachment: a slim document wallet with a strap or carabiner can ride on an exterior lug – secure it to the side webbing or a D-ring to avoid compressing the main compartment. Ensure closure overlaps by at least 15 mm so rain and movement don’t push pages out.
Quick measurement rule: measure available internal height and depth while the main compartment is empty; subtract 10–15 mm for lining and closure. If document packet thickness exceeds that remaining space, apply the slimming steps above or select an alternate carrier whose internal depth exceeds your packet by 15–20 mm.
Additional resource for outdoor gear that pairs well with alternate carriers: best patio umbrella for arizona.


