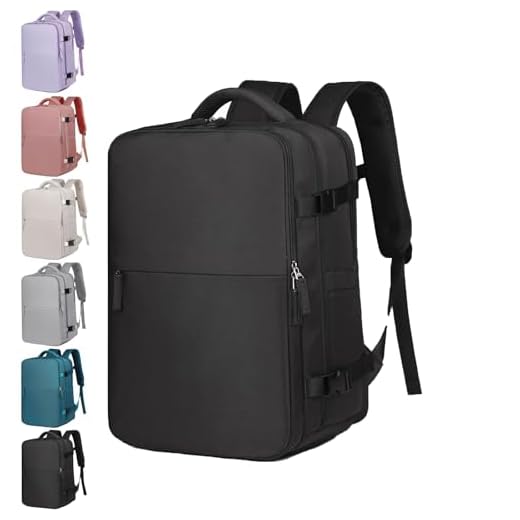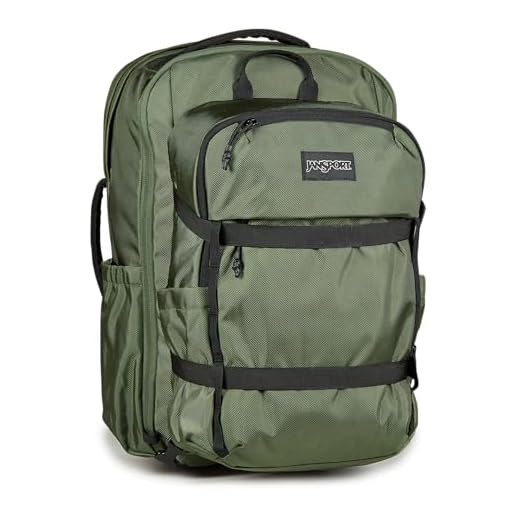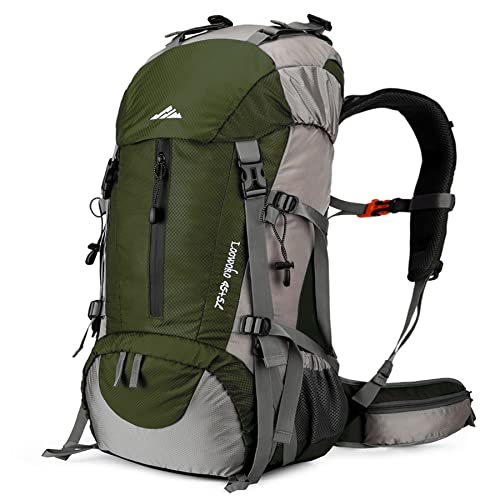


Measure torso by locating the C7 vertebra (the most prominent bump at the base of the neck) and the top of the iliac crest (upper edge of the hip bone). Use a flexible tape while standing straight, head neutral. Typical sizing bands: S < 43 cm (≈17 in), M 43–48 cm (≈17–19 in), L > 48 cm (>19 in). If the measurement falls between bands, prefer the smaller size and use shoulder-pad or spacer adjustment to fine-tune fit.
Pick capacity by activity: day use 10–25 L; overnight/light tour 25–45 L; multi-day/fast pack 45–65 L; extended expeditions 65–100+ L. For commuting and school, 15–30 L with a dedicated laptop sleeve. Aim to transfer 60–80% of carried weight onto the hip belt; keep total carried weight roughly 20–30% of body mass for sustained comfort (adjust lower for steep terrain or reduced fitness).
Convert external dims to liters using the quick formula: liters ≈ (H_cm × W_cm × D_cm) / 1000. Measure H from base to top of main compartment (include lid if fixed), W at widest point, D at maximum depth. Expect manufacturer totals to include pockets and rolled sections; multiply the raw product by a packing-efficiency factor of ~0.65–0.9 depending on shape. Verify laptop fit by measuring device width and height against the stated sleeve internal dimensions.
Fit checkpoints before purchase: hip belt centered on the iliac crest with load resting on hips; shoulder straps should contour without pressing the neck and allow ~2–3 cm clearance at the base of the neck; load-lifter straps angled at ~30–45° when tightened. Confirm torso-adjuster range on the harness (common adjustable spans: 38–56 cm) and match that span to your measurement rather than relying on nominal size names.
Pack sizing: Torso length, external dimensions and volume
Match stated capacity in liters and external dimensions to intended load: 15–25 L for daily carry, 25–35 L for commuting and light hiking, 30–50 L for weekend trips, 50–75 L for multi-day treks, 75+ L for extended expeditions.
Take height from the lowest seam at the base to the highest point of the shoulder-strap attachment; take width at the widest point including side pockets; take depth at the midpoint bulge. Record dimensions in centimeters. Use the following approximation to convert external box dimensions into liters: volume (L) ≈ height(cm) × width(cm) × depth(cm) / 1000. When manufacturers list volume, expect ±5–10% variance caused by pocket geometry and compression straps.
Determine torso length by locating the C7 vertebra (prominent neck bone) and measuring down to the top of the iliac crest (highest point of the hip bone). Standard torso ranges used by suspension systems: S 41–46 cm, M 46–51 cm, L 51–56 cm. Select a frame or suspension that matches torso length within ±2 cm for optimal load transfer; adjustable systems with 4–6 cm of travel reduce the need for exact sizing.
Take hip circumference at the level of the iliac crest; choose a hip-belt size that wraps that measurement with 10–15 cm of overlap remaining after fastening for final fine-tuning. Ensure hip-belt pads fully span the hipbones so load shifts to the pelvis rather than the shoulders. Shoulder strap placement should allow a 2–3 cm clearance above the C7 point when loaded and tightened to transfer weight to the belt.
Pack to intended dimensions and then re-check external size once loaded: compression straps commonly reduce depth by 10–30%. Use full-stuffing dimensions when planning capacity for bulky gear; use compression straps primarily for stabilization rather than as extra storage to avoid unexpected shape changes.
| Size category | Volume (L) | Torso length (cm) | Common use | Typical external dimensions (HxWxD cm) |
|---|---|---|---|---|
| Daypack | 10–20 | Any (small, frameless) | Commute, school, short hikes | 40 × 25 × 15 |
| Commuter / Urban | 20–30 | 38–52 | Laptop, daily essentials | 45 × 30 × 18 |
| Weekend | 30–50 | 43–53 | 1–2 night trips | 55 × 35 × 25 |
| 3-day / Lightweight | 40–60 | 44–54 | Short multi-day hikes | 60 × 40 × 30 |
| Multi-day | 50–75 | 46–56 | Extended trekking, loaded with food | 70 × 42 × 35 |
| Expedition | 75+ | 48–58 | Long expeditions, heavy loads | 80 × 45 × 40 |
For online purchases, compare the stated torso-range and listed external dimensions; request a photo with a measuring tape across the pack when possible to confirm real-world size before buying.
Use dimensions for theoretical maximum; use a fill-test for real-world usable liters
For a quick capacity estimate, multiply external length × width × depth and convert to liters or cubic inches. Formula: liters = (L_cm × W_cm × D_cm) / 1000. For imperial: cubic inches = L_in × W_in × D_in; liters = cubic_inches / 61.0237 (1 L = 61.0237 in³). Example: 50×30×20 cm → (50×30×20)/1000 = 30 L. Same in inches (19.7×11.8×7.9) → ≈1,836 in³ → 1,836/61.0237 ≈ 30.1 L.
When to trust dimensional calculation
Dimensional volume equals the geometric maximum; use this number for rigid, boxy packs and internal-frame duffels where walls are straight. Expect manufacturers to round to the nearest whole liter; convert between units before comparing listings. Add external-pocket volume separately: measure pockets individually and sum.
Practical fill-test method and interpretation
Fill-test procedure (recommended): remove internal frames and hipbelt pads to simulate usable space, line interior with a thin plastic liner, and fill with water using a 1 L measuring jug or with standardized 1 L dry sacks until the main compartment reaches designed closure point (zipper, flap, roll-top closed as intended). Record total liters added. Alternative: use identical 1 L stuff-sacks or full 1 L water bottles and count how many fit without excessive deformation. Typical results: panelled daypacks show fill-test ≈10–20% below dimensional volume; curved/contoured alpine packs often ≈20–35% lower. Roll-tops vary with compression–measured liters depend on closure position.
Use fill-test numbers when packing specific gear (sleeping bag, stove, clothing): place the actual item(s) inside and note remaining free liters using 1 L sacks as spacers. If seller reports only dimensional liters, apply an adjustment: subtract 10% for boxy designs, 20% for tapered/curved designs, and 25–35% if substantial internal frame/liner reduces internal space. Always convert units with the 61.0237 factor before applying adjustments. For additional context unrelated to capacity methods see which is a difference between proteins and carbohydrates and fats 2.
External Dimensions to Meet Airline Carry-on and Baggage Rules
Confirm the carrier’s published cabin and checked-size limits, then measure the bag fully zipped with wheels and the telescopic handle retracted; record height × width × depth in both centimetres and inches for compressed and fully expanded states.
Step-by-step measurement
- Place the empty bag on a flat surface and zip all compartments closed; tuck straps and external attachments inside or fasten them in their stowed position.
- Use a rigid tape measure. Measure height from the lowest outer point (wheel or base) to the highest external point with handle down.
- Measure width at the widest lateral point, including side pockets and any molded corners.
- Measure depth from the front-most external surface to the back-most surface; include front pockets, compression straps and any hard-shell protrusions.
- Record two sets: compressed (sides/expansion zipped down) and expanded (expansion zipper or front pocket fully open). Note which value corresponds to the carrier’s published limit.
- Round up measurements to the nearest whole centimetre (or ¼ inch) and add a 0.5–1 cm safety margin for fabric bulge and measuring error.
- For checked items, calculate linear dimensions by summing length + width + height; compare against the carrier threshold used for oversize fees.
Practical tolerances and common thresholds
- Many legacy carriers in the US use 56 × 36 × 23 cm (22 × 14 × 9 in) for cabin bags; several European carriers list 55 × 40 × 20 cm (21.7 × 15.7 × 7.9 in).
- Budget carriers often have a very small free personal item allowance (example: 40 × 20 × 25 cm / 15.7 × 7.9 × 9.8 in); a larger cabin allowance may require priority purchase.
- Standard checked-baggage linear maximum commonly used: 158 cm (62 in). Oversize surcharges typically apply above that; special cargo handling may start near 203 cm (80 in).
- Manufacturer specs sometimes exclude wheels or handles; always measure outermost points rather than relying solely on listed dimensions.
- Soft-sided models that compress can pass if within ~1–2 cm of the limit, but gate staff decisions vary–carry documented measurements when close to limits.
- When unsure, test fit the packed bag in a rigid gate sizer or the airline’s official luggage box prior to departure.
Check the carrier’s website for the exact cabin and checked-size rules for your itinerary and update measurements if you add or remove external accessories.
Torso Length and Hip Belt Position for Proper Fit
Measure torso length from the C7 vertebra to the top of the iliac crest and select a frame that matches within ±1–2 cm (±0.4–0.8 in).
Locate C7 by tilting the head forward; the most prominent neck vertebra is the reference point. Palpate the top of the iliac crest at the sides of the pelvis. Use a flexible tape or a string run along the spine while standing straight, feet shoulder-width, normal breath. Record distance in centimeters and inches. Typical manufacturer size bands (use as starting guide): Small <43 cm (<17″), Medium 43–48 cm (17–19″), Large 49–53 cm (19–21″), X-Large ≥54 cm (≥21.5″). Aim for the frame specification within the listed tolerance; if between sizes choose the smaller for heavy loads, larger for light loads and layered clothing.
Position hip belt so the padded belt’s central stabilizer sits directly on the iliac crest; top edge of pads should align with the crest, not the waistline. Hip-circumference fit method: measure circumference at the iliac crest; match that number to the belt’s fit range. Typical belt fit ranges: Small 70–90 cm (27.5–35.5″), Medium 85–110 cm (33.5–43.5″), Large 100–130 cm (39–51″). The hip belt must carry the majority of load: target 60–80% transfer to hips for heavy loads (>20 kg / >44 lb), 40–60% for daypacks (<10 kg / <22 lb).
Tightening sequence and angles: 1) Fasten hip belt snugly so pads compress soft tissue but do not pinch; 2) tension shoulder straps until shoulder load feels light; 3) set load lifters at roughly 45° to draw upper frame inward; 4) place sternum strap 4–6 cm below collarbones to stabilize shoulder straps. When set correctly, shoulder straps should allow 1–2 cm vertical movement of the pad over the deltoid during walking.
Dynamic fit test: load the pack to typical field weight, fasten hip belt, tighten harness, walk 20–30 steps and climb a flight of stairs. If hip belt slides downward, reposition central pad higher on the iliac crest and retighten; if chest or neck pressure appears, lower sternum strap or lengthen shoulder straps slightly. Persistent shoulder pain signals insufficient load transfer to hips or torso length mismatch; adjust frame length or select different size.
Gender and torso variations: women-specific harnesses commonly feature shorter torso heights and narrower shoulder strap spacing; petite frames frequently need torso lengths <43 cm and narrower hip-pad shapes. When possible, perform fit checks with the brand’s demo model under load.
Hardware note: suspension and lift systems influence fit stability; for reference on pulley and lift components consult best umbrella pulley and pin lift system.
Estimating Usable Capacity: Accounting for Compression Straps, Pockets and Gear Shape
Recommendation: Convert the manufacturer’s liter rating into an operational volume by applying three adjustments: add actual pocket volume, subtract compression-strapping loss, and multiply by a gear-shape packing-efficiency factor. Use the formula: Operational L = (Listed L × Packing Efficiency) − (Listed L × Compression Loss) + Pocket L.
Step 1 – Listed L: record the stated liters from the manufacturer (e.g., 50 L).
Step 2 – Pocket L: add measured or typical pocket capacities. Typical values: lid/brain pocket 2–4 L, two hip-belt pockets 1.0–2.0 L total, two stretch side pockets 2–4 L total, front shove-it pocket 1–3 L. Sum these and add to the calculation as Pocket L.
Step 3 – Compression Loss: apply a subtraction percentage that reflects using compression straps to cinch load or to secure external items. Use these working values: no cinch/full load 0–3%, moderate cinch/partially filled 6–10%, heavy cinch/mostly empty 12–15%. If straps are used to lash external items (sleeping pad, tent), treat that external component as separate volume rather than internal loss and add its nominal liters as external attachment volume.
Step 4 – Packing Efficiency: estimate how well your specific gear fills internal space and use one of these multipliers: soft, highly compressible items (down jacket, clothing in compression sacks) 0.80–0.95; mixed clothing and gear 0.65–0.80; rigid cookware, stoves, hard cases 0.30–0.50; cylindrical bottles and tripods 0.45–0.60. Example: a 50 L listed bag with mixed gear (0.75 efficiency), moderate cinch (8% loss) and 3 L pocket volume → Operational L = (50 × 0.75) − (50 × 0.08) + 3 = 37.5 − 4 + 3 = 36.5 L usable.
Practical checks: pack a representative weekend kit, note unused voids or overhang, then adjust the packing-efficiency factor for future estimates. When planning to carry bulky insulating layers or foam pads, estimate their occupied volume separately and decide whether to place them inside (lower packing efficiency) or lash outside (adds external L but changes compression loss).
If attaching items to external lash points, test strap length and stability under movement; for securing awkward poles, umbrellas or long gear to external straps consult a proven technique such as this best way to secure outdoor umbrella and then treat the lashed item as independent volume in your calculations.
Quick reference: for planning add 2–6 L for pockets, subtract 5–12% for cinched straps depending on fill level, and use packing-efficiency 0.3–0.95 based on gear shape. Record observed differences over three trips and use the averaged multiplier for reliable trip planning.


