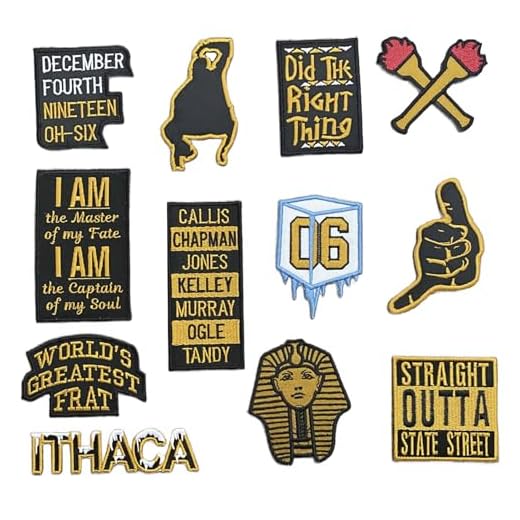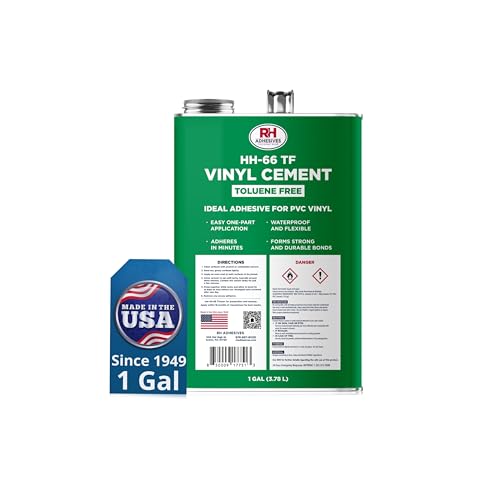


For textile panels choose a heat-activated backing followed by a perimeter stitch: set a household iron to 150°C (300°F), place a thin cotton press cloth over the emblem, hold firm pressure for 30–45 seconds, allow 4–6 minutes to cool fully, then topstitch 3–5 mm from the emblem edge using polyester thread (40/2) and a 90/14 needle at 2.0–2.5 mm stitch length.
For coated nylon, canvas or heavy-duty packs select the bonding method by substrate: avoid heat above 120°C on TPU-coated fabrics; use a solvent-based neoprene contact cement for canvas (apply a thin even coat to both surfaces, flash 5–10 minutes, press and clamp 12–24 hours). For extreme-wear zones use 6 mm brass rivets with internal washers set 10–15 mm from the emblem edge; set rivets with a hand setter on a hardwood block and check for burrs.
Hand-sewing and finishing: for manual attachment use a saddle stitch with two size 0 waxed polyester threads, spacing 3–4 mm between holes; pre-punch holes with a 1.0–1.5 mm awl or rotary punch. Reinforce stress points with two rows of bartack stitches or a 4 mm overlap of adhesive plus stitching. Wash at 30°C gentle cycle, air-dry; inspect seams and rivets after the first three washes and re-tighten or re-stitch if thread abrasion exceeds 20% of original thickness.
Select the right emblem type for nylon, cotton duck, leather, or polyester
Recommend matching emblem construction to substrate: use sew-on or low-temp heat-seal for synthetic fabrics, heavy embroidered sew-on or high-temp fusible for cotton duck, mechanical fasteners or contact cement for leather, and heat-seal or welded PVC for polyester – test on a scrap area first.
Material-specific quick guide
- Nylon (ripstop, pack cloth): Flexible PVC emblems with adhesive film or sew-on embroidered emblems. If using heat-activated adhesive, set iron to low synthetic (120–140°C / 248–284°F), press 10–15 seconds through a Teflon or pressing cloth. Use polyester or bonded nylon thread, needle 80/12–90/14. For PU-coated nylon, lightly abrade with 400-grit first; consider sewing for long-term durability.
- Cotton duck (heavy cotton): Merrowed-edge embroidered emblems or woven labels with high-temp fusible web. Iron at 160–180°C (320–356°F) for 15–25 seconds, then topstitch around the perimeter using heavy polyester thread (90/14–100/16) to prevent peeling in high-wear spots.
- Leather (natural or bonded): Avoid heat adhesives and standard iron-on films. Use rivets, Chicago screws, snap studs, or contact cement formulated for leather (e.g., neoprene-based). For stitched attachment, pre-punch holes with an awl, use waxed polyester or nylon thread and a leather needle; stitch spacing 3–4 mm. For delicate finishes, test adhesive on an inconspicuous spot.
- Polyester (oxford, taffeta): Heat-seal adhesives rated for polyester work well (150–170°C / 302–338°F, 10–15 seconds) but DWR coatings or laminated films reduce adhesion–prefer sewing or welded PVC emblems. Use polyester thread and needle 80/12–90/14; for high-wash items, double-stitch edge.
Attachment methods and hardware – quick rules
- Sew-on: Best universal method for longevity; use zigzag or small straight stitch close to edge; reinforce corners with bar tack.
- Heat-seal/fusible web: Use when substrate tolerates temperature and is uncoated; always use pressing cloth and apply firm, even pressure.
- Adhesives: Use contact cement (leather) or flexible textile glue (PVC to synthetics); allow full cure time per manufacturer; not recommended for high-flex seams unless backed by stitching.
- Mechanical fasteners: Rivets, snaps, or screw posts provide permanent hold on thick fabrics or leather and avoid heat/chemical exposure.
- Surface prep: Clean with isopropyl alcohol, roughen smooth coatings lightly, remove dust and oils, and test on a hidden scrap before final attachment.
Prepare the backpack: clean, stabilize fabric, and mark placement
Clean with purpose: Wipe the target area with a lint-free cloth and 70% isopropyl alcohol to remove oils and water-repellent finishes; for heavy soil, wash with a mild, phosphate-free detergent on a gentle cycle, rinse thoroughly and air-dry for at least 24 hours. Avoid fabric softeners and waterproofing sprays before any adhesive or heat application.
Neutralize coatings: Silicone or DWR finishes block heat adhesives. Test a small hidden scrap: apply alcohol and rub; if finish breaks up, repeat until clean. If finish remains, use a thin strip of abrasive pad (scotch-brite, light pressure) on a scrap to create a micro-rough surface–test adhesion before proceeding.
Choose stabilizer method by material: For thin synthetics use a lightweight tear-away stabilizer under the work area and hoop when machine-sewing; for medium-weight woven cottons, fuse a single-sided lightweight interfacing to the interior (apply with short presses via a press cloth). For flexible PVC or leathers, skip fusibles–use a stitched canvas or leather backing panel glued with contact cement, then hand- or machine-stitch through pre-punched holes.
Needles, thread, and stitch specs: Machine-sew synthetics with a size 90/14 topstitch needle and polyester thread; set stitch length to 2.5–3.0 mm for lock stitching or 2.0–2.8 mm for zigzag tack-downs. For heavy leather, use a leather needle and either hand saddle-stitch or a walking-foot machine with heavy-duty polyester or bonded nylon thread.
Heat-adhesive guidance: When using heat-activated adhesive emblems, test on scrap fabric first. Protect surface with a Teflon or parchment press sheet; apply short, firm presses 10–15 seconds, check bond, and repeat as needed rather than a single prolonged press. For delicate synthetics, use the lowest heat that achieves adhesion; if unsure, rely on stitching rather than full heat bonding.
Mark placement precisely: Measure from fixed reference points (centerline, top seam, zipper edge). Create alignment marks at the emblem’s center and four cardinal points using removable tailor’s chalk or a water-soluble marker. Mark the intended stitch line 3–5 mm in from the emblem edge to allow a neat seam allowance.
Temporary hold and final check: Use two small pieces of low-tack painter’s tape or heat-resistant double-sided tape to hold the emblem in position; for bulky materials use binder clips, not pins. Simulate normal wear by flexing and loading pockets to confirm the position clears zippers, straps and seams–maintain at least 10 mm clearance from moving parts. Once alignment and stability are confirmed, proceed with the chosen attachment method.
Sewing badges: needle choice, stitch types, and step-by-step technique
Recommendation: Match needle size and type to fabric density and backing: Microtex/Sharp 70/10 for lightweight ripstop or thin nylon; Universal/90 or Denim/100 for medium-weight synthetics; Leather/110 or a triangular-point leather needle for thick hides and dense webbing. Use bonded polyester or nylon thread for synthetic fabrics, waxed linen or heavy-duty polyester (tex 70–135 or commercial #30–#18) for leather and heavy-duty work.
Needle and thread specifics: hand-sewing needles – sizes 2–5 (1.2–1.6 mm) curved for leather saddle work; sharps size 5–10 for general hand sewing on fabric; long upholstery or glovers needles for multi-layer seams. Machine needles – 80/12 for lightweight, 90/14–100/16 for medium, 110/18 or leather-specific for thick materials. Thread prep: wax thin threads lightly; use 18–24″ (45–60 cm) lengths to limit fraying; double thread for backstitch or saddle stitch strength.
Stitch choices and measurements: Backstitch (hand) – 2–3 mm spacing, strongest single-line option. Saddle stitch (hand, leather) – alternate two-needle method, 3 mm bite, use pricking iron to pre-mark holes. Whipstitch – edge-focused, 2–4 mm spacing for attachment and fray control. Blanket stitch – decorative edge, 3–5 mm. Machine straight stitch – 2.5–3.5 mm length for secure hold; machine zigzag – 2.0–3.0 mm width for embroidered emblems. Bar tack – 4–8 passes at corners for reinforcement; stitch density 1.5–2.0 mm for machine bar tacks.
Tools and accessories: thimble or metal palm for heavy pulls; flat-nose pliers to extract stubborn needles; awl or hole punch for leather; beeswax for thread; small curved embroidery scissors for trimming; removable basting tape or water-soluble glue stick to hold emblems during sewing. For long hand sessions on dense material, gloves reduce blistering: best gloves for restaurant dishwashers.
Step 1: Align emblem and secure temporarily with low-tack basting tape, clips, or a few tacking stitches at opposite corners. Step 2: If leather or heavy webbing, pre-punch holes with an awl or pricking iron spaced to match stitch choice. Step 3: Thread needle, make a small waste knot and bury the tail under the first few stitches or secure with a flat overhand knot, then trim. Step 4: Execute primary seam – backstitch or saddle stitch for load-bearing joins; keep stitch length consistent (2–3 mm for hand, 2.5–3.5 mm for machine). Step 5: Reinforce high-stress points with 4–8 passes of bar tack or an extra row of zigzag 2–3 mm from the edge. Step 6: Finish by burying thread tails under stitches or locking with two small reverse stitches; trim flush and apply a dab of fray-blocking fluid only where visible.
Troubleshooting quick reference: needle breaks – increase size and switch to stiffer needle type; skipped machine stitches – replace needle and check tension; puckering on synthetics – lengthen stitch 0.5 mm and reduce presser-foot pressure; needle-resistant fabric – pre-punch holes or use pliers to feed needle through.
Applying heat-on emblems: temperature, pressing time, and protective layers
Set an iron or heat press to 320°F (160°C) and apply firm pressure for 12–15 seconds for small iron-on emblems on lightweight fabrics; for medium-sized emblems increase to 340–350°F (170–177°C) and 18–25 seconds; for thick emblems or dense fabrics use 350–375°F (177–190°C) and 25–35 seconds with higher pressure and incremental presses.
Temperature & Time Matrix
| Scenario | Temperature (°F / °C) | Pressing time (seconds) | Pressure (heat press) | Peel type | Protective layer |
|---|---|---|---|---|---|
| Small emblem on lightweight synthetic | 320°F / 160°C | 12–15 | Light–Medium (~10–20 psi) | Hot peel (if adhesive film specified) | Parchment paper or cotton press cloth |
| Medium emblem on woven or blended fabric | 340–350°F / 170–177°C | 18–25 | Medium (~20–30 psi) | Cold peel or hot peel per manufacturer | Teflon sheet or cotton press cloth |
| Large emblem or thick backing on dense fabric | 350–375°F / 177–190°C | 25–35 (two passes of 12–18 s recommended) | Medium–High (~25–35 psi) | Cold peel preferred for stronger bond | Silicone/Teflon + pressing from reverse if possible |
| Delicate, heat-sensitive shell (thin nylon-type or coated surfaces) | 280–300°F / 140–150°C | 8–12 (short bursts) | Light (~5–10 psi) | Hot peel often required | Cotton press cloth; press from reverse; test on scrap |
Protective layers and practical technique
Always use a barrier between the heating element and the emblem surface: parchment paper or a cotton press cloth prevents shine and scorching; Teflon sheets give uniform heat transfer and reduce sticking for glossy vinyl or PVC emblems. For adhesives that list a hot peel, remove the carrier while warm; for cold-peel adhesives allow full cool-down on a flat surface before removing carrier. If the substrate is thin or coated, press from the reverse side through a folded cotton cloth to protect finishes.
When working with large or multi-piece emblems, sequence pressing: tack corners first with brief 2–4 second bursts at recommended temperature, then perform full-area presses in overlapping passes to avoid edge lifting. If edges remain loose after cooling, repeat a short press (8–10 s) focused on the lifted area rather than redoing the entire emblem.
Perform a quick test on scrap material matching the target fabric and emblem backing. For field repairs without a heat press, use a household iron set to the specified temperature range, applying firm, even pressure for the specified time and using a steam-off setting. For frequent travel or storage of treated gear consult best luggage storage near grand central station and for replacement carry options see best luggage bargain.
Using Velcro and adhesives: removable mounts, glue types, and curing tips
Recommendation: Choose hook-and-loop with pressure-sensitive adhesive for temporary emblem mounts; select sew-on or 3M Dual Lock-style reclosable fasteners when repeated shear loads or long-term durability are expected.
Removable mounts: Adhesive-backed hook-and-loop works well for light-to-medium emblems and allows fast removal – press firmly with a hand roller or palm for 10–30 seconds and allow an adhesive dwell of 24 hours before heavy use. Dual Lock (mushroom-stem reclosable fastener) provides markedly higher shear resistance and lower peel than standard hook-and-loop; engagement requires firm pressure across the entire area. Magnetic mounts (thin rare-earth discs bonded into a backing) give instant removable attachment but add thickness and require metal plate reinforcement on the garment.
Contact adhesives: Neoprene/contact cement develops high initial tack; apply thin, even coats to both bonding faces, wait until surfaces are tacky (typically 5–15 minutes at room temperature), then mate with firm pressure. Solvent-based contact cements resist moisture but emit VOCs – use outdoors or in a ventilated room and allow 24–48 hours for strong bonding.
Solvent-based flexible adhesives: Urethane/industrial-strength elastomeric adhesives (E6000-style) bond leather, vinyl, rubber and many textiles while remaining flexible. Expect tack-free time of 12–24 hours and full cure at roughly 72 hours at 20–25°C. Apply sparingly to avoid stiffness at the joint; clamp or weight flat surfaces during initial set.
Spray and pressure-sensitive adhesives: Spray adhesives (3M Super 77-type) are useful for large-area, temporary bonds and positioning prior to stitching. Hold spray 6–10 inches from the surface, allow a 30–60 second flash, then mate. Double-sided textile tape offers immediate hold for handwork but is not a long-term replacement for sewing or structural adhesive.
Hot-melt and cyanoacrylate: Low-temp hot-melt glue can work for quick fixes on heavy woven fabrics but will soften and fail with repeated washing and high flex; avoid high-temp glue on thin nylons. Superglue bonds quickly to trims and rigid appliqués but becomes brittle and may crack on flexible fabric – reserve for non-flexing trims only.
Curing and handling tips: Maintain ambient temperature around 20–25°C and moderate humidity (40–60% RH) for predictable curing. Keep bonded assemblies flat and immobilized for the first 24–72 hours depending on adhesive chemistry; minimise flexing and avoid machine washing for at least 48–72 hours after bonding. Use weights, a hand roller, or clamps to ensure full contact during cure. Ventilate when using solvent-based products and follow manufacturer safety data sheets.
Application practice and removal: Test adhesives on a scrap of the same material before final application. For adhesive-backed hook-and-loop, clean mate faces of loose fibers and apply firm, even pressure; allow 24 hours dwell before subjecting to shear. To remove stubborn adhesive, apply low heat (hair dryer or heat gun on low, short bursts) to soften the glue, then work a solvent appropriate to the adhesive chemistry (isopropyl alcohol for water-based, citrus or acetone-based removers for neoprene/solvent adhesives) – test in an inconspicuous spot first.
FAQ:
Can I use iron-on patches on a nylon or polyester backpack?
Heat-activated patches can work on some synthetics, but many backpacks have coatings or laminates that will not bond well and may melt under high heat. Test on an inside seam or scrap first. If you try heat application, use a low heat setting, place a thin cloth between the iron and the patch, press briefly, and avoid prolonged heating. If the patch doesn’t stick firmly or the fabric shows signs of distortion, stop and switch to a non-heat method such as sewing, adhesive designed for synthetics, or hook-and-loop (Velcro) for a removable option.
How do I hand-sew a patch on without weakening the backpack fabric?
Use a strong thread made for outdoor gear (polyester or nylon) and a needle sized for the fabric thickness. If the backpack fabric is thin or coated, reinforce the area behind the patch with a small piece of canvas or fusible interfacing placed inside the pack so stitches won’t pull through. Mark the patch position, pin or baste it in place, then use tight, even stitches around the edge—whipstitch or a narrow running/backstitch works well. Keep stitch length short (about 2–3 mm) to spread load across the fabric. Tie off with a secure knot on the underside and trim excess thread. If you need to sew through multiple layers (linings, foam), take care to avoid damaging seams or padding by stitching slowly and using an awl to create pilot holes if necessary.
Which glues hold patches to backpacks and stay flexible after washing?
Choose adhesives formulated for fabrics and outdoor use. Flexible fabric glues such as Beacon Fabri-Tac or textile-specific contact adhesives stay pliable after drying. For heavy or waterproof materials, contact cements rated for rubber and plastic can provide a stronger bond, but check for compatibility with any coating on the backpack. Avoid superglues that become brittle or expand foams that can warp the surface. Apply adhesive sparingly and evenly, press the patch firmly, and allow full cure time per the manufacturer. For a removable option, use adhesive-backed Velcro or sew Velcro to the backpack and attach the patch to the hook side.
What’s the safest way to remove an old patch or glue residue without damaging the pack?
If the patch is sewn on, carefully cut a few stitches with a seam ripper and pull the remainder out to avoid tearing fabric. For heat-bonded patches, warm the area with a hair dryer to soften adhesive, then peel gently. To remove sticky residue, test a small, hidden spot with isopropyl alcohol, Goo Gone, or a commercial adhesive remover; some solvents can strip dyes or coatings, so proceed cautiously. Apply the solvent with a cotton swab, let it sit briefly, then rub gently with a soft cloth. After removal, wash the area with mild soap and water and, if the backpack had a water-repellent finish, consider reapplying a spray-on waterproofer to restore performance.


