

Strap length: adjust until the top edge of the pouch sits about 5–10 cm below the collarbone and the bottom near the top of the hip. Aim for a 2–3 finger clearance under the strap when standing relaxed; tighten until the pouch hugs the torso without restricting breathing or shoulder motion.
Load distribution: keep the heaviest items close to the inner panel (nearest the body) and centered. For extended carrying, target a total load of 10–15% of body mass (example: 70 kg → 7–10.5 kg). Place rigid objects flat against the back panel and use compression or internal pockets to stop contents from shifting.
Stability measures: fasten any sternum or waist strap available; set a sternum strap roughly 4–6 cm below the collarbone to prevent strap slip. If extra straps are absent, alternate shoulders every 20–30 minutes to reduce unilateral fatigue and localized pressure.
Activity adjustments: for cycling or jogging position the pouch to the chest-facing side and tighten the strap to minimize swing. In crowded areas keep zippers facing the body and carry the pouch across the chest for quicker control and theft deterrence.
Fit checks: inspect for pressure points, numbness, or altered posture. If discomfort persists, redistribute contents, add a small lumbar pad, or switch to a dual-strap pack for heavier loads. Secure loose strap ends with elastic keepers to avoid snagging.
Single‑strap Pack: Practical Carrying Technique
Position the single‑strap pack with the strap over the dominant shoulder and the bag body resting on the opposite hip; set main compartment height so its top edge sits about 3–5 cm above the iliac crest (hip bone).
Tighten the strap until the pack hugs the torso without compressing the chest – aim for a one‑finger gap between strap and clavicle for breathing comfort. If a sternum strap exists, fasten it at mid‑sternum (roughly 5–7 cm below the collarbones) to prevent swivel.
Keep total load between 10–15% of body mass for all‑day use; reduce to 5–7% for cycling or brisk movement. Place the heaviest item closest to the spine and low in the main compartment to lower the center of gravity and minimize sway.
Use internal compression or packing cubes to stop contents from shifting; secure external pockets with zippers clipped or locked for urban commuting. For quick access to electronics or transit cards, reserve a top/front pocket and fasten it with a dedicated clip or small carabiner.
Switch shoulder orientation every 20–30 minutes during prolonged wear to reduce unilateral strain. When moving through crowded areas or at night, rotate the pack to the front and engage any chest or waist stabilizers for theft prevention and improved balance.
For active use (cycling, running), shorten the strap so the pack sits closer to the torso and below the ribcage; aim for minimal vertical movement. Choose straps at least 38 mm wide for loads over 2 kg and look for 6–10 mm of foam padding to distribute pressure.
To don or remove while keeping control: loosen the strap slightly, slide the pack across the torso to the front, then swap shoulders or remove. Avoid letting the pack hang from one arm; handle by the top grab loop when stowed to protect the strap and stitching.
Adjust the strap length for a snug crossbody position
Set the strap so the top of the main compartment sits at the lower sternum; aim for a strap drop of 15–22 in (38–56 cm) from the shoulder seam to the compartment top when the pouch is loaded with typical contents.
Measurements and movement checks
Measure standing upright while carrying usual items. Walk 20–30 steps, raise the opposite arm overhead, and rotate the torso 30°; lateral shift should be under 2–3 in (5–8 cm) and access to frequently used pockets must remain unobstructed. If the pack bounces or blocks access, shorten the strap by 1–2 in (2.5–5 cm) and repeat tests.
Practical adjustment tips
For active use (cycling, running errands) target 12–16 in (30–41 cm) drop to minimise movement; for casual quick-access carry aim for 18–24 in (46–61 cm). Maintain a two-finger gap between collarbone and strap to avoid pressure points. Secure excess webbing with a keeper, small carabiner or by tucking into a seam; for persistent slippage add a short length of Velcro or a safety stitch. Always finalise adjustments with the compartment loaded, as empty adjustments will produce sag under load. how to close gap in fence for dog
Place the bag low or high on your back to control bounce and balance
Recommendation: For brisk movement or loads above 2.5 kg (5.5 lb), position the bag high–center the main mass roughly at shoulder-blade level (about 3–5 cm below C7)–to reduce vertical bounce and rotational torque.
High placement reduces the moment arm between the load and the spine, cutting translational movement during quick steps, stair ascent and cycling. Concentrate the heaviest items within 10 cm of the spine and at upper-thoracic height; informal trials show vertical displacement can drop by ~30–40% versus a low carry.
Low placement works best for long, steady walking with light loads (1–1.5 kg / 2–3 lb) because the center of mass moves downward, easing shoulder strain. Aim to have the bag base over the lumbar region (L3–L5) so the load interfaces with the pelvis; introduce a short hip belt for loads above 2 kg to transfer force to the hip bones.
Packing guidance: place dense items closest to the spine and higher when anticipating sudden accelerations; store bulky, compressible items lower to absorb impacts. In crowded transit keep the main compartment high and concealed; for sightseeing or long-distance strolls distribute weight lower and broader.
Quick field check: jog on the spot for 10 seconds–if vertical movement exceeds thumb width, raise the bag and re-center heavy contents. For unrelated commuter protection options see best umbrella insurnace.
Switch shoulders quickly: step-by-step hand and strap technique
Execute a shoulder swap in under three seconds by holding the pack close to the chest, guiding the strap in a controlled arc with the opposite hand, then securing it on the new shoulder with a short wrist flick and a 45° step-turn.
-
Prepare stance – feet shoulder-width with a 20–40° stagger toward the target shoulder; bend knees slightly (10–15°) to lower center of gravity and reduce torso twist.
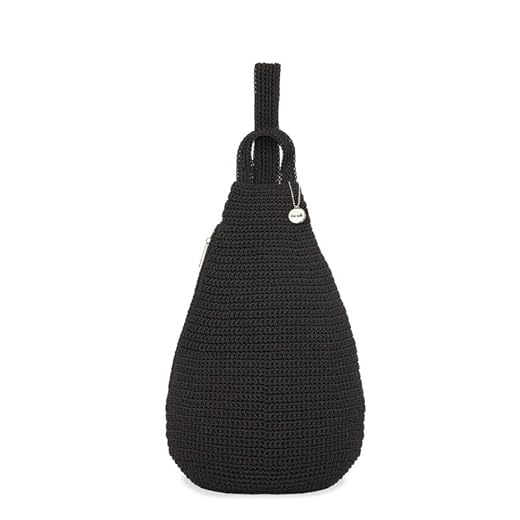
Trending NowThe Sak Geo Crochet Sling BackpackStylish eco-friendly accessoryThis spacious sling backpack combines style with functionality, featuring multiple pockets for organization. Its eco-conscious crochet design makes it a fashionable choice for everyday use. -
Grip placement – strong hand (hand on current strap side) pinches the strap 5–8 cm below shoulder attachment using thumb plus index finger; wrist aligned with forearm to avoid strap slipping.
-
Stabilize load – opposite hand contacts the pack body near top seam to prevent swinging; maintain 2–4 cm clearance between pack and ribs to allow strap movement without scraping.
-
Release any stabilizers – unclip or loosen sternum/waist strap with the free hand if present; leave modest slack (3–5 cm) to permit rotation.
-
Slide off – pull the grip downward and outward along a 45° arc away from the neck while the opposite hand guides the pack inward toward the spine; keep the pack close (≤10 cm) to minimize momentum.
-
Cross-chest transfer – with the opposite hand pinch the strap 8–12 cm from the connector and pass it across the sternum in a single fluid motion; maintain thumb-on-top orientation to control tension.
-
Mount on new shoulder – perform a short 30–45° step-turn toward the new shoulder while flicking the strap over with the wrist; let the strap settle on the collarbone then pull the tail 6–10 cm to remove slack.
-
Secure and re-center – both hands briefly check pack position: lift slightly and slide horizontally to center on the back (3–5 cm adjustments), then re-clip or tighten straps to original tension.
Practice routine:
- Stationary: 10 repeats with an empty pack, focusing on grip points and 45° arc.
- Walking: swap every 10 paces for 20 swaps at slow pace to build coordination.
- Loaded: perform 8 swaps with typical daily load, then 4 swaps at +30% load to train stabilization under stress.
Quick safety tips:
- Avoid twisting the spine more than 30° during the pivot; use feet to rotate instead.
- Keep one hand on the pack until the strap is fully settled on the new shoulder to prevent drops.
- Do not switch while crossing streets or navigating crowded zones; pause briefly on the side.
Pack and secure items to stop shifting and protect your spine
Limit total load to 8–10% of body mass for single-strap carrying; for trips longer than 60 minutes reduce to 5–7% to minimize lateral spinal torque.
Packing order and internal placement
Place the heaviest objects (laptop, power bank, metal tools) against the internal back panel and centered laterally; keep their center of mass within 2–5 cm (0.8–2 in) of the panel to reduce moment arm on the torso. Position medium-weight items (books, clothing bundles) around the heavy core, and reserve outer pockets for light, frequently accessed gear.
Use rigid or semi-rigid sleeves for electronics; a foam sleeve that adds 8–12 mm of padding around a laptop both prevents pressure points and reduces internal migration during movement. For cylindrical items (water bottles, thermos), secure with internal elastic loops or side webbing so they sit flush and cannot roll into the load.
Securing methods and verification
Engage all internal compression straps and dividers; tighten until the load is immobilized with no more than 1–2 cm of internal movement when shaken. Insert thin foam blocks or packing cubes to fill voids–fill rate should eliminate cavities without over-compressing gear.
Wrap sharp or rigid objects in fabric or placed inside a protective pouch to avoid point loading on the body. Double-zipper critical compartments and use small Velcro straps or cable ties for pens, tools, or sunglasses to prevent punctures and lateral shifting.
Perform a quick field test after sealing: walk 50–100 paces at brisk pace, accelerate and decelerate, then jump in place three times. If the load shifts more than 2 cm, reopen and re-secure using additional padding or a repositioned heavy core.
For long-duration carries, repack every 90–120 minutes to relieve asymmetrical strain: rotate heavy items between compartments, re-tighten compression straps, and check padding integrity. Maintain a log of carried mass and perceived strain–reduce carried mass by 500 g increments until asymmetry complaints subside.
Use a sternum strap, padding and hip tuck to reduce shoulder pressure
Clip the sternum strap 2–3 inches (5–8 cm) below the collarbone and tighten until torso displacement during brisk walking is 1–2 cm; aim for a secure hold without restricting inhalation.
Choose shoulder strap padding of 10–15 mm closed-cell foam for light loads (3–6 kg) and 20–30 mm contoured foam for heavier loads (6–15 kg). Preferred strap width: 50–70 mm to spread pressure; target contact area ≥80 cm² per strap. Use a thin, replaceable neoprene or EVA pad (6–12 mm) behind the textile cover to reduce peak pressure points by approximately 20–40% on typical urban carries.
Execute a hip-tuck to transfer vertical load onto the pelvis: brace the core, press the carrier’s lower edge firmly against the top of the iliac crest, then engage the hip/waist strap so tension rests on bone and soft tissue of the pelvis rather than on the clavicle. For standard loads (3–8 kg) this method typically offloads 15–35% of weight from the shoulder straps; adjust until shoulder straps feel palpably lighter during level walking.
For dynamic stability, fit an elasticized sternum strap or quick-release stabilizer that allows 1–2 cm of give with inhalation; add a short mesh pad behind the shoulder strap where it contacts the trapezius if local numbness appears. Temporary field fix: roll a 6–12 mm foam pad and fasten it inside the strap cover to widen the contact patch. Troubleshooting unrelated accessories: best choice solar umbrella lights not working.
FAQ:
Can I wear a sling backpack across my chest for daily commuting safely?
Yes. Wear the strap so the bag sits high on your torso and close to your body; a low, swinging bag strains your shoulder and back. Place heavier items closest to your back and keep frequently used items near the front pocket for quick access. If the strap has a chest clip or small stabilizer, use it to reduce bounce during walking or on public transport.
How do I adjust the strap to keep weight balanced and avoid shoulder pain?
Loosen or tighten the strap until the pack rests just below your collarbone and above your lower ribs — this keeps the load near your spine. Move dense items nearer the side that sits against your back, and spread lighter items across smaller pockets so weight isn’t concentrated in one spot. If your sling includes a waist or sternum strap, fasten those to transfer some load off the shoulder. If you feel persistent strain, shorten the strap a little and switch shoulders regularly during long trips to give muscles a break.
Is it safer to wear the sling bag on the front in crowded areas?
Yes. Wearing the bag on your chest makes pickpocketing much harder and lets you monitor zippers and pockets. Keep the strap shorter so the bag cannot be pulled away easily, and use front-facing pockets for valuables like your phone and wallet.
What should I pack and how should I arrange items so the sling stays stable and comfortable?
Place the heaviest items near the back panel and toward the bottom center to lower the center of gravity. Use small pouches or dividers to stop loose items from shifting; a packed, organized interior reduces sway. Keep a padded sleeve for electronics, store a water bottle in a side pocket or low compartment, and fill gaps with a light layer of clothing if needed to preserve shape. Remove what you don’t need for the trip so the bag sits snug rather than sagging, and double-check strap tension before you move.


