

Immediate recommendation: stitch badges through both the emblem backing and the pack fabric when possible, using bonded polyester thread and a size 90/14 (denim) needle; set machine stitch length to ~2.5 mm and reinforce each corner with two reverse stitches of 4–6 mm to prevent lifting.
Tools and materials: needle: 90/14 for canvas or 100/16 for heavy nylon; thread: bonded nylon or polyester #30; temporary hold: double-sided fabric tape or wash-away basting tape; glue option: Barge All-Purpose Cement for leather trims or 3M Super 77 spray for textile appliqués; metal fasteners: rivets/grommets Ø6–8 mm with matching washers.
Placement and marking: measure from top seam or shoulder strap anchor point – common vertical offsets: 8–12 cm for center-front placement, 4–6 cm for pocket flaps; mark center with chalk or disappearing fabric pen and verify symmetry using a 30 cm ruler or digital caliper to ±2 mm.
Sew-on technique: baste the emblem with double-sided tape, use a 3–4 mm hand saddle stitch or a straight machine stitch at 2.5 mm length, spacing equivalent to 18–22 stitches per 10 cm. For heavy canvas, pre-punch holes with a #1.5–2.0 mm awl and finish edges with a short zigzag (1.5 mm width) to lock threads.
Iron-on and adhesive options: for cotton/canvas iron-ons, set iron to 160–180 °C (320–356 °F), press with firm pressure for 30–45 s, then cool under weight for 2–3 minutes; for synthetic shells reduce to 120–140 °C (248–284 °F) and test on scrap. For permanent bonding on mixed materials, combine contact cement application with a 24-hour cure under clamped weight before stitching perimeter.
Rivet/grommet installation: punch a clean 4–6 mm hole, insert rivet with washer on interior, set with hand rivet setter or arbor press; tighten until no lateral play remains and check that interior washing contact is cushioned with a small leather or fabric washer.
Care and longevity: launder cold (≤30 °C / 86 °F) on gentle cycle, line dry; avoid tumble drying iron-on badges and avoid prolonged direct heat on synthetic shells. If edge lifting occurs after 10–20 wash cycles, re-stitch perimeter with 1.5× original stitch density and add a thin bead of clear flexible fabric glue under the lifted edge.
Troubleshooting quick fixes: melting or warping – reduce temperature and switch to sewing-only; fraying edges – trim to a straight line, seal with a small amount of solvent-free fray check, then stitch; persistent detachment – convert to rivet pairs spaced 10–15 mm apart and back up interior with a small patch of heavy fabric for reinforcement.
Choose emblem type and backing for your pack fabric
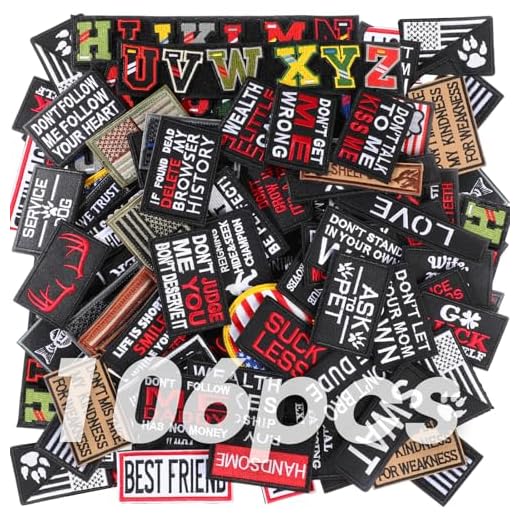
For medium-weight cotton canvas or denim, use embroidered badges with either sew-on edges or a heat-activated adhesive backing; for lightweight nylon or PU-coated fabrics, prefer molded PVC or bonded-leather appliqués attached by stitching around the perimeter or by a low-temperature adhesive formulated for synthetics.
Typical heat-seal settings: 150–165°C (300–330°F) under firm pressure for 8–15 seconds using a heat press or iron. Always test on a scrap piece first–do not apply that temperature to coated nylon or laminated fabrics without testing. If the substrate shows surface change or melting, switch to sewing or a solvent/urethane contact adhesive with mechanical reinforcement.
Quick selection guide
Match emblem and backing to fabric weight and finish: cotton/denim – embroidered with cut-away stabilizer and heavy-duty polyester thread; canvas with wax coating – sew-on only using topstitch with 90/14 needles; lightweight ripstop nylon – thin appliqué with fusible interfacing plus bartack at stress points; PU/PVC-coated – molded emblem sewn around the edge with bonded nylon thread or glued with a flexible urethane adhesive and left to cure 24 hours.
Sewing, adhesives and support layers
Needles and thread: use 90/14 or 100/16 topstitch needles for heavy fabrics; 70/10 for light synthetics. Thread: bonded nylon or polyester for UV and abrasion resistance. Stitch choices: 2–3 mm zigzag for raw edges, straight topstitch 3.0–3.5 mm for leather-type appliqués, bartack reinforcement at corners (6–8 mm wide). Support layers: medium fusible interfacing (80–150 gsm) for thin cloth, heavy woven interfacing (200–300 gsm) under very soft substrates; tear-away stabilizer during machine embroidery to prevent puckering.
| Emblem type | Best substrates | Recommended backing/attachment | Pros | Cons |
|---|---|---|---|---|
| Embroidered (iron-on or sew-on) | Cotton, denim, canvas | Cut-away stabilizer; heat-seal adhesive or sewn perimeter | Durable, breathable, textured | Heat adhesive fails on coated synthetics; bulky on thin fabric |
| Woven (flat) | Light cotton, twill, medium canvas | Fusible web or edge-stitch | Low profile, detailed designs | Less abrasion resistance, frays if not sealed |
| PVC / rubber molded | Ripstop nylon, PU-coated fabrics | Sewn perimeter with bonded thread or urethane adhesive | Waterproof, flexible, clean edges | Can delaminate if glued to weak coatings |
| Leather / faux leather | Canvas, heavy twill, leather panels | Sew-on (leather needle) or contact cement for leather-to-leather | Premium look, long-wearing | Requires heavier needles; adhesives slow to cure |
| Printed heat transfer | Light cotton, polyester blends (check compatibility) | Low-temp transfer film or sublimation for polyester | High-resolution graphics | Cracks with flexing; heat-sensitive substrates may deform |
Clean and prepare the placement area, then mark exact position
Use 70% isopropyl alcohol with a lint-free microfiber cloth to remove oils and silicone; wipe in one direction and allow 10 minutes air-dry. For PU‑coated or dyed nylon, substitute a mild detergent solution (1 tsp dish soap per 250 ml warm water), rinse with a damp cloth and blot-dry, then wait 20 minutes to evaporate residual moisture.
Surface preparation
Empty the interior compartment and lay the rucksack on a flat, rigid board with a sheet of cardboard inside the panel behind the work area to prevent bleed-through. Remove detachable straps, buckles or carabiners that could obstruct positioning. Use a lint roller or tack cloth to remove fibers; for stubborn grime use a soft-bristle toothbrush with the detergent solution, then dab with absorbent paper towels. For leather panels use a dedicated leather cleaner and conditioner; for waxed canvas, brush off loose particles and avoid solvent wipes that strip the wax coating.
If the fabric has seams, piping or raised embroidery nearby, press the area flat with a household iron on the lowest safe setting through a thin cotton pressing cloth for 5–8 seconds to reduce surface distortion; test a 1 cm² hidden spot first.
Exact placement and marking
Cut a paper template matching the emblem’s outer shape. Position the template and align to reference features: measure from the top seam, side seam or zipper using a metal ruler and record two perpendicular distances (e.g., 2.0 cm from top edge and 3.5 cm from left seam). For center placement, fold the panel or use a digital caliper to find the midpoint; mark that midpoint with a 1–2 mm pencil dot.
Use two small strips of low‑tack masking tape as a hinge at the top edge of the template to test placement, then step back 1–2 m and check visual alignment. Verify symmetry by measuring left/right or top/bottom distances to within ±2 mm. For curved or domed panels, attach the template with thin double‑sided low‑tack tape or four sewing pins near corners to hold contour while you check alignment.
Mark only alignment points, not large outlines: tailor’s chalk (white on dark fabrics, slate on light fabrics) or a water‑soluble fabric pen works best. Place a single dot at each corner and one at the center; avoid permanent markers. After final checks, photograph the template in place and note the measurement values for reference. If the pack will normally carry weight, load it with the typical amount (for example 2–4 kg) and recheck marks – reposition if measurements shift more than 3 mm.
Hand-sew a badge: needles, thread, and recommended stitches
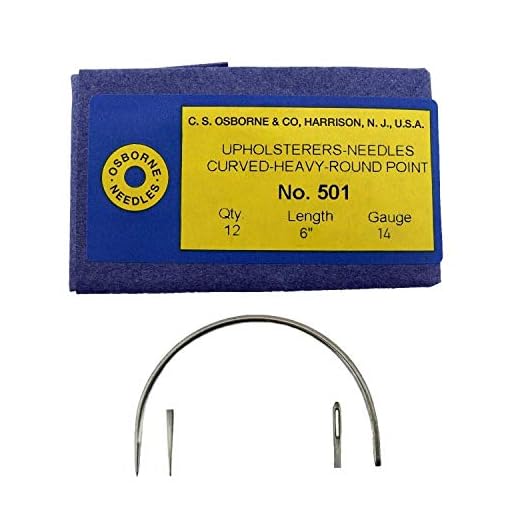
Use waxed bonded nylon or polyester thread for long wear; select a heavy-duty upholstery or bonded thread for thick synthetics and a finer polyester for lightweight fabrics. For very heavy textiles (Cordura, canvas, leather) choose a sailmaker’s or upholstery needle (curved or long) and 0.5–0.8 mm thread; for medium-weight woven nylon or canvas use a sharp hand needle (comparable to 90/14) with 30–40 wt polyester; for thin ripstop or liner fabrics use fine sharps (comparable to 70/10) with finer polyester.
- Saddle stitch (two-needle) – best for permanent repairs: pre-punch holes with an awl every 3–4 mm, use waxed thread, pass two needles so each stitch locks the opposite side. Recommended for straps, seams, and areas under load.
- Backstitch – machine-like strength with one needle: make 2–3 mm stitches, overlap each stitch slightly into the previous hole to eliminate gaps. Ideal where tensile strength matters across flat areas.
- Whip/overcast stitch – secures edges: place stitches ~3 mm from the edge, spacing 3–4 mm, keep angle shallow to avoid puckering. Good for attaching emblems where the edge must resist fraying.
- Blanket stitch – decorative plus edge reinforcement: stitch depth 2–3 mm, spacing 4–5 mm; fastens raw edges and creates a neat border.
- Running/basting stitch – temporary placement: long stitches 5–7 mm for alignment before permanent sewing or gluing.
Practical details and finishing
- Pre-punch holes for dense fabrics with an awl or ice pick to keep needle and thread moving freely.
- Use a thimble and pliers on multi-layer passes; curved needles ease work around seams and corners.
- Secure thread ends with a surgeon’s knot or two square knots, then bury the tail by passing the needle through the fabric layers before trimming. For synthetic thread, a brief melt with a lighter (very controlled) will fuse the end.
- Reinforce critical corners with a small bar-tack: 4–6 tight horizontal passes, then trim.
- Waxed thread reduces abrasion and water uptake; bonded polyester resists UV better than plain cotton.
Color and matching tip
Match thread color to the emblem background for invisible seams or choose contrast for a visible outline. For general color guidance see best color umbrella to protect from sun and for budget-friendly options see best value garden umbrellas.
Machine-sew an emblem: machine settings and feeding tips for thick seams
Use a heavy-duty needle and walking/even-feed foot; set stitch length to 3.0–4.0 mm and test on a scrap assembly with the same layers before sewing the actual item.
Recommended machine settings
- Needle: 90/14 for medium layers, 100/16 for multiple canvas/cordura layers, 110/18 for heavy canvas, webbing or leather. Use a leather point (LR) for true leather emblems.
- Thread: bonded nylon or heavy polyester upholstery thread (Tex 35–70) for top thread; matching polyester in bobbin or slightly lighter (Tex 35). Avoid cotton for high-stress seams.
- Stitch length: 3.0–4.0 mm for crossing stacked seams; 2.5–3.0 mm for decorative topstitching on single-layer areas.
- Tension: start at factory setting, then reduce top tension by 1–2 clicks if bobbin shows on top when sewing thick stacks; increase slightly if top thread loops on underside.
- Presser foot pressure: lower pressure by 1–2 notches on adjustable machines for bulky sandwiches so layers feed without dragging; if using an even-feed/walking foot, keep normal pressure.
- Presser foot: walking/even-feed or roller foot for coated fabrics; use a single-hole plate if your machine supports heavy needles to prevent deflection.
- Speed control: set electronic speed limiter to slow-to-medium and maintain steady manual foot control when approaching seam piles.
Feeding and stitching technique
- Prepare a test stack: recreate the exact layer order (bag fabric + stabilizer + emblem + backing) and sew 10–15 cm to check needle choice, thread, stitch length and tension.
- Use an underlay stabilizer (tear-away or wash-away) beneath the sew area to prevent needle sinking and skipped stitches; remove after completion.
- Create a smooth height transition: place a thin scrap strip (cardboard, interfacing or folded fabric) ahead of the thick pile to form a ramp so the presser foot doesn’t jam when crossing.
- Engage needle-down/pivot feature to rotate corners and keep needle in fabric while lifting presser foot to reposition; this prevents misalignment when layers shift.
- Sow slowly and crank the handwheel over each seam pile; use the foot controller lightly rather than stomping to avoid skipped stitches when needle meets thickness.
- Clip or use binder clips instead of pins for heavy fabric; pins can bend or break under heavy-duty needles. If pins are used, place them well ahead of the needle line.
- When approaching dense intersections (multiple seams/webbing), stop with the needle down, raise the presser foot, feed the stack forward by hand to clear the bulk, then continue.
- Trim backing layers and grade seams where possible before sewing the emblem to reduce bulk: reduce inner layers by 1–2 mm at the join to lower pile height.
- Keep a spare heavy-duty needle in the bobbin area; change the needle after 4–6 thick crossings or at first sign of skipped stitches or burrs.
If skipped stitches persist despite correct needle/thread/settings, switch to a larger ball-point or a different needle brand and re-test; persistent problems are usually solved by a walking foot plus a slightly longer stitch length and manual handwheel control over bulk areas.
Iron-on emblems: temperature, protective layers, and press timing
Set a heat press to 320°F (160°C) and press for 15 seconds at medium-high pressure (≈45–55 PSI) for cotton or cotton-blend appliqués on canvas or heavy twill.
For synthetic shells (nylon, polyester) lower temperature to 275–300°F (135–150°C) and reduce dwell to 8–12 seconds; use a heat-activated adhesive formulated for synthetics or choose mechanical fastening if the substrate is glossy or coated. Avoid steam on synthetics.
Denim, duck cloth and heavy canvas tolerate higher heat and pressure: set 325–350°F (163–177°C), press for 12–20 seconds with firm pressure. For multiple-layer seams or thick seams, use two short presses (for example, 2 × 10 seconds) rather than one long press to improve bond through thickness without scorching.
Do not apply direct heat to leather, vinyl or suede; either use a low-temperature adhesive (250°F / 120°C) tested on a scrap or secure by stitching. Metal hardware and zippers must be moved out of the press area or covered with a protective pad to avoid heat damage and uneven pressure.
Protective layers and peel method
Always place a barrier between heat source and emblem surface: a Teflon sheet or parchment paper prevents glue bleed and shine; a single-layer cotton press cloth (old T-shirt) protects prints and fabric texture. Use dry heat only–turn iron steam off. Follow backing instructions for peel timing: hot peel means remove immediately; cold peel means wait until cool to the touch (~2–5 minutes). If backing type is unknown, perform a hot-peel test on a scrap and, if edges lift, repress and finish with a cold peel.
Practical tips for consistent results
Use a scrap of the target fabric to dial temperature, time and pressure before working on the final item. If adhesive squeezes out, blot while warm with parchment; remove residue with isopropyl alcohol after cooling. Allow a full bond cure of 12–24 hours before subjecting the area to heavy flexing or machine laundering; for high-wear applications add a running stitch perimeter for mechanical security.
Velcro and adhesive-backed emblems: fastening and edge reinforcement
Always pair pressure-sensitive Velcro or self-adhesive emblems with sewn or mechanical reinforcement: adhesive alone loses hold on flexible, frequently handled gear. For small emblems (≤6 cm) sew a single round of stitches 2–3 mm from the perimeter; for medium (6–12 cm) use a 2–3 mm topstitch plus a secondary row 6–8 mm inboard; for large emblems (>12 cm) sew a perimeter box with an X across the interior to distribute shear loads.
Surface preparation and adhesive curing
Clean area with 70% isopropyl alcohol, allow 60 seconds to flash off. Scuff slick nylon or PU coatings with 180–220 grit sandpaper over the exact footprint to improve mechanical grip; remove dust with compressed air. Apply PSA-backed Velcro or decal, press using a 10–15 psi roller or hand-press for 30–60 seconds, then clamp or weight for 1 hour. Expect handling strength immediately but full bond development over 24–72 hours at room temperature; cold or damp environments extend cure time. For removals, heat to 60–80°C with a hot air gun to soften adhesive, then peel slowly at a low angle.
Edge treatments and mechanical reinforcement
Trim adhesive liner flush but leave a 1–2 mm adhesive skirt under the sewn edge to prevent peeling; do not fold the emblem edge over–this creates stress concentrators. Use bonded nylon or polyester thread (Tex 70 / US #69) for longevity; hand-sew with a 3–4 mm spaced overcast or whipstitch using a size 18 chenille or sharp needle, and machine-stitch with a 3–4 mm zigzag (3 mm stitch length, 3–4 mm width) when fabric thickness allows. For coarse canvas or heavy webbing, install small rivets or bar tacks at corners: place rivet centers 6–8 mm from the emblem edge and use 3–4 mm diameter eyelets for load relief. Seal exposed cut fabric edges with a cyanoacrylate-based fray inhibitor (single thin pass, 10–30 seconds to set) or a flexible silicone seam sealer; allow 10–20 minutes drying before flex testing.
Test the chosen combination on a scrap of identical material: perform 1000 flex cycles and a 5 kg peel test if durability is required. For logistics or regulatory questions unrelated to fastening details see how can a country regulate imports and exports.


