
Use two 25–38 mm cam-buckle webbing straps, 120–150 cm long, positioned 30–40 cm apart. Roll an inflatable mat to a 8–12 cm diameter or fold a foam mat lengthwise; route the lower strap under the hipbelt webbing or through the pack’s lower compression loop, run the upper strap through the lid or daisy-chain, then tension both until the mat resists a 5–10 kg lateral pull.
Placement: For best load stability place the mat low on the rear panel with its top 5–10 cm below the shoulder harness; for wet routes put the mat inside a 5–10 L dry sack before securing or slide it under the lid. Avoid mounting the mat so it extends more than 30 cm behind the pack–excess overhang increases torque on the harness and reduces maneuverability.
Technique by mat type: Inflatable – deflate completely, roll from valve end, wrap once with a 50–80 cm keeper strap, then use the two cam straps to lock it vertically. Foam – fold or roll and thread the straps through factory slots or around the roll twice; if using a closed-cell pad with no slots, lace a 4–6 mm shock cord (120–180 cm) through the pack’s daisy-chain and cinch with a cord-lock to prevent slippage.
Hardware choices: prefer cam buckles over side-release clips for minimal slip; use 25–38 mm webbing for loads up to typical mat weights (0.3–1.0 kg). Cover outer seams with a 10–15 cm scrap of nylon to reduce abrasion. Keep external mat mass under <2 kg for daypacks and under 3.5–4 kg for larger expedition packs to limit load-shift; inspect straps and buckles before each trip and replace any webbing with fray or buckles that deform.

Choose mat placement: top, side, inside, or underpack
For frequent stops and wet weather, place a rolled mat on the pack lid using two compression straps: one at the roll center, one 10–15 cm from an end. Keep the roll length equal to or shorter than the pack height to prevent snagging; limit overhang to ≤5 cm beyond the pack sides to reduce wind drag.
Mounting along the pack sides suits long closed-cell mats and preserves interior space. Run the mat low on the hipbelt side of the bag to lower the center of mass; use a daisy chain or side straps and a 10 mm shock cord as an anti-sway lash. Tension so lateral movement is <2 cm during a brisk 50 m walk test. Distribute equally left/right within 1–2 kg.
Stowing inside the main compartment is best for insulated inflatables and weather protection. Pack the mat dry in a compression or dry sack, slide it against the frame sheet to keep weight near the torso, and limit this option to rolls ≤60 cm diameter and ≤1.5 kg to avoid crushing other items. Expect interior volume loss of roughly 5–15% depending on mat type and roll diameter.
Securing underneath the pack lowers the center of gravity and frees space but increases exposure to mud and abrasion. Use bottom lash points or reinforced straps, and protect the mat with a waterproof stuff sack (silnylon or PVC). Check manufacturer lash ratings–common limits are 5–10 kg–and avoid relying on thin webbing alone for heavier foam mats.
Hardware and tuning: choose 20–25 mm webbing for compression straps and cam buckles for repeatable tensioning. For anti-sway add 10 mm shock cord tied with figure-eight knots; use two-point cinches rather than a single loop. Before setting out, walk 50 m on uneven ground and re-tension so the mat stays within 2–3 cm of the pack surface and does not shift the shoulder load noticeably.
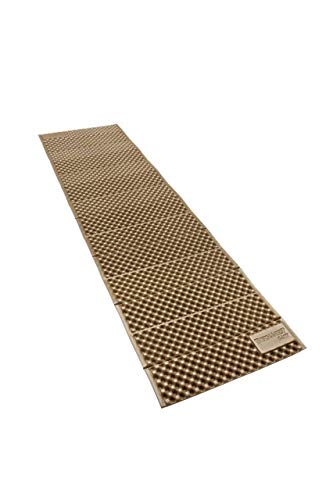
Fasten closed-cell foam mat to rucksack using webbing and buckles
Use two 25 mm (1″) nylon straps with side-release buckles, 1.2–1.8 m (47–71″) each; position one strap through lower attachment points at hip-belt level and the second through upper daisy chains or load-lifter loops.
Materials
- 25 mm nylon webbing, polyester or nylon, breaking strength ≥1,200 kg (use 1″ width for balance of strength and handling)
- Side-release buckles (ACU/ITW type) or quick-release cam buckles for single-handed operation
- Two rubber keepers or silicone bands to stop strap tails flapping
- Short length of 10–12 mm shock cord for secondary anti-sway lash (optional)
- Closed-cell foam mat with cut-to-fit notches or Velcro loop if perimeter retention is desired
Step-by-step lashing
- Lay the mat flat against the rear panel or lid, foam facing away from load so ribs compress correctly.
- Thread lower strap through pack’s hip-belt webbing or bottom loop, then under the mat and back up through the opposite loop to form a cinch; buckle and tension until the mat does not shift under a firm downward pull.
- Route upper strap through daisy chains or shoulder strap webbing–feed the strap across the mat horizontally, then through the opposite chain and buckle. Tighten to remove lateral play but avoid over-compression of the foam cell structure.
- Use a figure‑eight lacing when only side loops exist: feed strap over the mat, through left loop, under the mat, through right loop, then buckle. This reduces rotation and keeps the mat flush to the pack body.
- Secure excess webbing by threading through rubber keepers or looping and tucking under adjacent straps; trim and heat-seal cut ends if permanently fitted.
- Add a short shock-cord loop at the middle of the mat as a secondary anti-sway restraint, tied to a central daisy chain or bottom anchor.
Practical tolerances: tighten straps to remove movement but keep foam compression under ~10–15% of its original thickness to preserve insulation and rebound. For ultralight builds prefer one wide strap with a low-profile tri-glide and a middle keeper; for heavy loads use two straps spaced 20–30 cm apart to prevent canting.
- Noise control: place a thin fabric sleeve or Velcro strip between webbing and foam to eliminate rubbing sound on long marches.
- Weatherproofing: wrap the mat in a waterproof sack or use a thin silnylon cover before strapping to prevent water intrusion into foam seams.
- Quick deployment: leave one buckle partially clipped so the mat can be released single-handedly while standing.
- Inspection: check stitching and webbing for abrasion after 100 km or two multi-day trips.
Nutrition/resource note: for long outings where external carry increases wind and fatigue, plan caloric intake – see which is better whey protein or serious mass.
Secure an inflatable mat using daisy chains, lash points, or bungee
Use two 25 mm webbing straps (120–160 cm long) with cam buckles and a trucker’s hitch to lock an inflatable mat to daisy-chain rows; route one strap near the top daisy slot and the second near the hip-belt line, keeping the valve exposed for quick access.
Daisy-chain method
Route the strap through every other webbing loop so pressure distributes across at least 4–6 attachment points. Lay the mat rolled with the valve outward, run the strap under the roll, feed through the daisy slots, tension with a trucker’s hitch and finish with a single-turn safety tuck. Use a 25 mm ladderlock or cam for fast cinch; for very light mats swap one webbing strap for a 5–6 mm accessory cord tied with a taut-line hitch for on-the-fly tension adjustments.
Tension targets: aim for firm hold without crushing the foam or insulation – enough to stop lateral movement but not to reduce mat thickness by more than 30%. For insulated inflatables, avoid long-term storage compressed; reserve high tension for single-day travel.
Bungee and lash-point technique
Use 3–4 mm shock cord or 6–10 mm flat bungee straps with reinforced hooks on dedicated lash points. Create two crisscross loops: one loop high, one low. Cross them over the roll to form an X; secure each end to separate lash anchors so a single hook failure won’t release the load. Add a short elastic safety loop (20–30 cm) over the ends to capture loose cord.
For small, ultralight mats prefer continuous shock cord with a cord lock: wrap once, route through cord lock, then knot the free end with a figure-eight and tuck under the crossed bungees. Protect the mat’s shell by adding a 30–40 cm sleeve of ripstop nylon between the mat and webbing where straps contact seams or valves.
Quick checks before walking: valve accessible, no buckles rubbing sharp trim, straps routed close to pack frame to reduce torque, and ends secured so nothing flaps. Carry spare 3–4 mm cord and a small duct-tape patch for field repairs.
Convert trekking pole loops and shock cord into a custom cradle
Use 3–4 mm shock cord combined with two short webbing straps (15–25 cm) and a cord lock to build a low-profile cradle that holds a rolled mat along the pack’s lower side at hipbelt height.
Materials
Shock cord: 3–4 mm diameter, 1.5–2.5 m total depending on pack size. Stretch capacity of 20–30% preferred.
Webbing straps: two pieces 15–25 cm of 20–25 mm webbing with tri-glide or a small side-release buckle for mid-span restraint.
Hardware: one small locking carabiner or lightweight steel ring, one cord lock, a few zip-ties or a 50 mm sleeve of nylon tape to protect fabric contact points.
Step-by-step
Measure the mat length while rolled; leave ~10 cm clearance at both ends so the cradle doesn’t contact pack lid or hipbelt hardware.
Feed the shock cord through the lower pole loop from outside to inside and secure the cord end with a doubled overhand knot around the loop so the cord anchor point cannot slip.
Route the cord upward along the pack’s side, running it behind any side compression straps, then pass it through the upper pole loop. Keep the cord flat against the pack to minimize rub points.
Insert the rolled mat into position against the pack side at hipbelt level. Bring the free cord tail over the mat, thread it back through the lower loop or a metal ring, then through the cord lock. Pull until snug but not over-compressed; shock cord will hold tension and absorb bumps.
Use the webbing straps across the mat center: wrap each strap around the mat and the opposite side of the pack, route through tri-glides and cinch to prevent rotation and reduce slap. Secure webbing ends with a small stitch or heat-seal to avoid fraying.
Finish by clipping the cord tails to a daisy-chain or hipbelt anchor with the small locking carabiner to prevent runaway ends and to serve as a secondary retention point for rapid release.
Protect contact zones where cord crosses fabric with a 50 mm sleeve of nylon tape or a short length of inner-tube rubber; this reduces wear and prevents the cord from cutting into seams.
Load notes: place the roll low and centered on the hipbelt line to minimize torque. Avoid relying on the pole loops as the sole structural support for very heavy or long mats; use additional compression straps if the mat exceeds 1 kg or overhangs past pack ends.
Prevent shifting and moisture with drybags, tuck-ins, and compression straps
Use a waterproof roll-top drybag sized 5–10 L for a single foam or inflatable mat and roll the top at least three times; clip the bag to lower lash points and route one compression strap over the mid-length to eliminate lateral movement.
Drybag selection and packing technique
Choose 210–420D nylon with TPU lamination and fully taped seams; target a hydrostatic head rating ≥5,000 mm for wet climates. For a 3/4″ foam mat pick a 5 L bag, for full-width inflatable pick 8–12 L. Expel excess air before rolling, fold the mat in half if necessary to reduce profile, then compress the roll with a webbing strap tied to a fixed lash loop. Place a 15–30 mm strip of non-slip shelf liner between the bag and outer fabric to reduce slip on smooth surfaces.
Tuck-ins, strap routing and tension targets
Tuck one end of the rolled container into the lid pocket or side sleeve and run a 25 mm compression strap from the pack’s lower daisy chain up over the roll to the opposite lash point; use a second strap if the roll exceeds 40 cm length. Aim for movement under 10 mm under sharp pulls; test by briskly lifting the load and observing for slippage. Use cord-locked 550 paracord as a backup lash and stow the cord tails length ≤30 cm to avoid snagging. For long treks in wet terrain, add a small sil‑nylon stuffsack inside the drybag as a secondary barrier.
If you need a tighter external solution, swap one 25 mm strap for a 19 mm micro webbing strap with a low-profile cam buckle and tension to produce visible webbing compression without creasing the mat. For pack recommendations that pair well with external lash systems see best barber backpack.


